Overview
On the construction drawing page, you may not find the required drawings such as elevations, custom, hard furnishings, plumbing and electrical, colour images, etc. Or perhaps you wish to manually create drawings. You can easily solve this using the methods provided in this document.
Target Users
All users
Solutions
I.If I don't have elevation drawings, how can I create them?
1 First, click on the elevation drawing button under "① Generate View" in the top toolbar, or click on the "Elevation Index" button in the left view list.
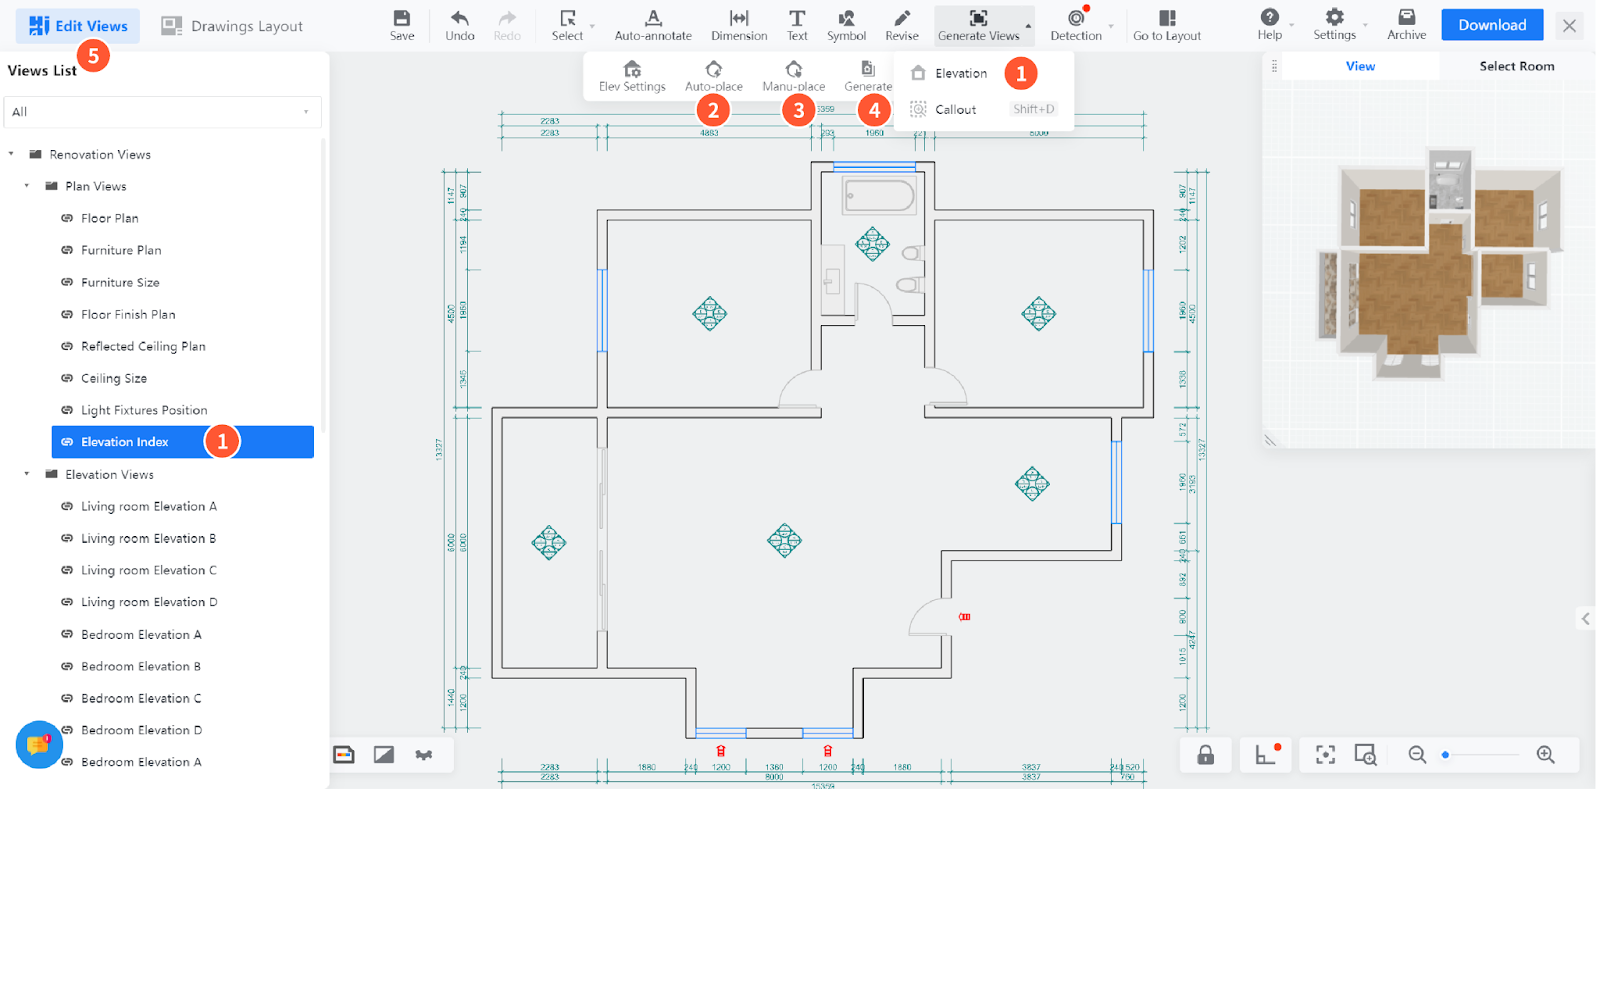
2.After that, you can either click on "Automatically Create Elevation Index Markers" or "Manually Create Elevation Index Markers."While creating index markers, you can also adjust the size of the elevation scope box to match the desired elevation drawing.
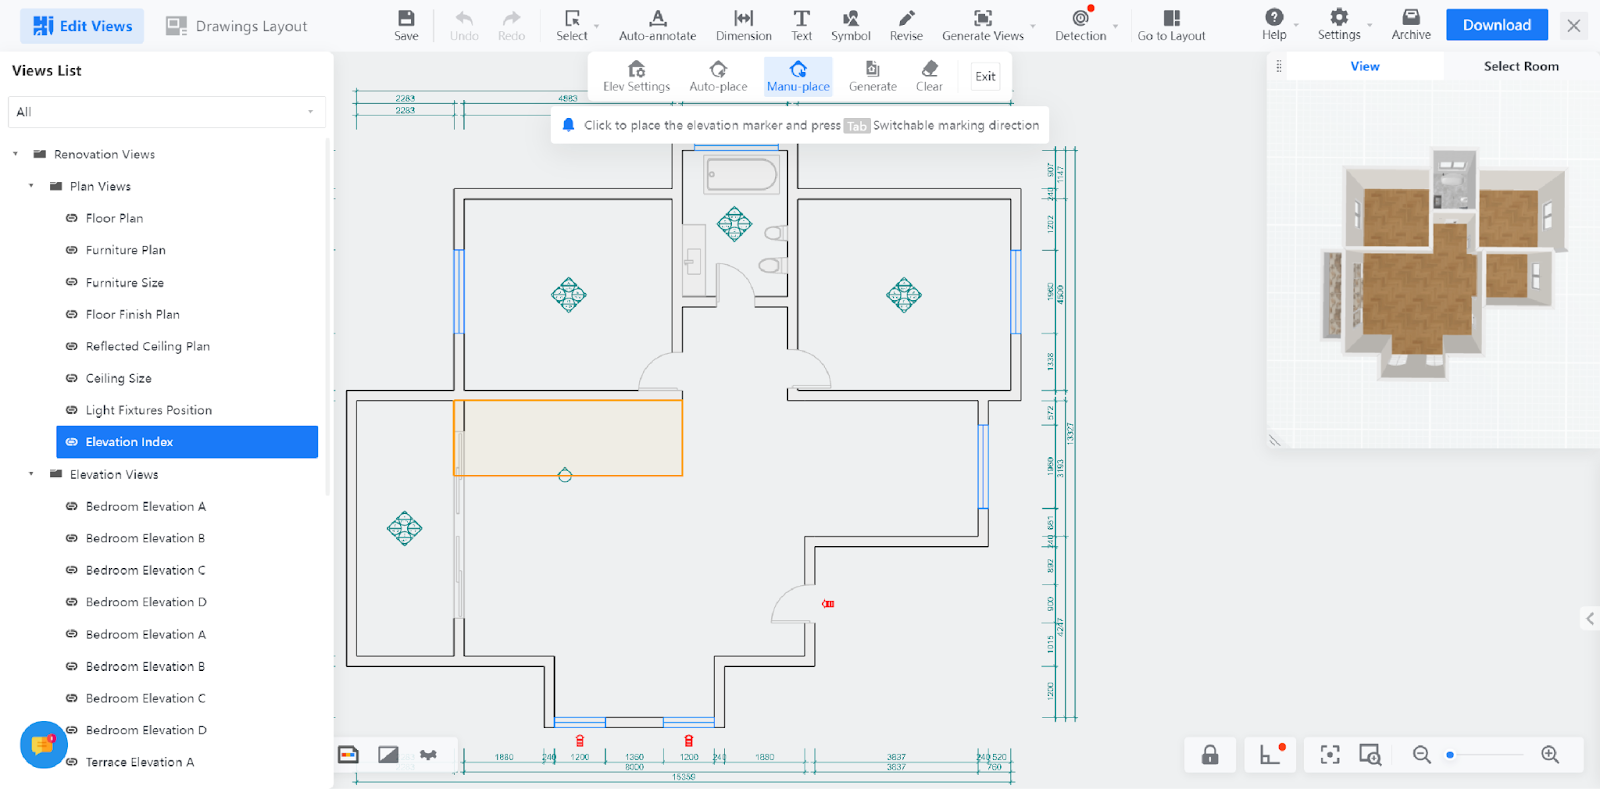
- After placing the elevation index markers, click on the "Generate Elevation" button (marked as ④). You can view the generated elevation drawings in the left view list. When creating a single elevation drawing, you can also click on the index symbol, then click on the pop-up "View Elevation Drawing" to see.
II.If I don't have custom drawings, how can I create them?
First, you need to go to the "Construction Drawing" page and check the "Layout Paper" list to see if there is a folder labeled "① Custom Paper", which confirms whether you have permission to customize papers. If there is a folder but no papers inside, follow these steps to create a drawing:
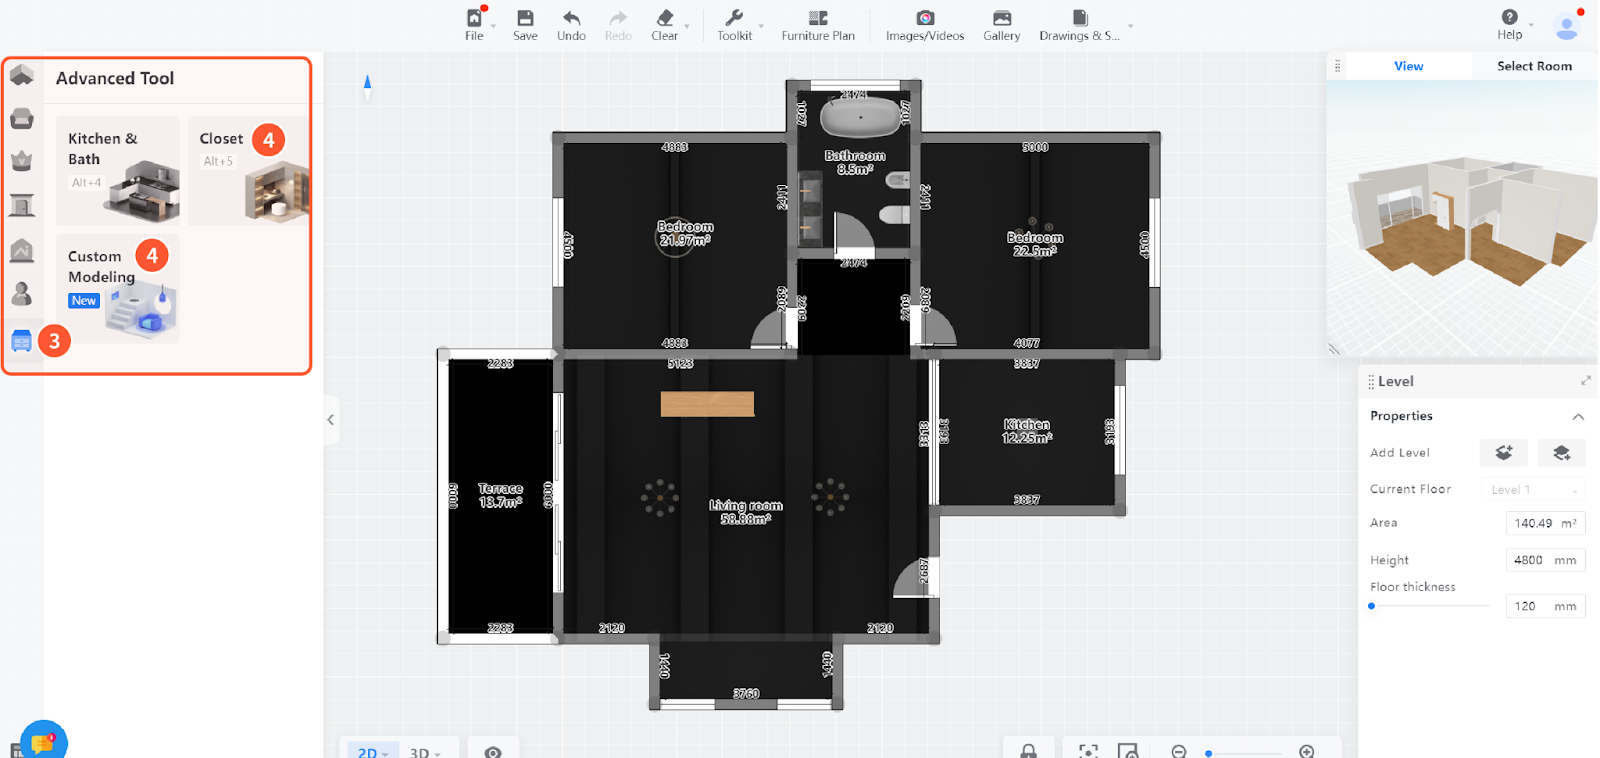
1.Return to the design environment: Click on the top right corner "②" on the "Construction Drawing" interface.

2.Click on the left sidebar labeled "③" to enter the industry library. Then, select the corresponding custom tool environment labelled "④" and complete the custom design.
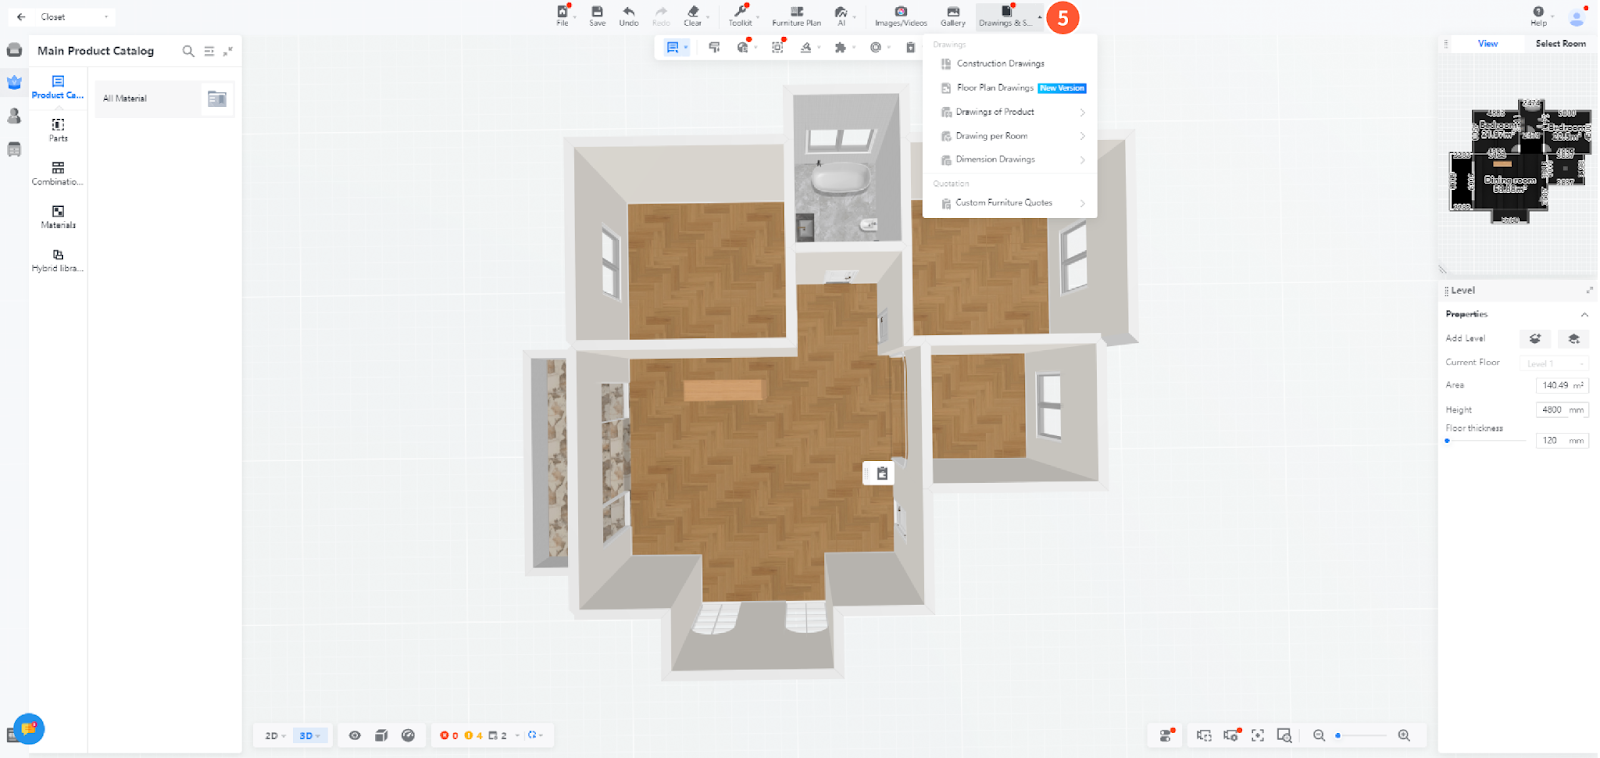
3.After completing the custom design, click on the "Drawings & Lists" option labeled "⑤" in the top toolbar. From the dropdown list that appears, select the desired output method.
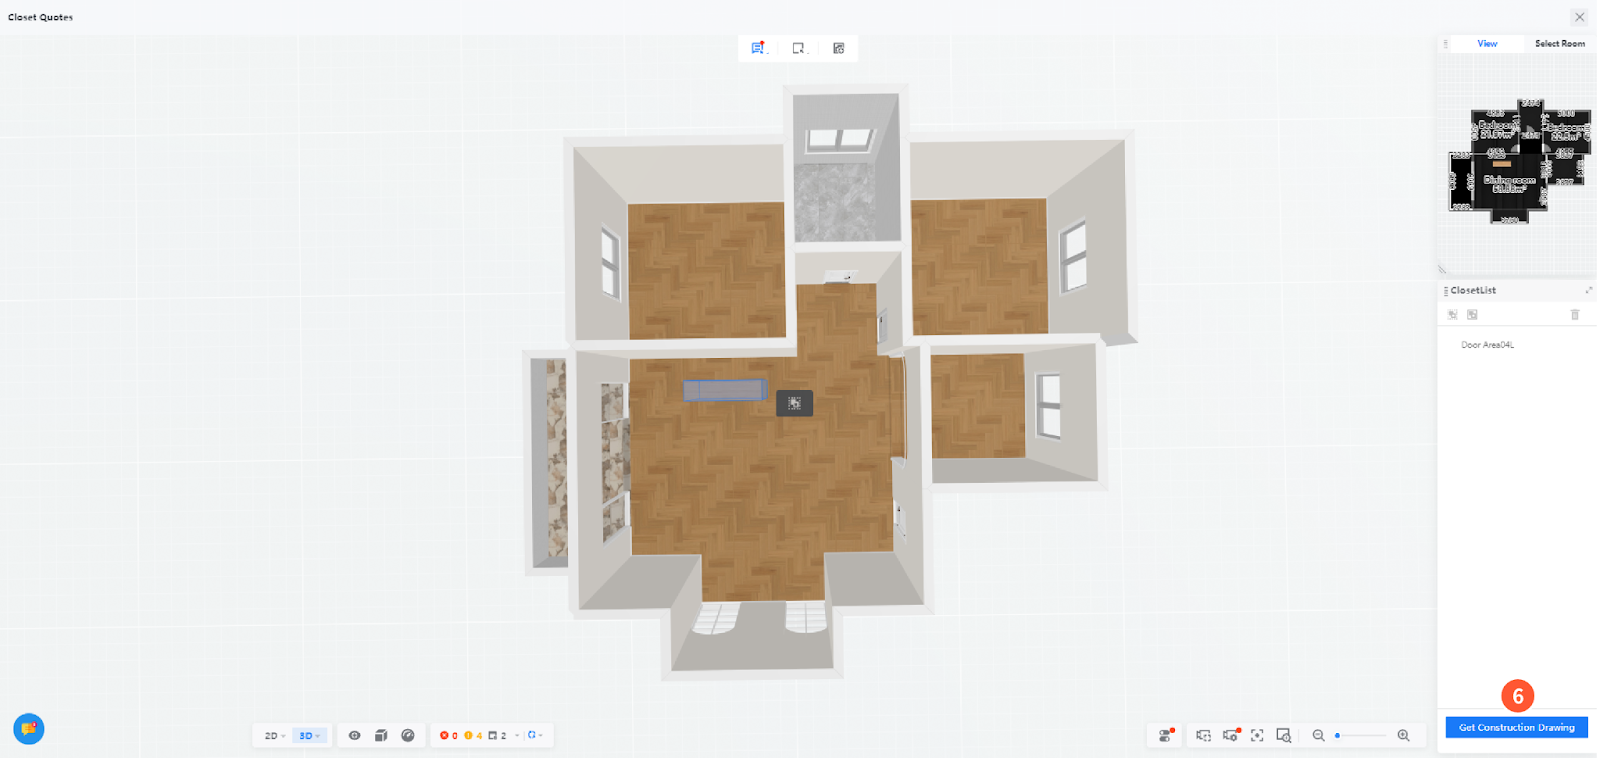
4.Using "Whole House Furniture Products" as an example, after selecting the furniture items you want to include in the drawing, click on the "⑥ Generate Construction Drawing" button located at the bottom right corner to generate the construction drawing.
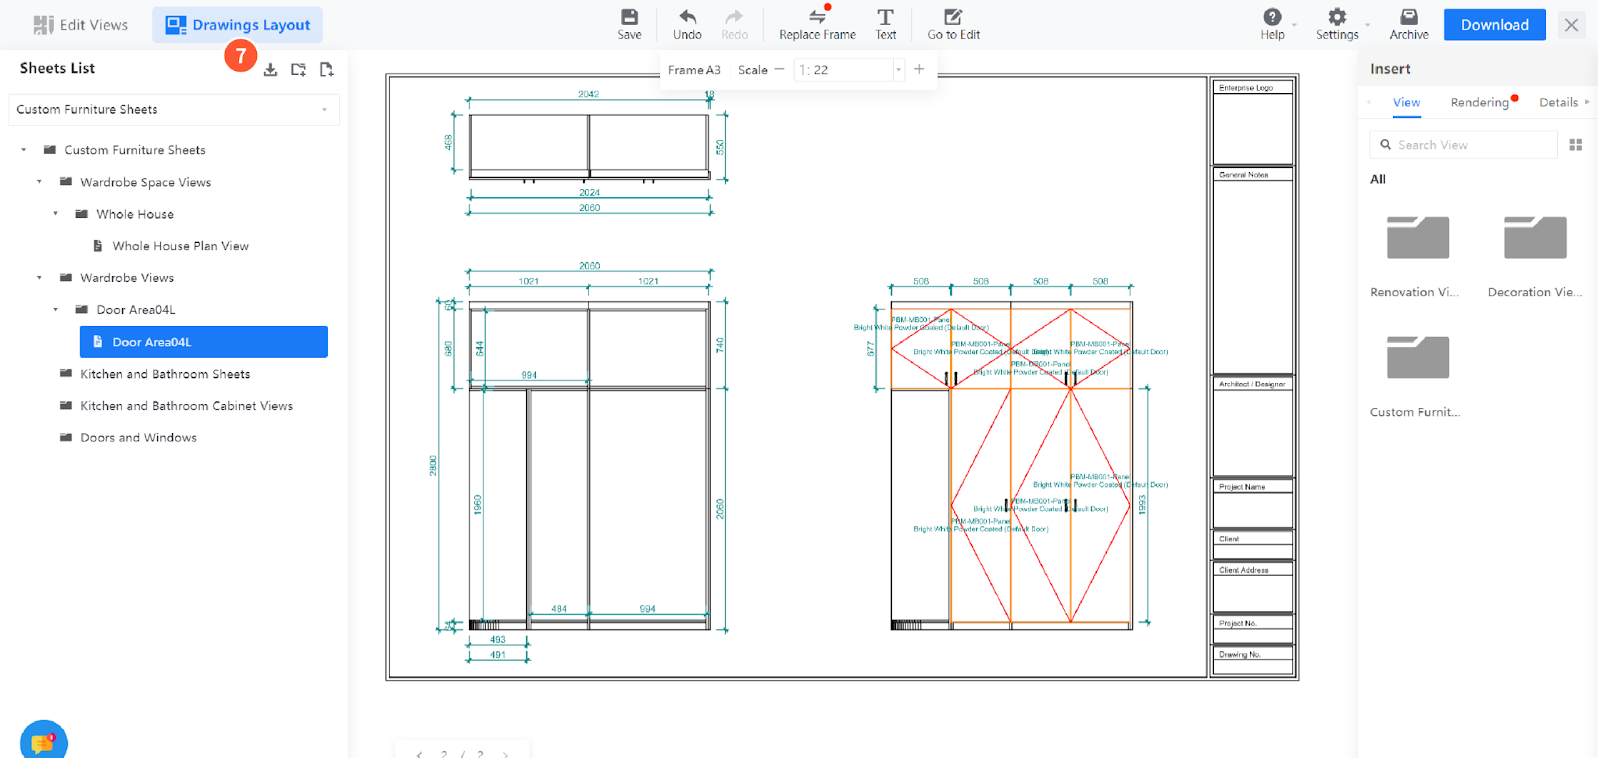
- Afterward, click on "⑦" to enter the "Layout Drawings" for viewing. If editing is required, you can click the "Edit View" button at the top left corner of the page to enter the editing environment.
VI.If I don't have interior finish plan drawings, how can I create them?
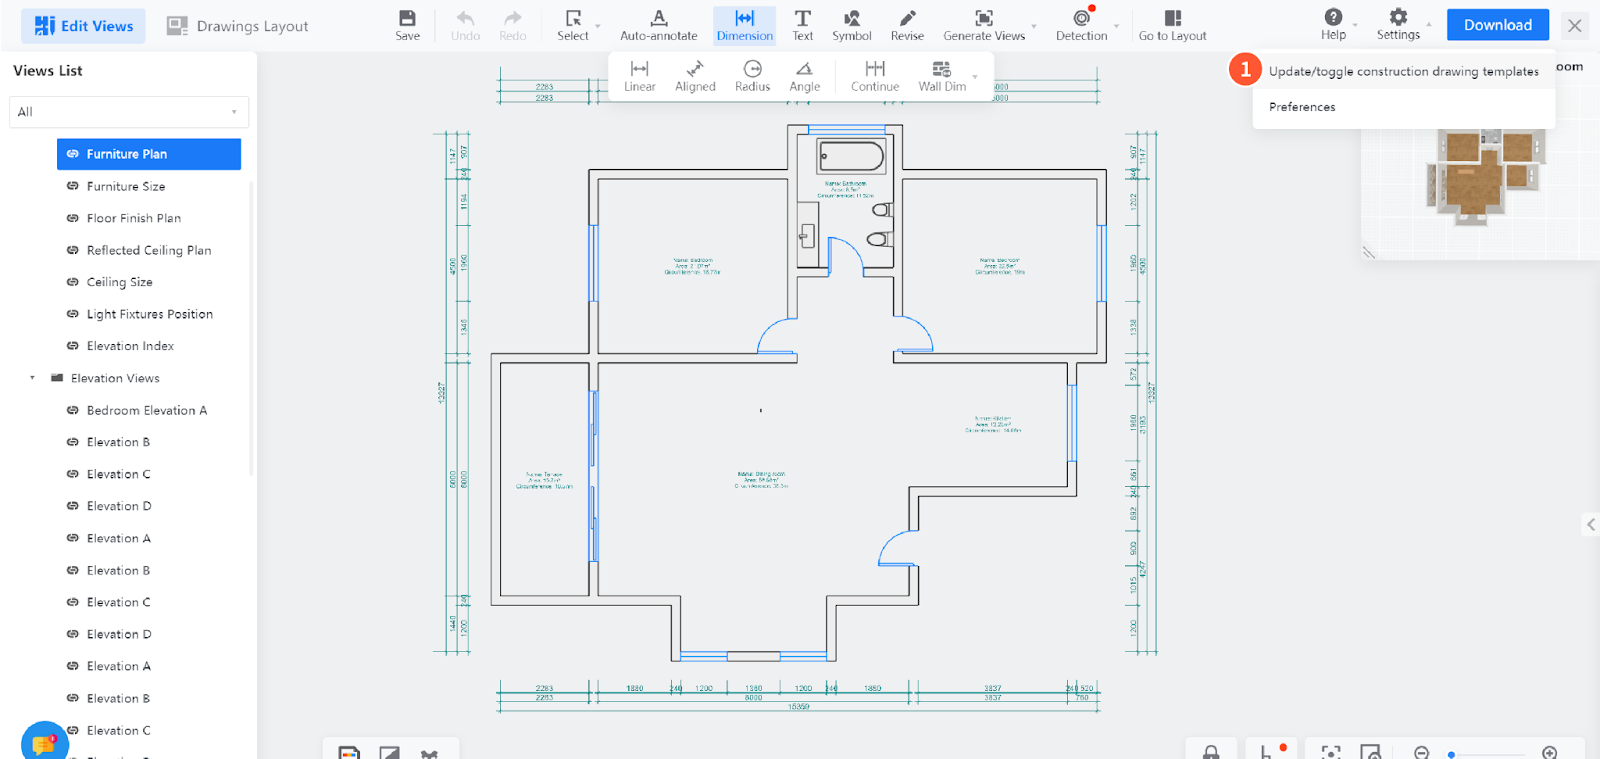
- Synchronize Configuration: If you accidentally delete drawings, you can click on "① Settings" at the top right corner of the construction drawing page and select "Update Construction Drawing Template" (some users may have synchronized system configuration).
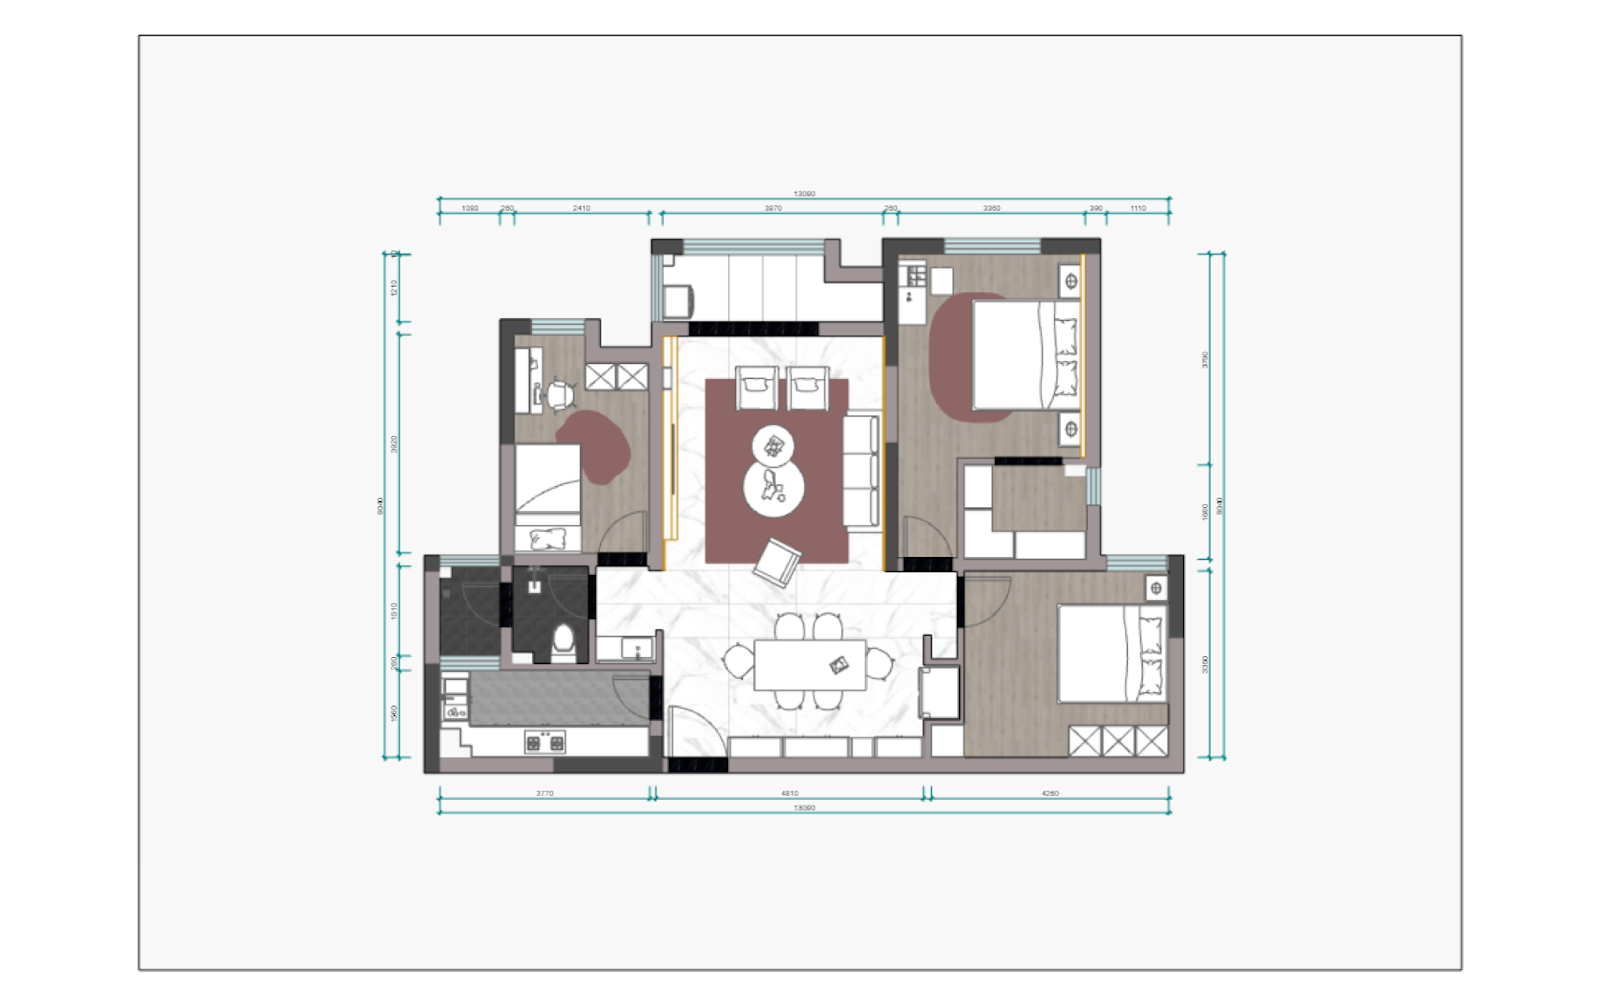
VII.I want to create a colored image with texture, how do I do that?
A sample of the colored image is as follows:
1.Click on "① Edit View" to enter the editing environment.
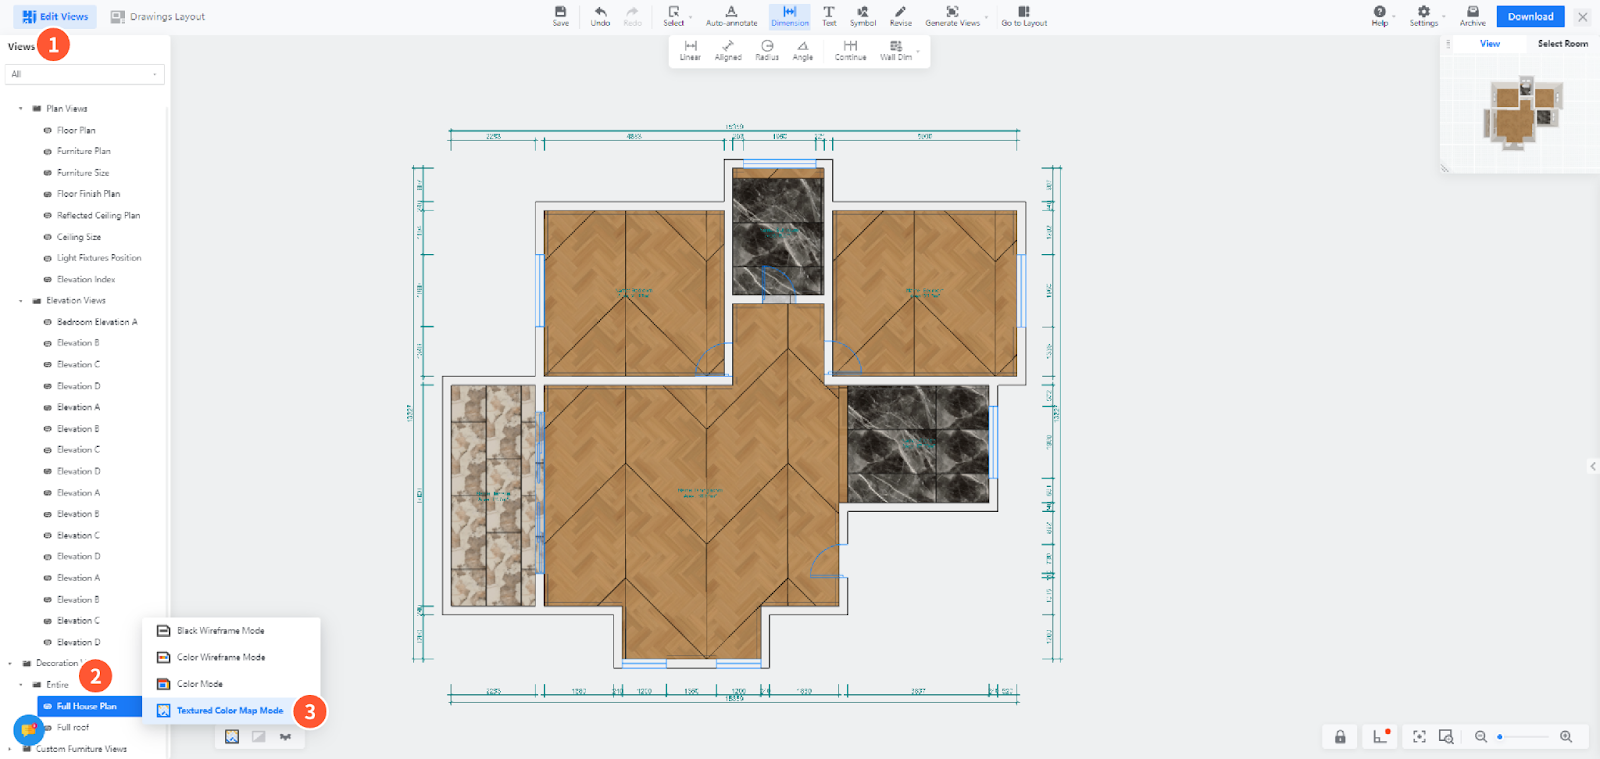
2.Click on "② Display Mode" at the bottom left corner of the screen, and switch to "③ Textured Color Map Mode".
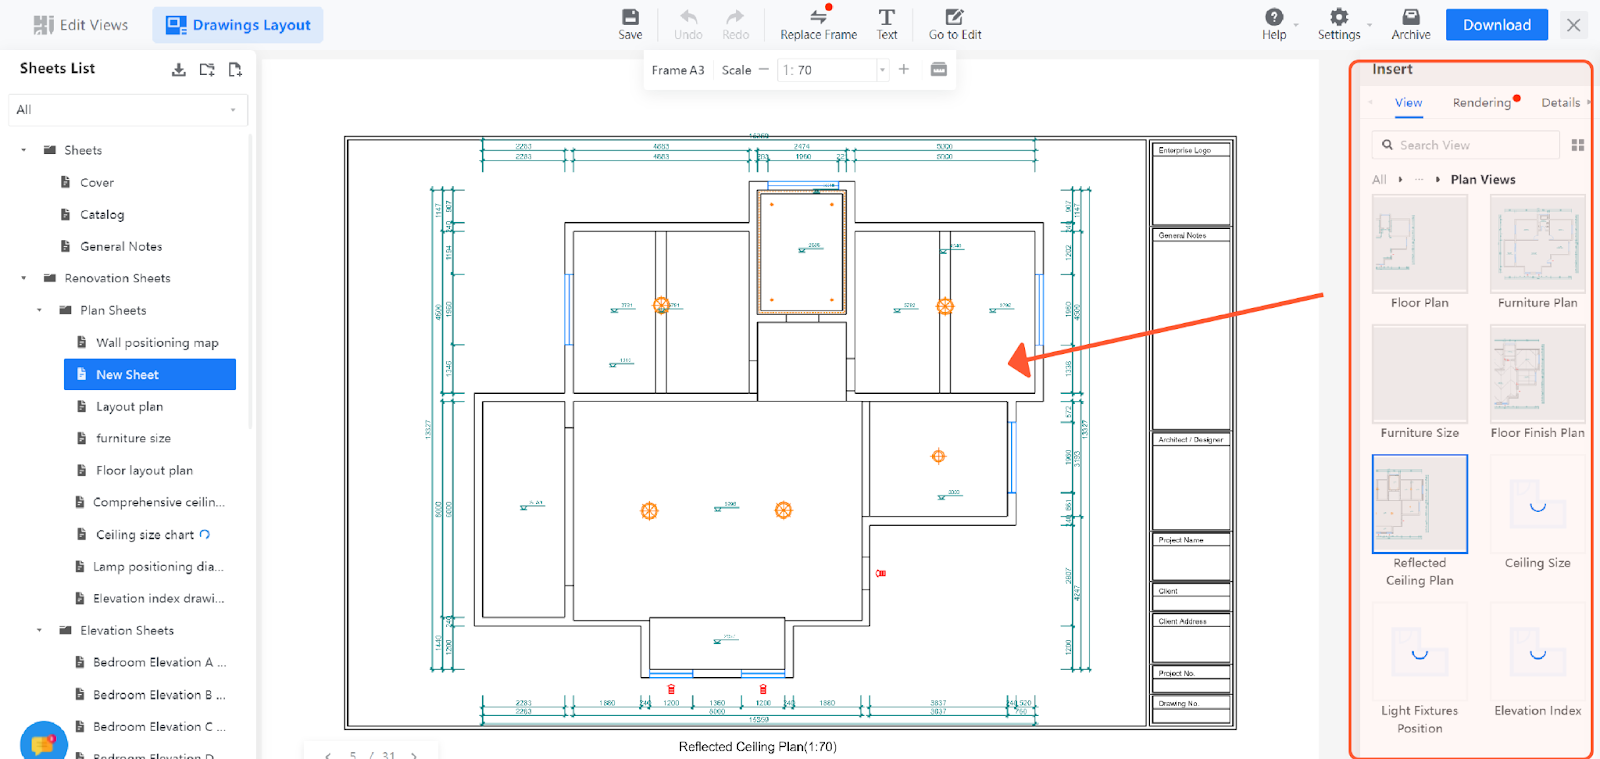
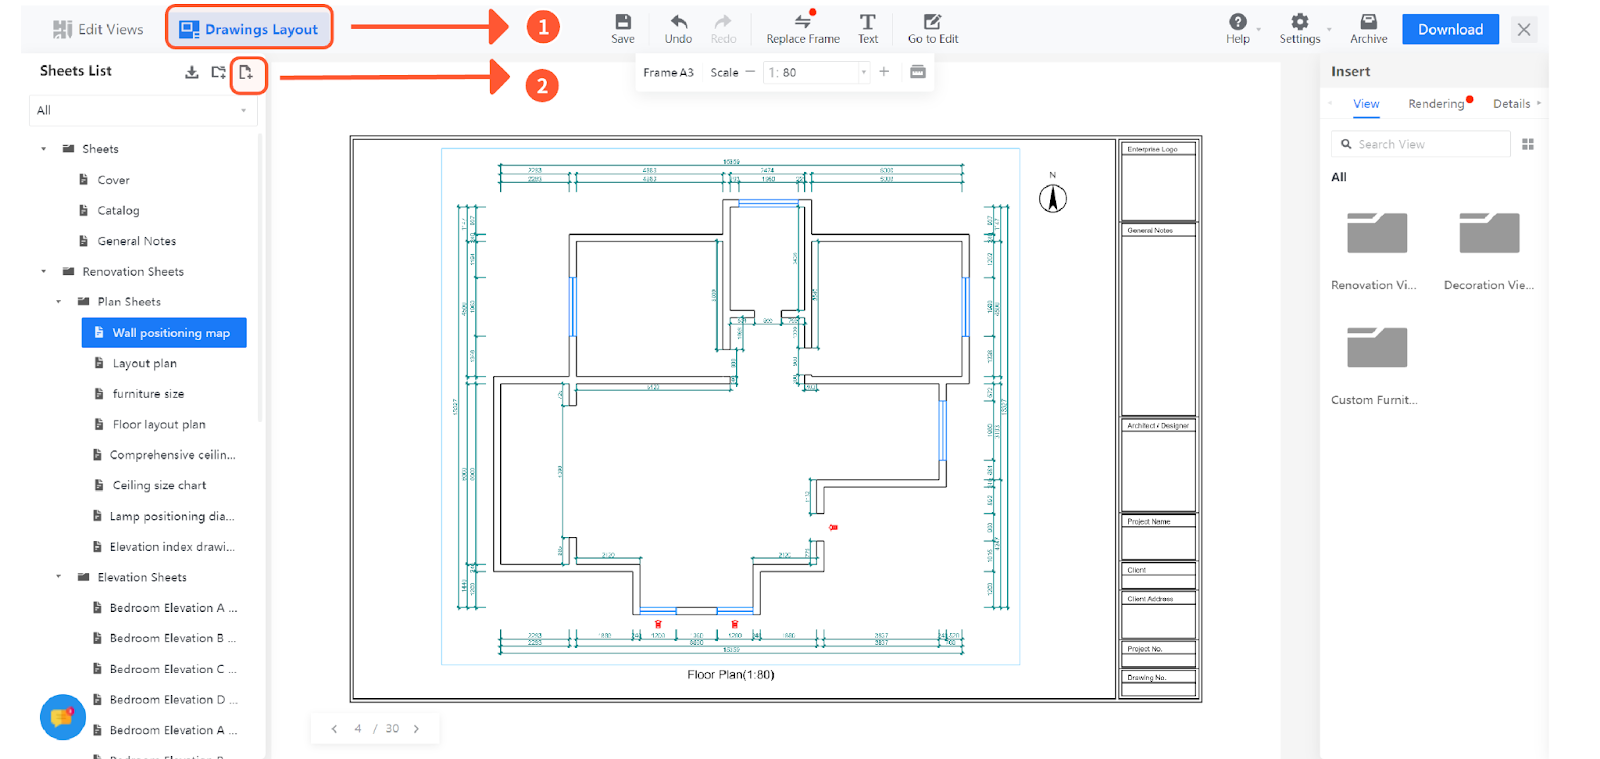
VIII.How can I create a blank sheet of paper?
1.On the "Construction Drawing" page, click on "① Layout Paper". Select a certain paper from the list of papers, then click on "② Add Paper". The newly created paper will be generated below the selected paper.
2.You can double-click on "③ Paper Name" to rename it.
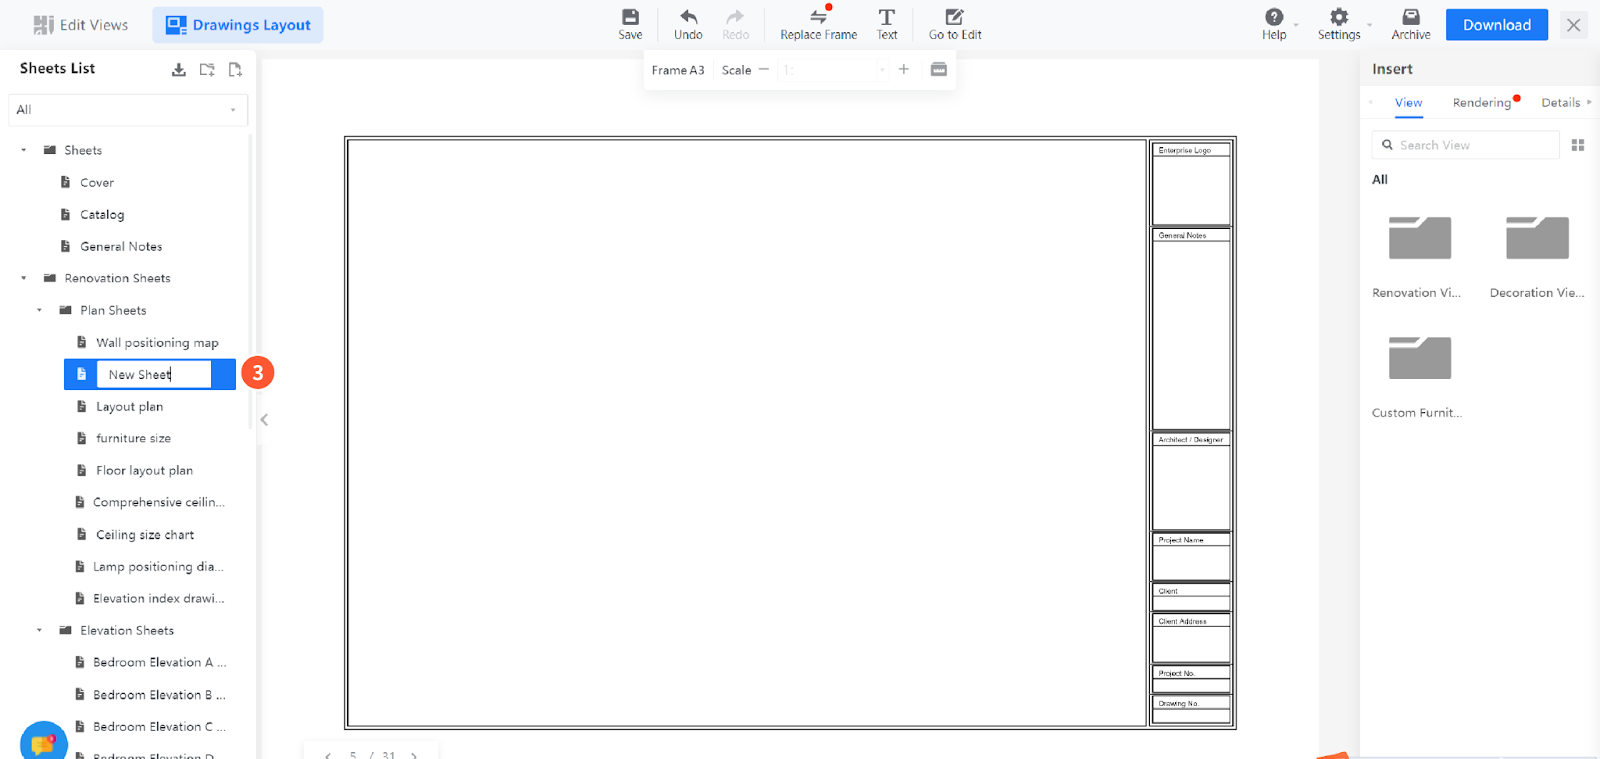
3.After completing the creation of the blank paper, you can drag the required elements, such as views and large-scale drawings, into the panel on the right side of the page. You can also adjust the position and size of each element here.