- Helpcenter
- Upload & Export
- Upload & Import
-
Getting Started
-
Model Library & Asset Management
-
News & Product Update
-
Kitchen, Bathroom, Closet, Custom Modelling
-
[Enterprise] 3D Viewer & Virtual Showroom
-
Payment & Billing
-
Version 5.0
-
Upload & Export
-
Personal Account
-
Photo & Video Studio
-
Material&Component
-
Floor Plan Basic
-
Images/Videos & Light
-
Tips & Tricks
-
Privacy & Terms
-
Inspiration Spaces
-
Testimonials
-
Construction Drawings
-
AI Tools
-
Customer Service Team
-
Projects Management
-
FAQ
-
Coohom Online Training
-
Lighting Design
-
Coohom Architect
[Enterprise] How to Upload Textures?
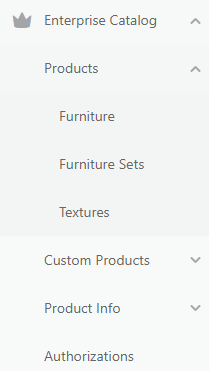
1. Select Enterprise Catalog>Products> Textures >

Upload Textures.
2. Drop files or upload models from your computer.
3. Modify the single finish or click Edit All to manage multiple ones.
4. Click Submit to confirm.
5. Choose to Continue Uploading to repeat this process or tap Check Textures to go to the New Product folder under the finish library for viewing your newly-uploaded finishes.
Note: Each finish file should not exceed 5MB. JPG and PNG formats are allowed.
Upload the photo in Custom Furniture
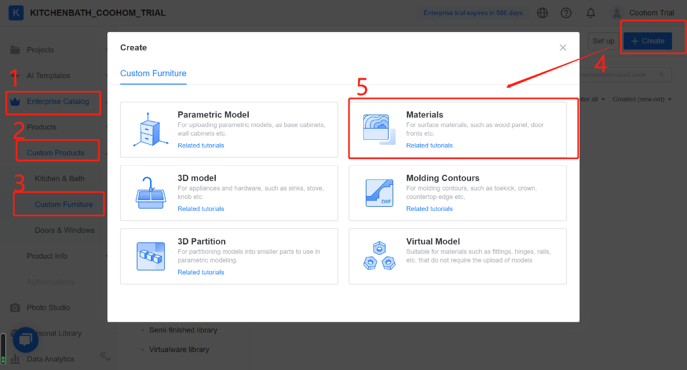
1. Go to Merchant Platform → Enterprise Catalog → Custom Products → Custom Furniture → Create → Materials

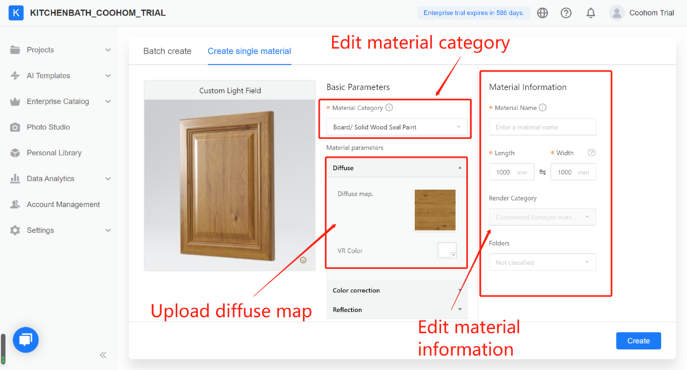
2. Edit Material Category → Upload diffuse map → Preview → Edit Material Information

Tips:
1. the file should not exceed 5M.
2. higher resolution is better but should not exceed 5,000 pixels.
3. the color mode is RGB.
4. supported file formats: *.jpg,*.jpeg,*.png,*.bmp,*.jp2,*.jpe,*.dib,*.tiff,*.tif.