Using the 3D Viewer Effect Editor, you can fine-tune 3D models by adjusting the lighting, lens effects, material settings, texture, background, etc to further customize the product in context.
To Access :
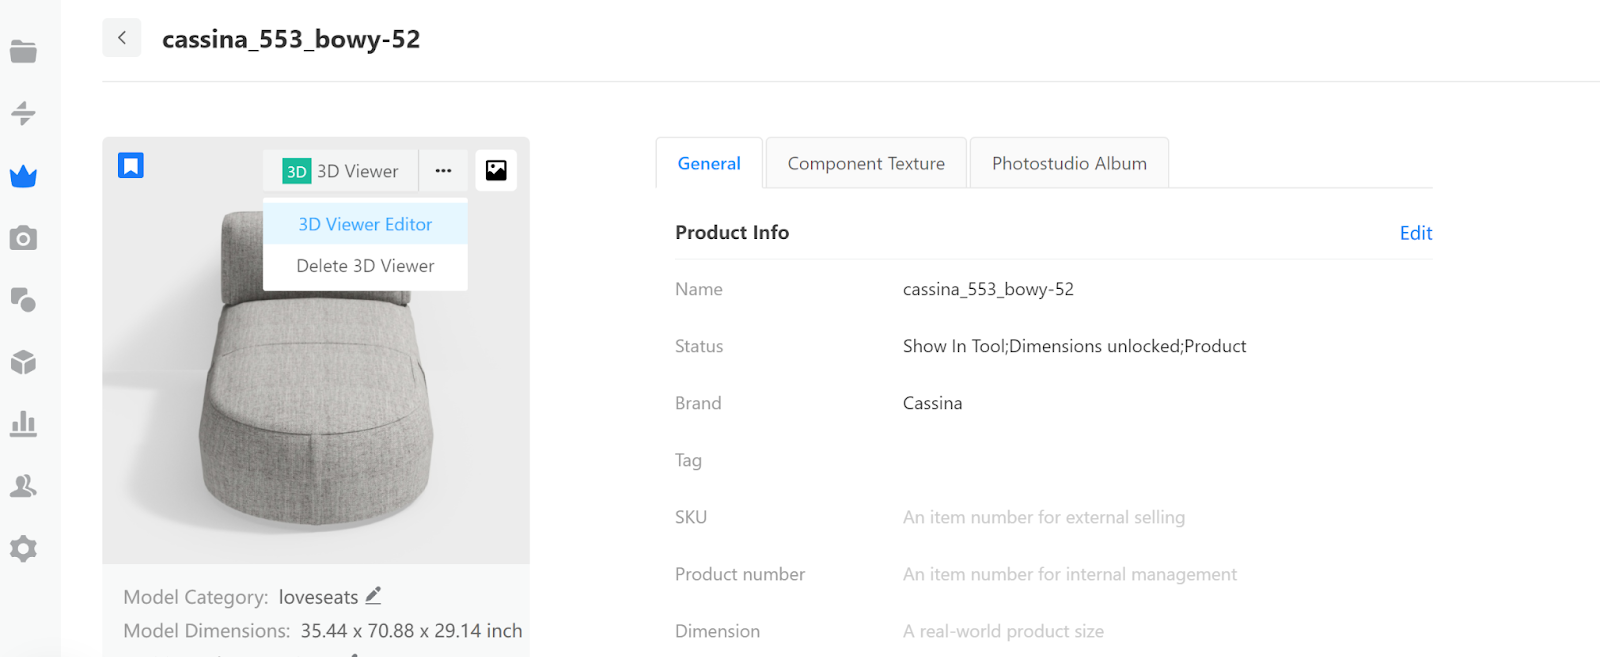
Enterprise Catalog >> Product >> Create 3D Viewer >> 3D Viewer Editor
# Core Feature Update:
1. Material Replacer
After you enable the 3D Viewer Editor, you can select textures from the enterprise catalog and apply them directly to the chosen product with one click.
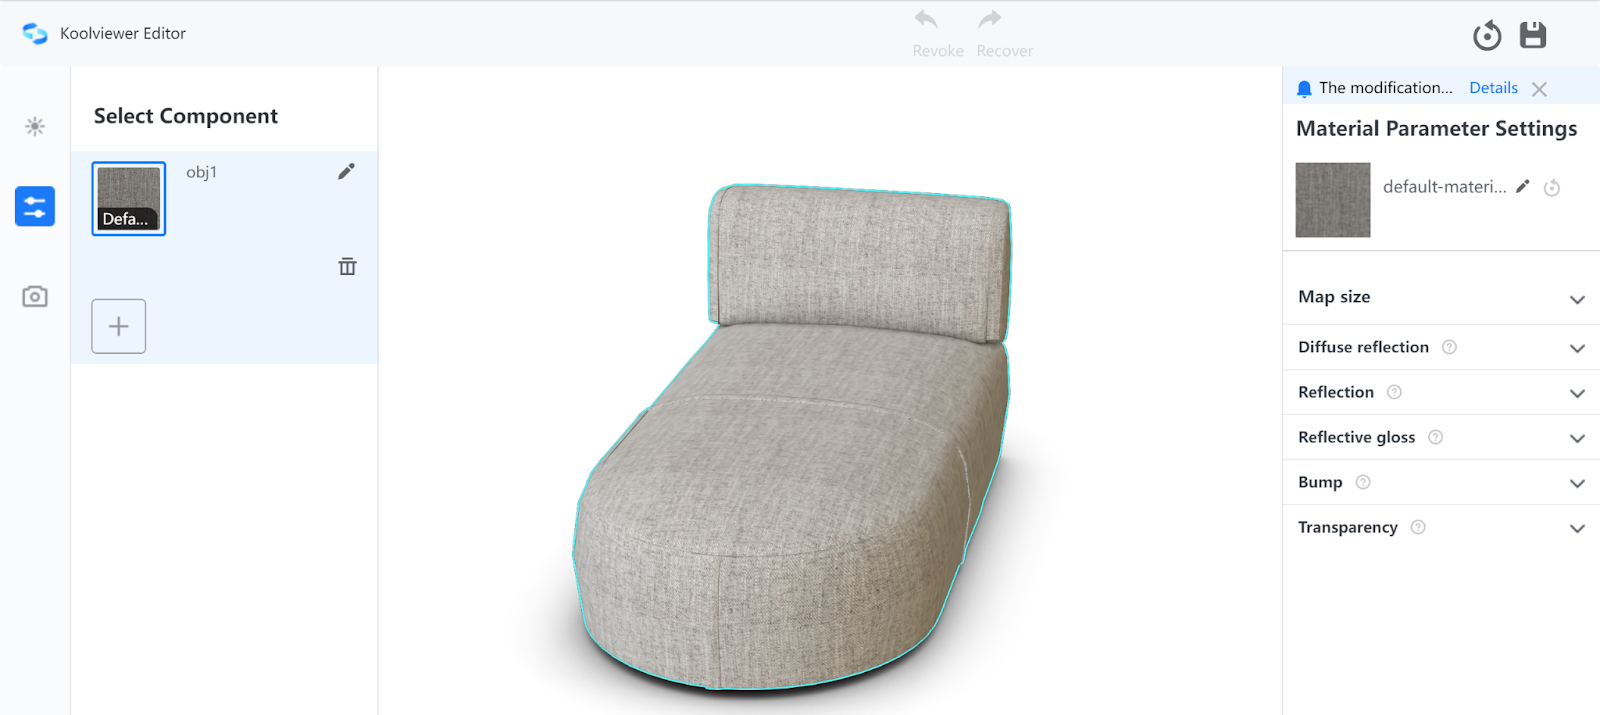
1). First, click on the component of the model whose texture you want to edit. When the component is selected, click Edit Material Effect.
You can replace the texture of components with the models that you uploaded, which could take a few seconds for the texture to bake. If you don’t have any model available for replacement in your account, click the + icon to upload.
After the replacement, you can also set material parameters in the right-side pane for map size, diffuse reflection, reflection, reflective gloss, bump, and transparency.
-
Map size
-
Diffuse reflection
-
Reflection (reflect the corresponding color)
-
Gloss (leather, metal, etc.)
-
Bump (texture pattern etc.)
-
Transparency (acrylic, glass, etc.)
Map size
Diffuse reflection
Reflection (reflect the corresponding color)
Gloss (leather, metal, etc.)
Bump (texture pattern etc.)
Transparency (acrylic, glass, etc.)
2). You can configure the display order of material shown in the Select Component panel. You can also pick one at the top as the default material.
3). To delete one or more textures that you uploaded, click the trash bin icon and then the cross icon on the top right corner of the thumb nail of the target material.
4). To rename a component texture, click on the Edit icon next to the component name that you want to modify. Then, enter the new name in the text field.
5). When all your configurations are done, you can click the Save icon on the top-right corner of the entire page to save the product as a model.
6). Now you can view the configured product that you saved as a model.
2. Light and lens customization options for the models and environment. Material editing has been enabled for models within the 3D viewer.
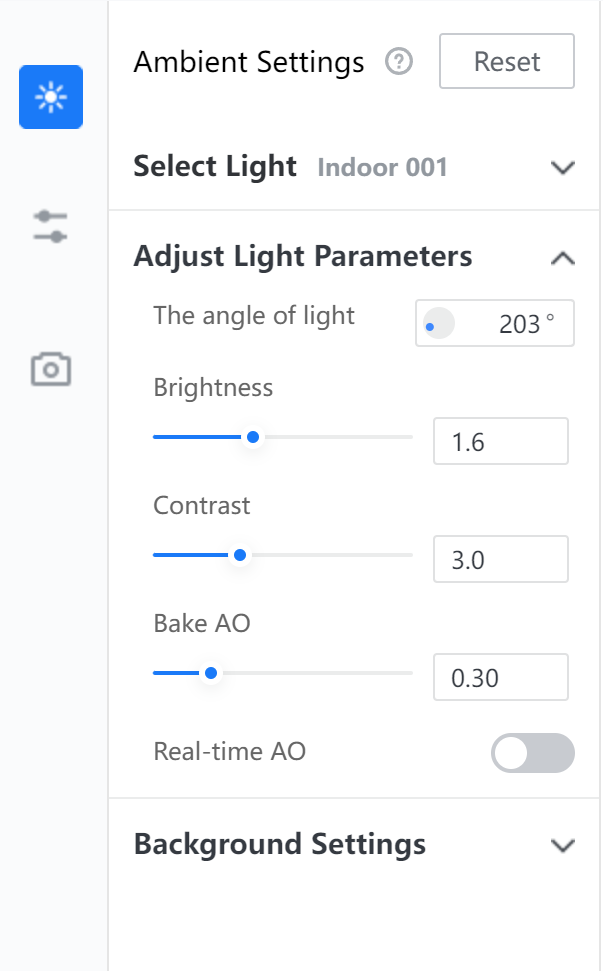
1).【Ambient Settings】
-
Studio & scene
-
Light parameters (Brightness, Contrast, Ambient Occlusion)
-
Background color
Studio & scene
Light parameters (Brightness, Contrast, Ambient Occlusion)
Background color
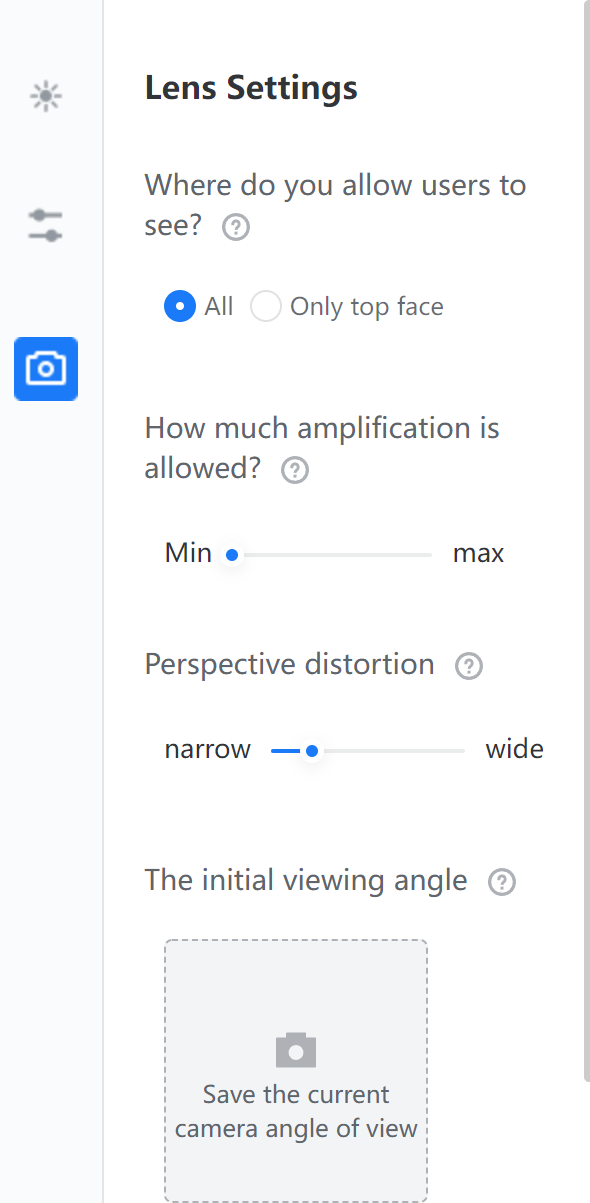
2).【Lens】
-
Model amplification
-
Save/cancel the initial viewing angle
Model amplification
Save/cancel the initial viewing angle
3. General operation instructions (Reset, Save, Initialization)
To go back to the state that you saved lately, click Reset.
You can choose to revoke an operation that you’ve performed and recover it afterwards. Operations that you revoke or recover don’t have to be the saved ones.
You can also choose to go back to the original model.
