-
Getting Started
-
Model Library & Asset Management
-
News & Product Update
-
Kitchen, Bathroom, Closet, Custom Modelling
-
[Enterprise] 3D Viewer & Virtual Showroom
-
Payment & Billing
-
Version 5.0
-
Upload & Export
-
Personal Account
-
Photo & Video Studio
-
Material&Component
-
Floor Plan Basic
-
Images/Videos & Light
-
Tips & Tricks
-
Privacy & Terms
-
Inspiration Spaces
-
Testimonials
-
Construction Drawings
-
AI Tools
-
Customer Service Team
-
Projects Management
-
FAQ
-
Coohom Online Training
-
Lighting Design
-
Coohom Architect
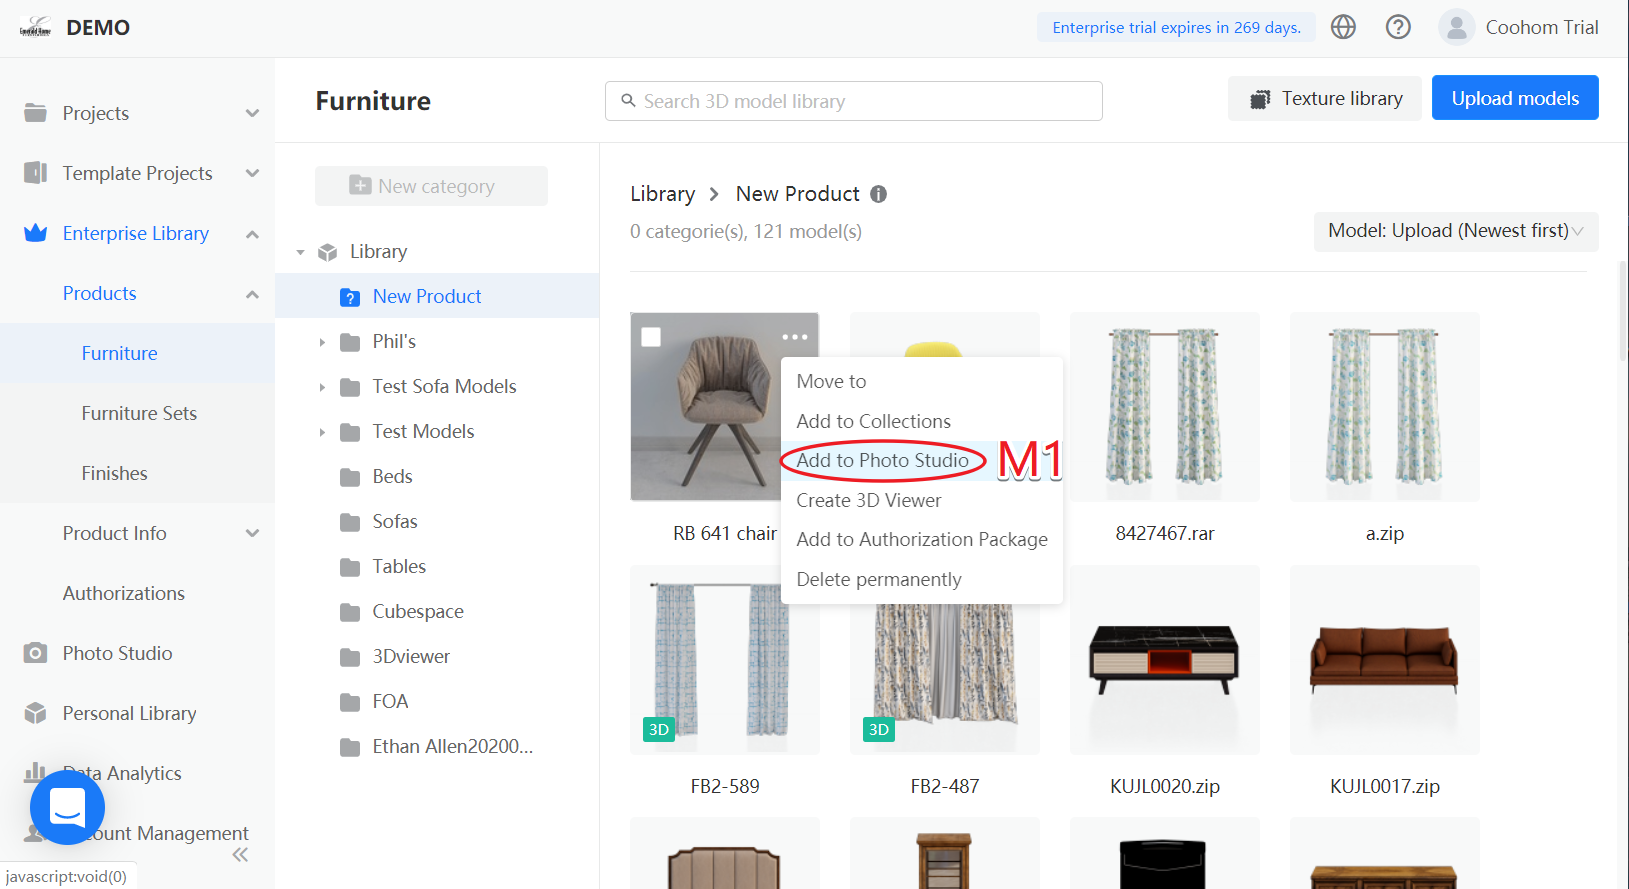
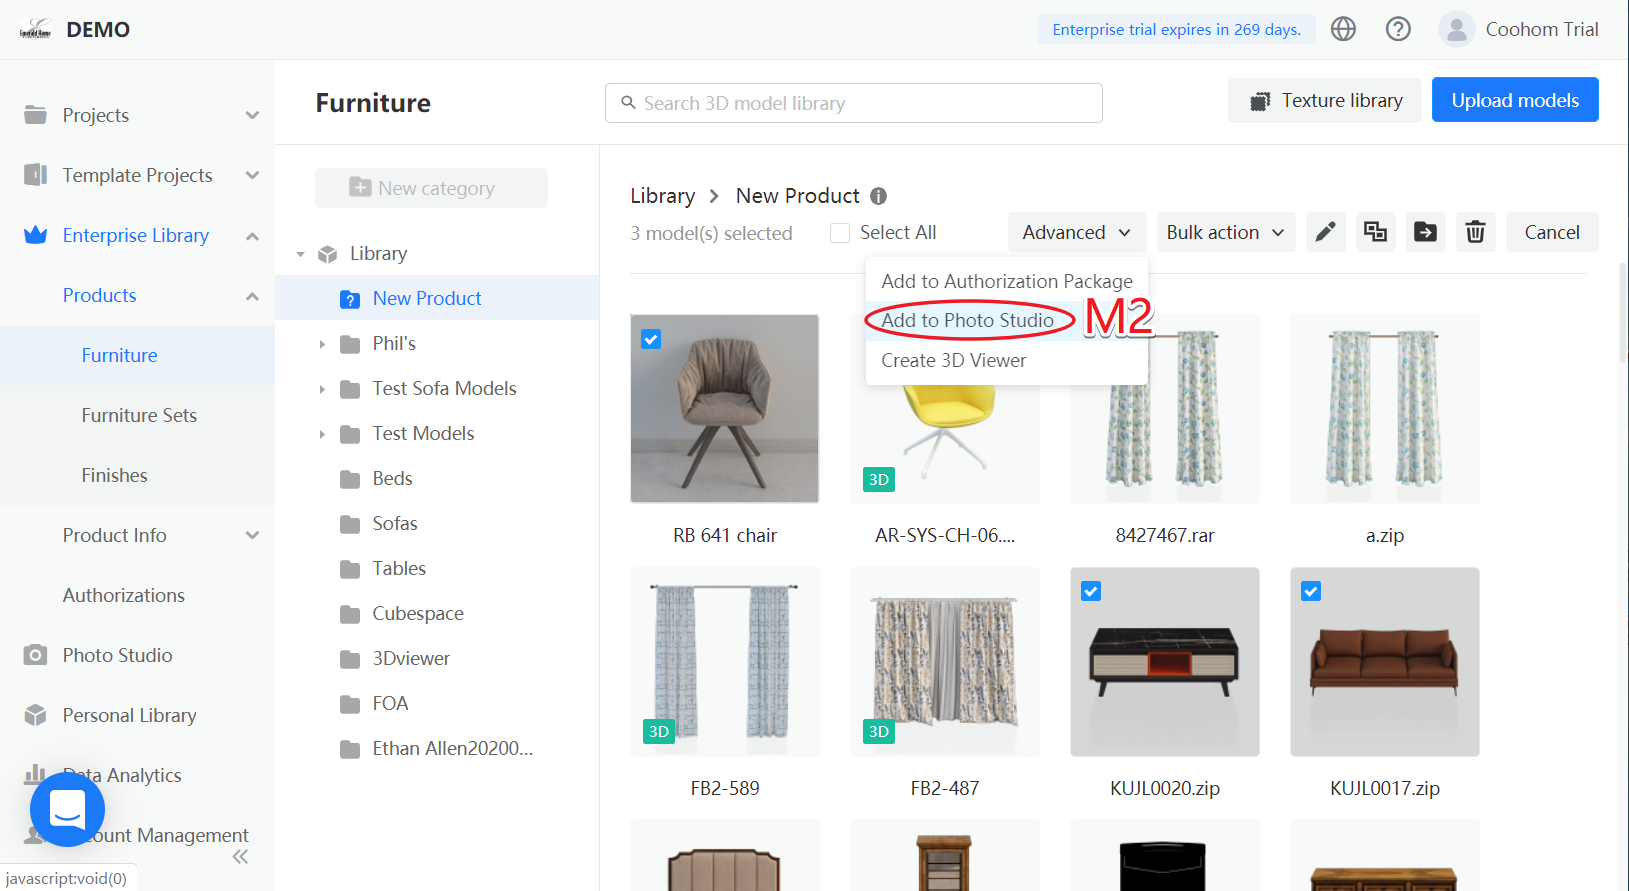
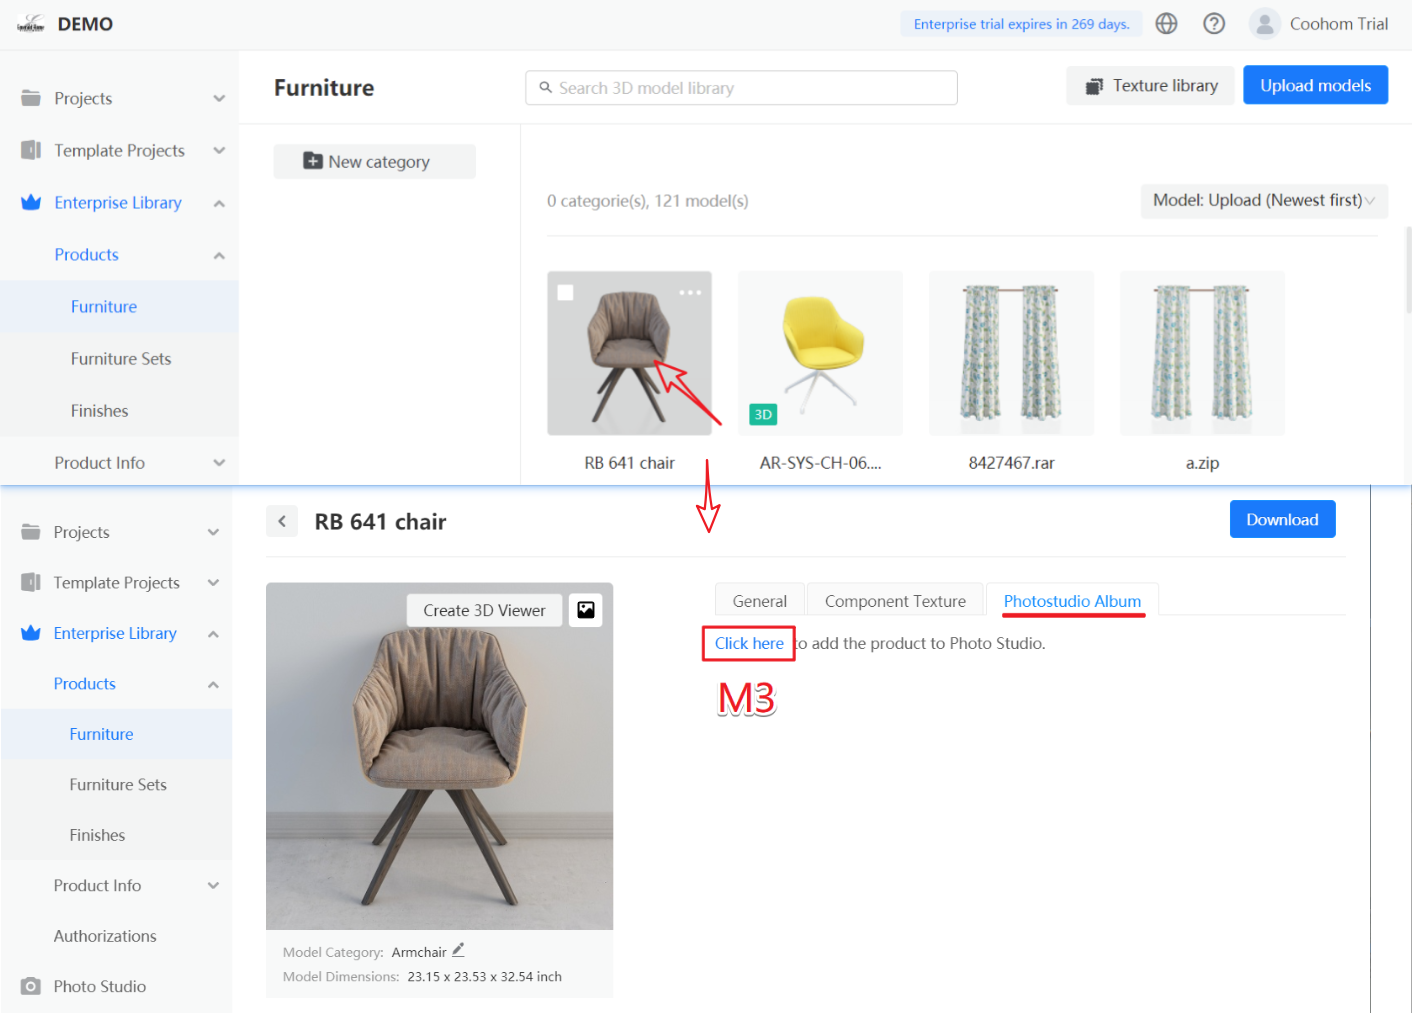
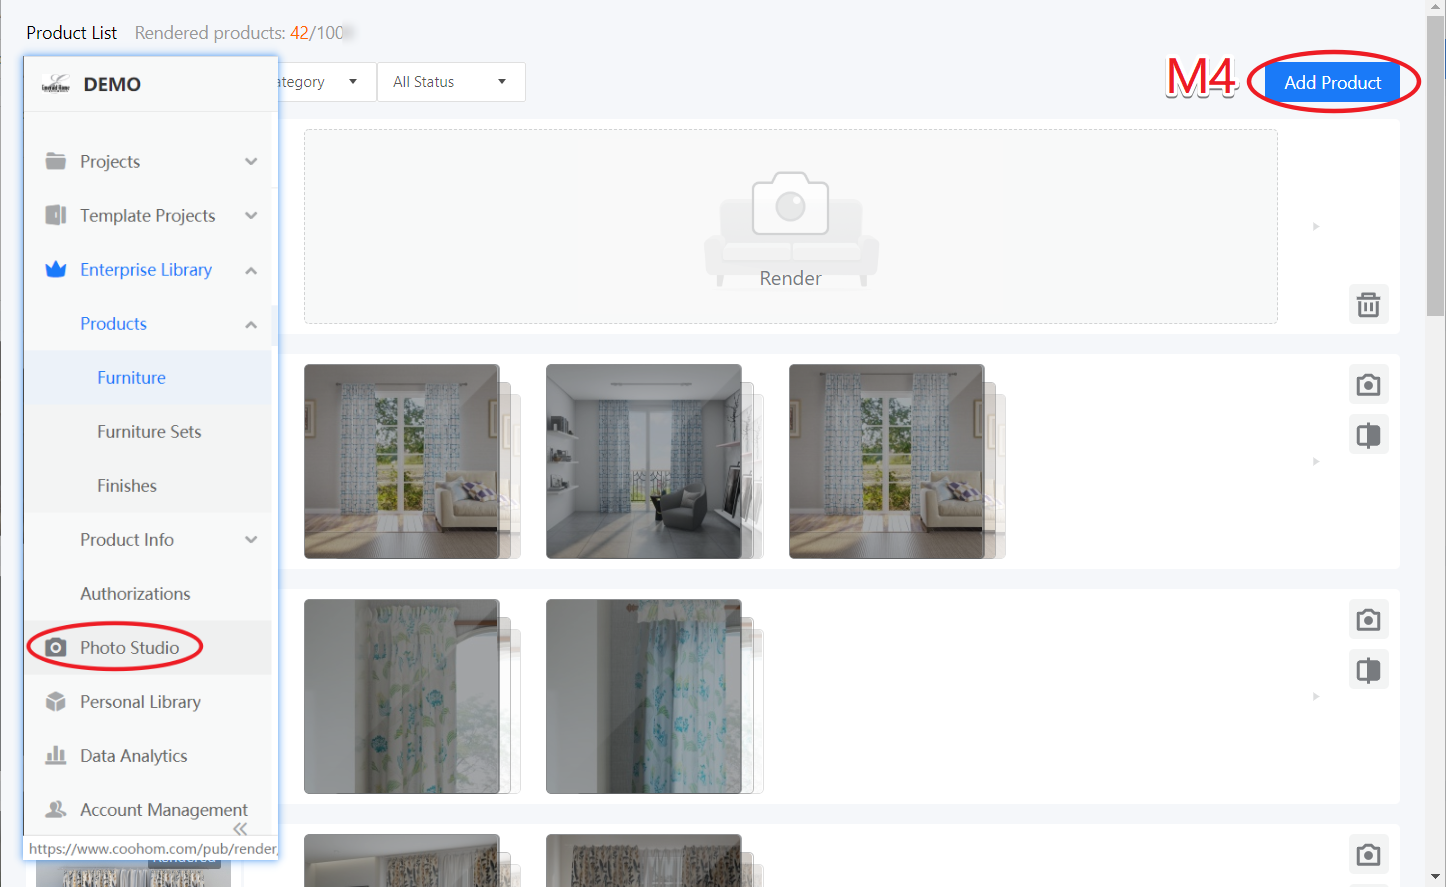
[Enterprise] Four Ways to Add Model to Photo Studio
M1: In the upper right corner of the model image, select Add to photo studio

M2: Select one or more models and click Add to Photo Studio in advanced.

M3: Click the model to enter the model details page, Photostudio Album > Click here to add the product to Photo Studio.

M4: Go to the Photo Studio on the left, click Add Product to enter the furniture list, and use the above 1-3 method to add the model to the photo studio.
