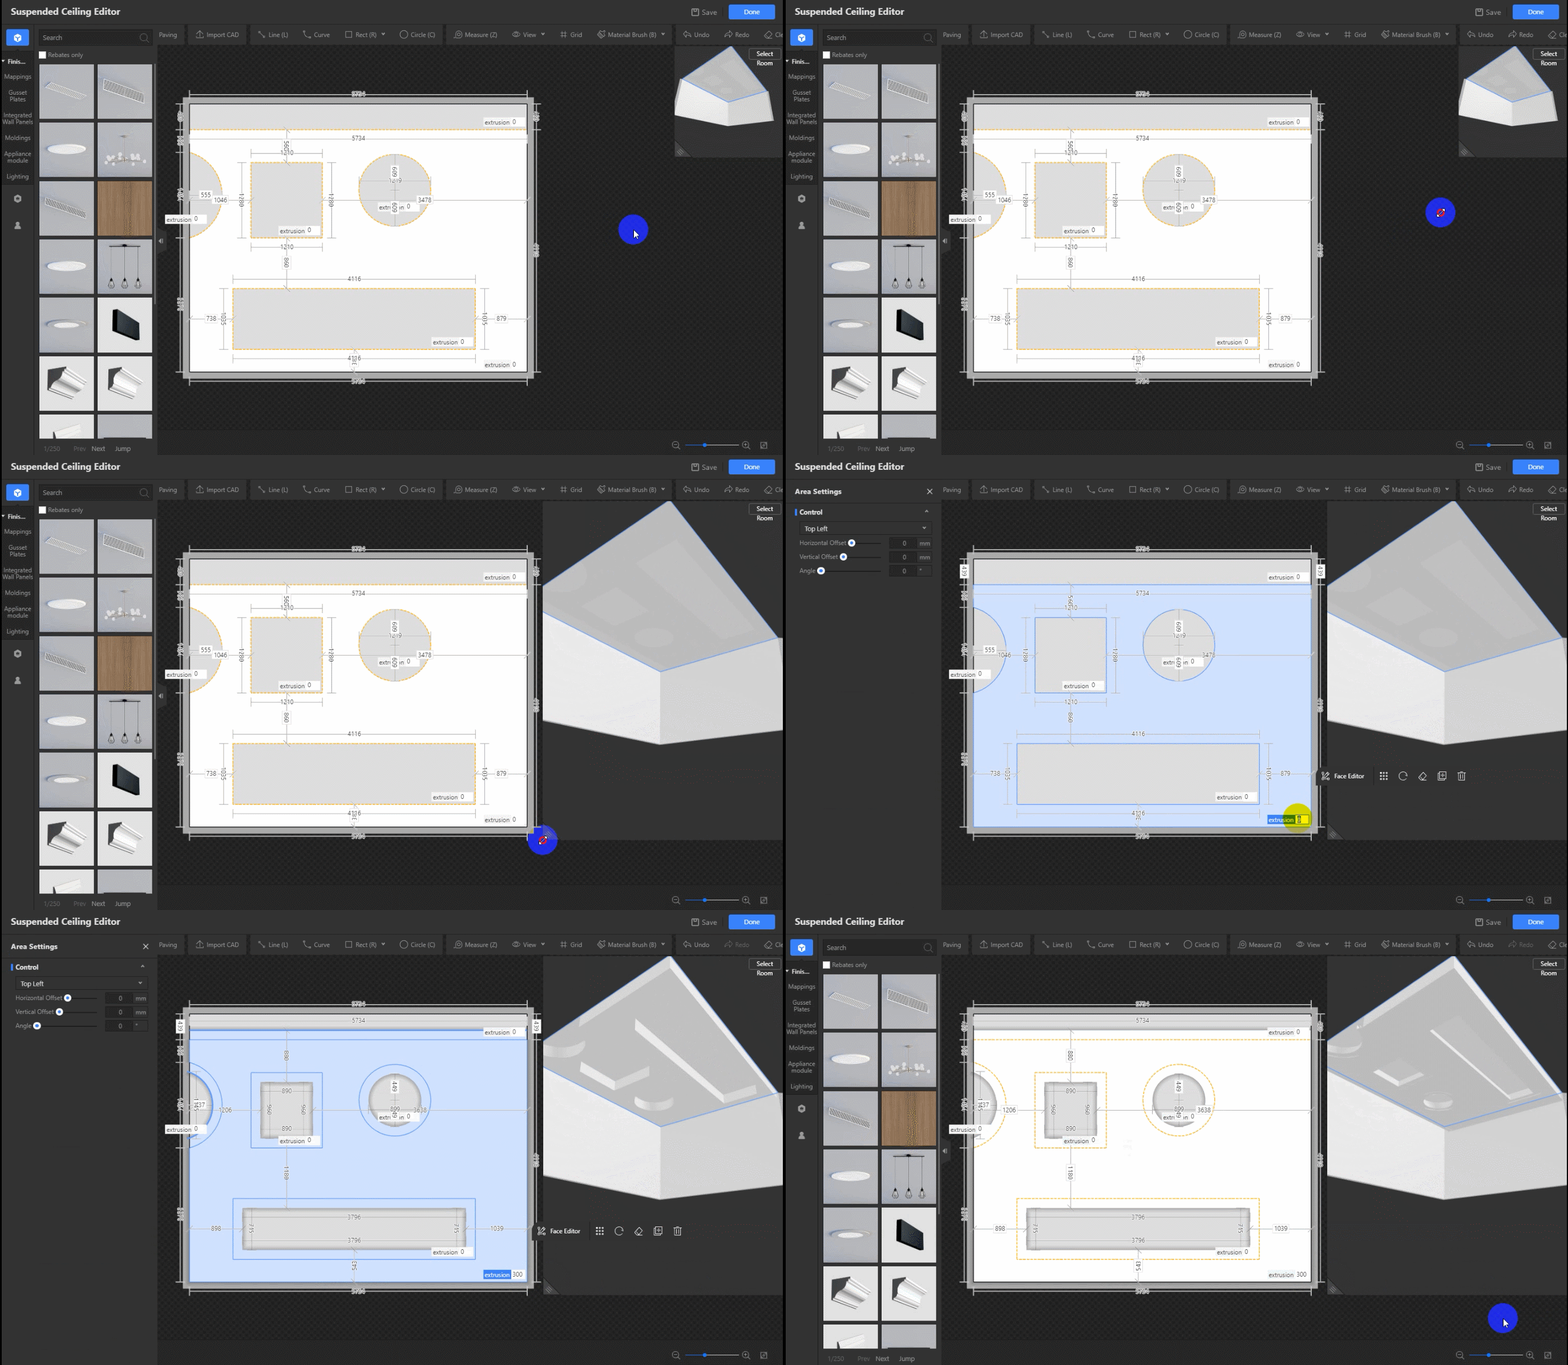
-
How to Add Light Strips?
How to Add Light Strips?
Light Strip in Material&Component tool helps designers to add lights anywhere he wants, such as on ceilings, background walls and grounds, etc..
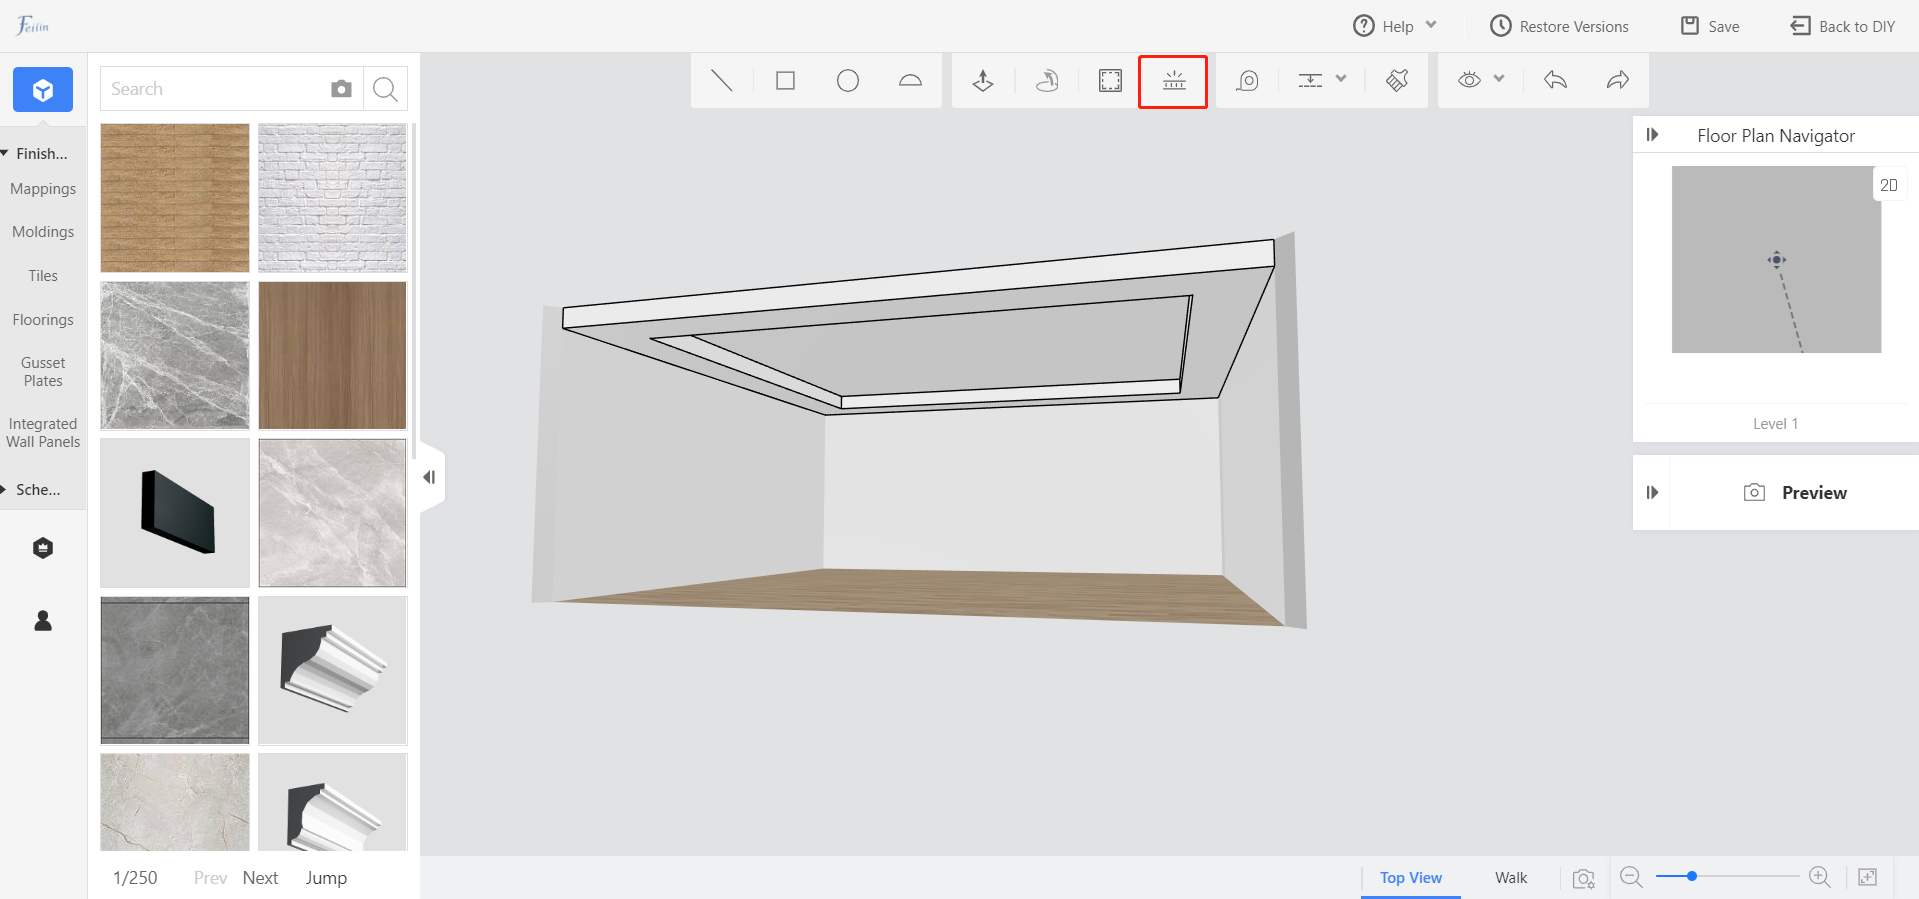
1. Click Light Strip on the top bar to set light strips
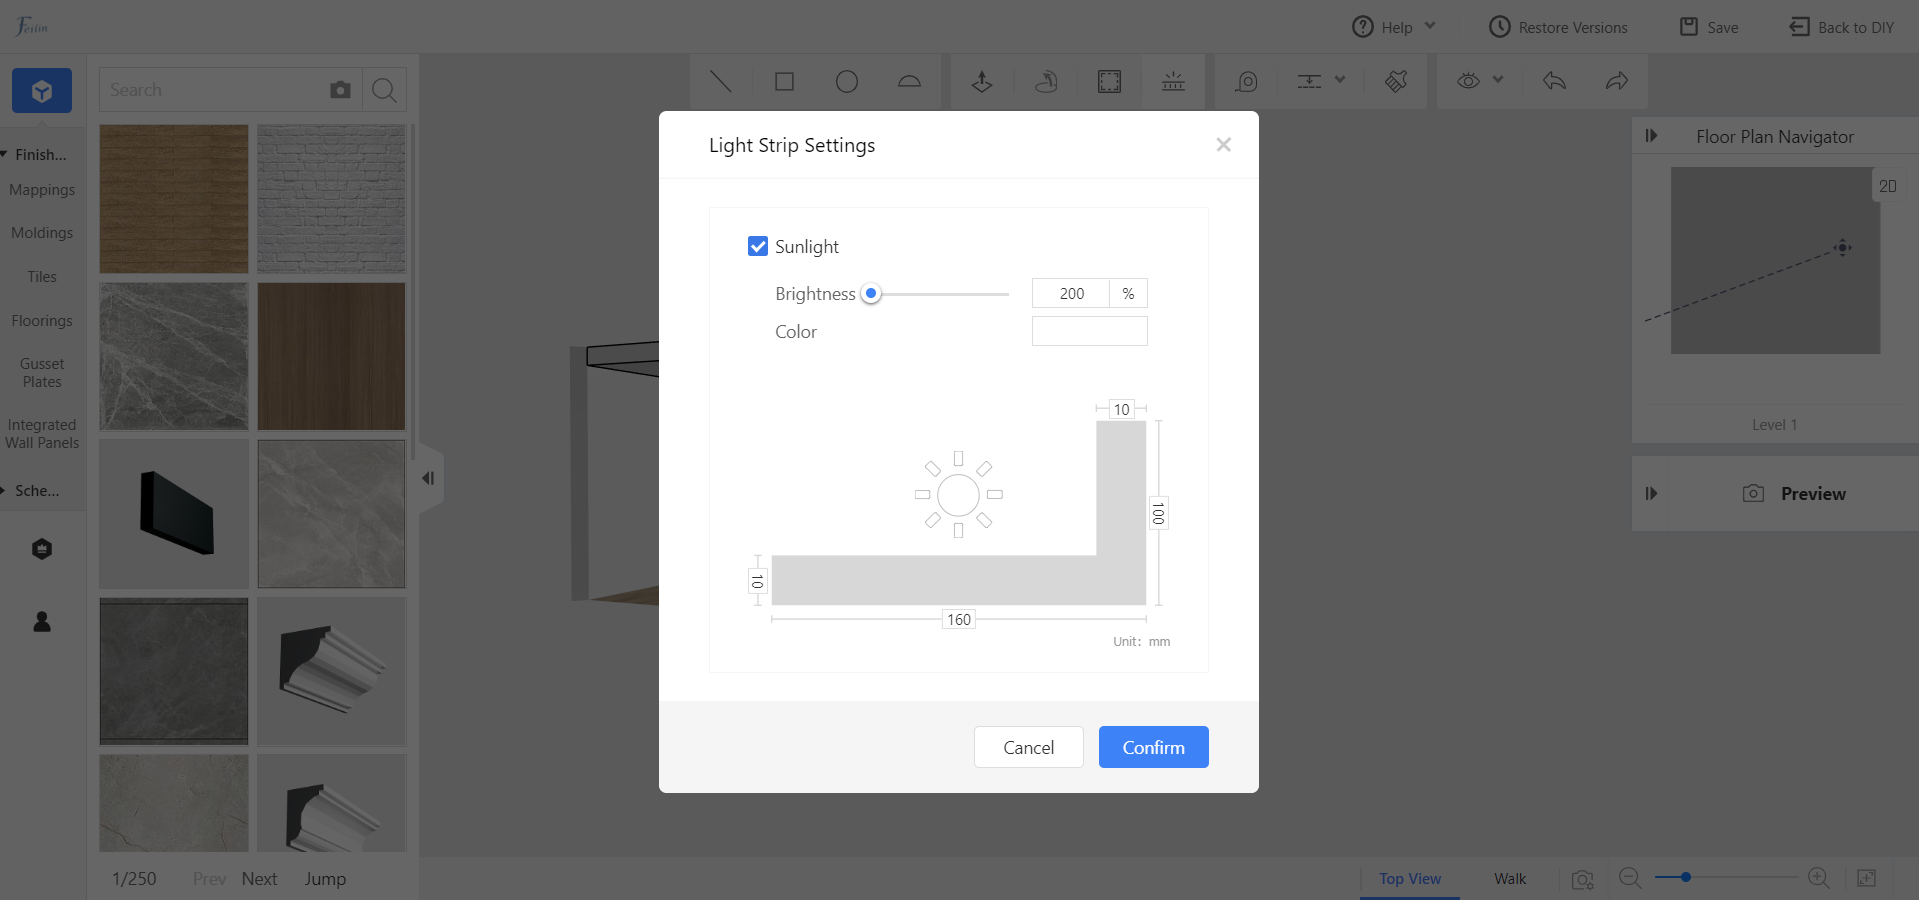
Light strips with light source: the brightness, color, length and width of light strip can be set.
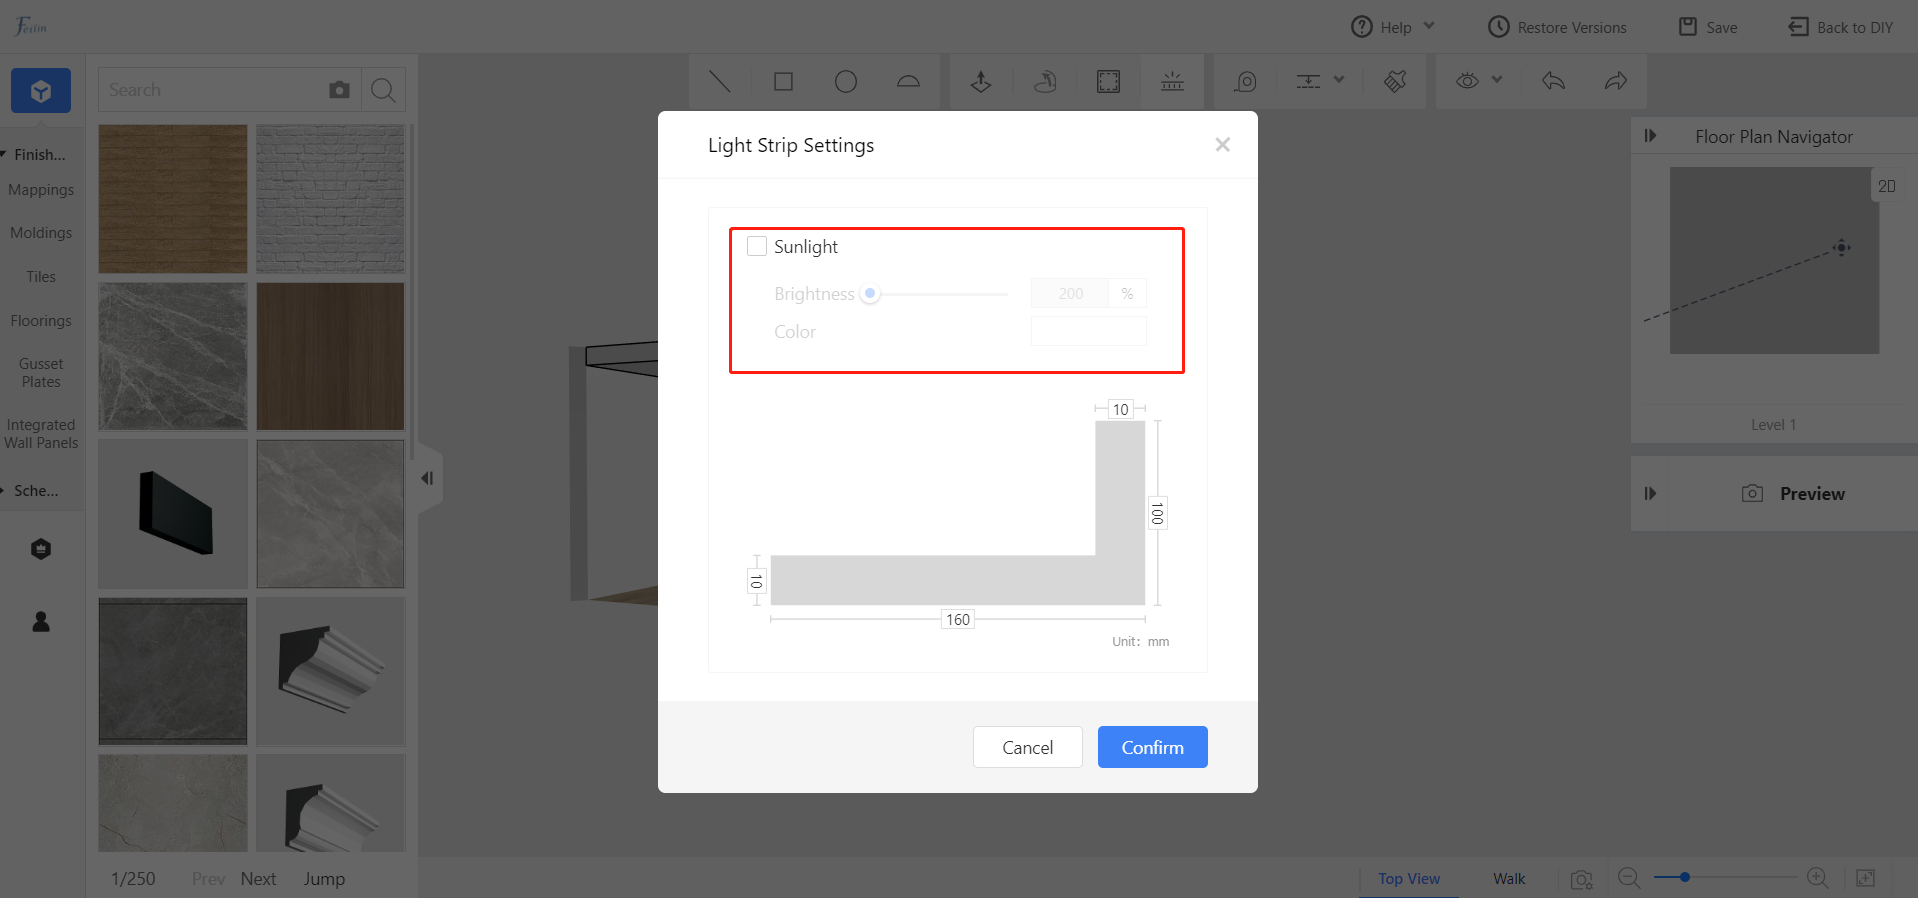
Light strips without light source: the length and width of the light strip can be set.
2. Then, hold down shift to select multiple paths where you want to add the light strip.
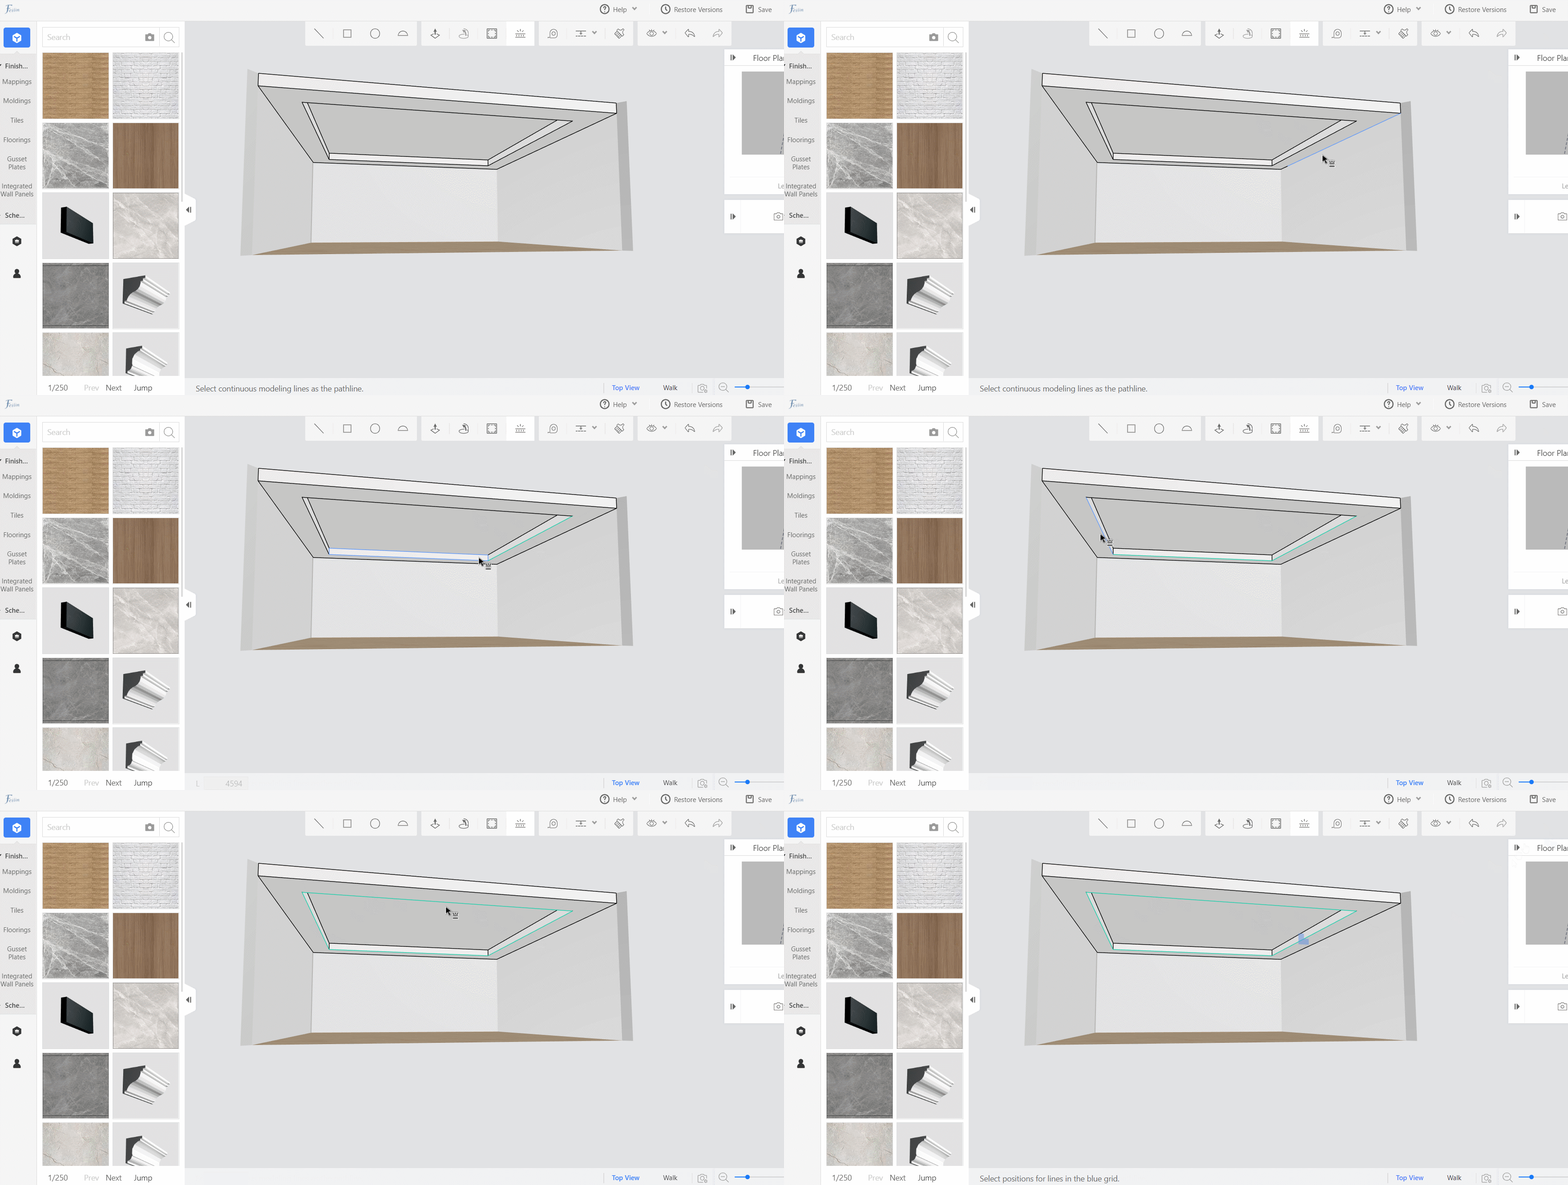
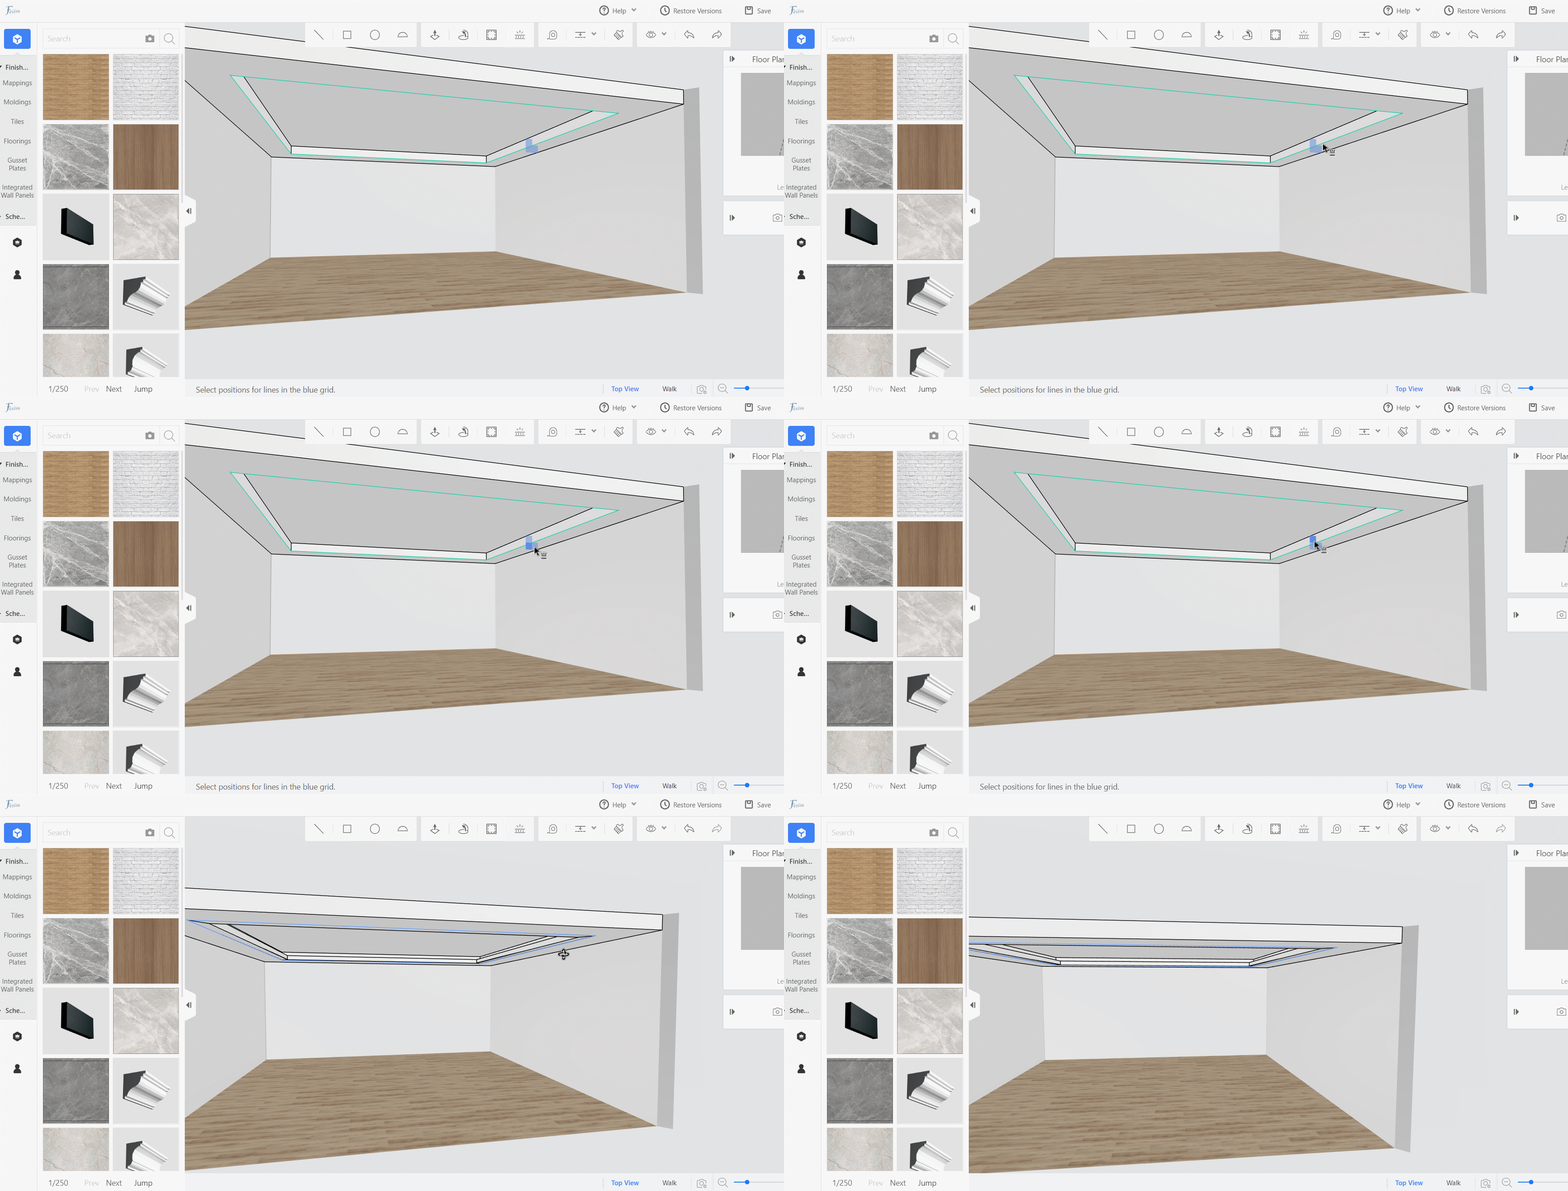
3. After selecting the paths, release shift. Select the placement quadrant of the light strip, click the desired position and the light strip will be placed around the path automatically.
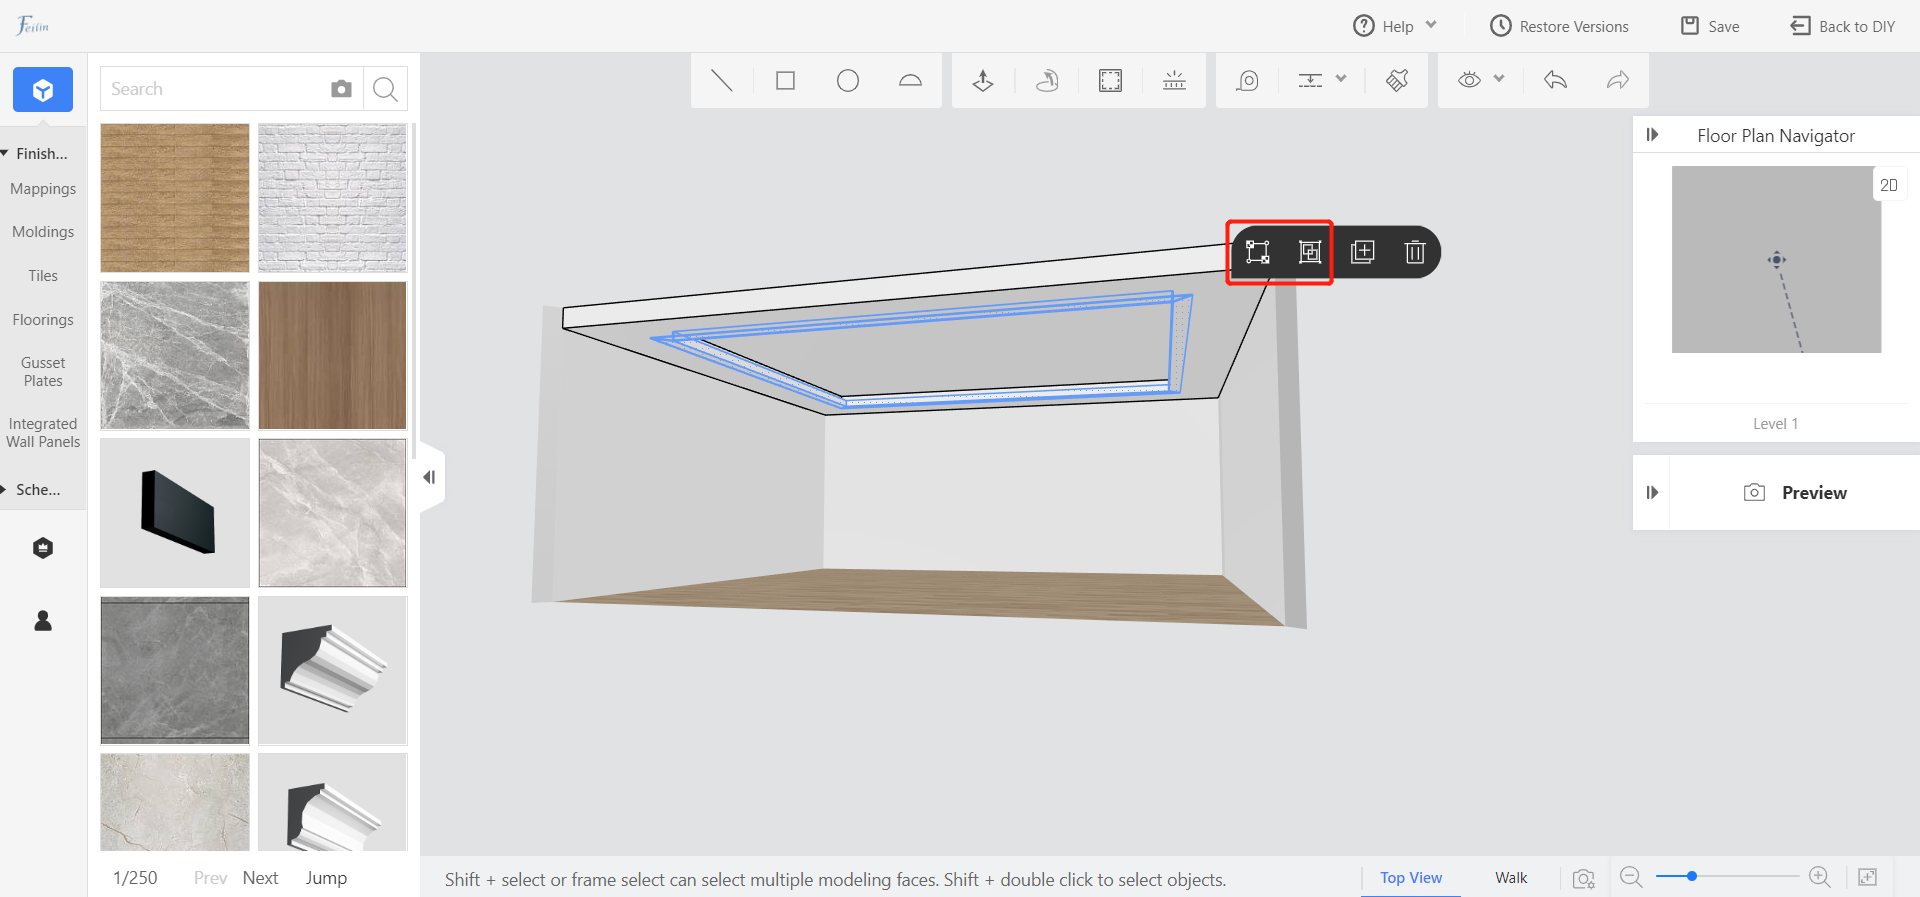
4. Hold down shift, double-click the light strip, you can group or edit the texture of the light strip in the floating bar.
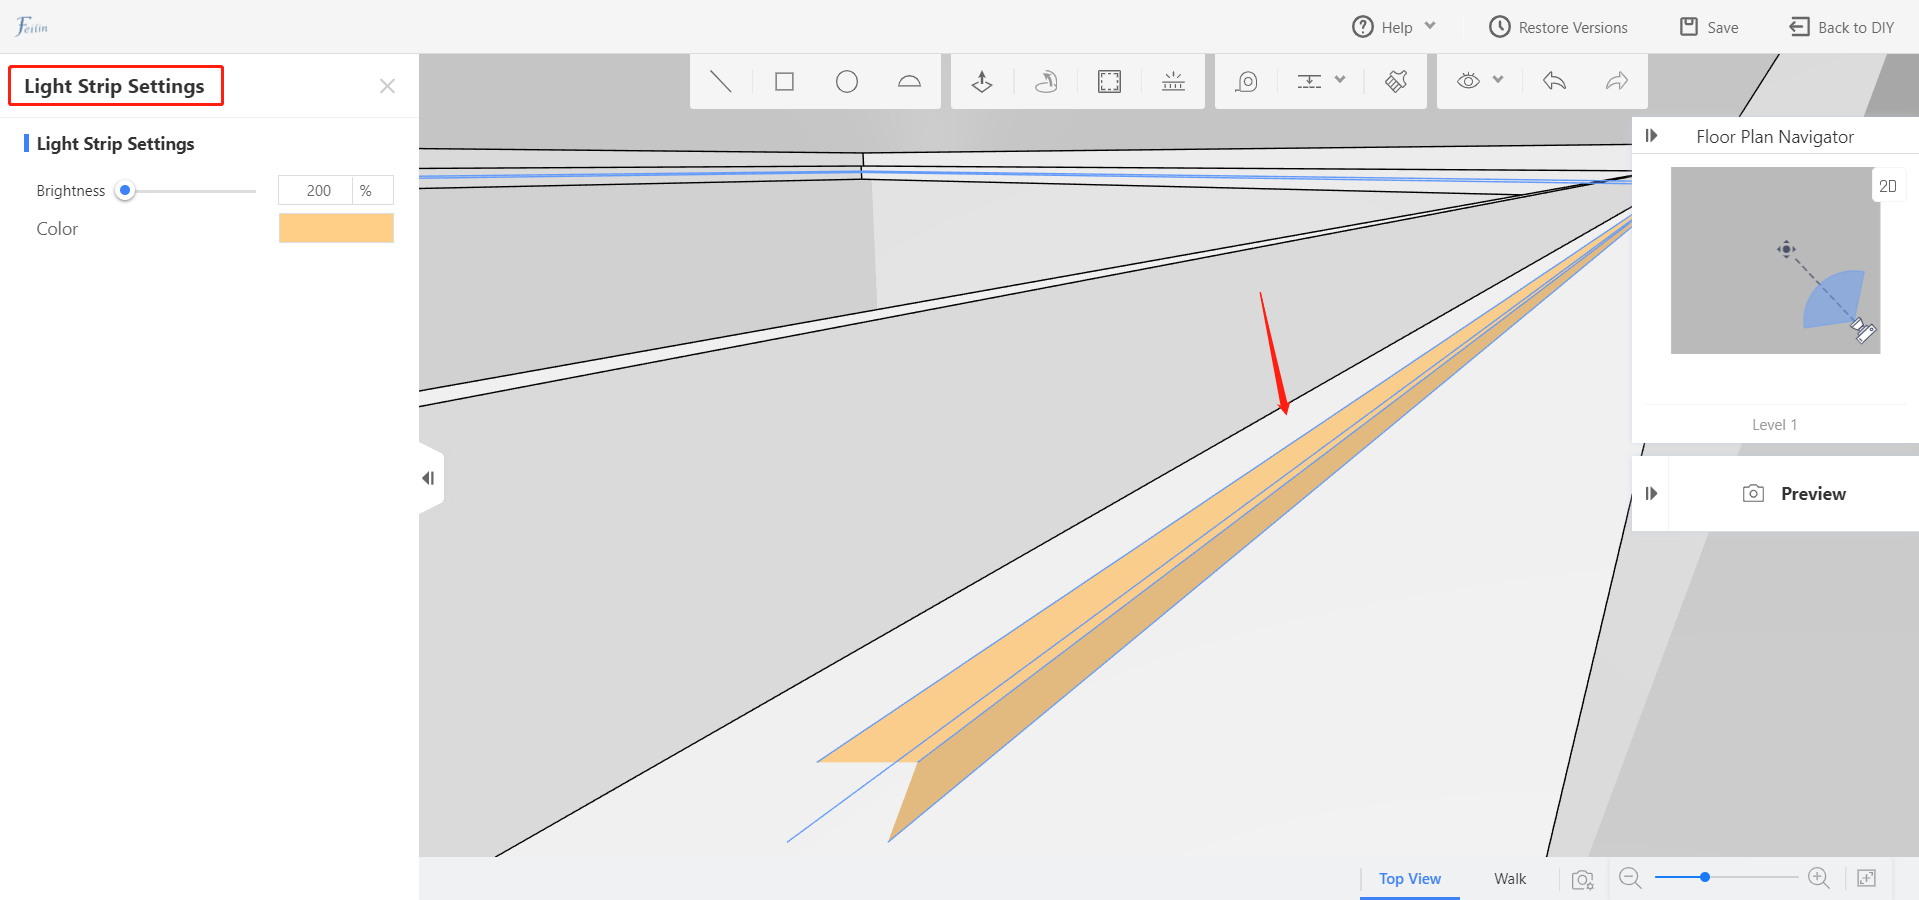
5. Click on the light, you can set the color and brightness of the light strip.
-
How to Create Light Strips in Ceiling with Ceiling Editor?
How to Create Light Strips in Ceiling with Ceiling Editor?
The settings of a light strip include the position that you want to install the light strip at and the dimensions of the light trough that supports the light strip.
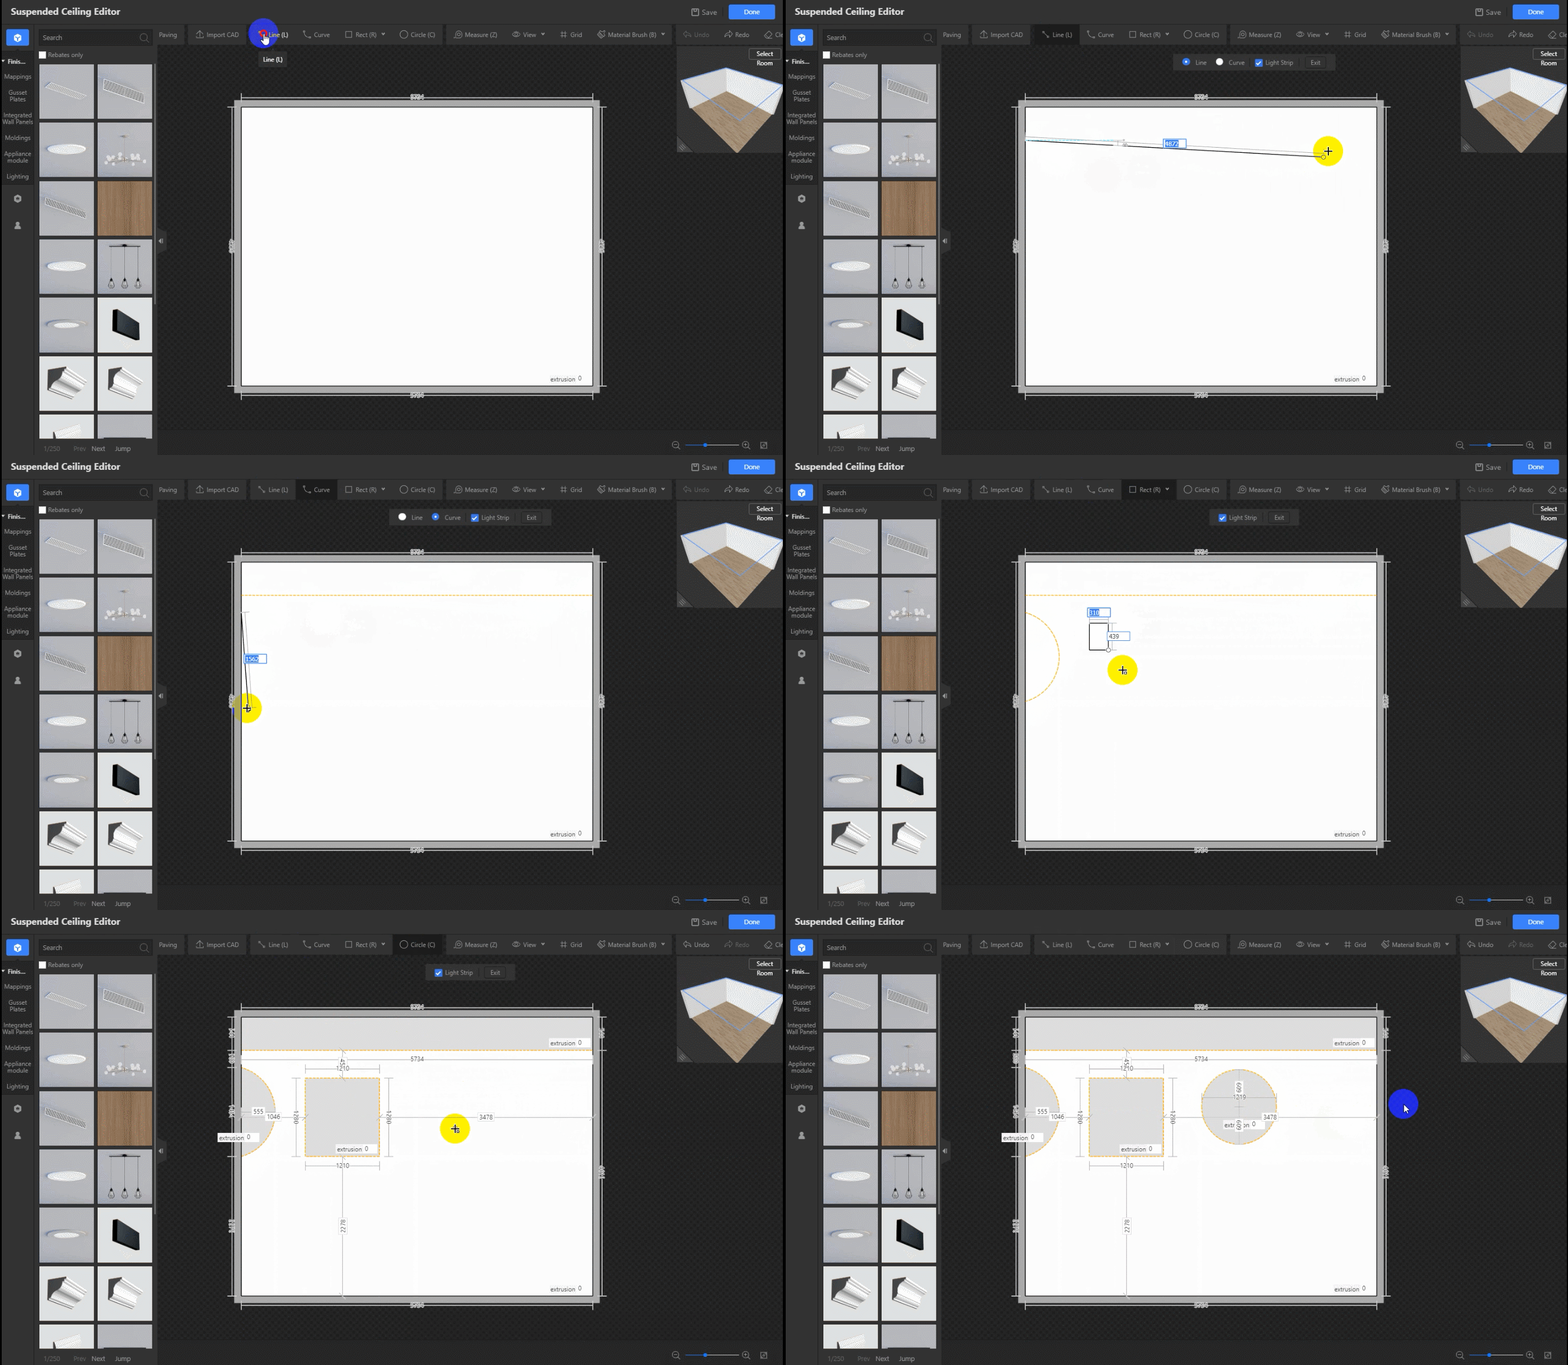
1. Click Line (L), Curve, Rect (R), or Circle (C), select Light Strip in the toolbar that appears, and draw a shape that you want. Or you can draw a shape first, click the shape edge that you want, and select Light Strip in the Section Plan section.
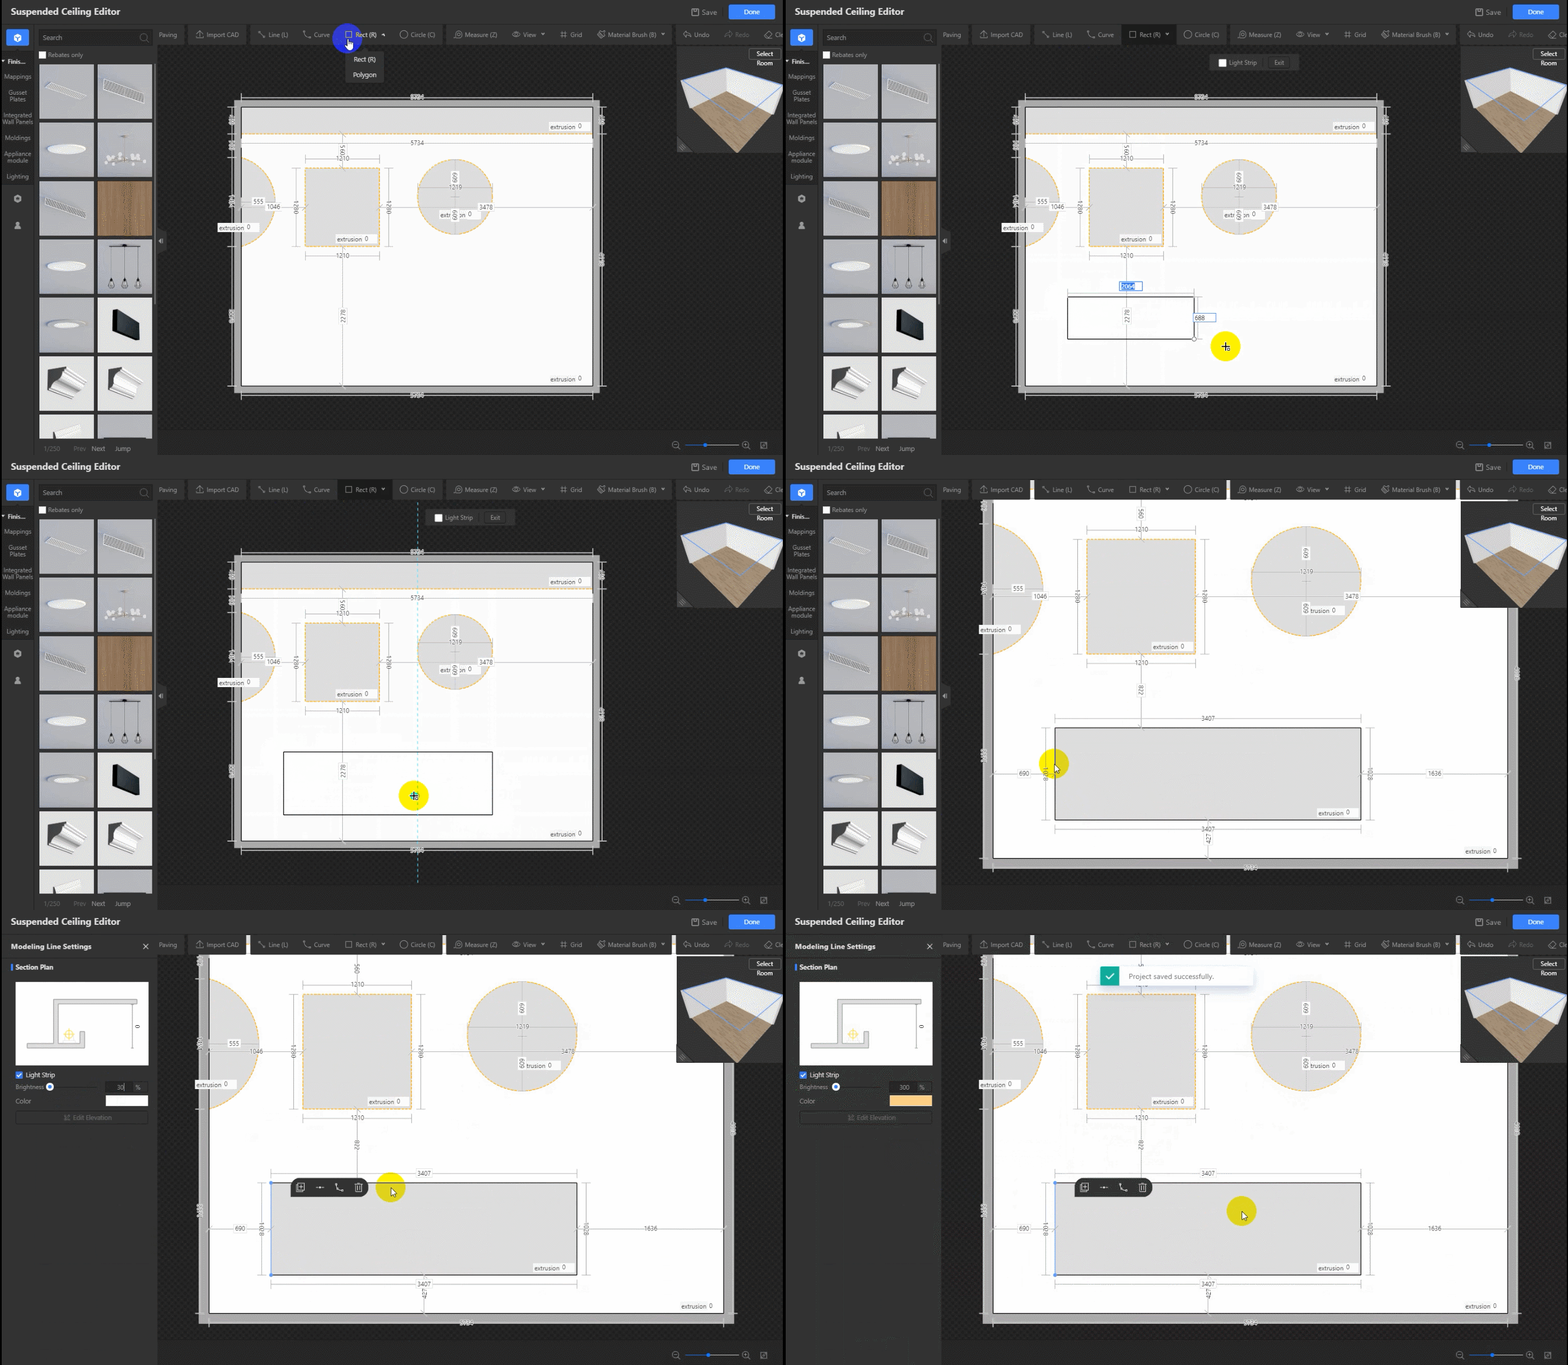
2. In the Section Plan section, adjust the brightness and color for the light strip.
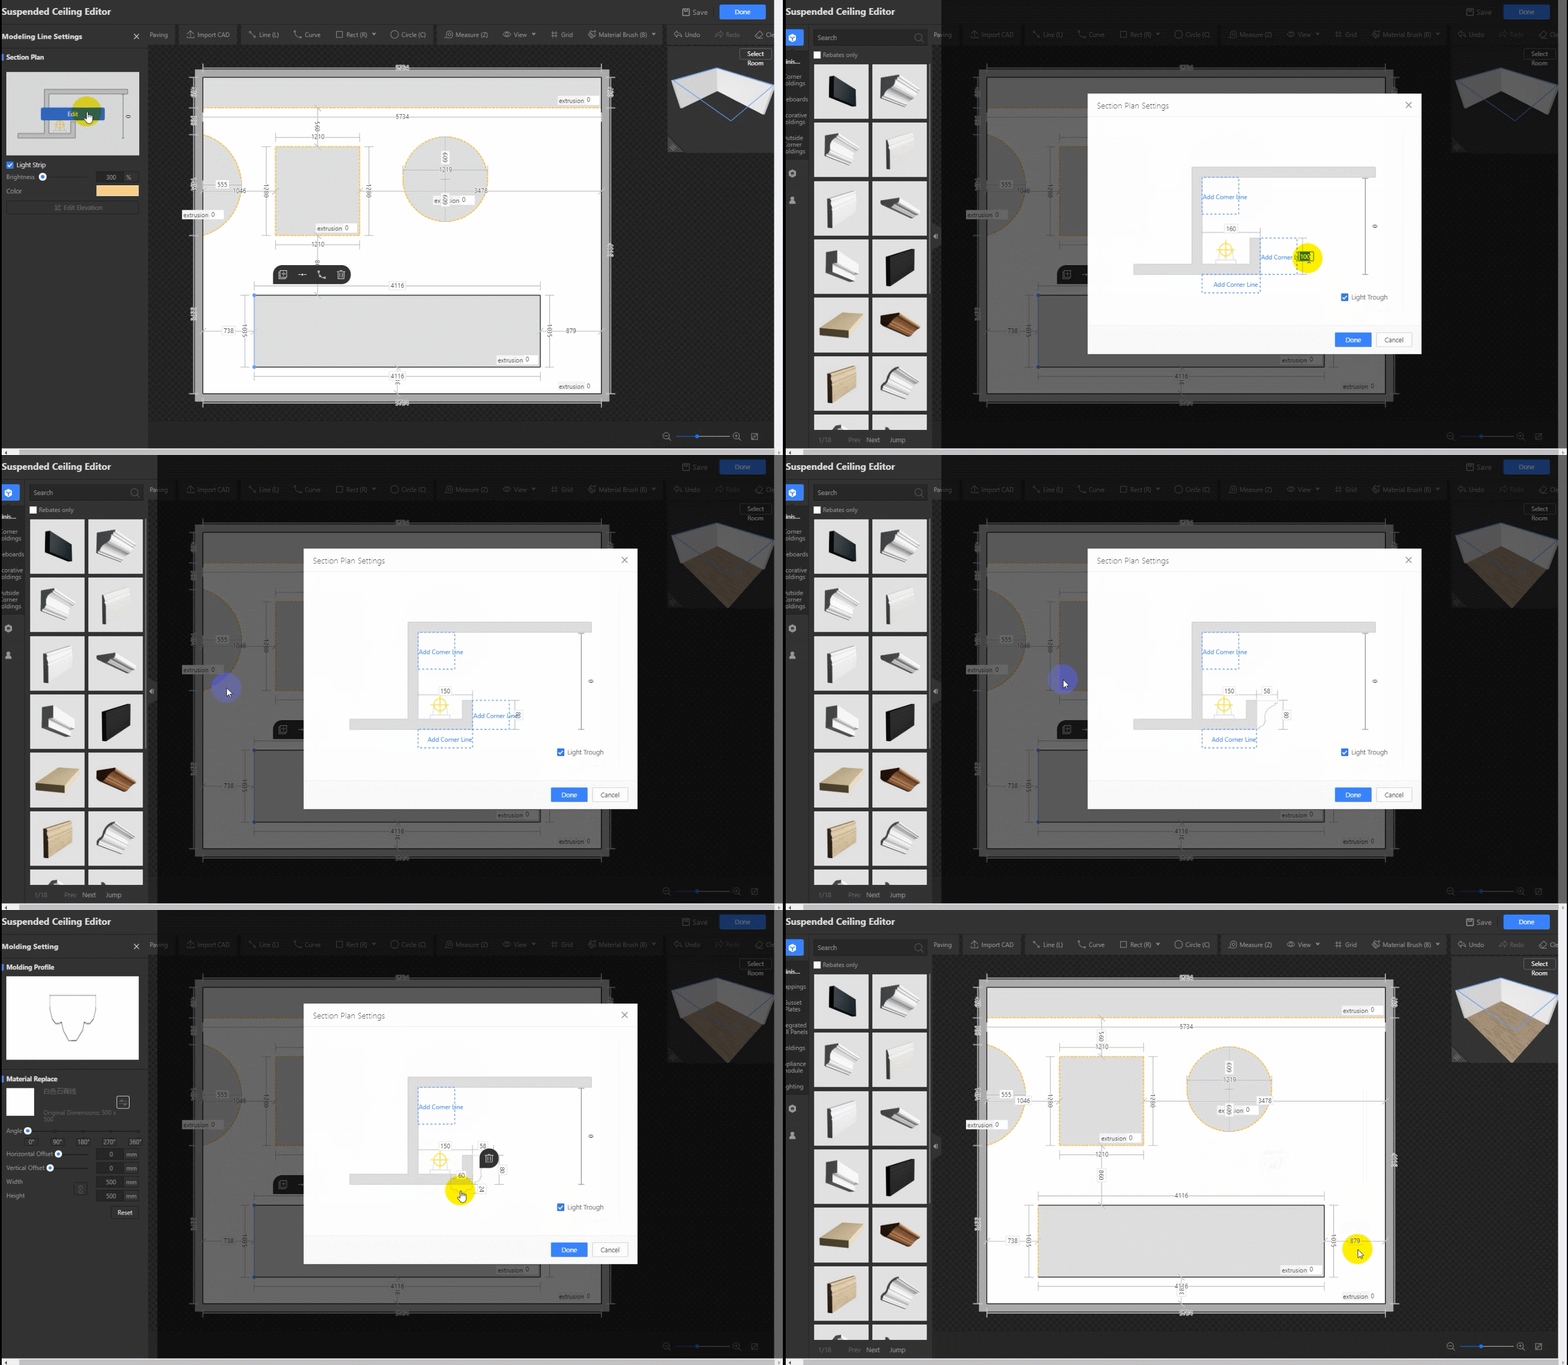
3. Move the pointer over the section plan, click Edit that appears, and the Section Plan Settings dialog box appears. Select or clear Light Through in the lower right corner to specify whether a light trough is applied. Enter values in the fields to specify the width and height of the light through.
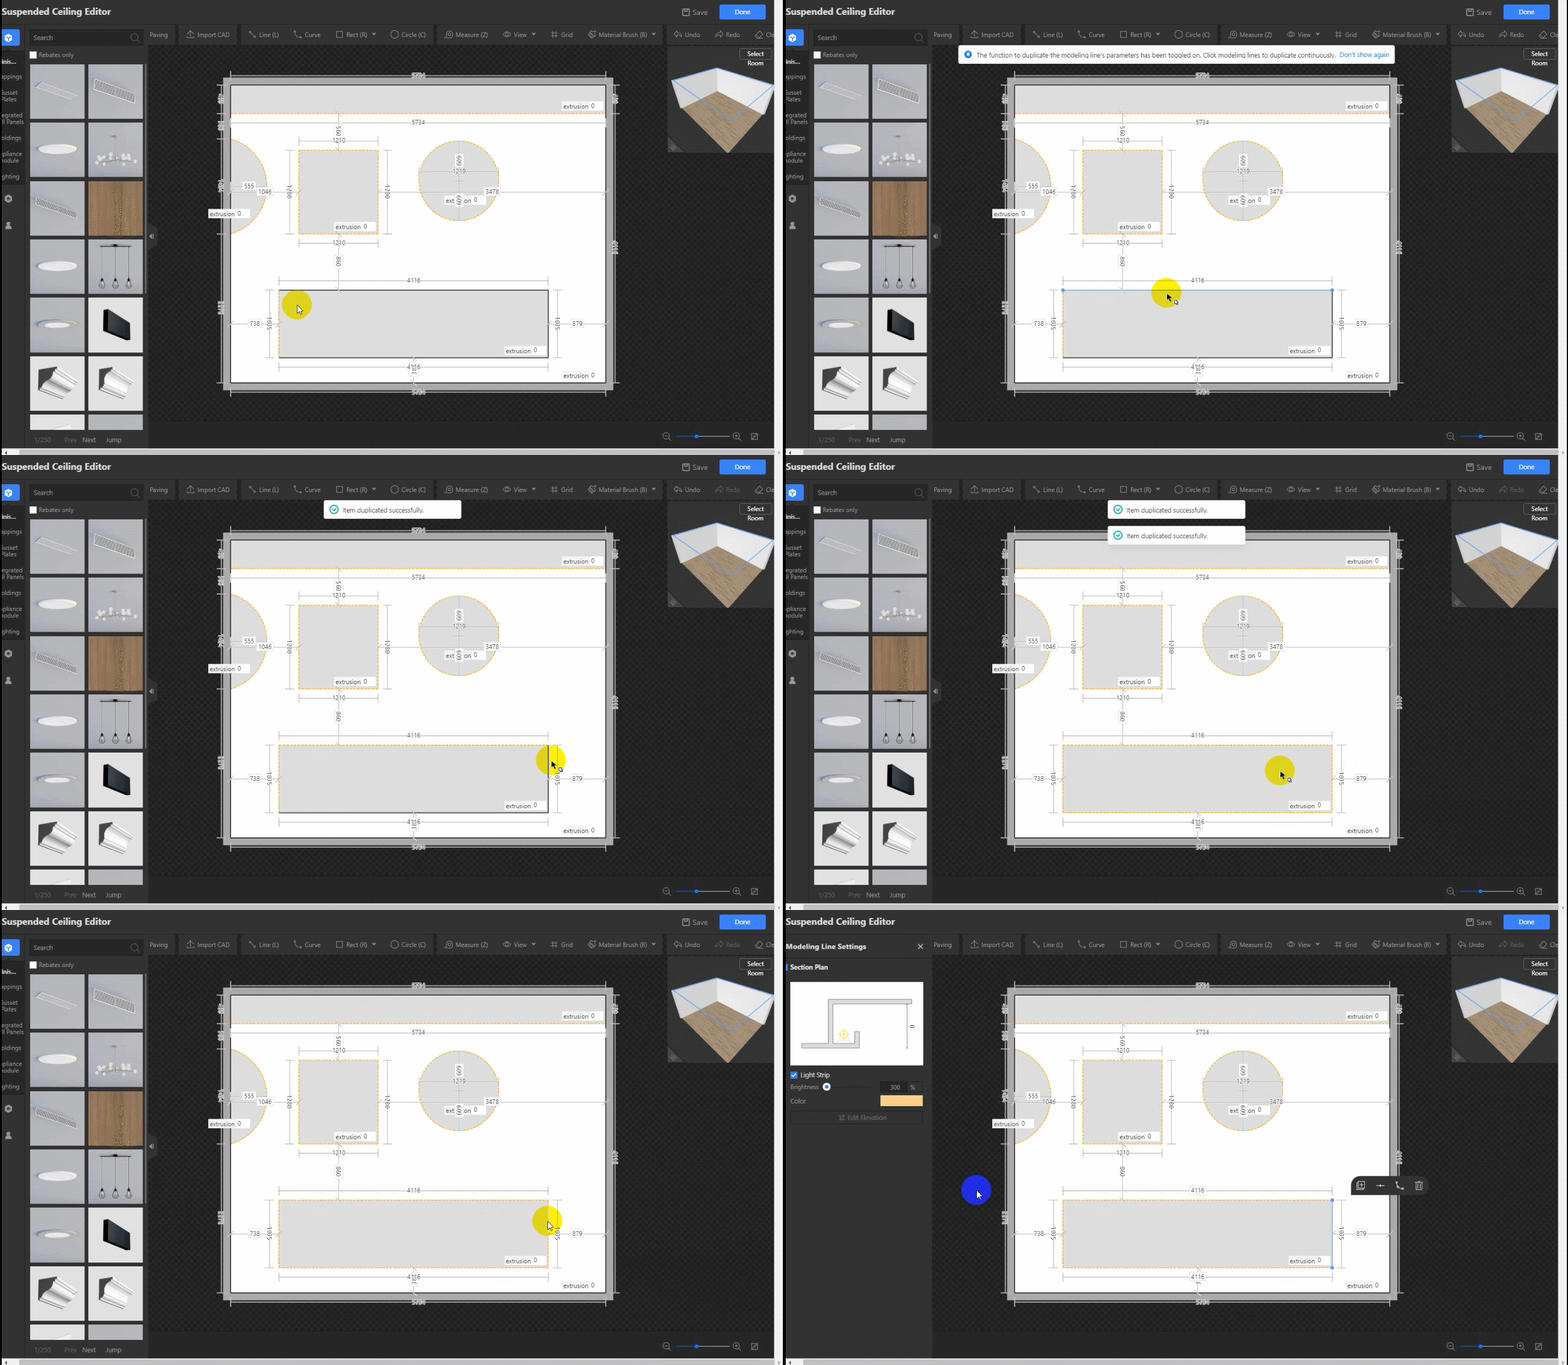
4. For applying the light strip settings of an edge to other edges, click an edge, click Duplicate in the toolbar that appears, and click the edge that you want to apply the settings to.
5. Set proper extrusion heights to ensure the light strips meet the requirements to be used in the real world.
