Moldings can be added manually to the edges of lines or areas.
Go to Material&Component > Public Library > Finishes > Moldings
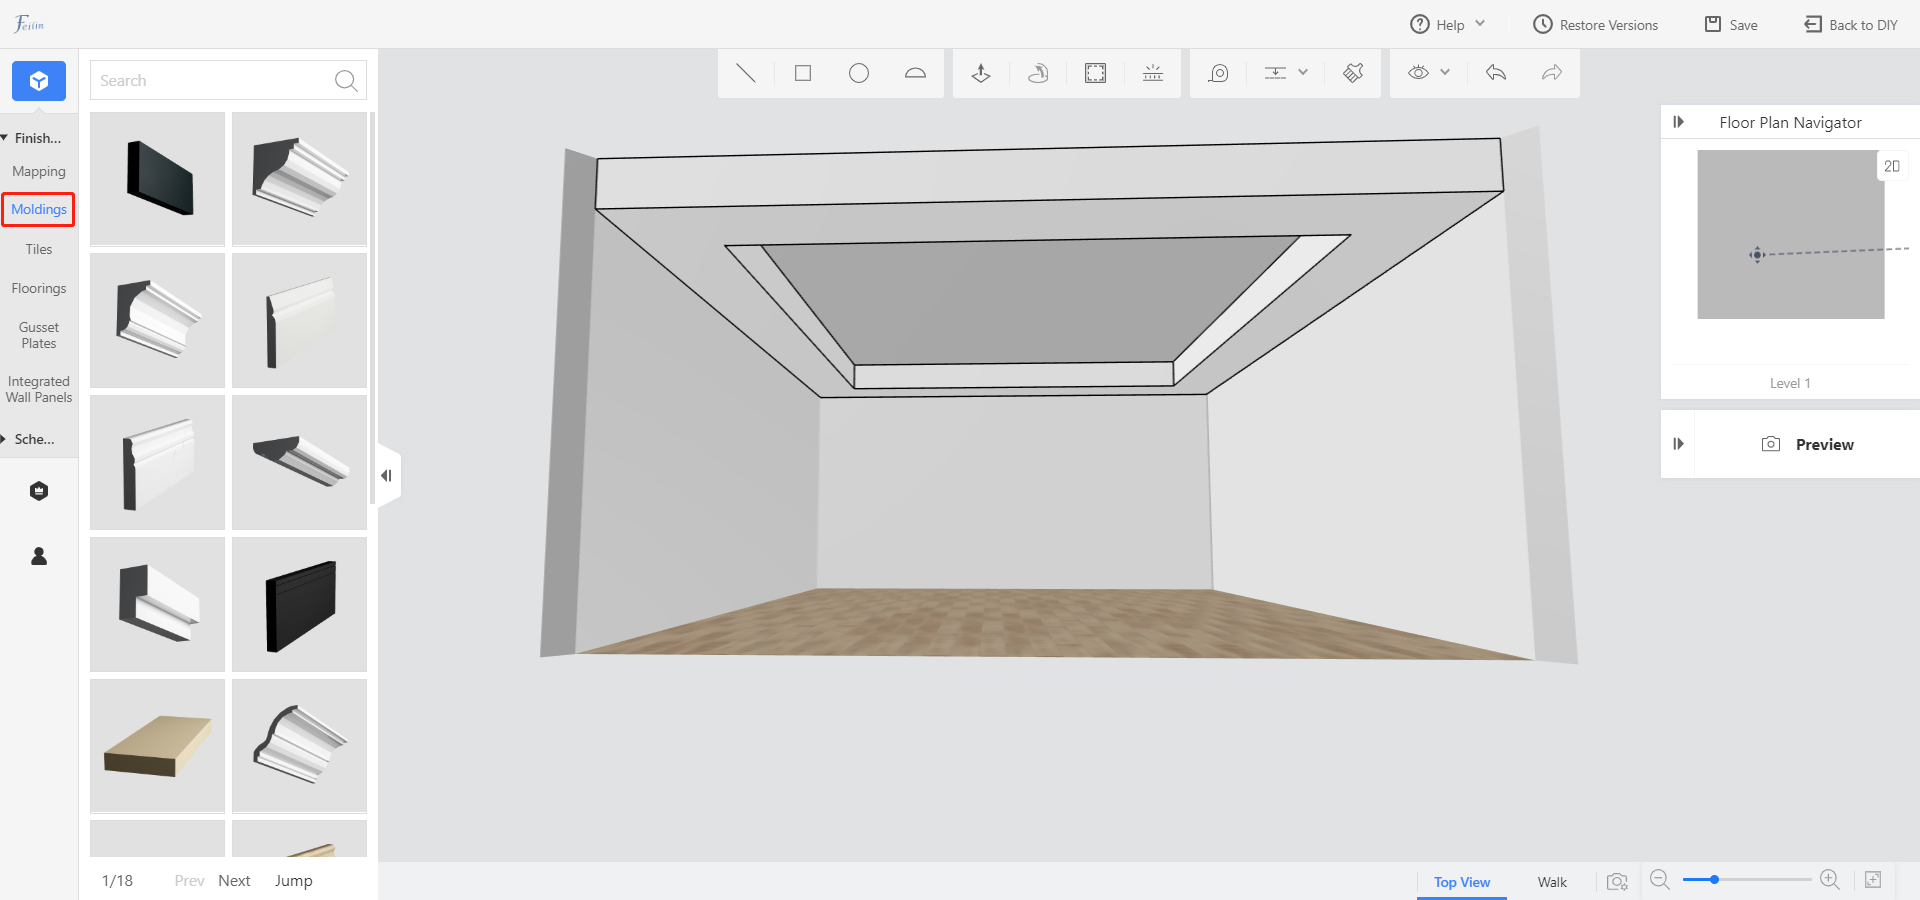
· Add to the area
If the style of the modeling lines is the same in the area, select the molding lines in the public library and drag it into the room or area, and the line will be automatically covered with highlight lines.
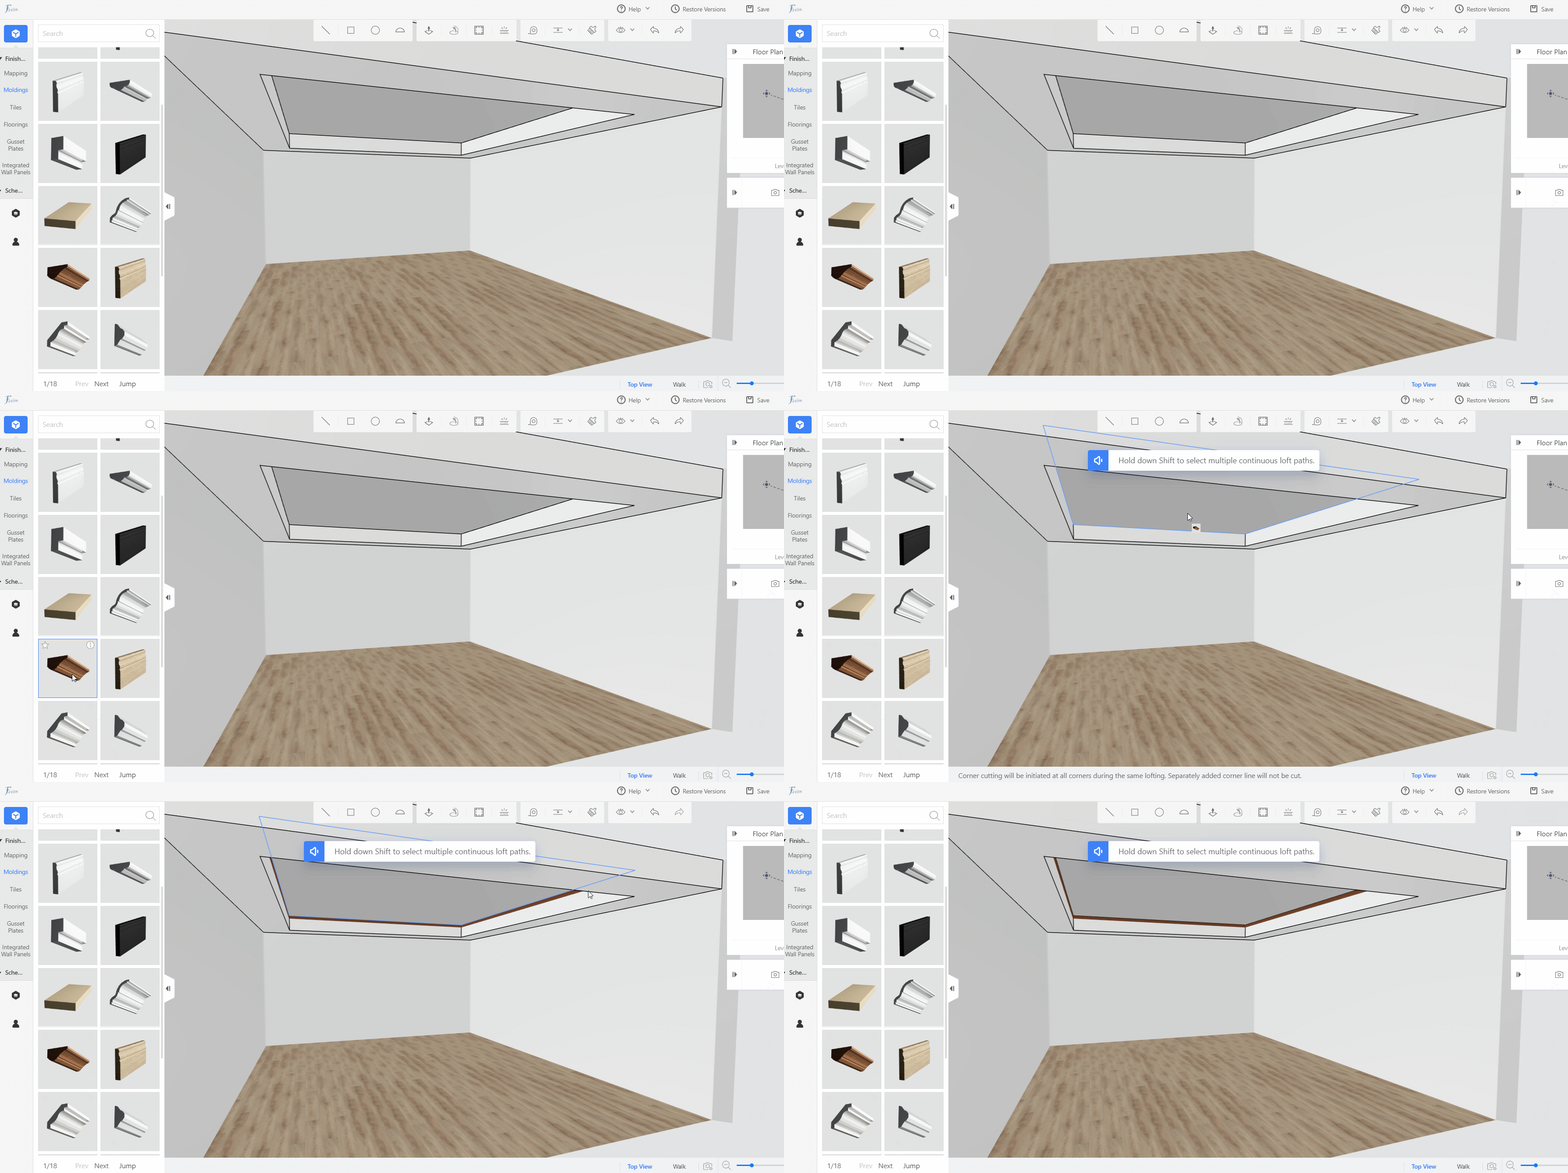
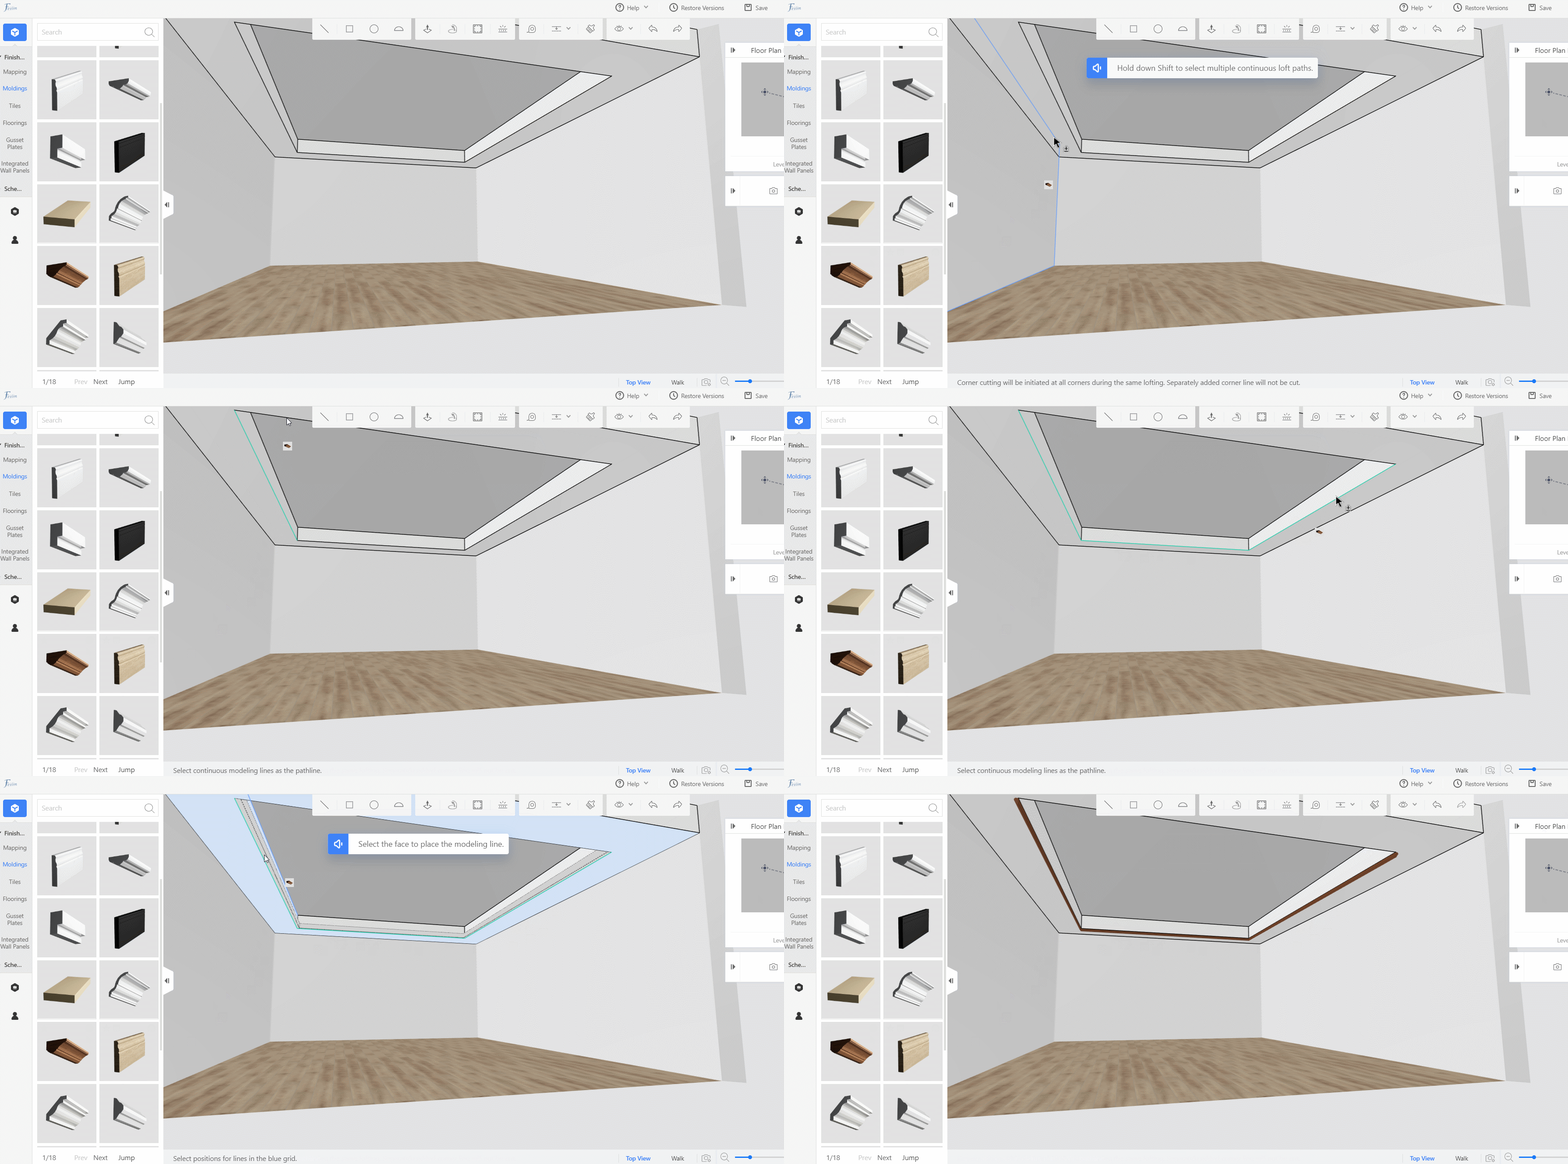
· Add to the lines individually
If you need to select an edge of lines or areas to add moldings, select the molding material from the public library. Hold down shift and click edges you need. After releasing the shift, select the face where the line will be placed, and the line will automatically covered.
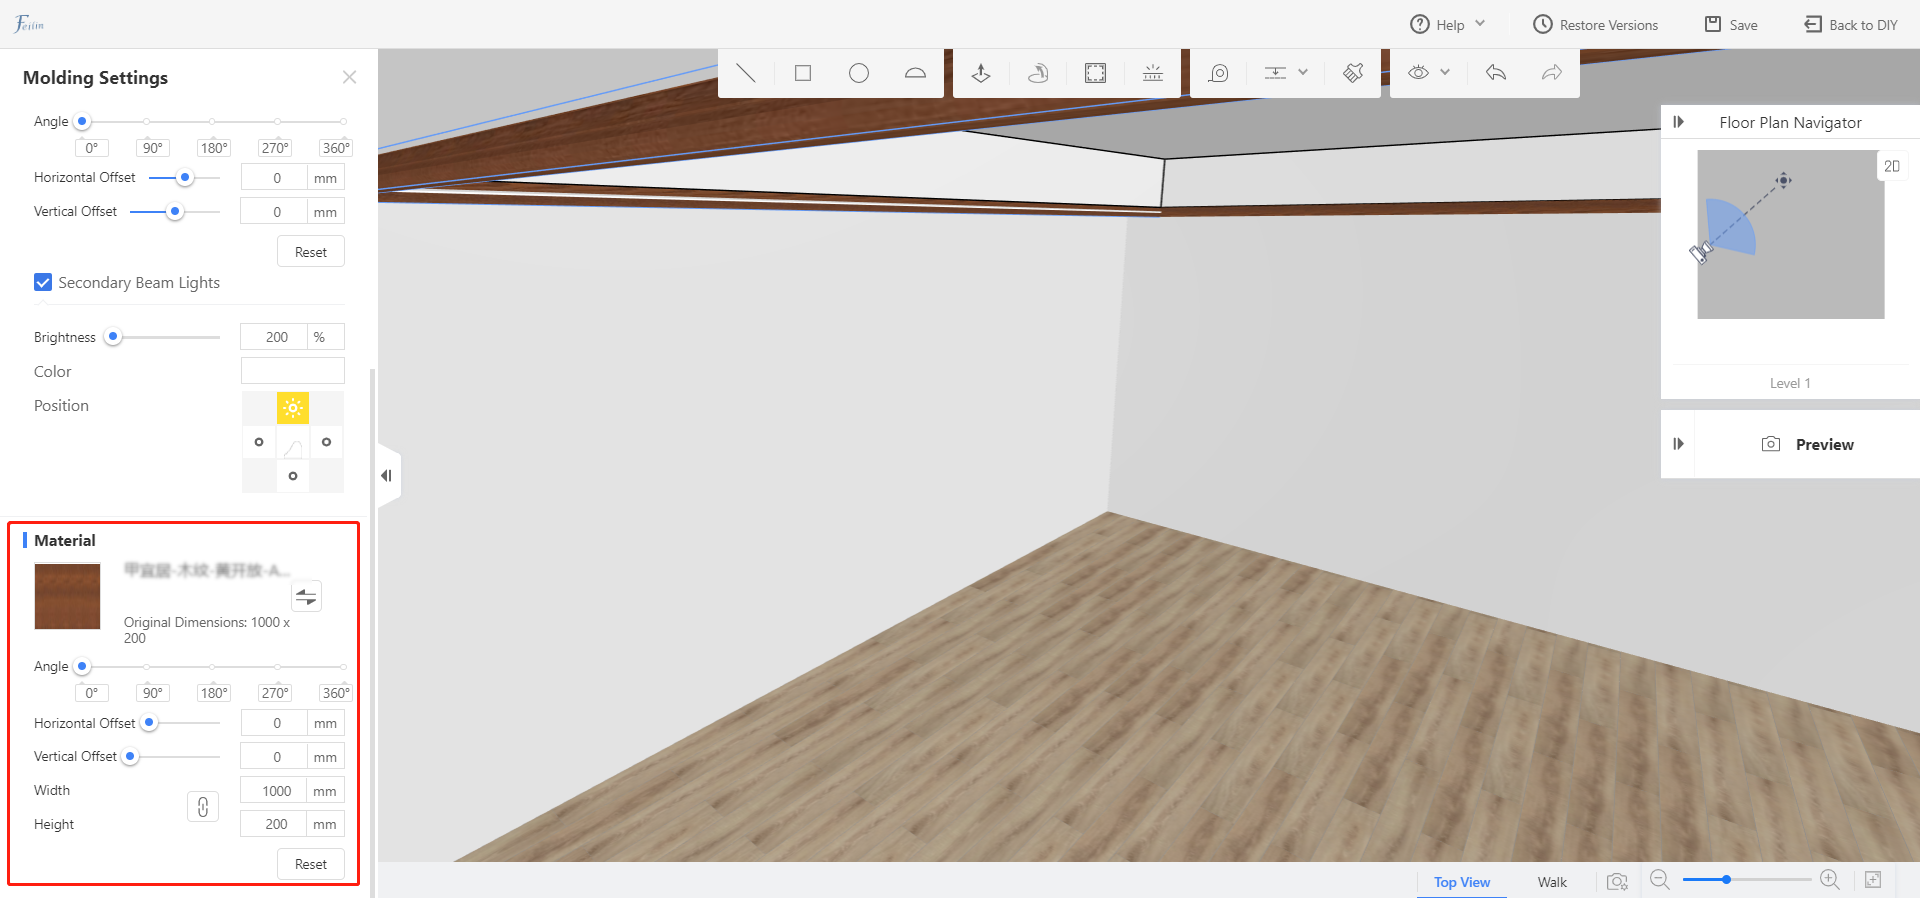
Molding Settings: After placing the moldings, click on them, you can adjust the parameters of the molding in the left column.
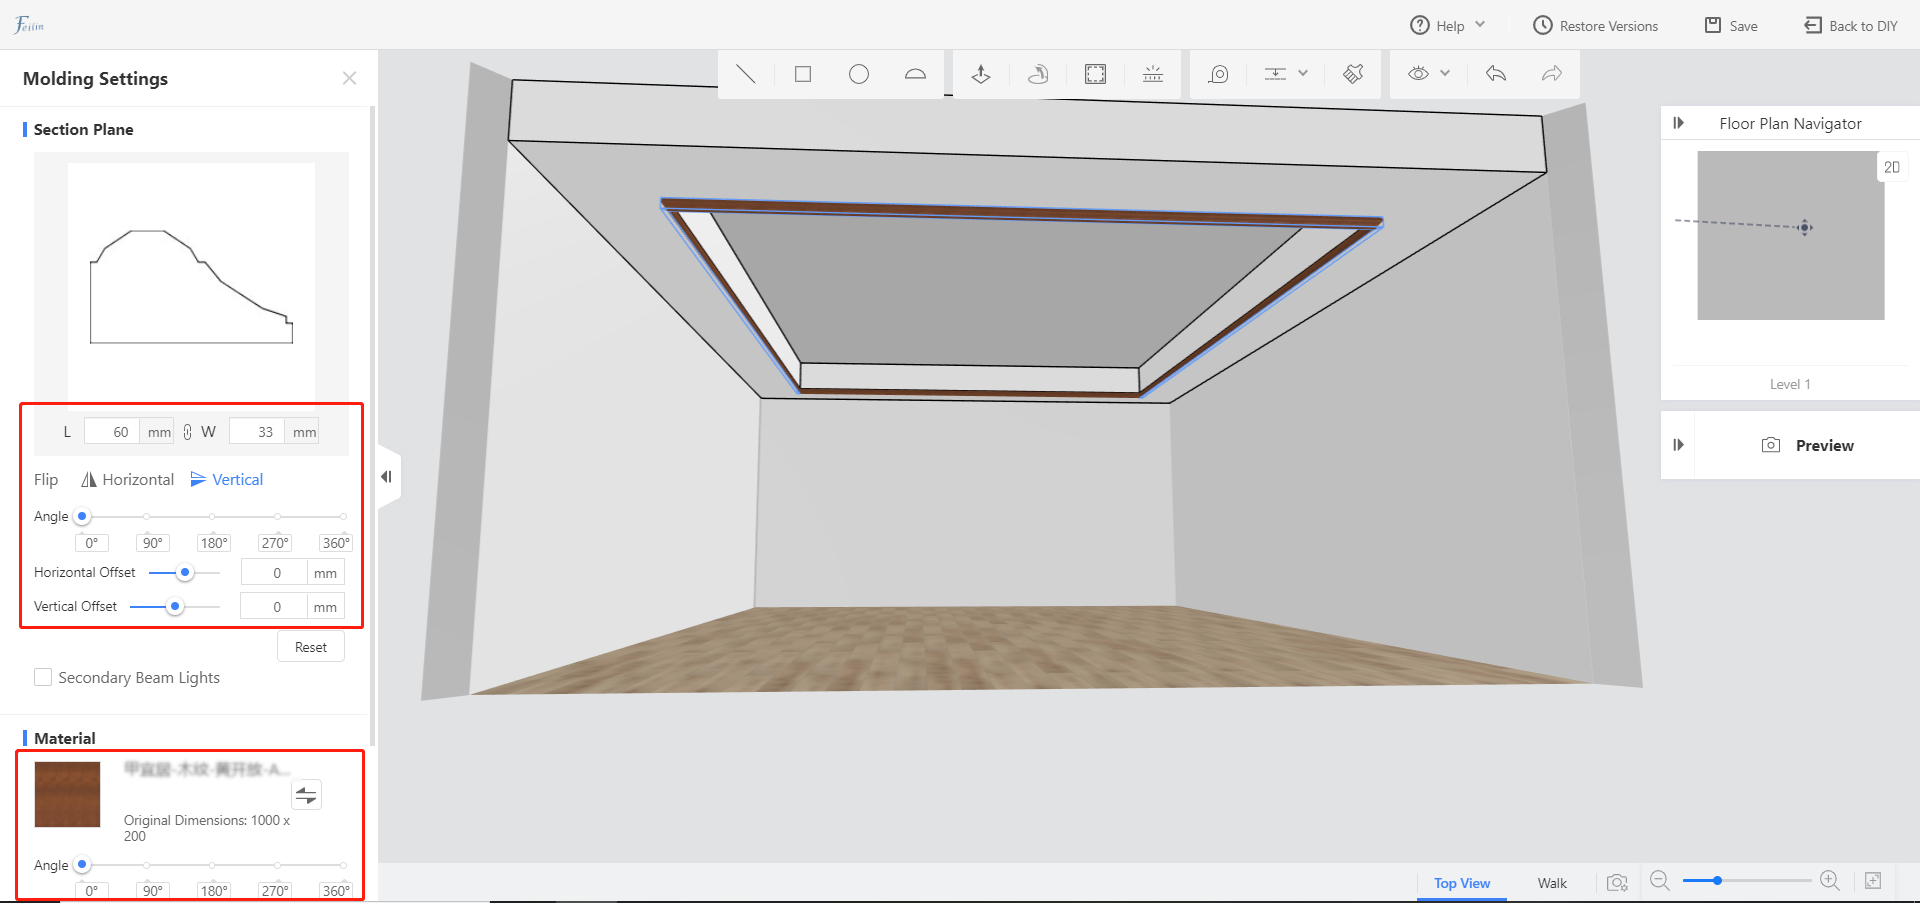
Section Plane
Length & width: you can set the length and width of the molding
Flip: divided into left and right, up and down mirroring
Angle: can rotate 360 degrees
Offset: size can be offset horizontally and vertically
Material
You can replace, edit and adjust the texture.
Click the material replacement button to enter the enterprise library / public library / personal library to replace the texture.
Angle: You can adjust the 360-degree angle of the texture of the texture
Offset: Texture can be offset horizontally and vertically
Length & width: You can adjust the length and width ratio of the material.
Lock: Once the scale locked, when adjusting the value of the length, the width will change in the same proportion.
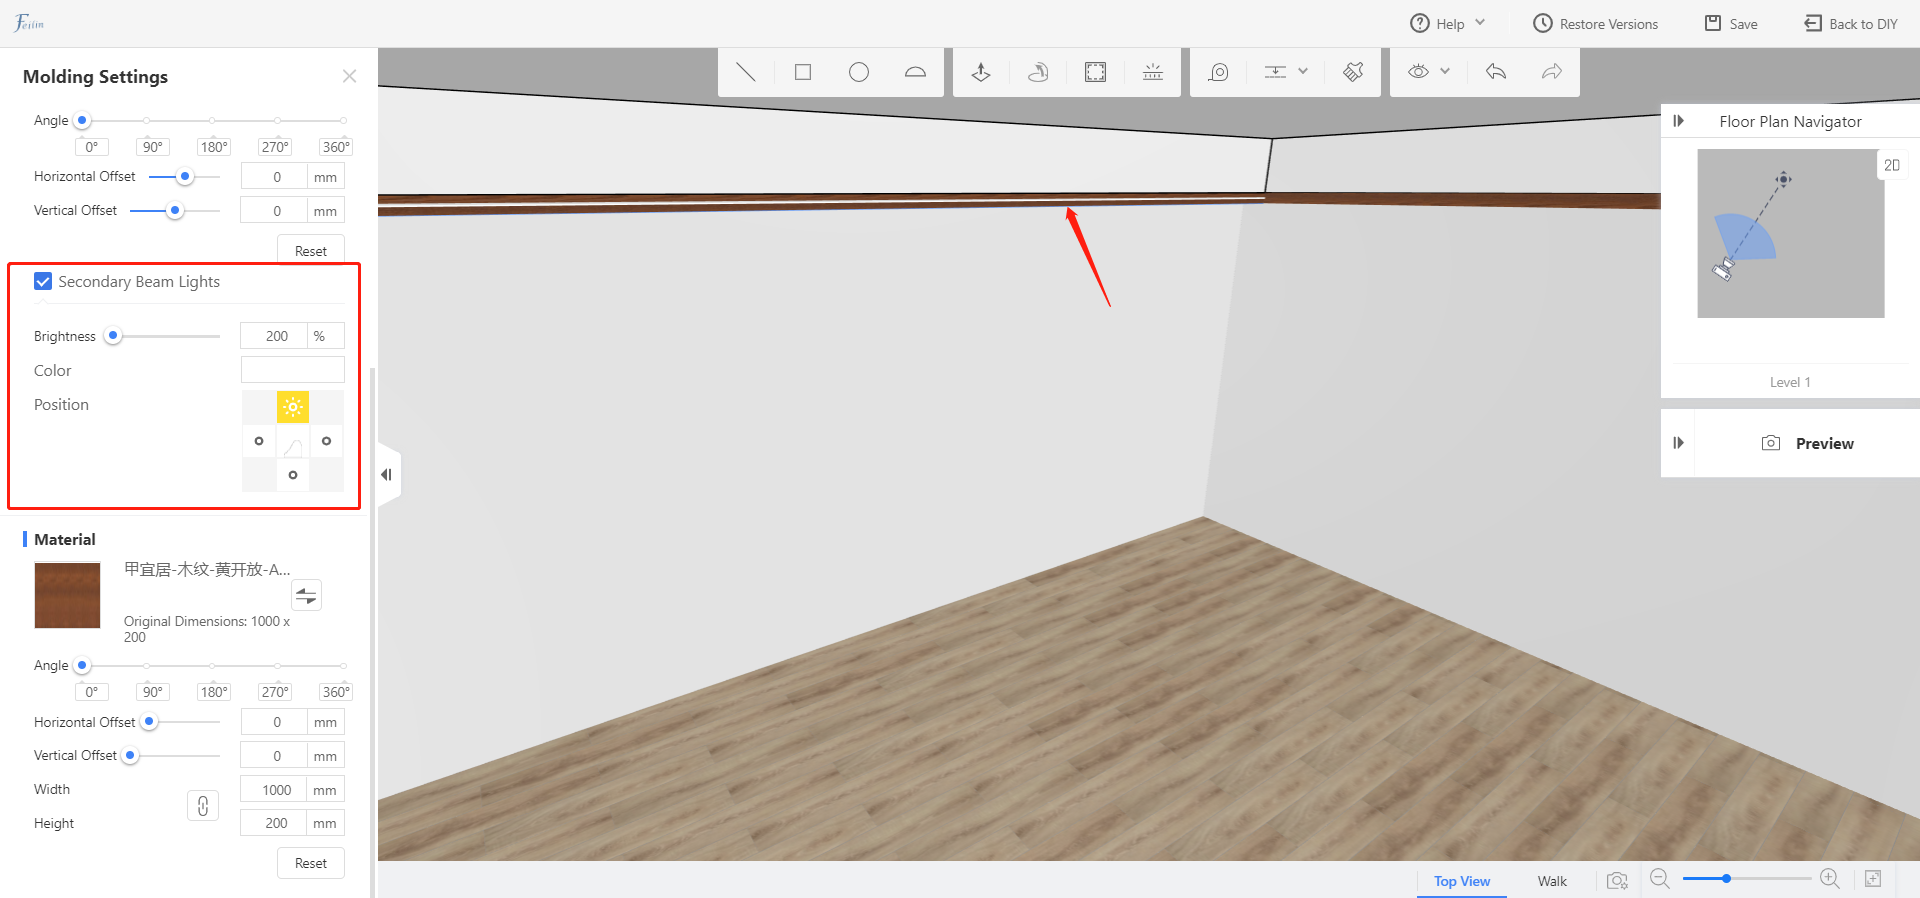
Secondary Beam Lights
Select Secondary Beam Lights to create light strips along the moldings.
Brightness, color and position of the light can be adjusted manually.
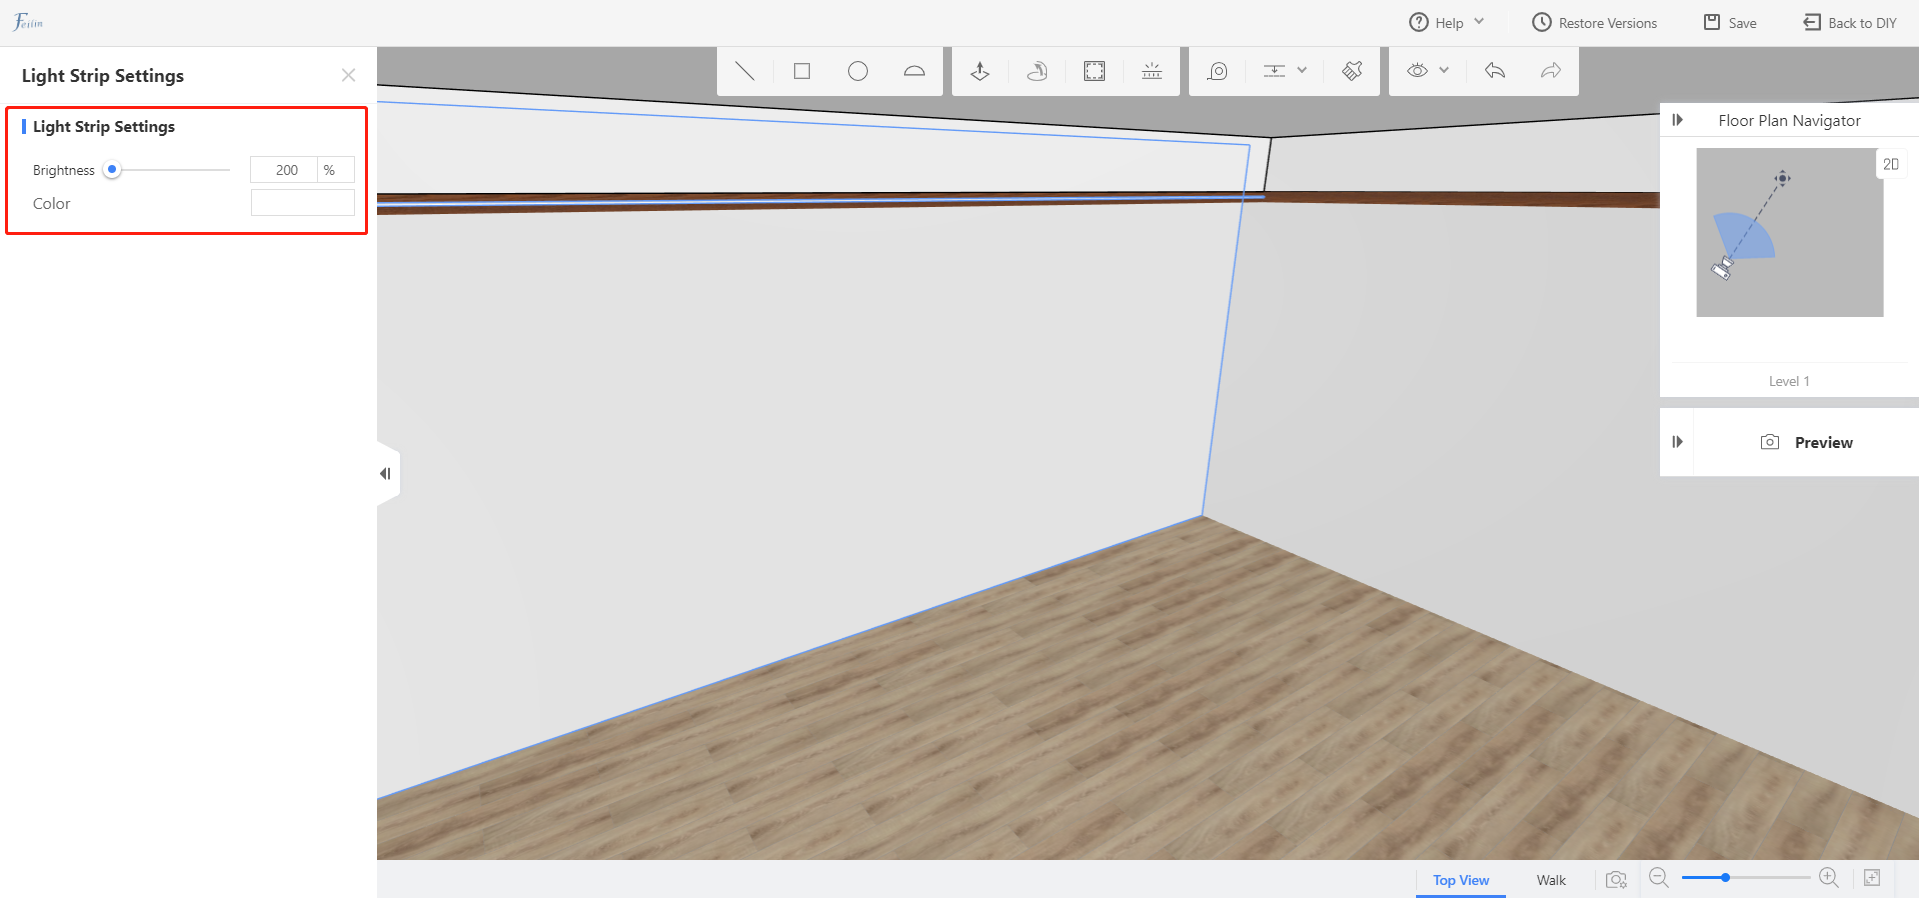
Click on the light, you can adjust the brightness and color, too.
Did this answer your question?