Some errors may occur when we try to upload 3D models. For example, the material fails to display or turns into black or some other strange color. Just like the situation in the sreenshot below.
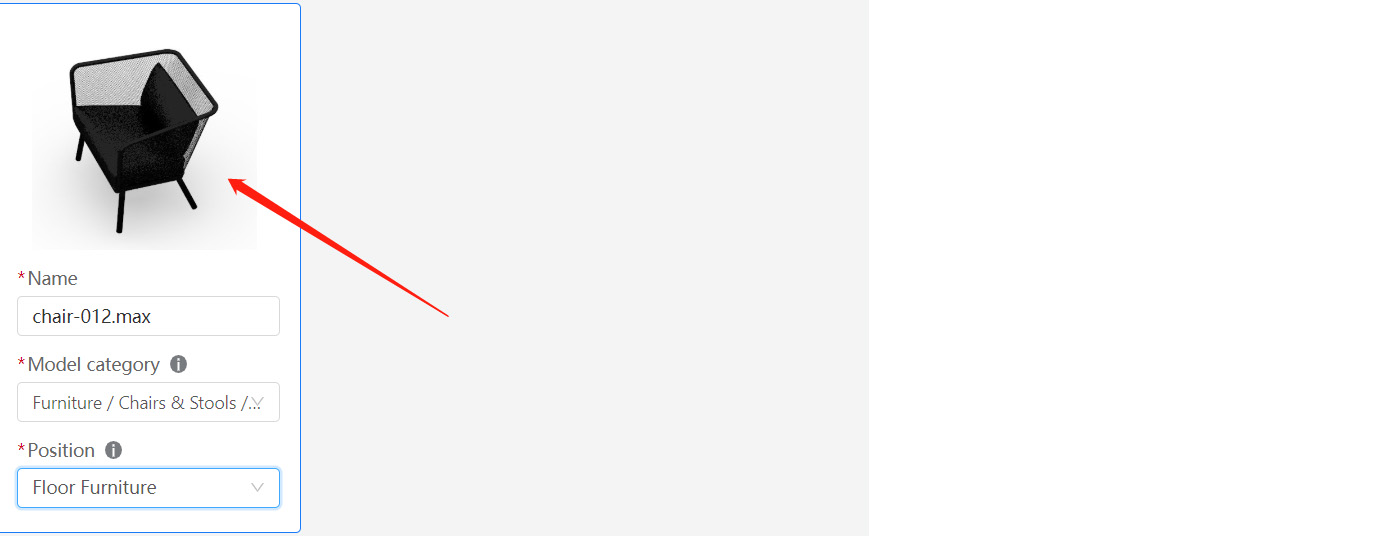
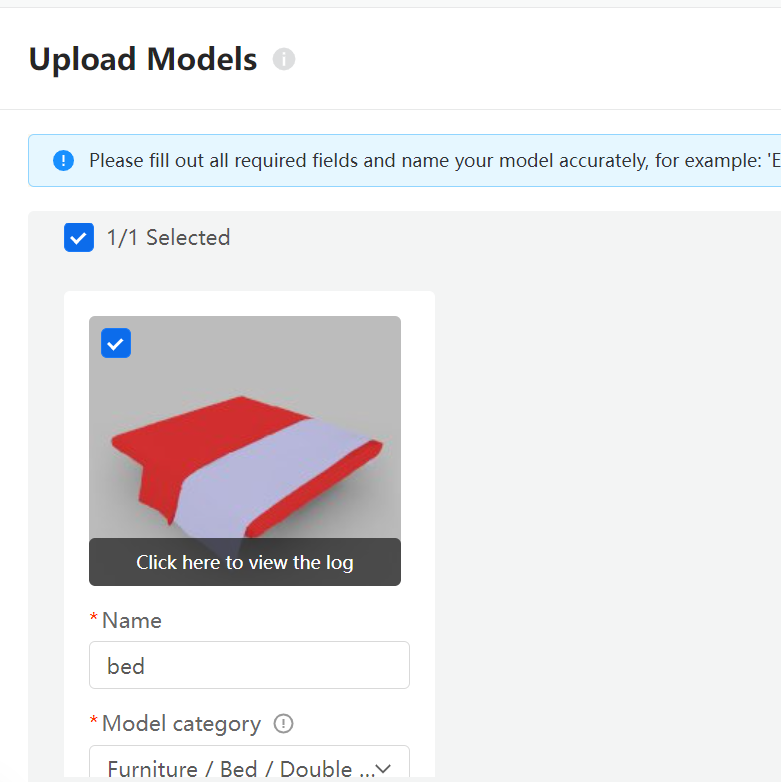
So, how can we figure out this problem?
Reasons & Solutions:
1. Mapping is missing (very common)
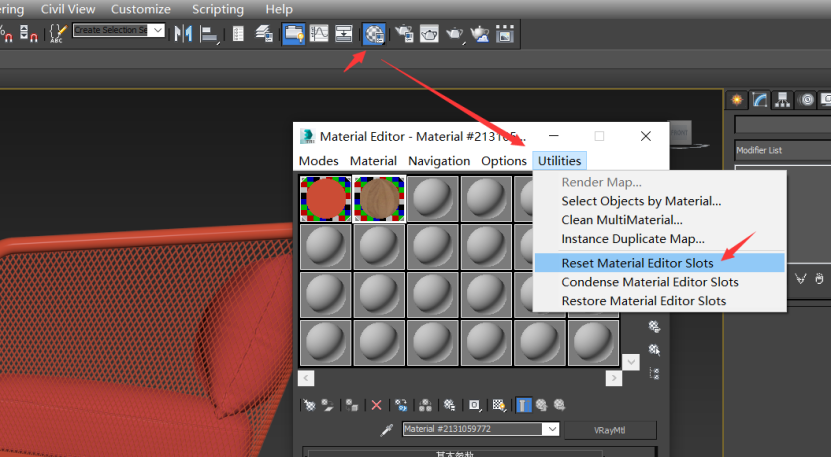
Solution: Reset material editor slots.
Reset Material Editor Slots to prevent unnecessary materials from affecting the Asset Tracking.
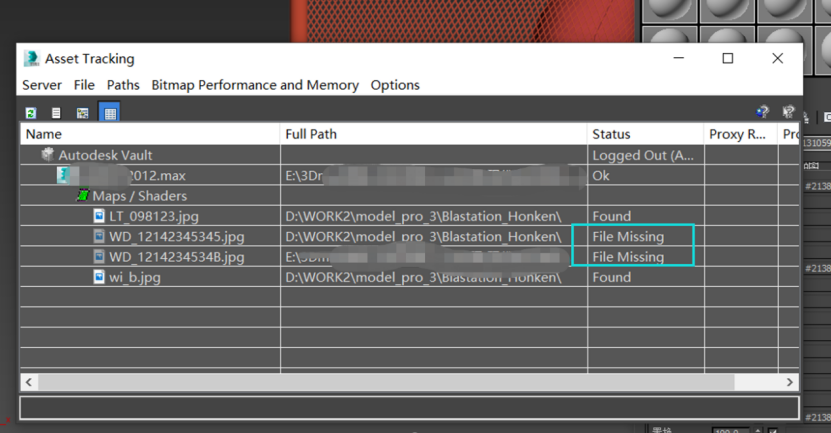
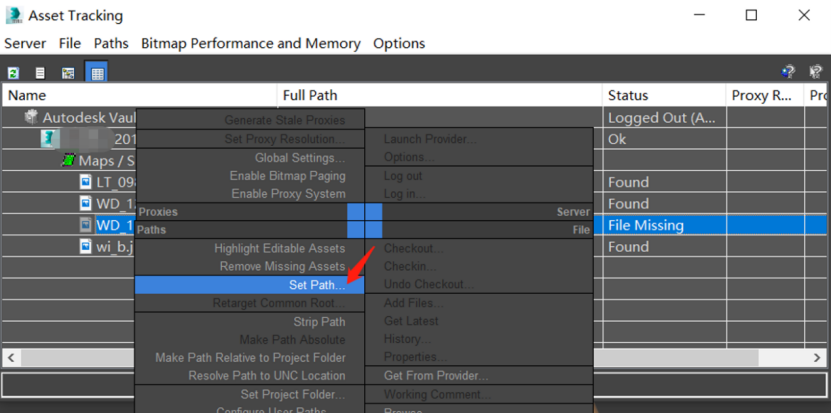
Press Shift+T to open Asset Tracking and check which files are missing.
Select one blank multi-layer. Then, click Eyedropper tool to copy the material of the model. We find that the multi-layer does not display any materials.
Click M button after Diffuse and open the target mapping in Bitmap.
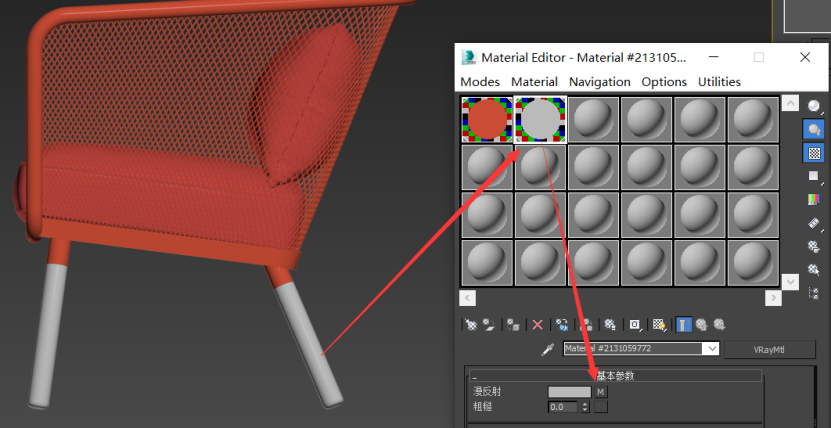
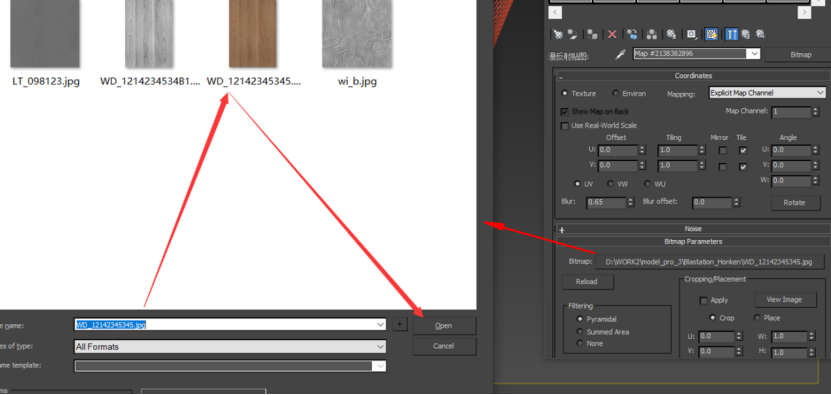
If you only want to adjust the path or the material name, you may change them in Asset Tracking directly.
Shift+T to open Asset Tracking > Set Path... > find your mapping > Use Path > Convert to Editable Mesh > Archive.
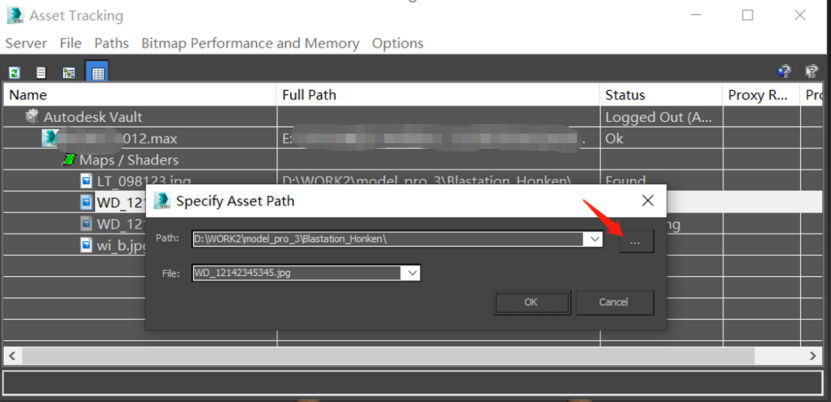
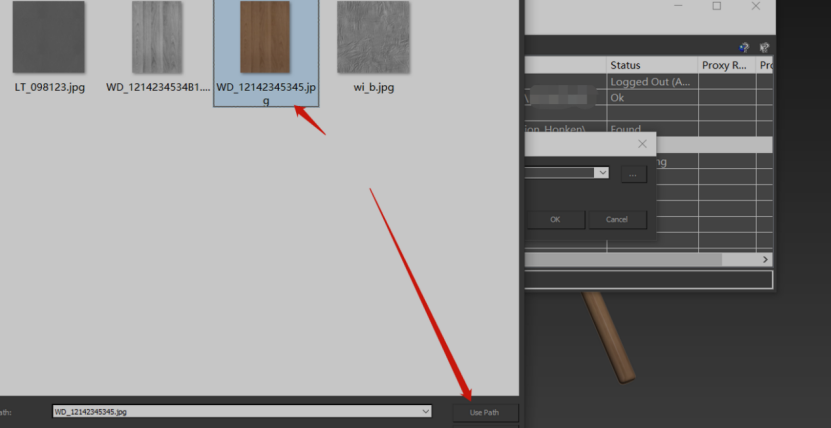
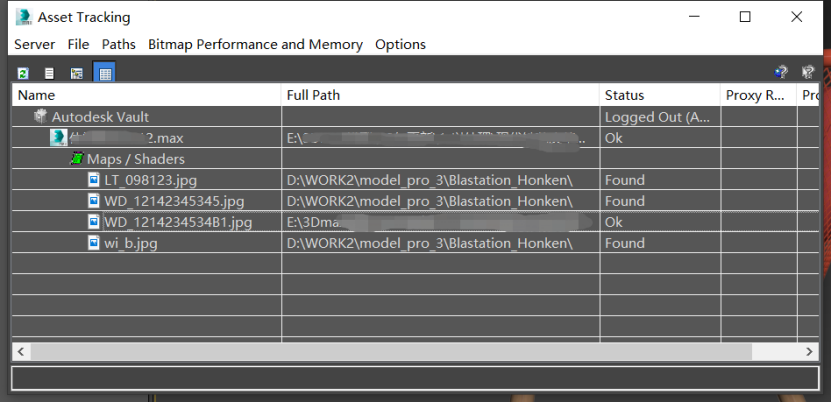
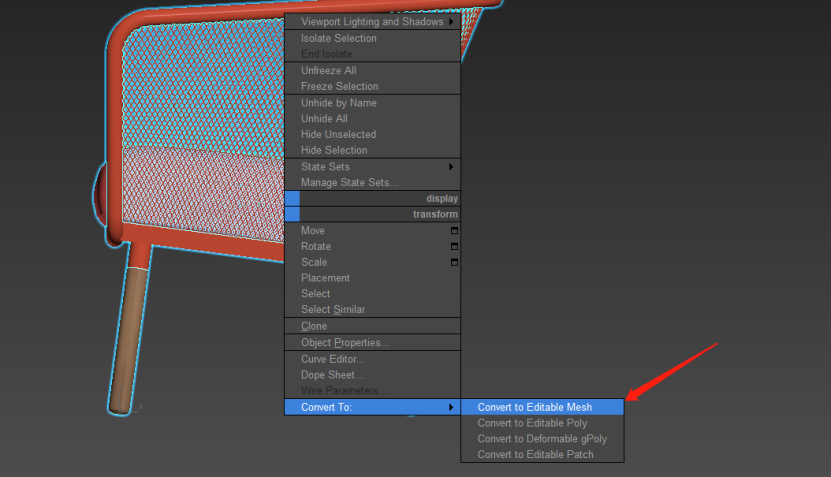
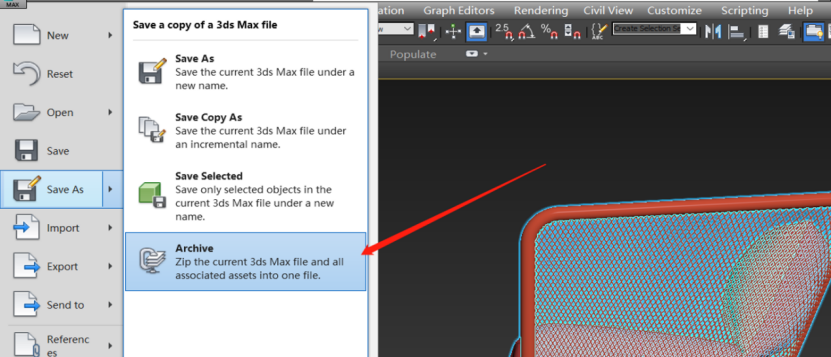
Archive all required files concerning this model to a compressed package. If you copy this package to and use it on any devices, these mappings will not be missing.
Notes:
-
Coohom supports compress package uploading. You can use Archive function in 3ds Max to upload your file.
-
Before archiving, you should toggle off Gamma and LUT ( Customize> Preferences...>Gamma and LUT>toggle off options).
Coohom supports compress package uploading. You can use Archive function in 3ds Max to upload your file.
Before archiving, you should toggle off Gamma and LUT ( Customize> Preferences...>Gamma and LUT>toggle off options).
2. Uploaded .max file without mapping
If the model does not need the mapping, you can just ignore it. But, if the mapping is needed, you should archive and upload the mapping with .max file together.
Open .max file to review your model. If the mapping is missing or path goes wrong, there will be no material mappings.
Find the target mapping and save it in the same folder with the .max file.
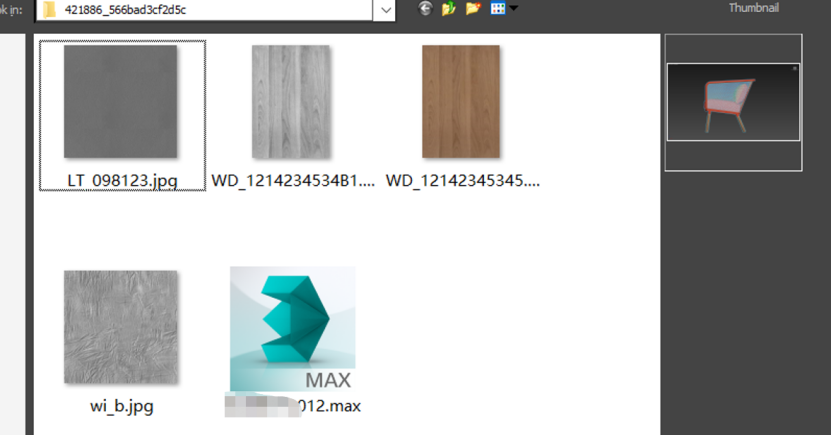
Archive your file.
3. Model’s normals have been flipped
We may encounter the preview problem as below after uploading the model successfully. This is caused by the normals in the model.
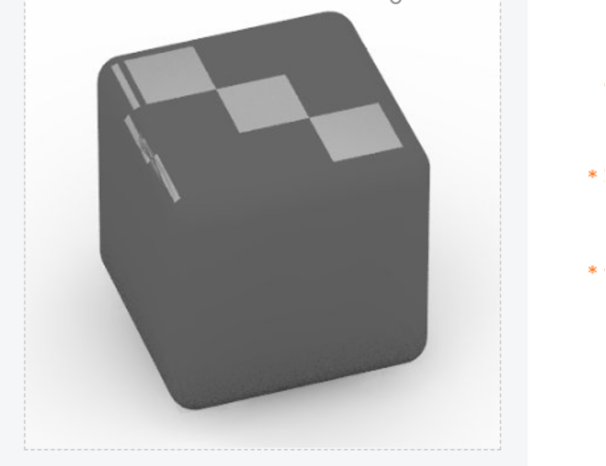
Solution: select the model > Convert to Editable Poly > Polygon > choose the normals in the model > Flip Normals.
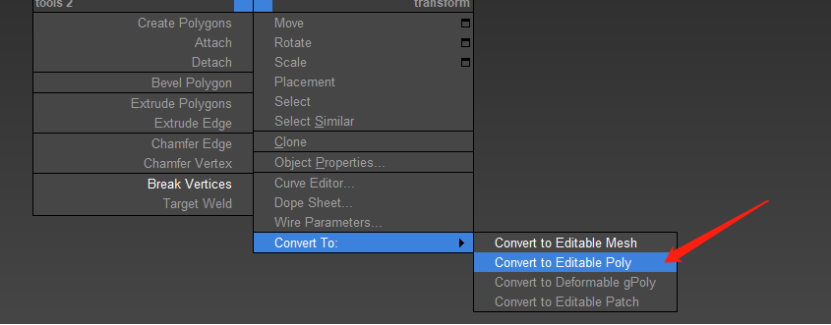
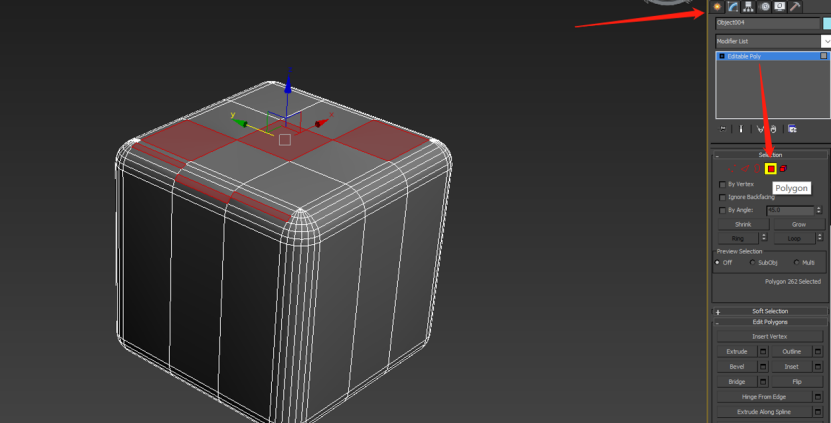
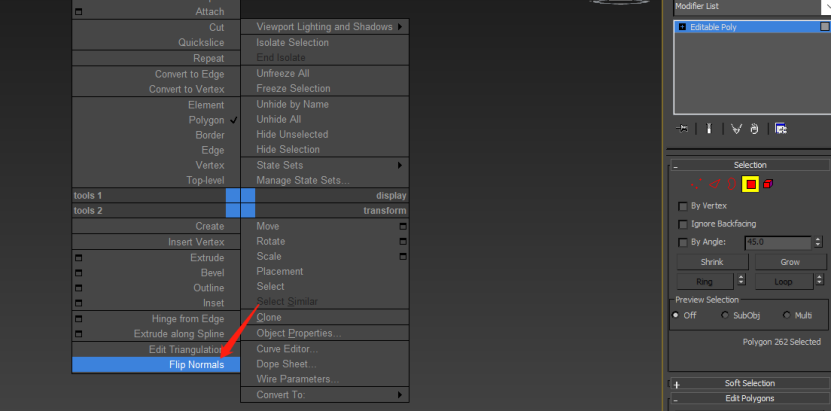
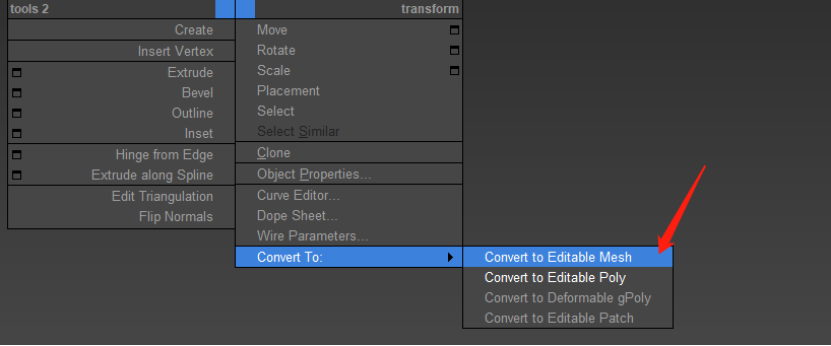
Finally, select your model and right click to Convert to Editable Mesh. Then, archive your file.
4. Diffuse ratio
Solution: Readjust the diffuse ratio.
Models with this problem may be demonstrated correctly during the preview step in the 3ds Max.
Under this circumstance, we can check that whether the multi-layer displays the material. Double click the multi-layer to preview. If the diffuse value is 10, just as shown below, the material might not be shown.
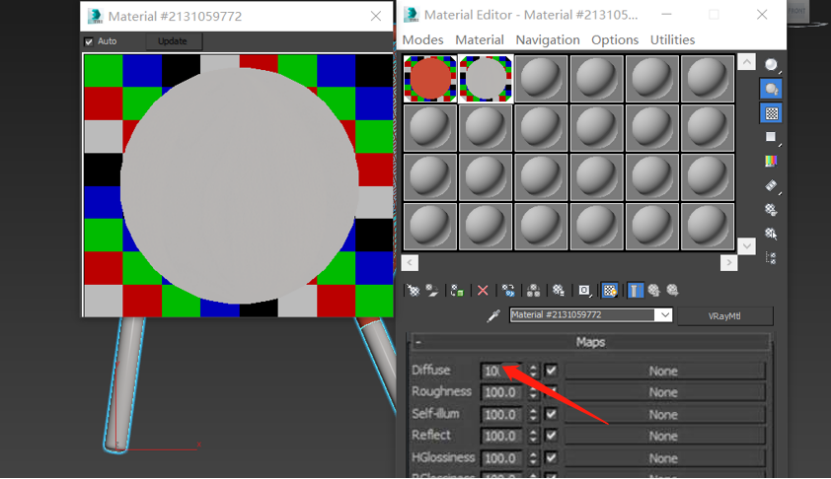
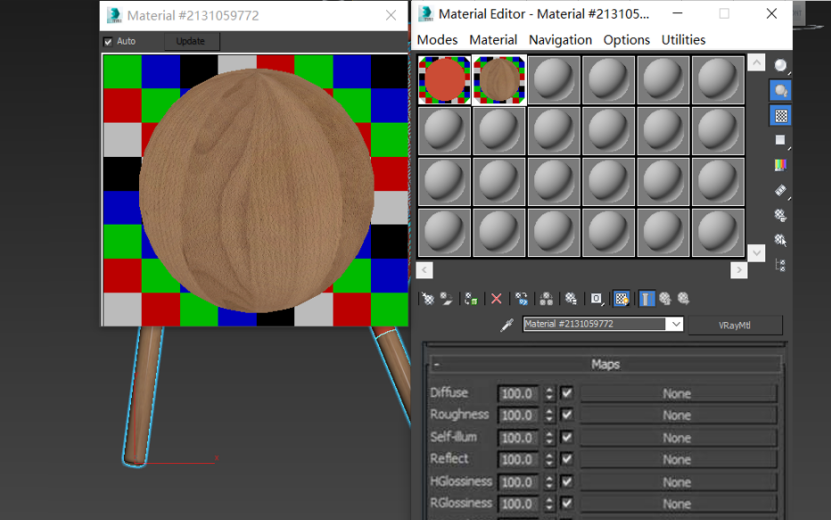
In most cases, the diffuse ratio should be 100.
5. Render settings
In this case, there are no problems with the model and mapping. You need to check your render settings.
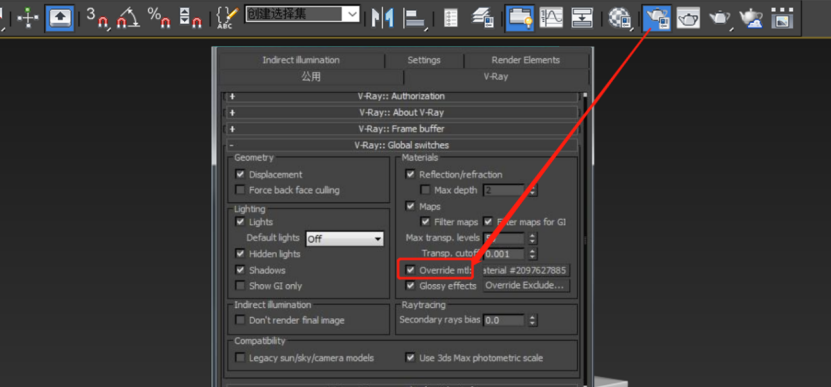
Render > V-Ray > Global switches > Override mtl > toggle off.
Render > V-Ray > Color mapping > Gamma (adjust Gamma to 2.2).
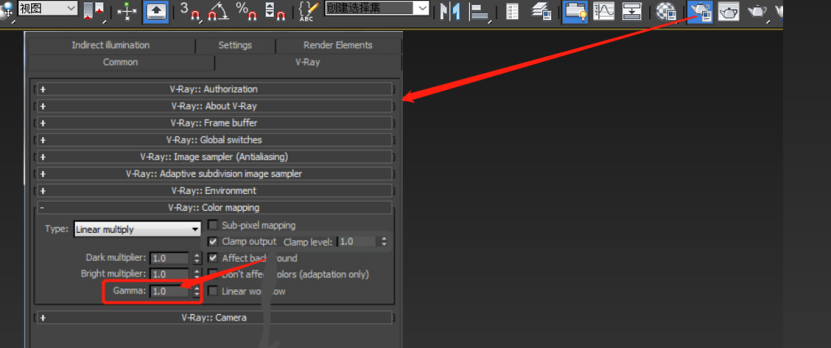
When you finish, archive your file.
6. Multi/sub Object Material
If the upload preview looks like below:
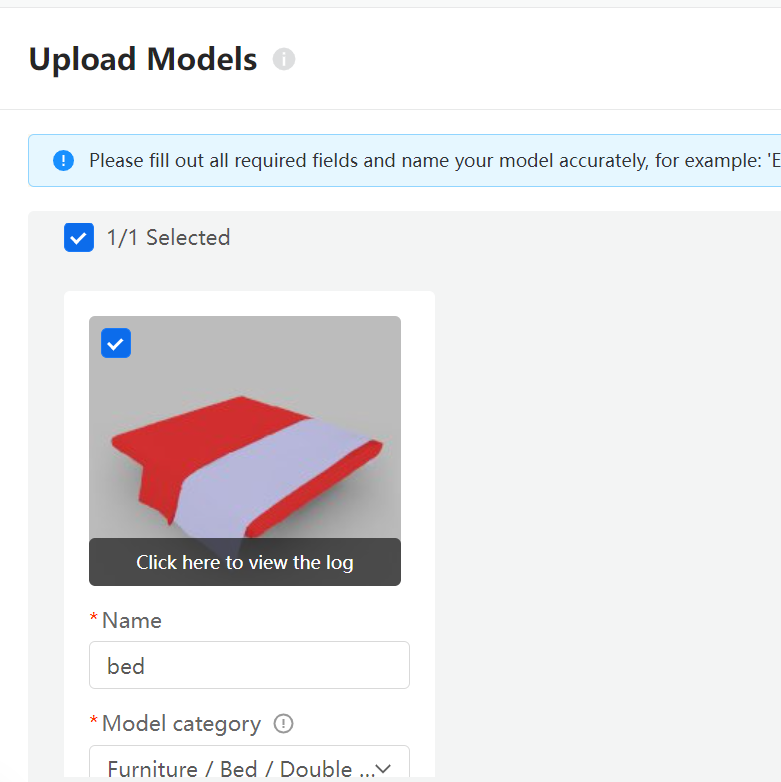
Most of the time, a colorful part show on preview refer to a Multi/sub Object Material on 3D MAX. Like below:
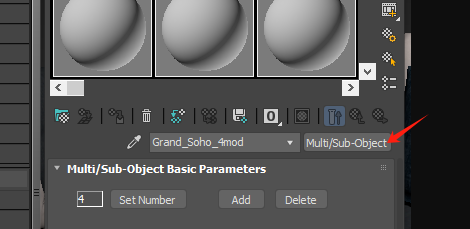
And what we need to do is to split all the Multi/sub Object Materials on 3D MAX.
Here is the tutorial: