- Helpcenter
- Material&Component
- Modeling in Material&Component Tool
-
Getting Started
-
Model Library & Asset Management
-
News & Product Update
-
Kitchen, Bathroom, Closet, Custom Modelling
-
[Enterprise] 3D Viewer & Virtual Showroom
-
Payment & Billing
-
Version 5.0
-
Upload & Export
-
Personal Account
-
Photo & Video Studio
-
Material&Component
-
Floor Plan Basic
-
Images/Videos & Light
-
Tips & Tricks
-
Privacy & Terms
-
Inspiration Spaces
-
Testimonials
-
Construction Drawings
-
AI Tools
-
Customer Service Team
-
Projects Management
-
FAQ
-
Coohom Online Training
-
Lighting Design
-
Coohom Architect
Material&Component Tool: How To Create Your Own Ceiling Template?
In the Ceiling Editor, you can save your current ceiling as a template for your next use.
In the Ceiling Editor, you can save your current ceiling as a template for your next use.
Function Location:
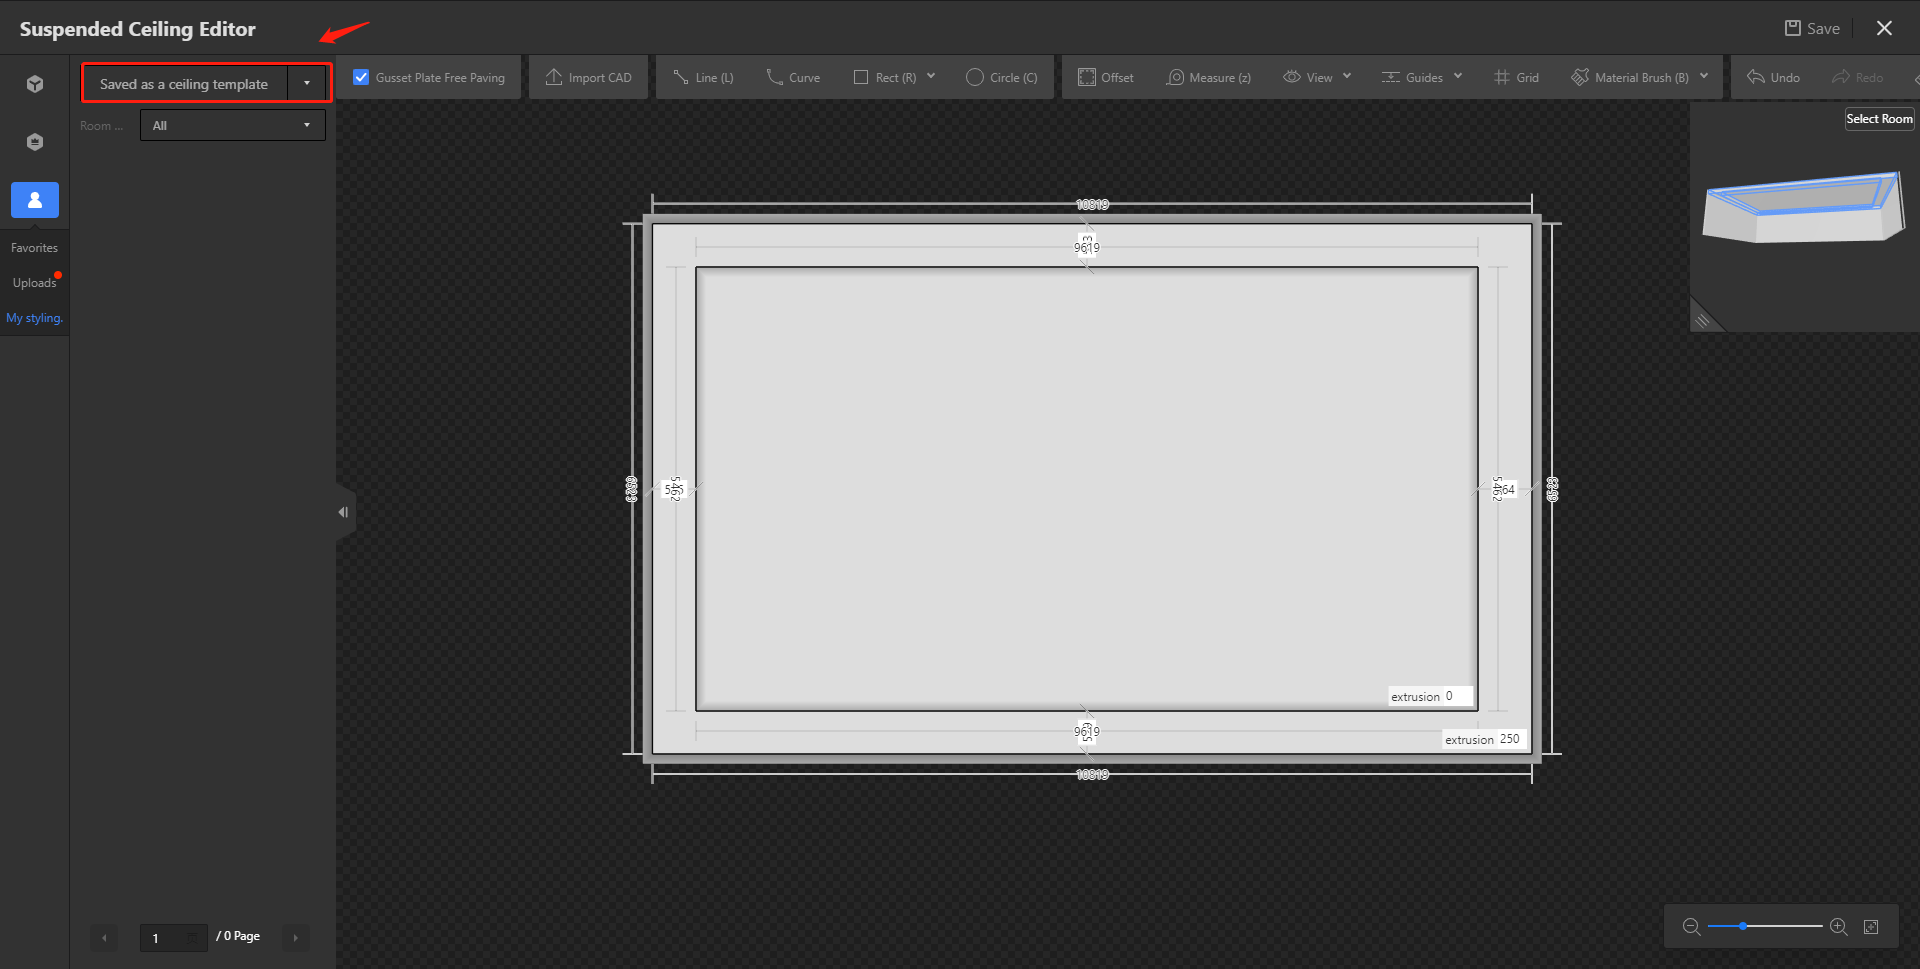
Ceiling Editor - My Account- My Styling- Saved as a ceiling template

Steps:
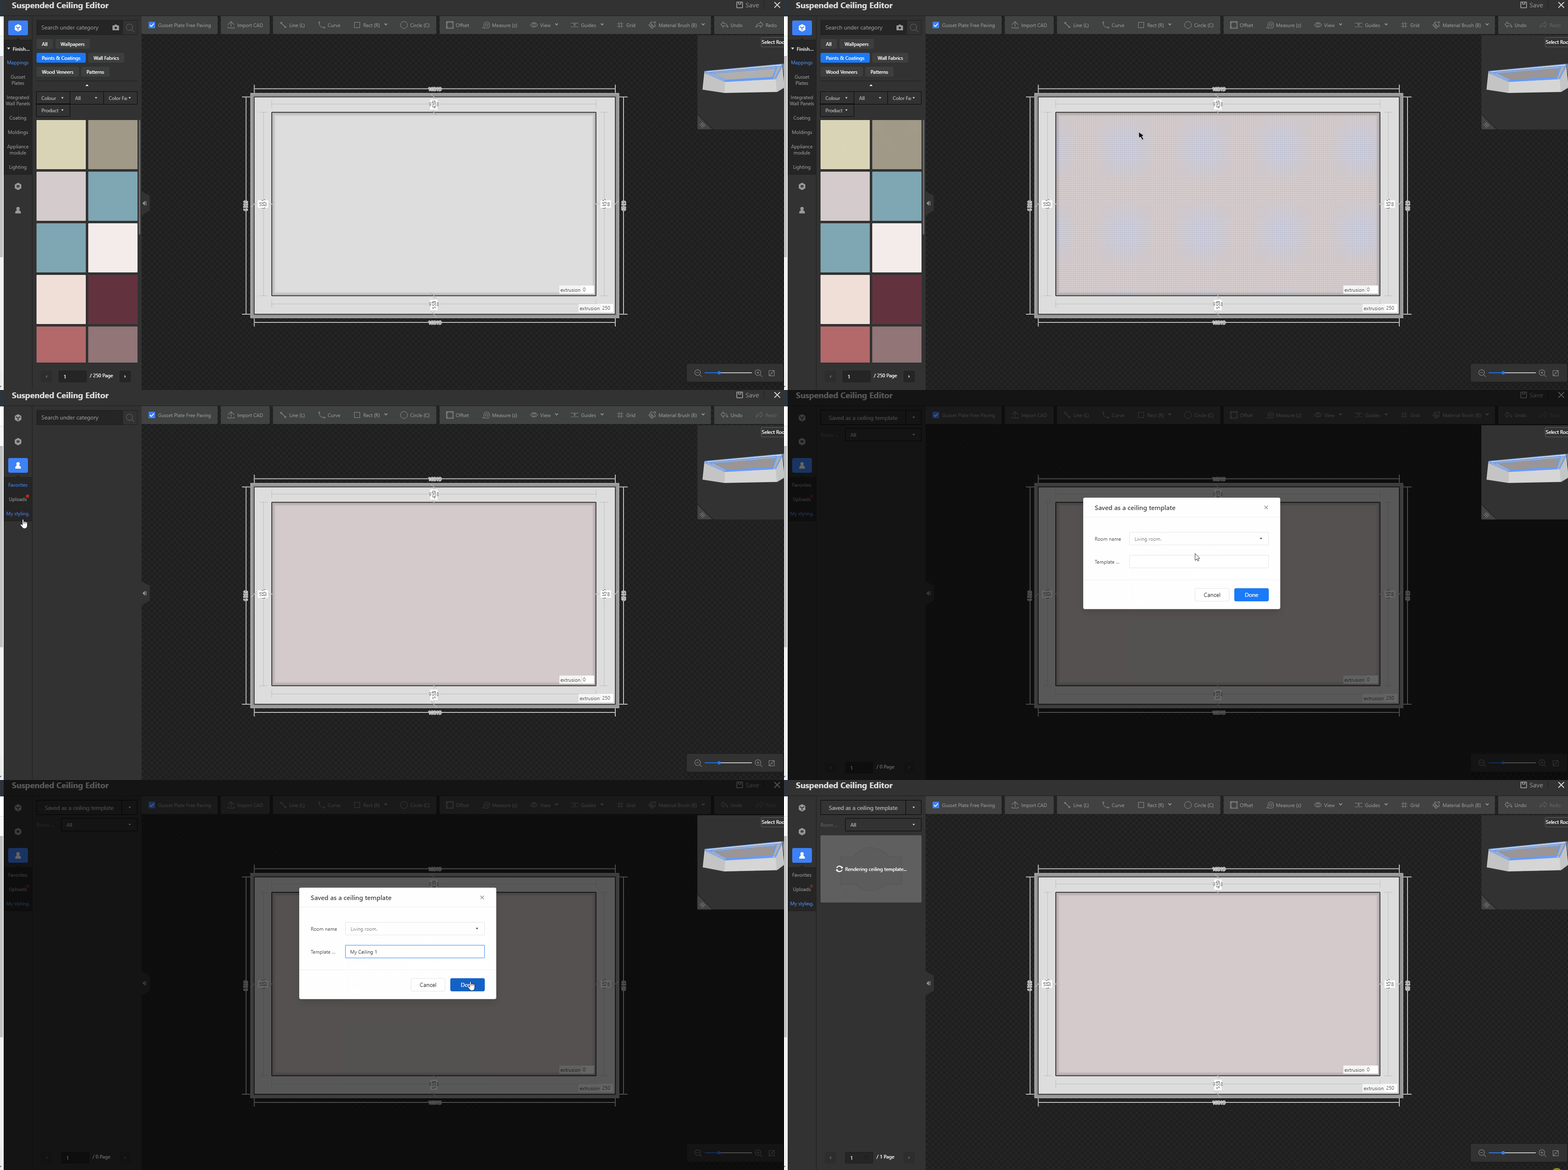
1.Enter [Ceiling Editor] - [My Account] - [My Styling]
2.After you create the Ceiling, Click [Saved as a ceiling template], Then choose the room type, Name your styling and Save.
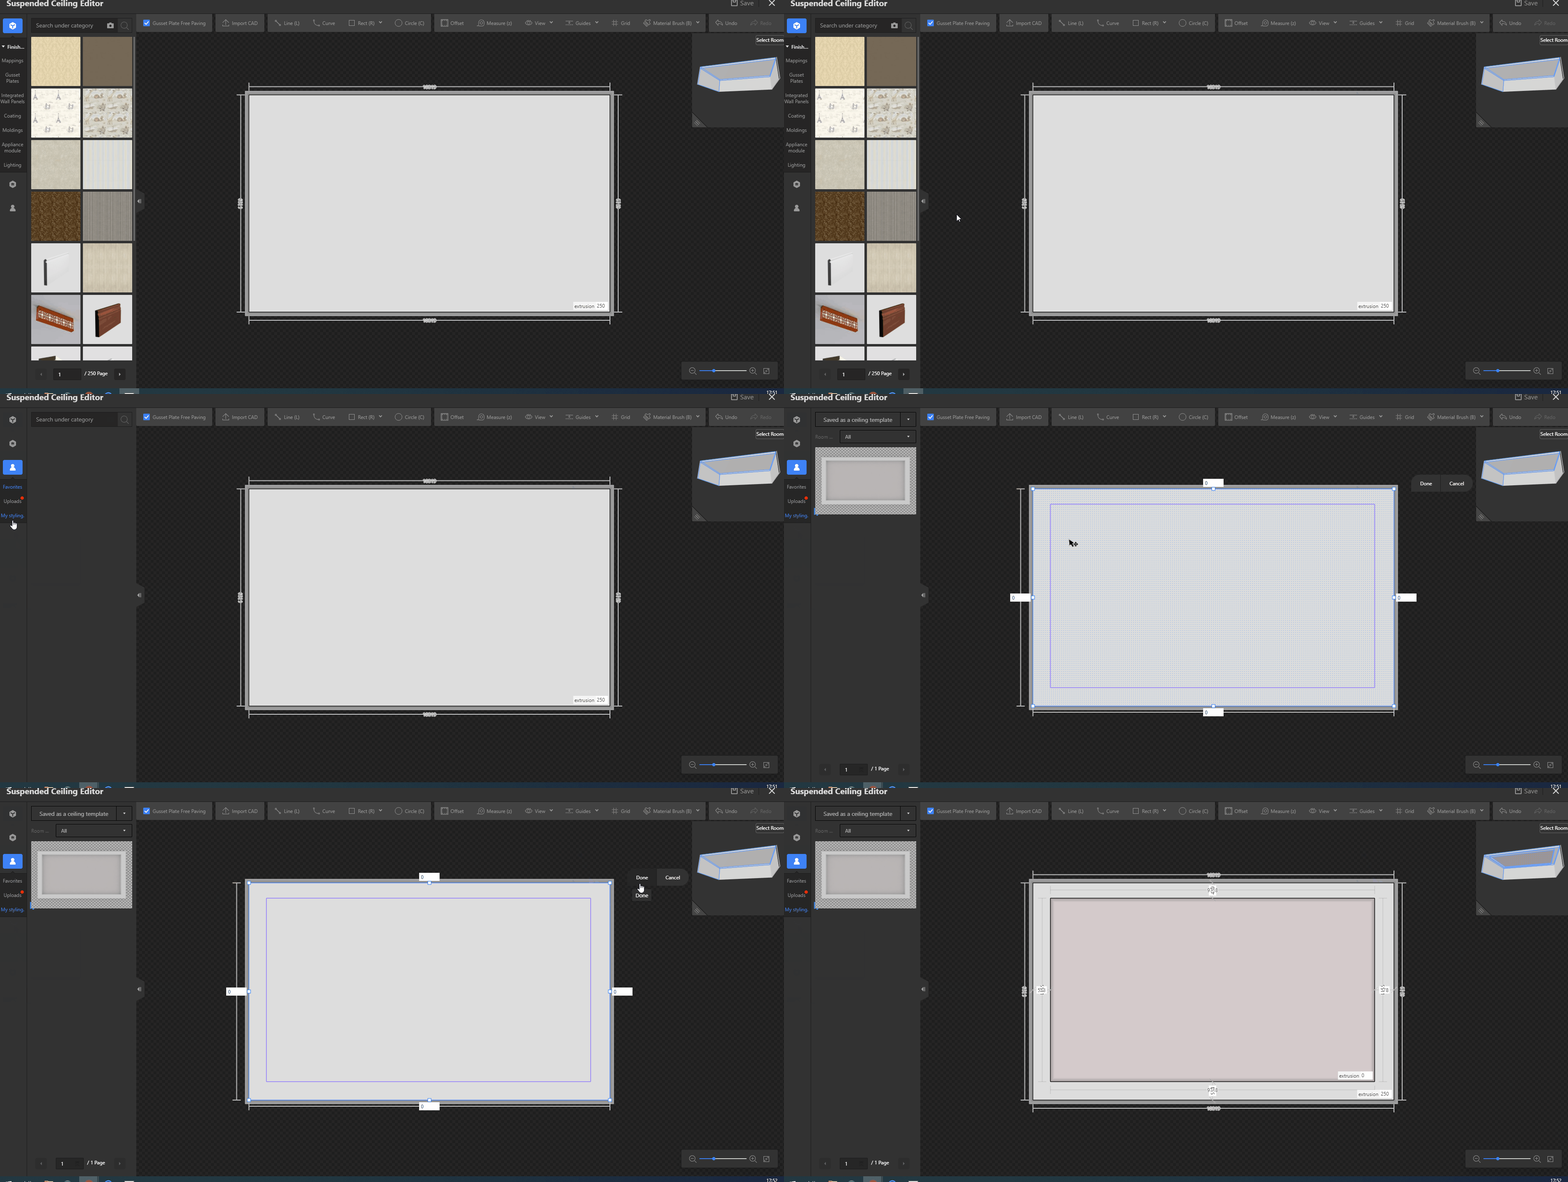
3.When you open another room, You can apply the saved ceiling template. Modify the size of the room consistent with the size of the Ceilings, then Apply, Click Done.

