- Helpcenter
- Kitchen, Bathroom, Closet, Custom Modelling
- Tool Bar & Toolkit
-
Getting Started
-
Model Library & Asset Management
-
News & Product Update
-
Kitchen, Bathroom, Closet, Custom Modelling
-
[Enterprise] 3D Viewer & Virtual Showroom
-
Payment & Billing
-
Version 5.0
-
Upload & Export
-
Personal Account
-
Photo & Video Studio
-
Material&Component
-
Floor Plan Basic
-
Images/Videos & Light
-
Tips & Tricks
-
Privacy & Terms
-
Inspiration Spaces
-
Testimonials
-
Construction Drawings
-
AI Tools
-
Customer Service Team
-
Projects Management
-
FAQ
-
Coohom Online Training
-
Lighting Design
-
Coohom Architect
How to Use Panel Array?
Overview
When you design the inner space of a piece of furniture, you can use the Panel Array feature to place panels evenly in vertical or horizontal distribution inside the furniture. This way, placing panels can be easier and faster.
Steps
Enter the Panel Array
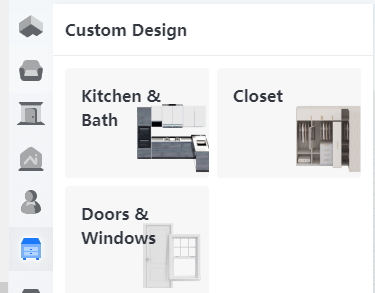
1. Go into the project that you want to work on. In the left-side navigation pane, click Custom Design. Then, click Closet down below.
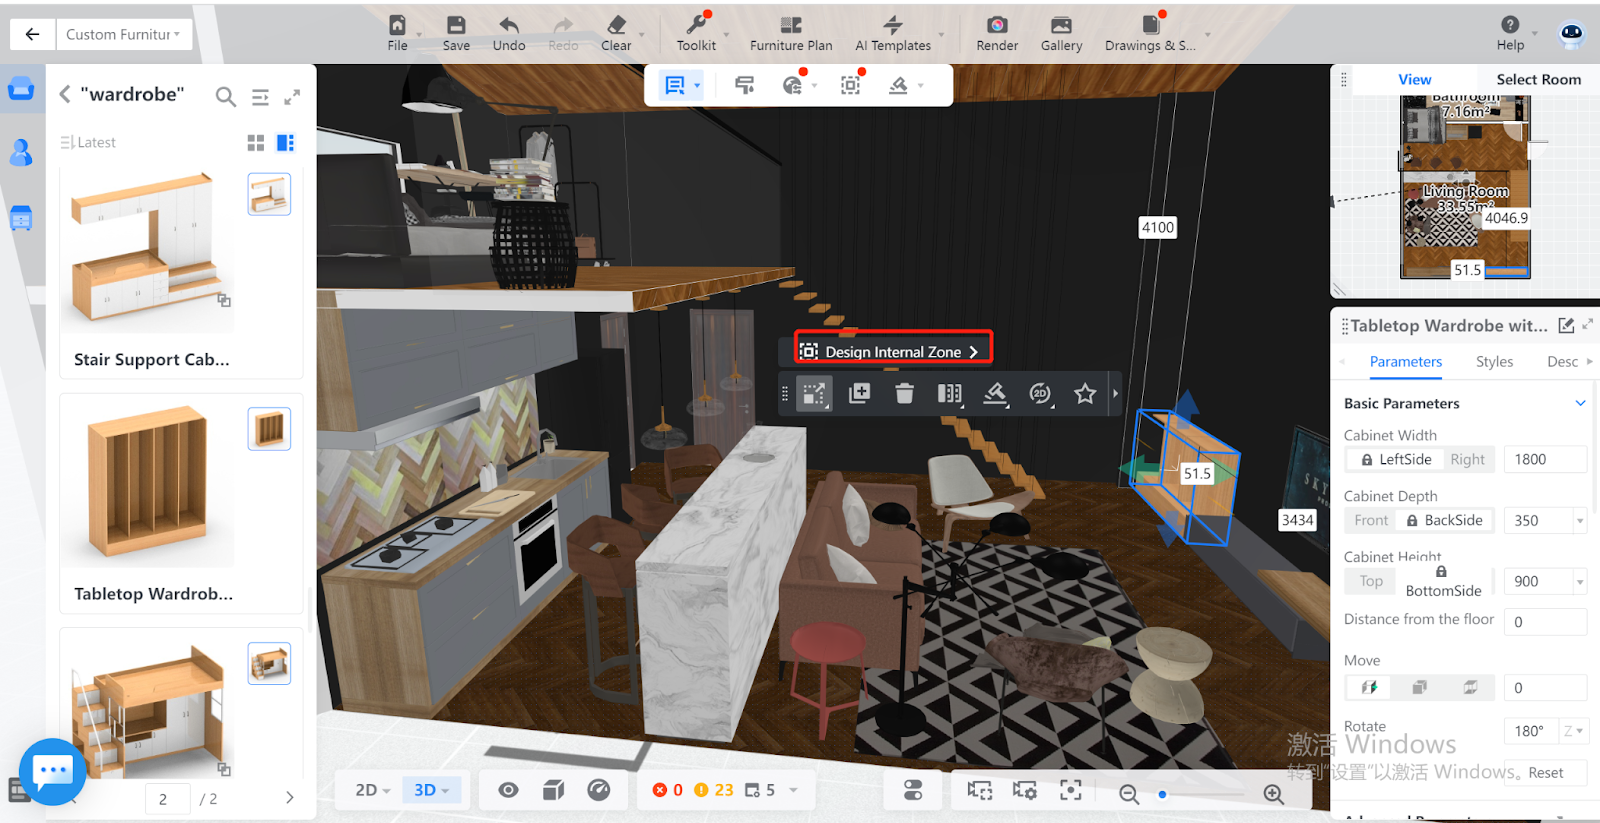
2. Click on the Closet whose inner space you want to design. In the popped tool bar, click Design Internal Zone on top.
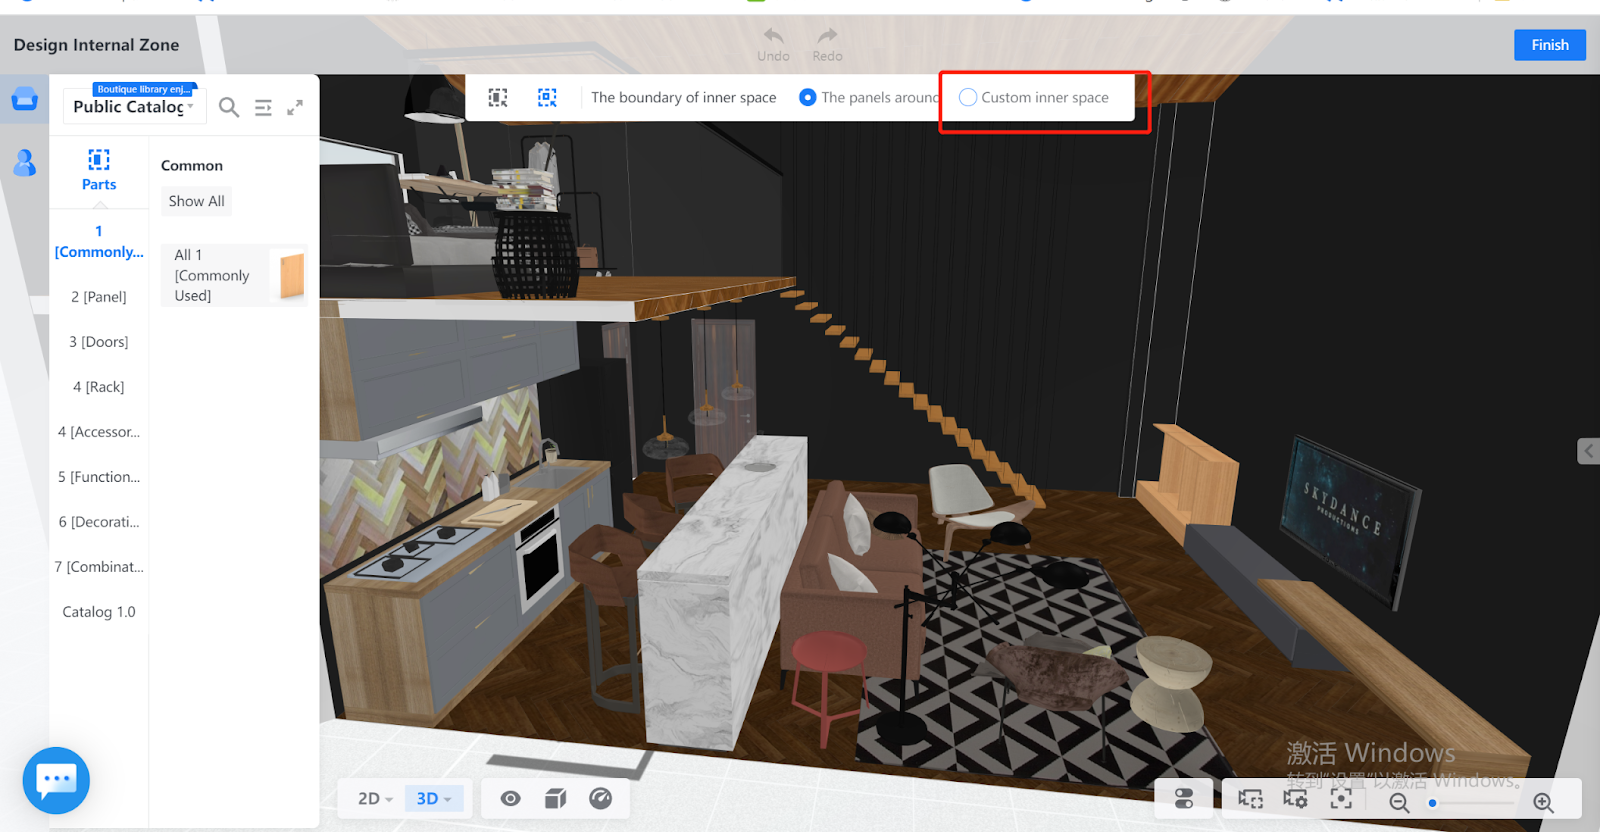
3. Choose Customize Inner Space.
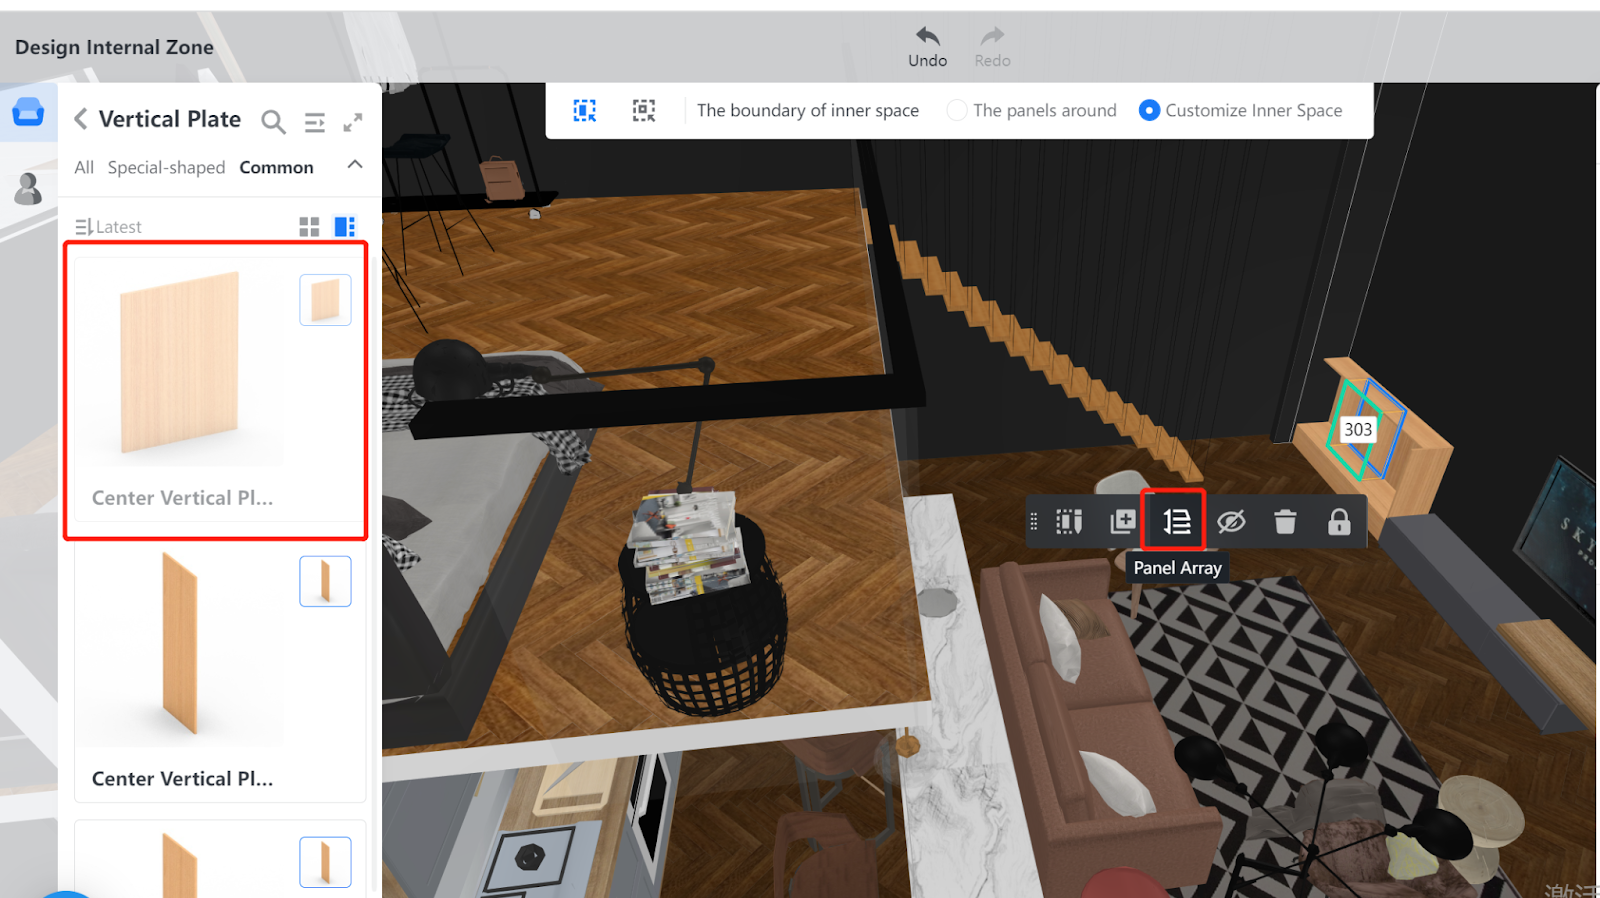
4. Choose the style of panel you want to place inside the furniture. Click Panel Array in the tool bar that appears. A Center Vertical Panel is used here as an example.
Place the panel
1. In the right-side Panel Array pane, specify the number of panels that you want to place inside the selected zone. Then, choose the direction along which you want to evenly place these panels. You can choose Vertically or Horizontally.
In the following example, the number of panels is set to 2 and the direction is set to Horizontally.
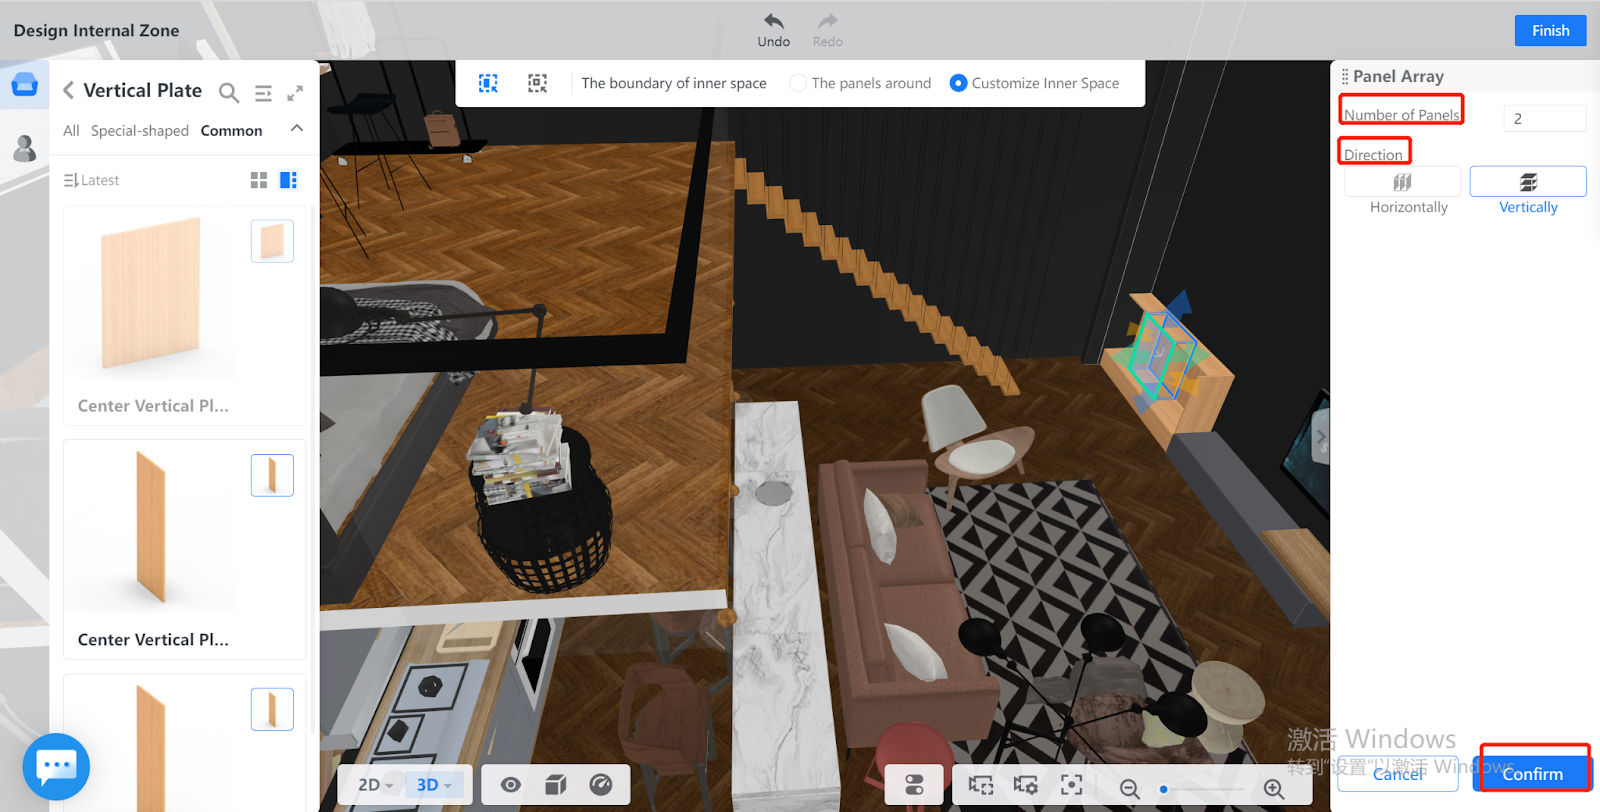
2. After you have set the parameters of Panel Array, click Confirm.