Overview
For a home design project, you often need to duplicate models such as metalware and houseplants, and then place them in an array. Whereas in a project for public design, you usually need to arrange groups of duplicated decoration plants as well as lines of desk and chair models such as office and theater chairs.
In either design scenario, the Coohom Array feature allows you to duplicate models and then place the models based on a clear pattern. It will take you only a few simple steps.
Steps
Enter Array
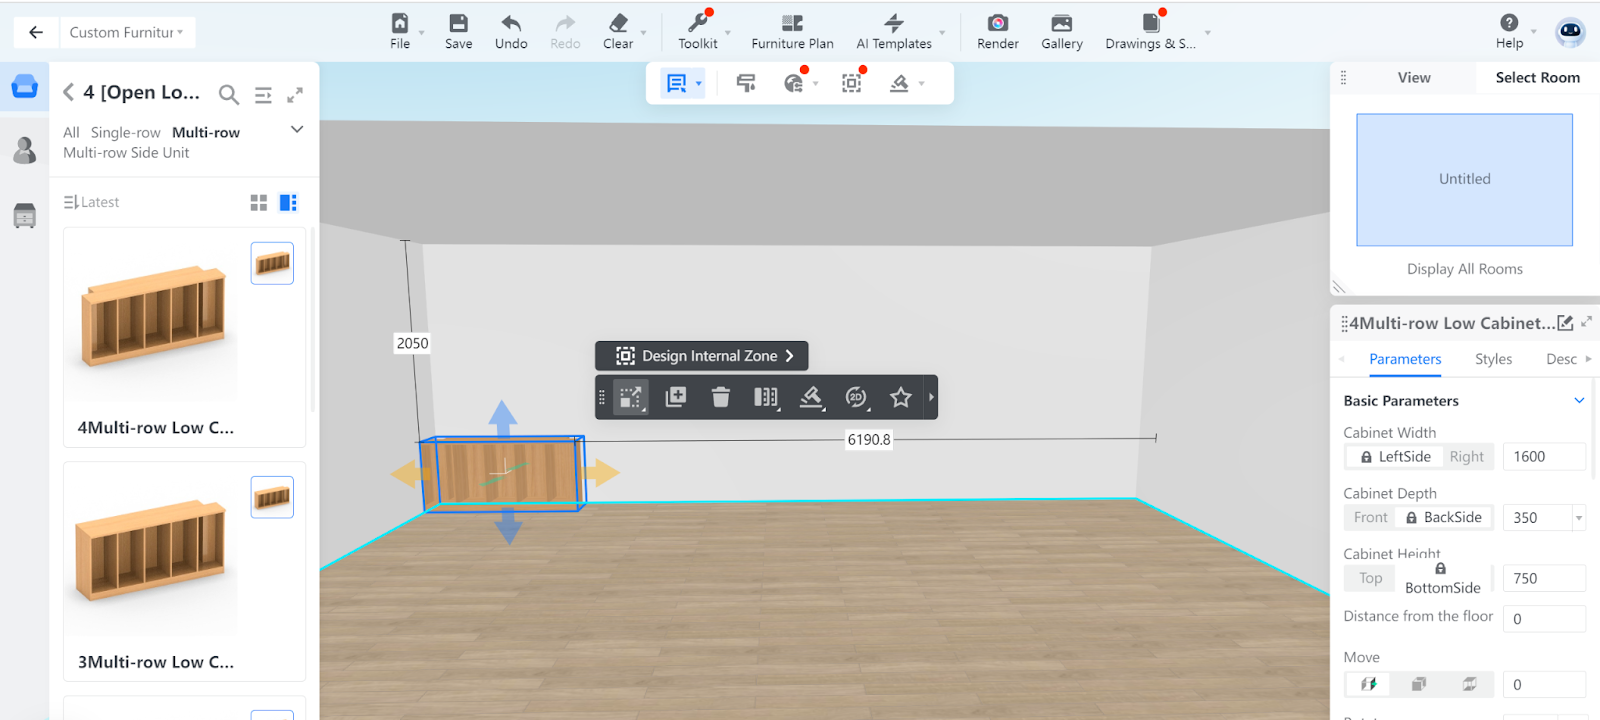
1. Go into the project that you want to work on. Click on a piece of furniture that you want to duplicate in an array.
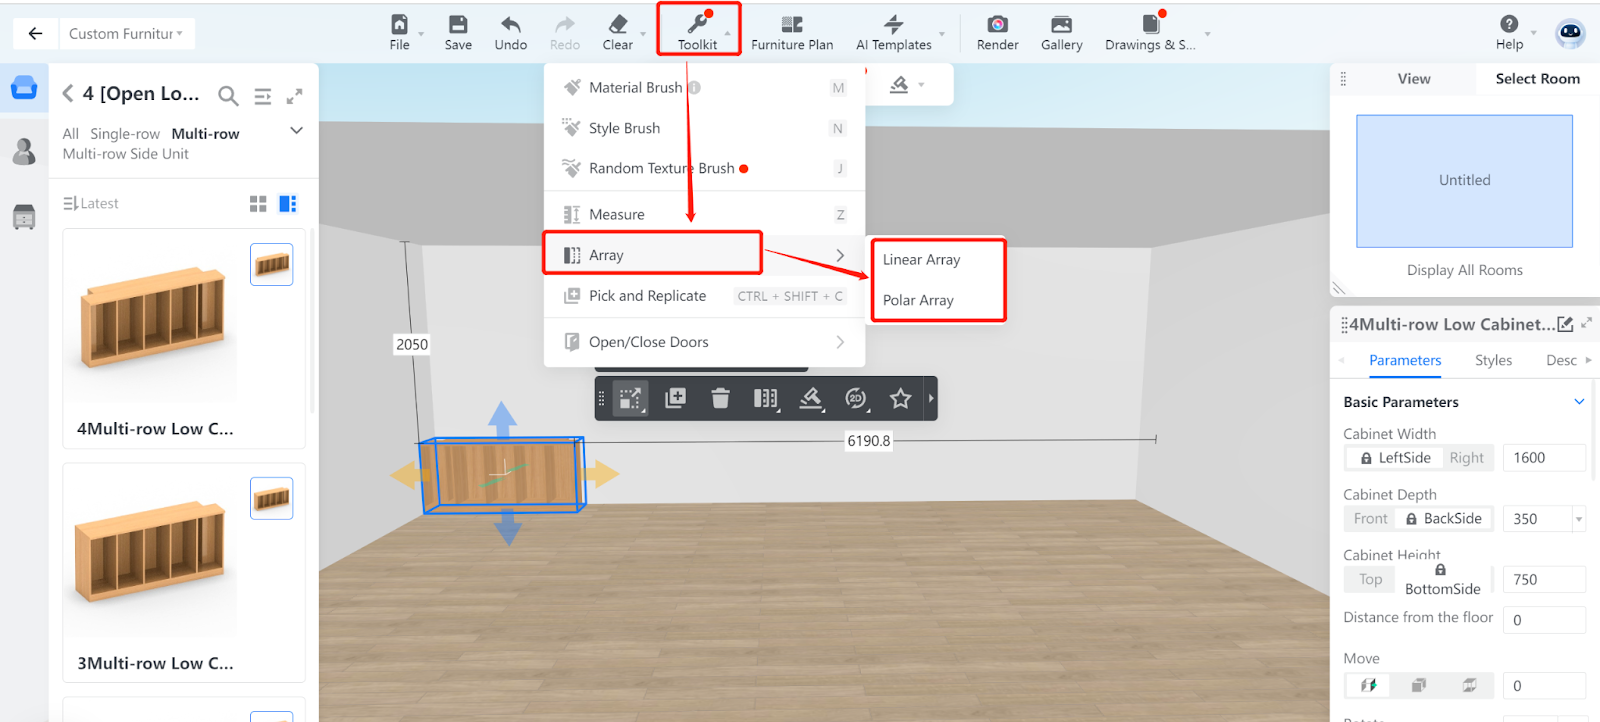
2. Click Toolkit, or the wrench icon, in the top navigation bar. From the drop-down menu, move the cursor over Array. Then, the two options of Array appear in a pull-down menu.
3. You can also display the two options by moving the cursor over the Array button at the center of the popped tool bar.
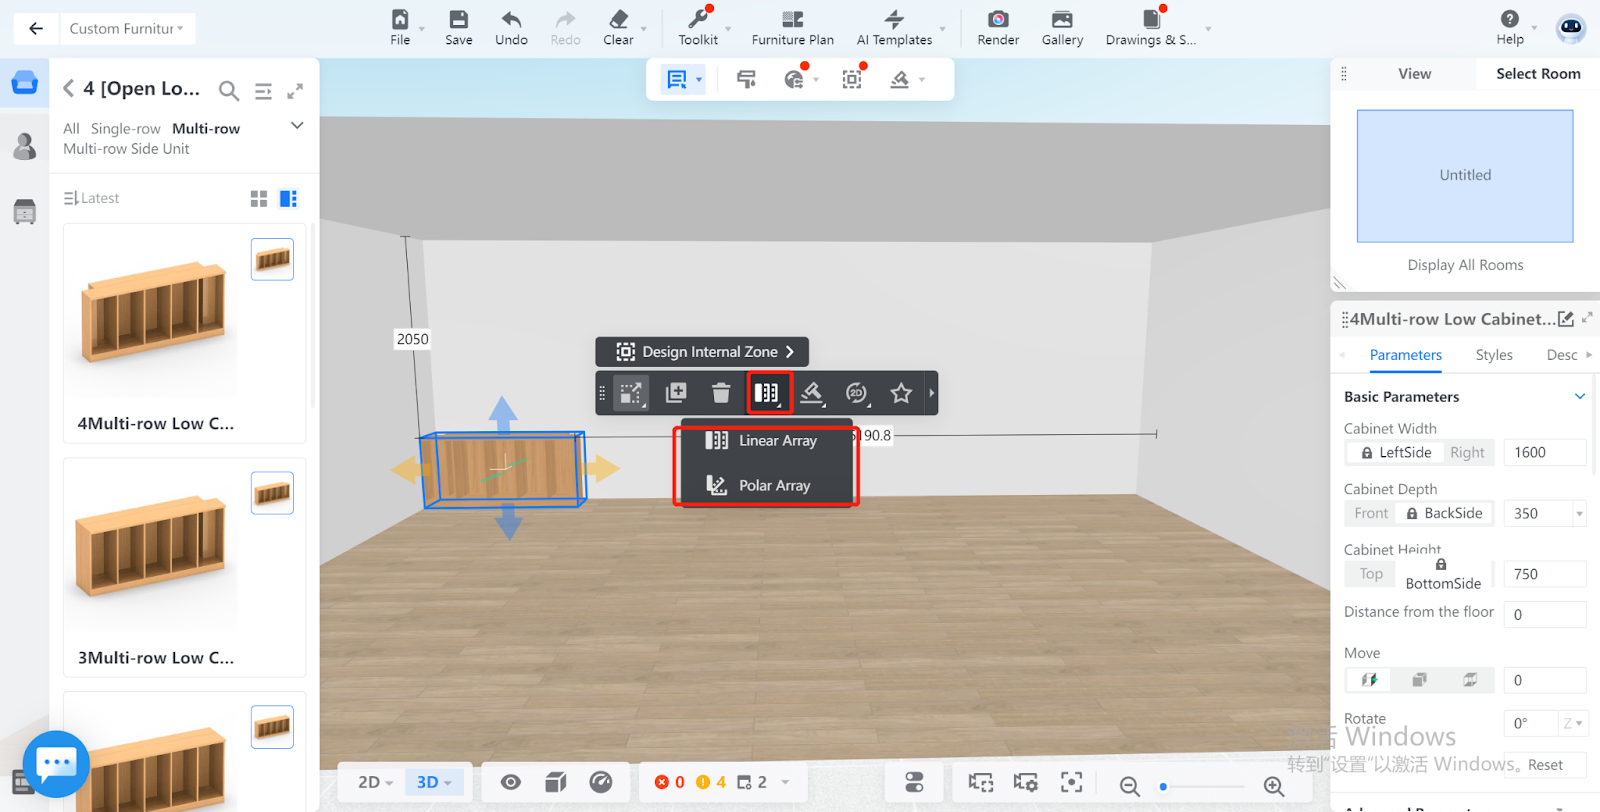
4. Next, choose Linear Array or Polar Array.
Linear Array
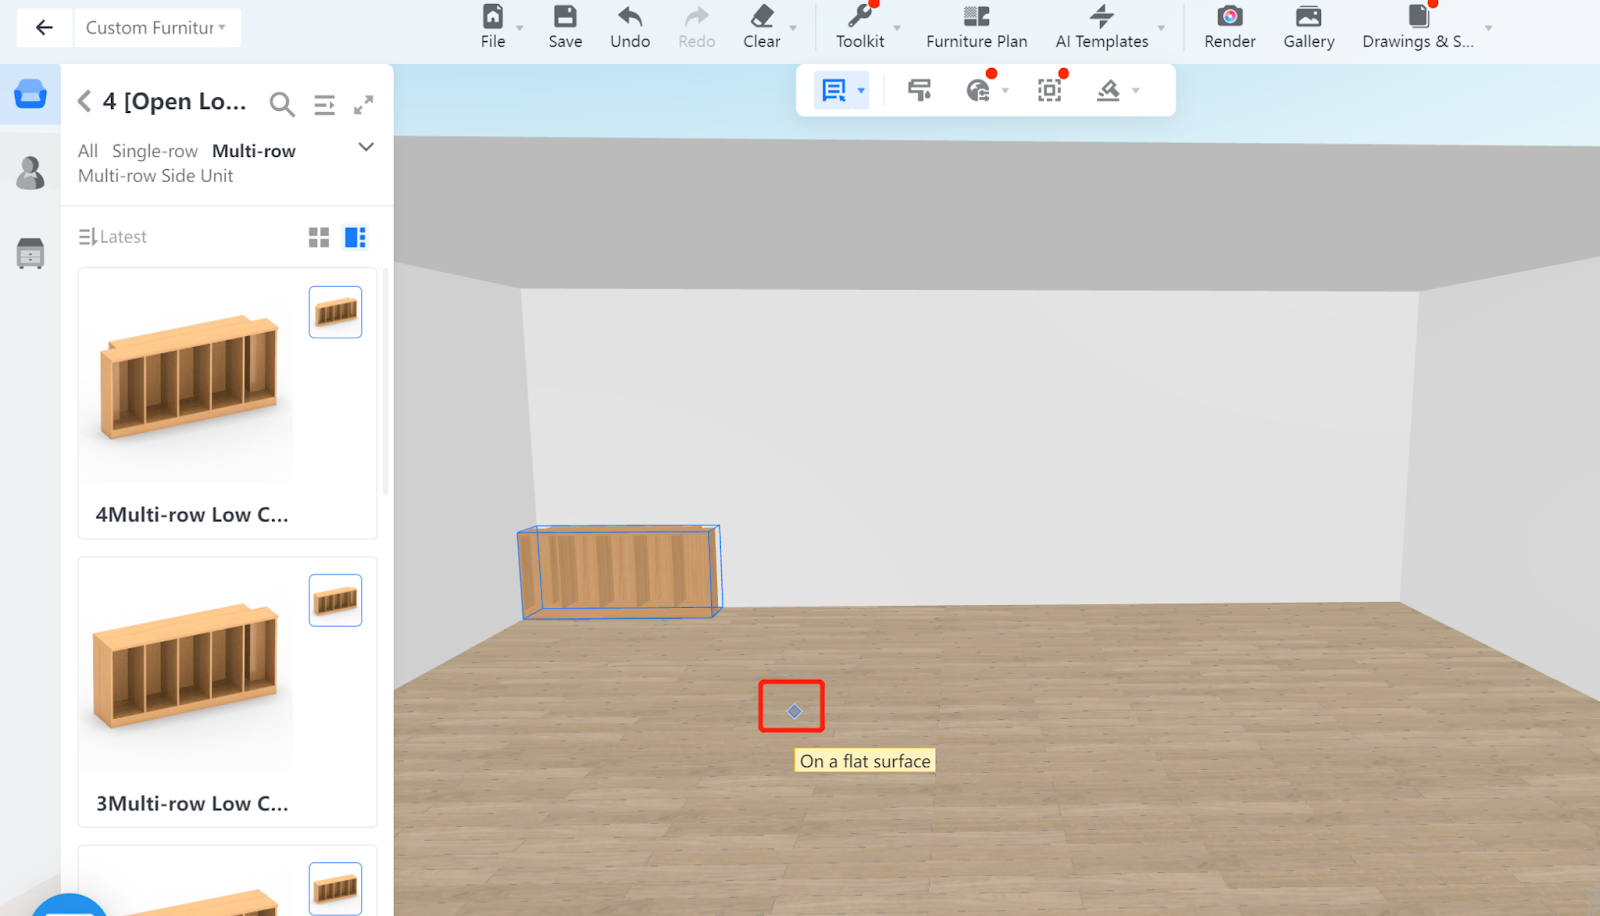
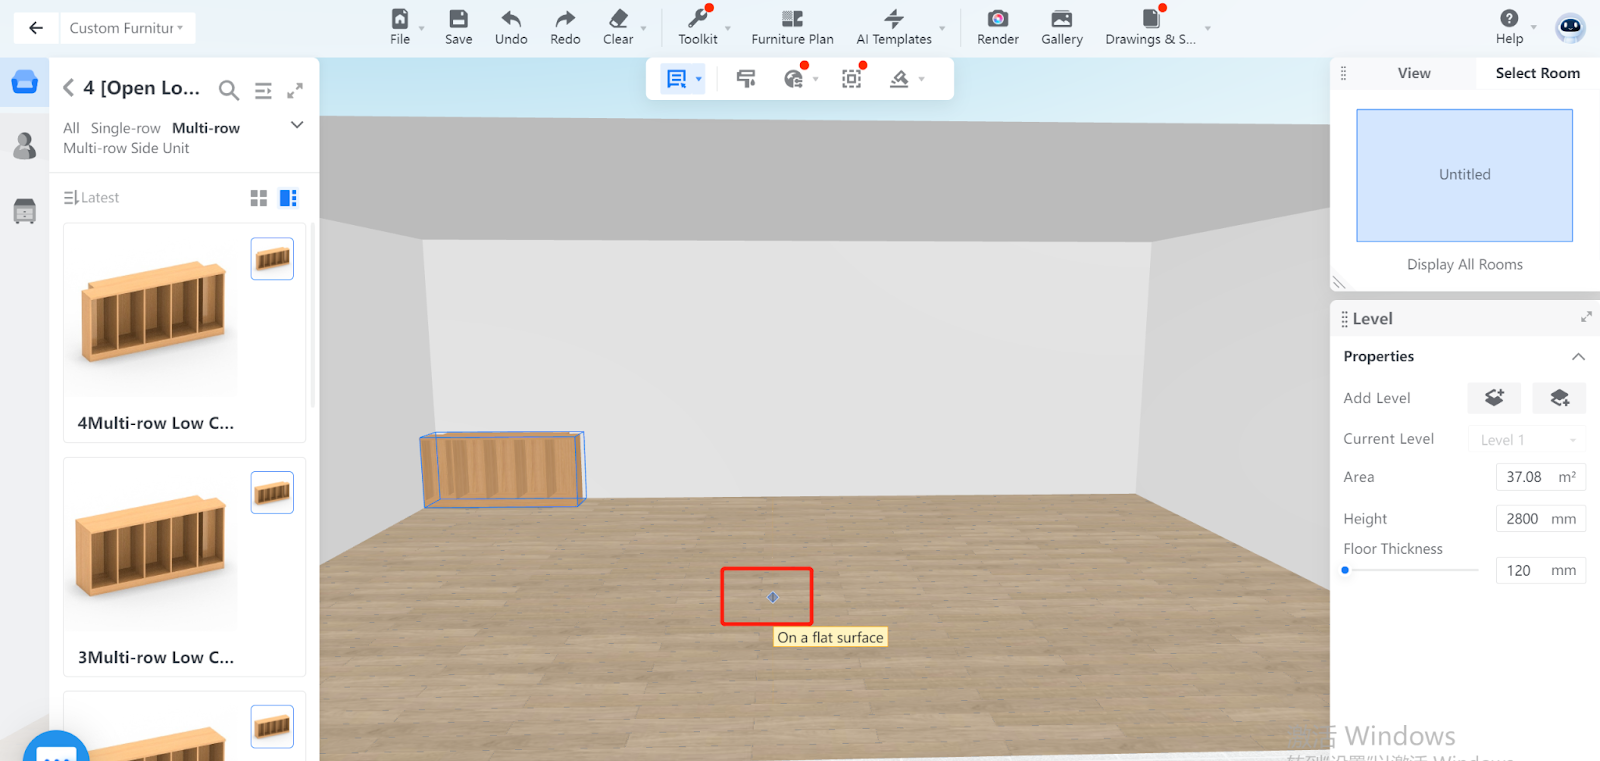
1. Set a start point on a flat surface by moving around your cursor and left-clicking a spot. For example, you can pick a spot on the floor.
2. After you set a start point, you can adjust the length and direction of a ray represented by a black arrow line. The ray determines the specific direction and spacing between the furniture models to be duplicated.
You can adjust the ray by setting parameters or simply moving around your cursor and clicking on another spot as the end point.
You can configure the total number of models in the array in the Number field.
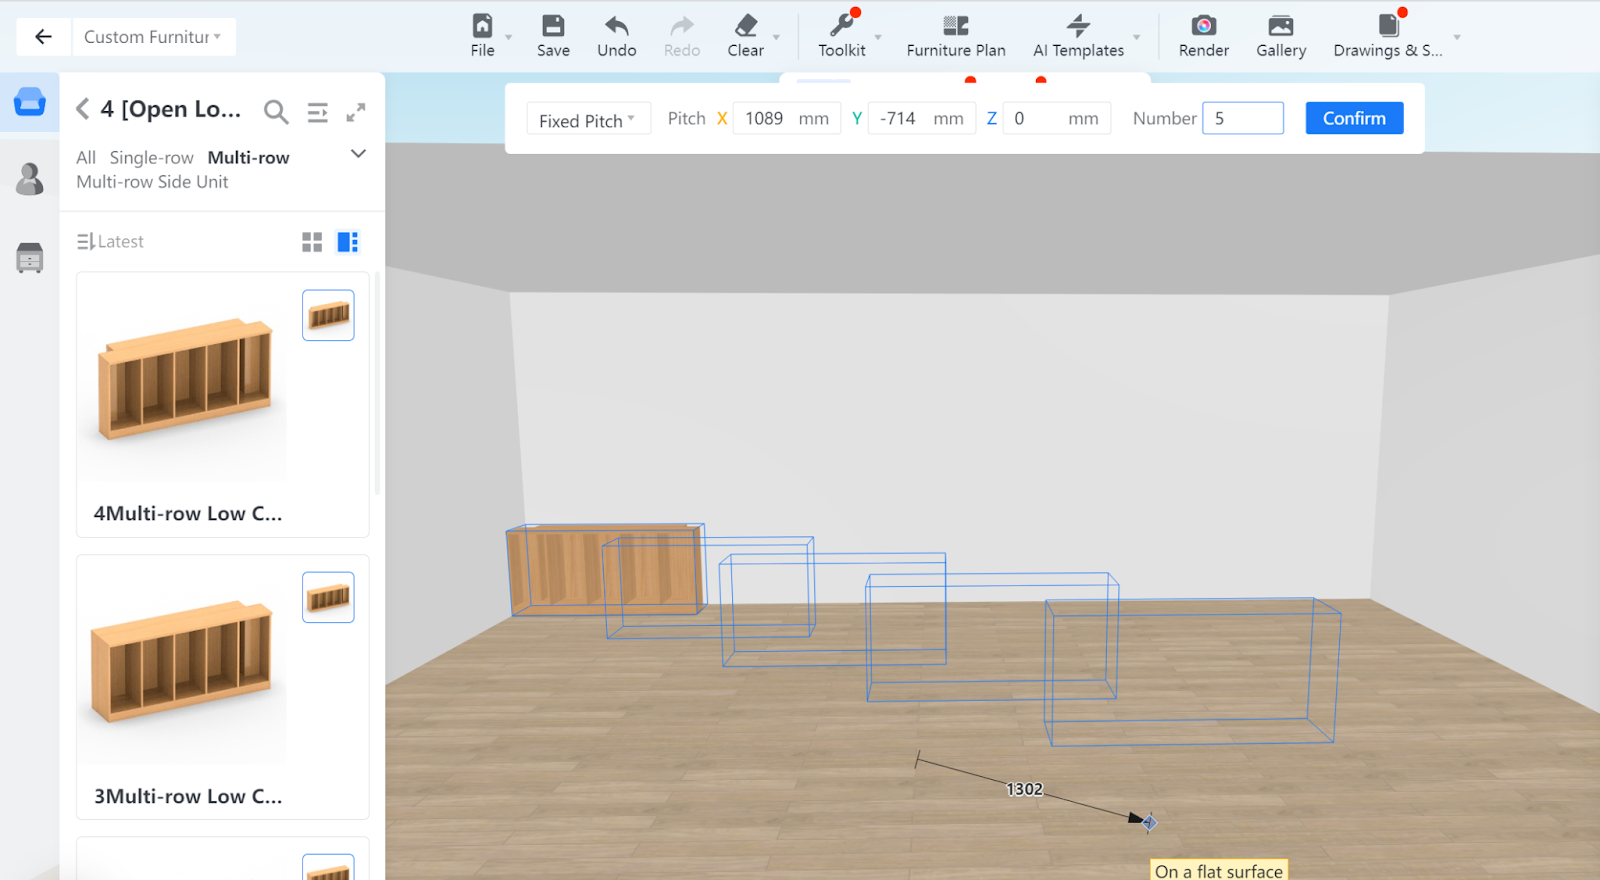
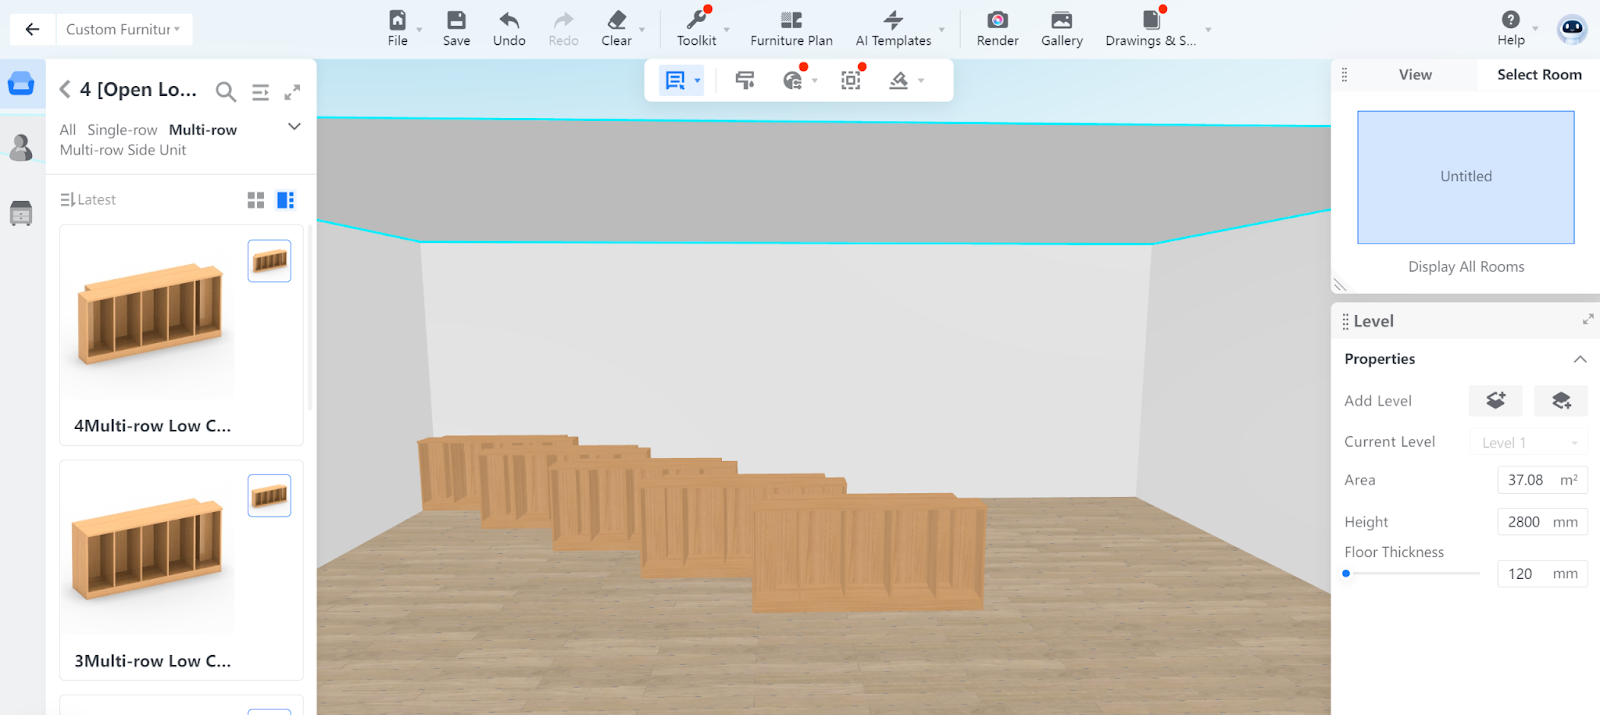
3. Left-click or click the Confirm button, and the furniture models are duplicated in the linear array that you configured.
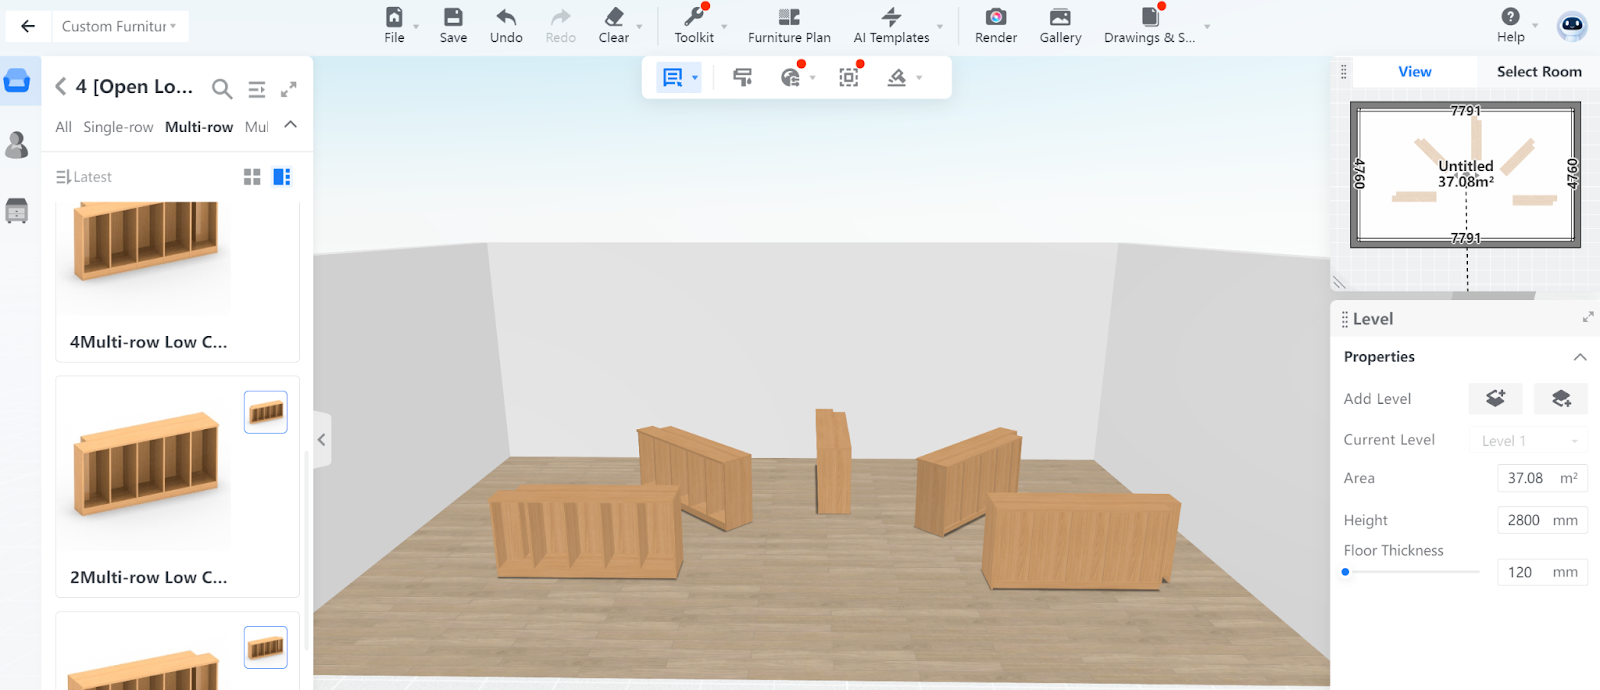
Polar Array
1. Select the center point of the polar array by picking a spot on a flat surface. Here, the floor is selected as the array plane.
2. After you pick a start point, set the end point.
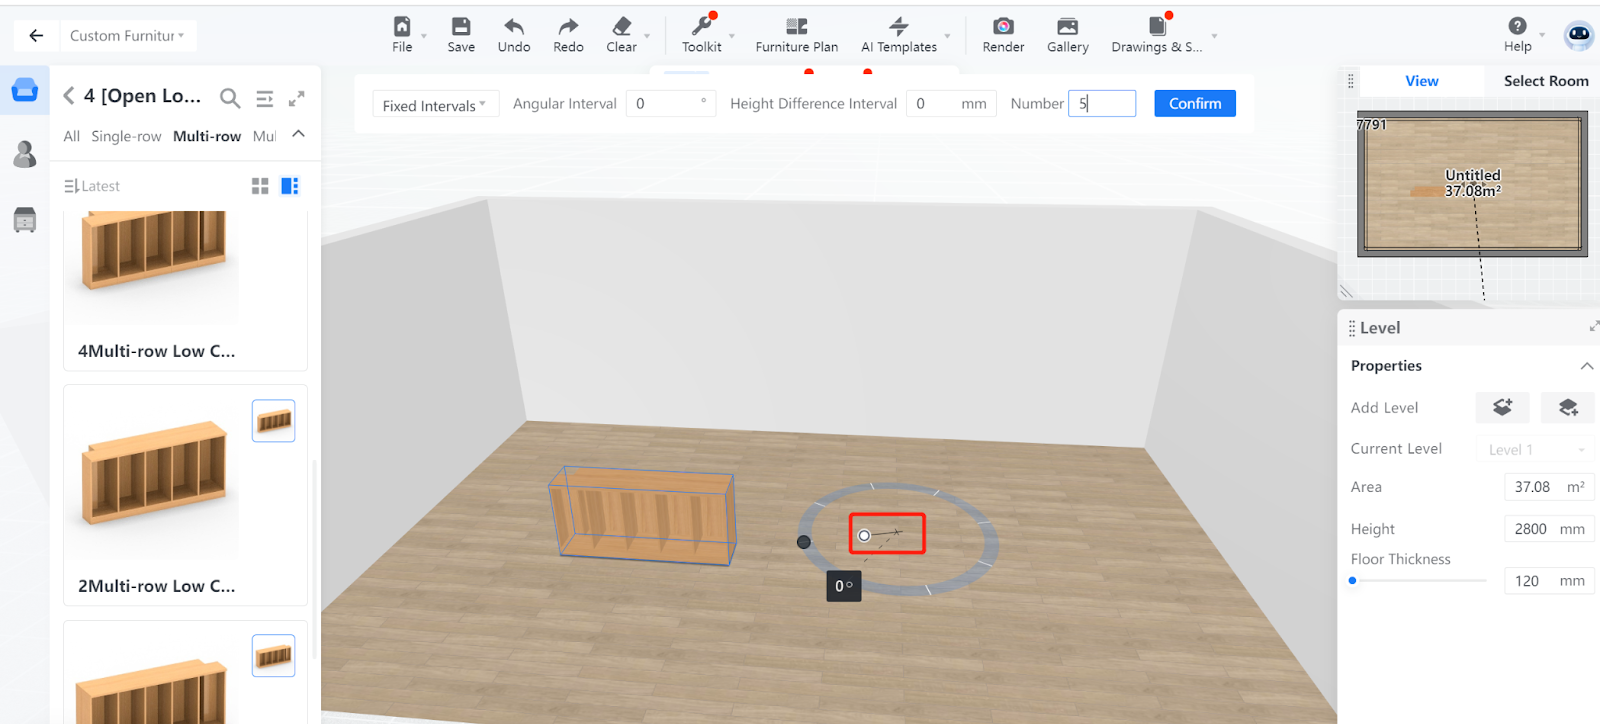
3. Next, move around your cursor to decide the angle, which is displayed inside the partly colored circular ring. The colored part changes as you move the cursor.
You can also adjust the angular interval between the models by setting parameters on the upper section of the page.
You can configure the total number of models in the Number field.
In some cases, you can even adjust the height difference, particularly when you need to place hanging furniture or components. Here, the height difference parameter is set to the default value 0.

4. Left-click or click the Confirm button, and the furniture models are duplicated in the array around the circular ring at the angular interval that you configured.
5. Note: You can press Shift or simply move the colored circle to a flat surface to switch the orientation of a circular array plane. By default, a circular array plane is shown in blue.