Overview
When you configure a wardrobe or a few cabinets in your project, you often find them placed close to or right against a wall. If you choose Floor or Ceiling in 2D view, you cannot see the front side of the wardrobe or cabinets, making it hard for you to visualize the adjustments you make.
Floor 2D View
Ceiling 2D View

Steps
-
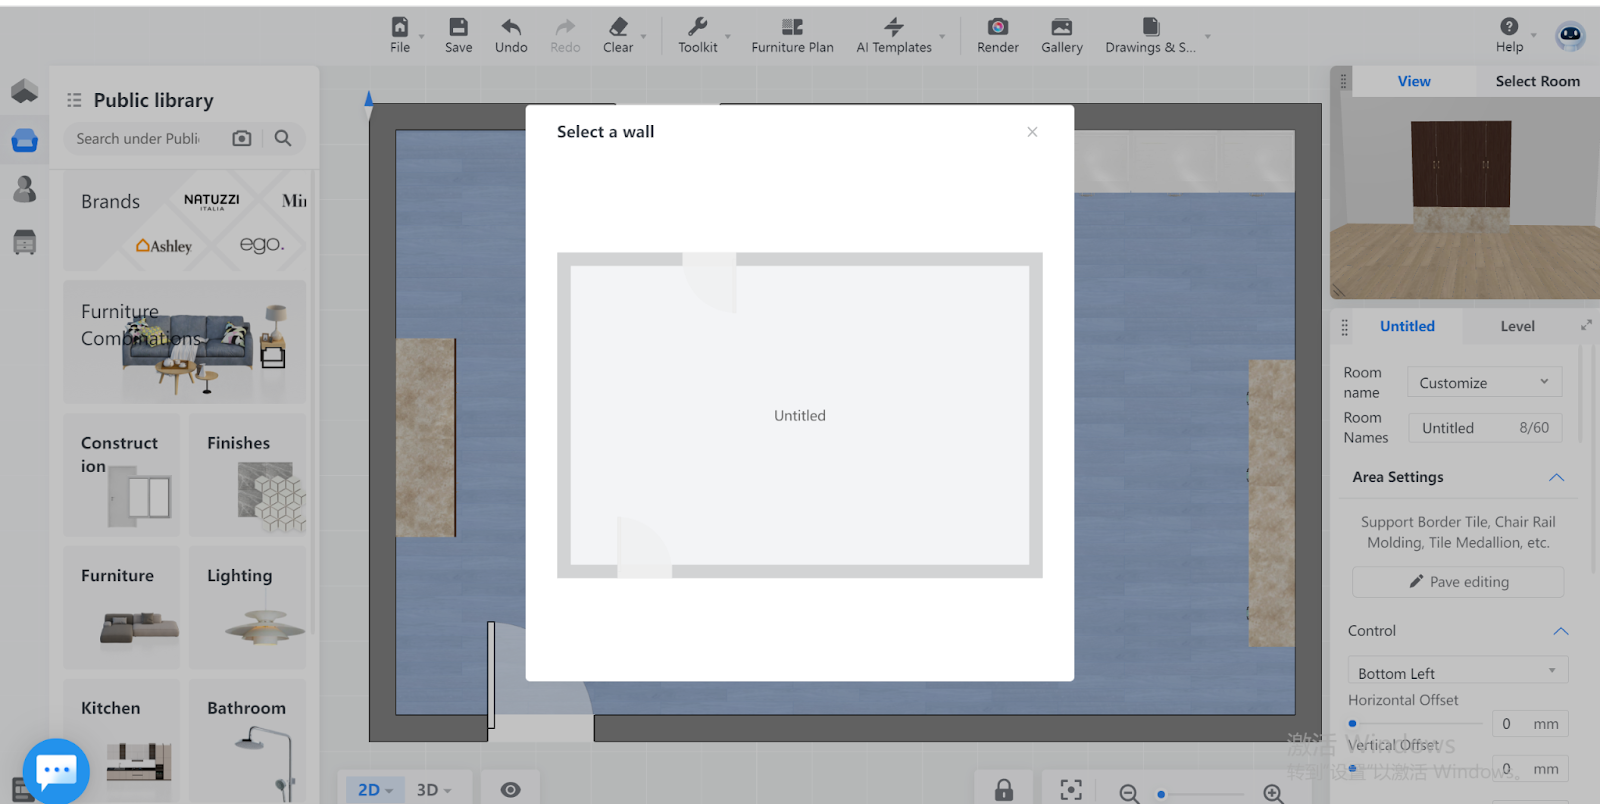
To configure your furniture intuitively even in 2D scenarios, you can switch to the Elevation view.
To configure your furniture intuitively even in 2D scenarios, you can switch to the Elevation view.
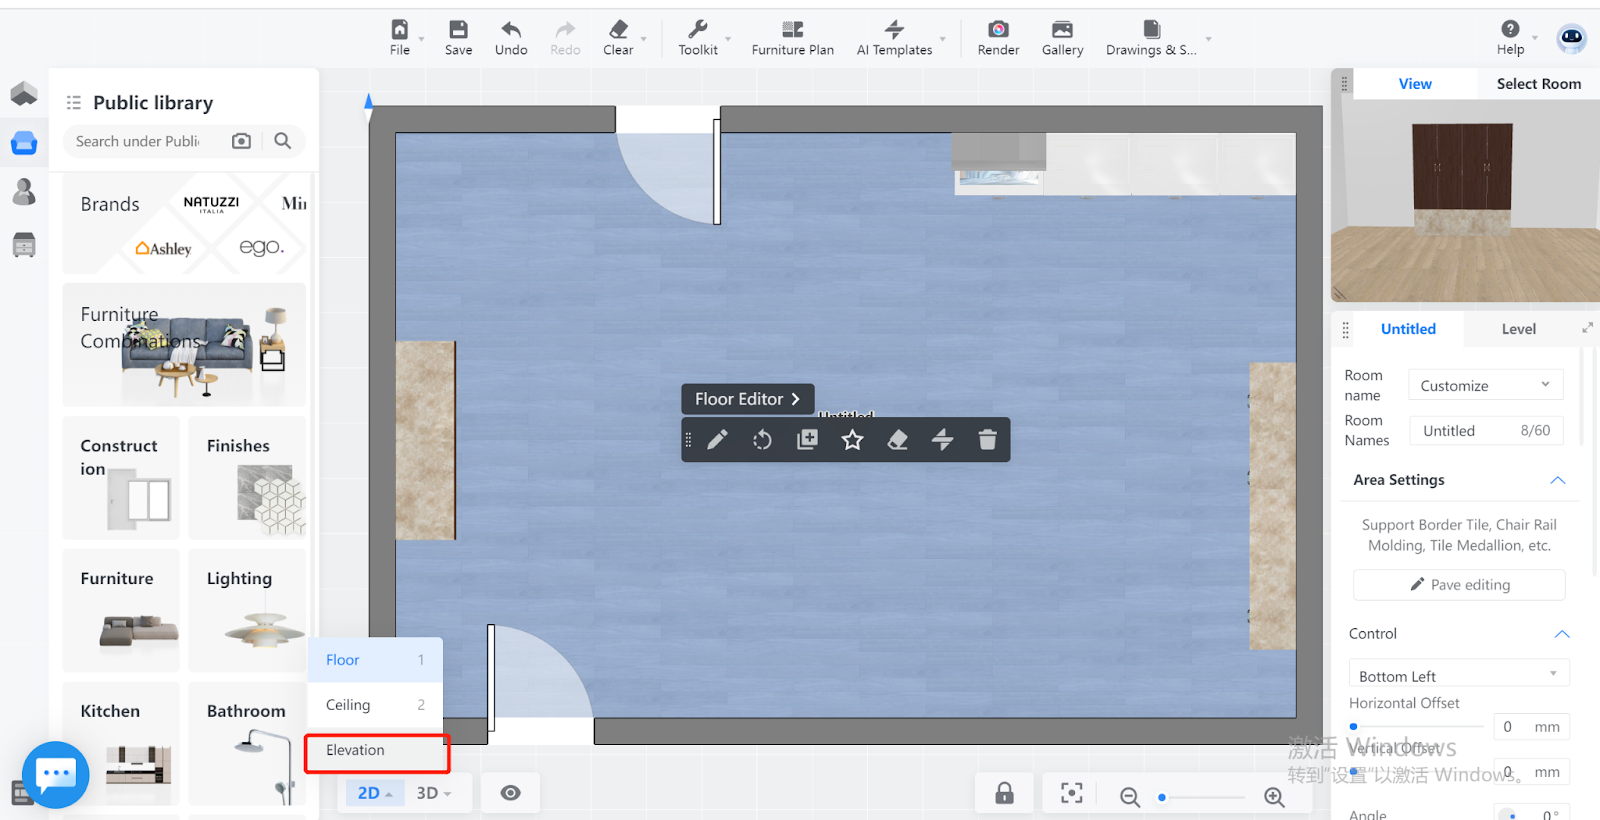
-
After you click on the Elevation option, a window pops out so that you can choose to view the elevation of a wall.
After you click on the Elevation option, a window pops out so that you can choose to view the elevation of a wall.
-
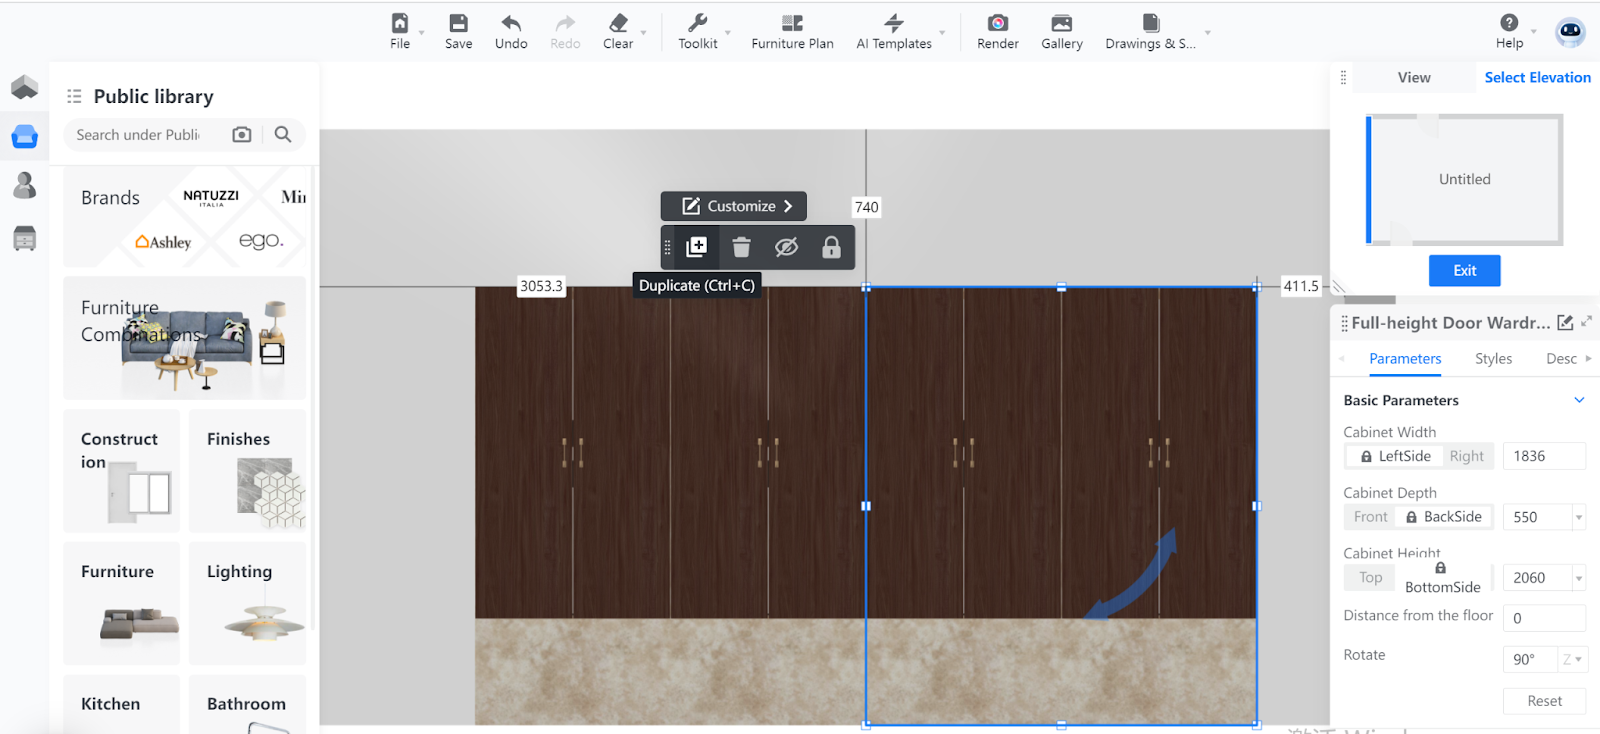
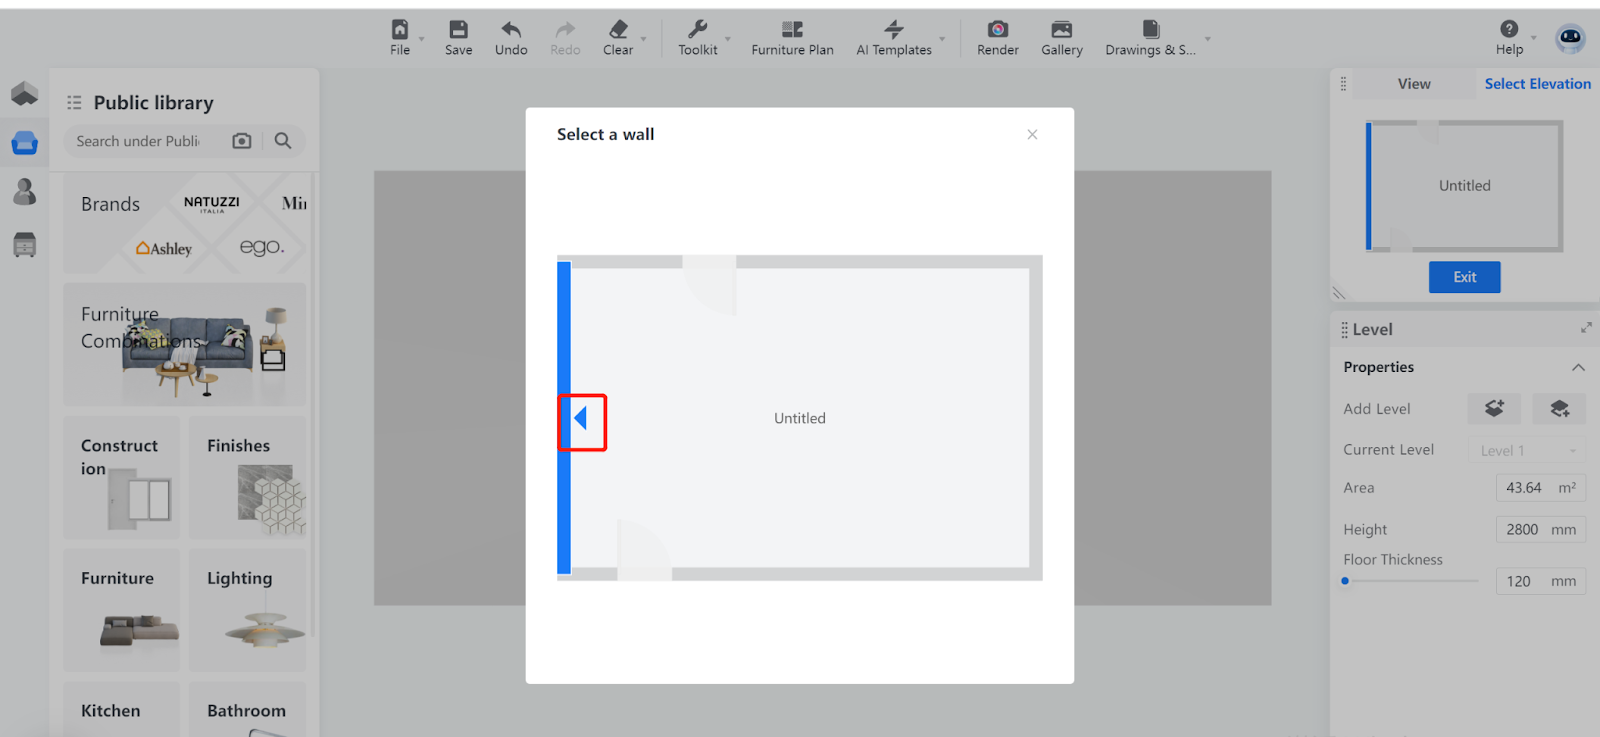
In this example, the wall on the left side behind the wardrobe is selected.
In this example, the wall on the left side behind the wardrobe is selected.
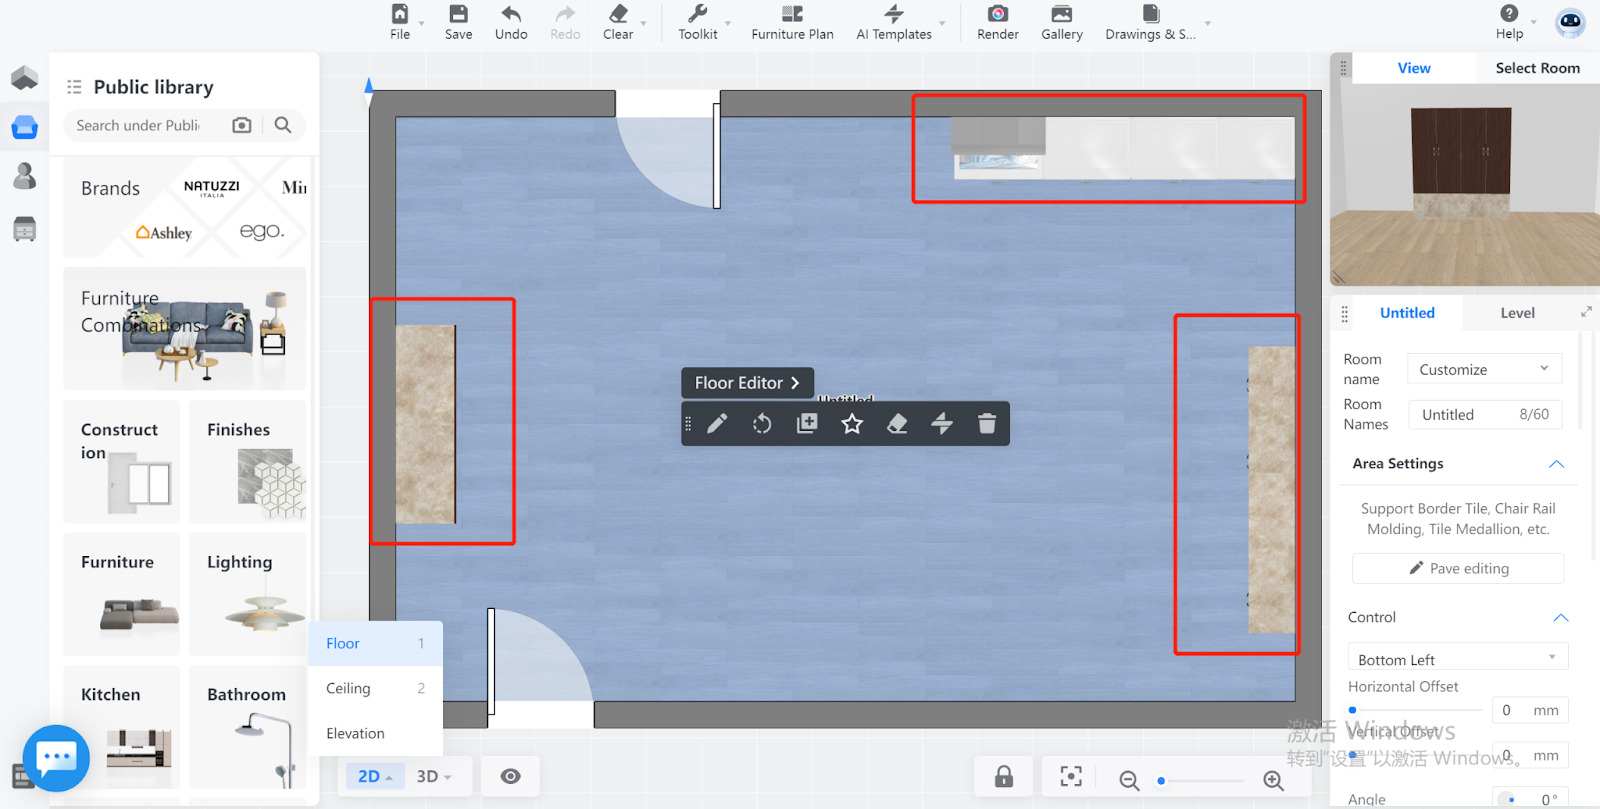
If you select the wall when the blue arrowhead is on the outside, you will see the wall from its back. In this case, you cannot see the furniture.
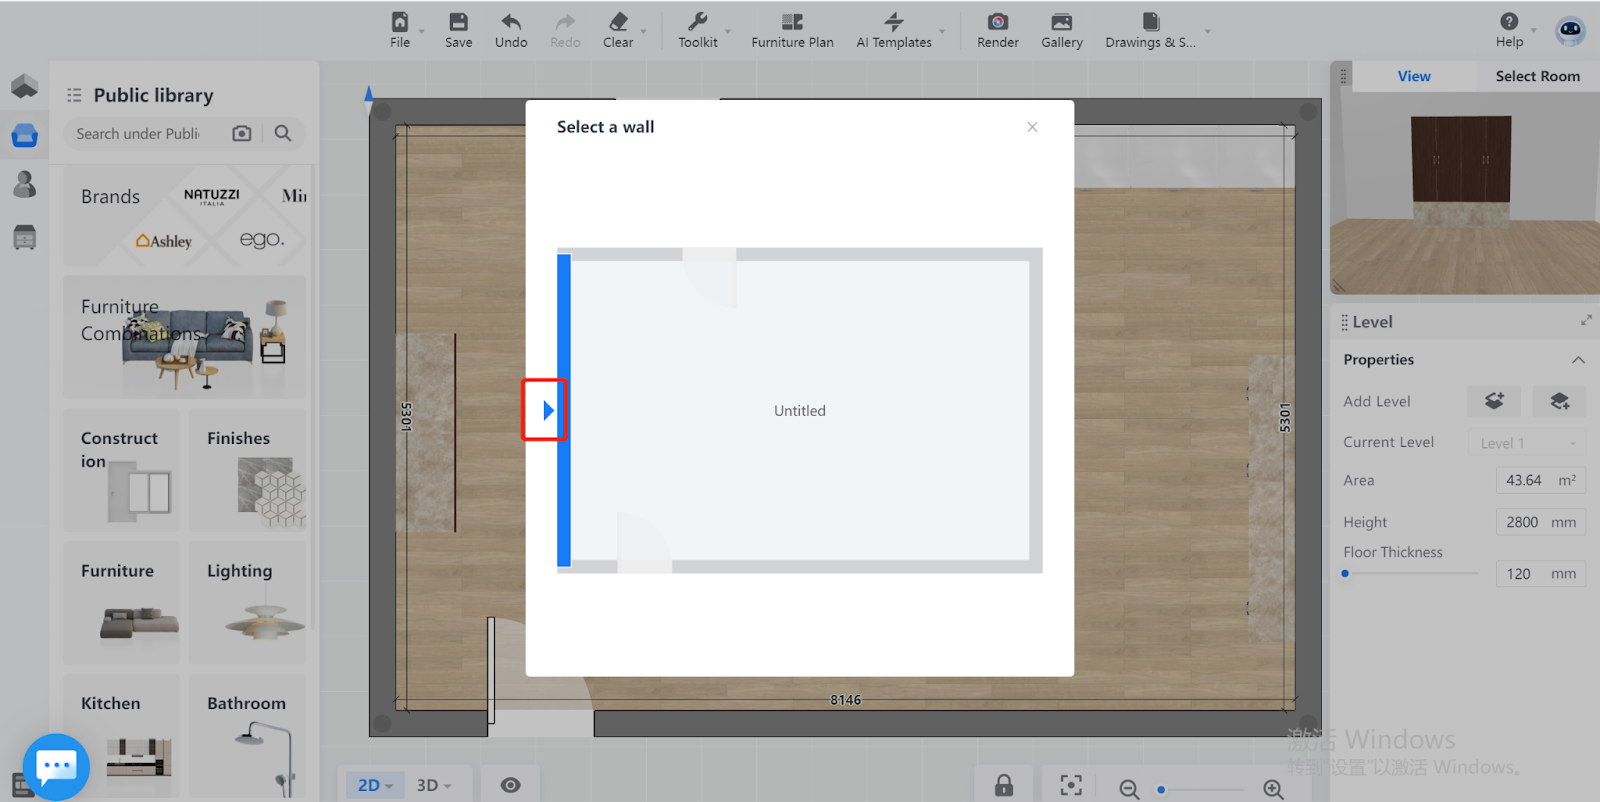
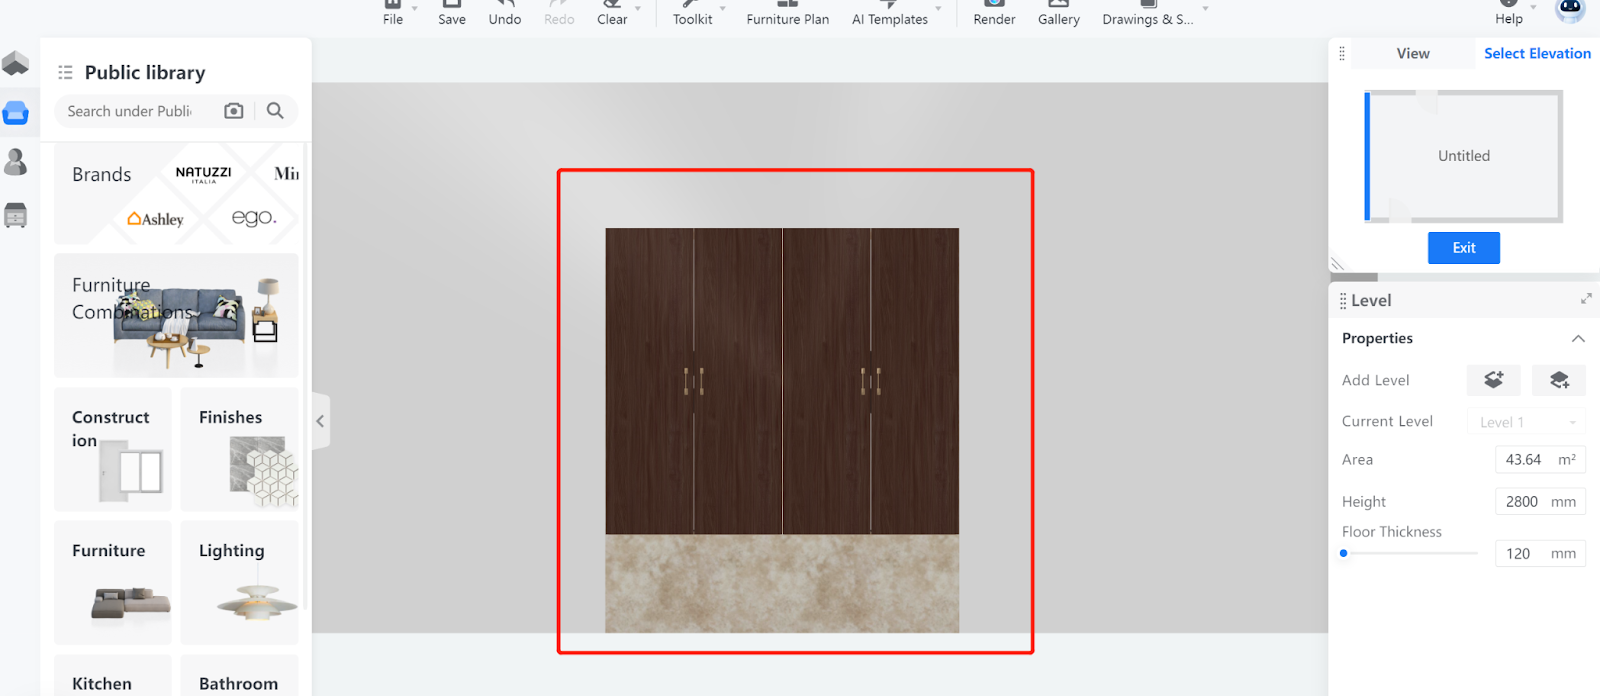
However, if you select the wall when the blue arrowhead is inside the bare floor plan, you will see both the front side of the furniture and the wall behind it.
-
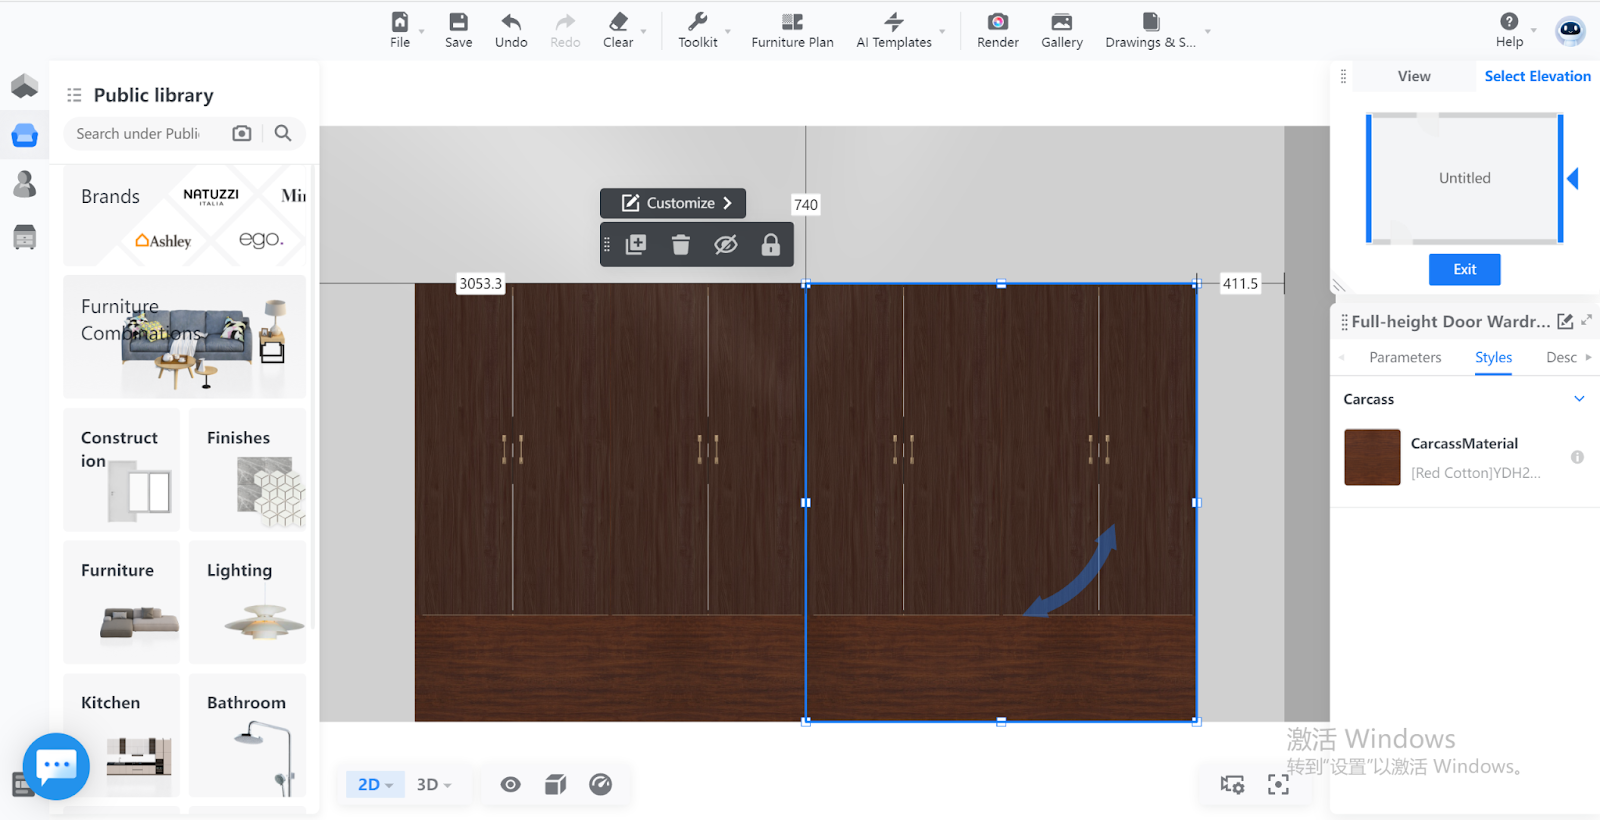
Then, it will be easier for you to rearrange the wardrobe, adjust its size horizontally, replace components, and add accessories since you can see the changes you make on the spot.
Then, it will be easier for you to rearrange the wardrobe, adjust its size horizontally, replace components, and add accessories since you can see the changes you make on the spot.