Overview
Panorama for Style Substitution are a group of panoramas that your end-customers can switch among while browsing the panorama scenes. In such panoramas, you can showcase different products/materials and display various decor styles, outdoor views and lighting to your end-customers as they switch panoramas through the Style Substitution hotspot.
Besides, if you have a particular need for showcasing various paving patterns, you can render the floor with various paving patterns in the group of panoramas as substitutions.
In a word, the Style Substitution feature enables you to create for your end-customers effect or style changes that wouldn’t be achieved by the Product Replacement feature.
Steps
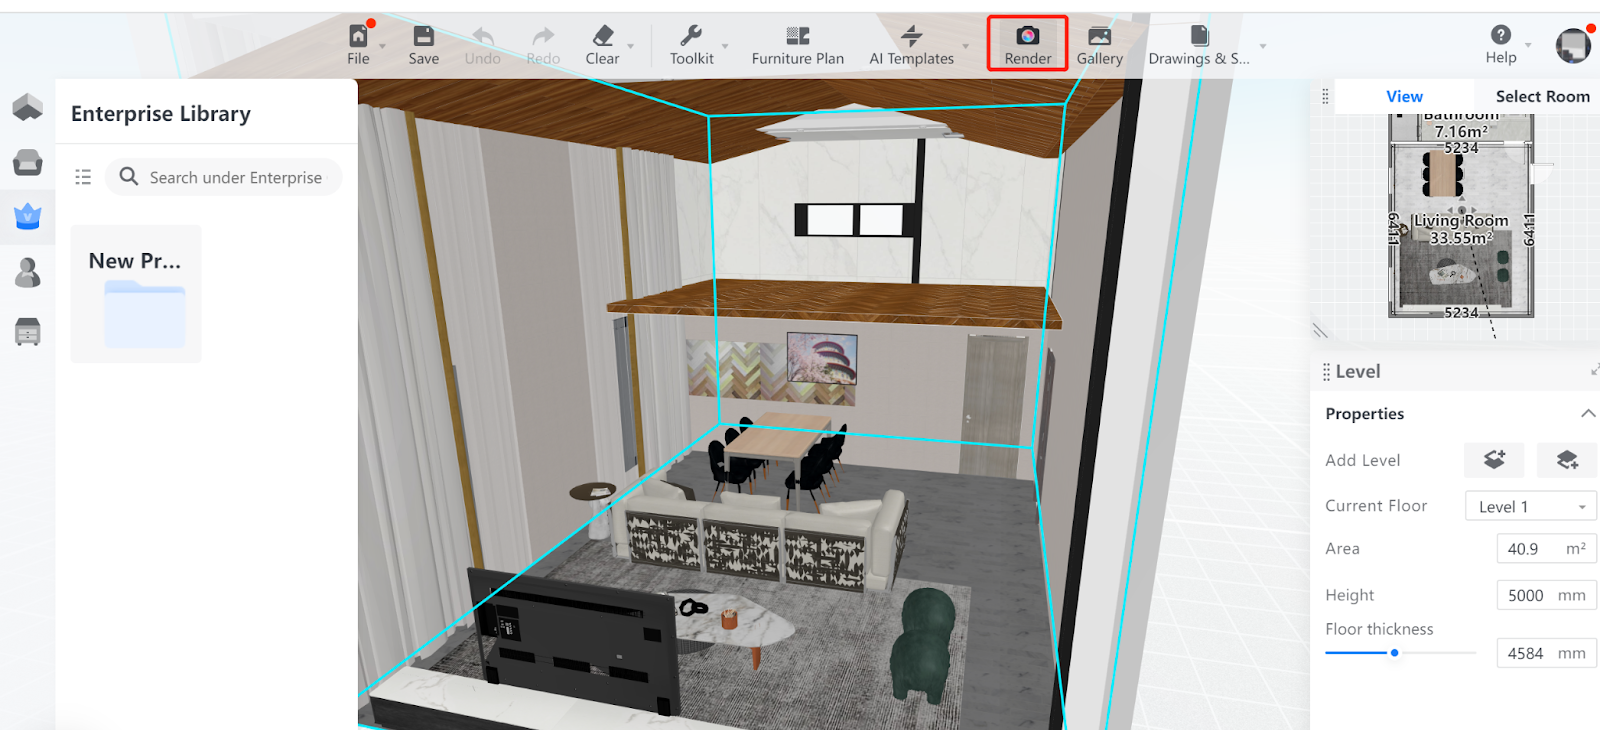
1. Enter your Saas backend. Select a project and enter the design tools.
2. When you are in the tools interface, click the Render button on the top bar.
3. In the Render page, click the 360° Panorama tab on top and render multiple panoramas with the same camera settings as a group for Style Substitution.
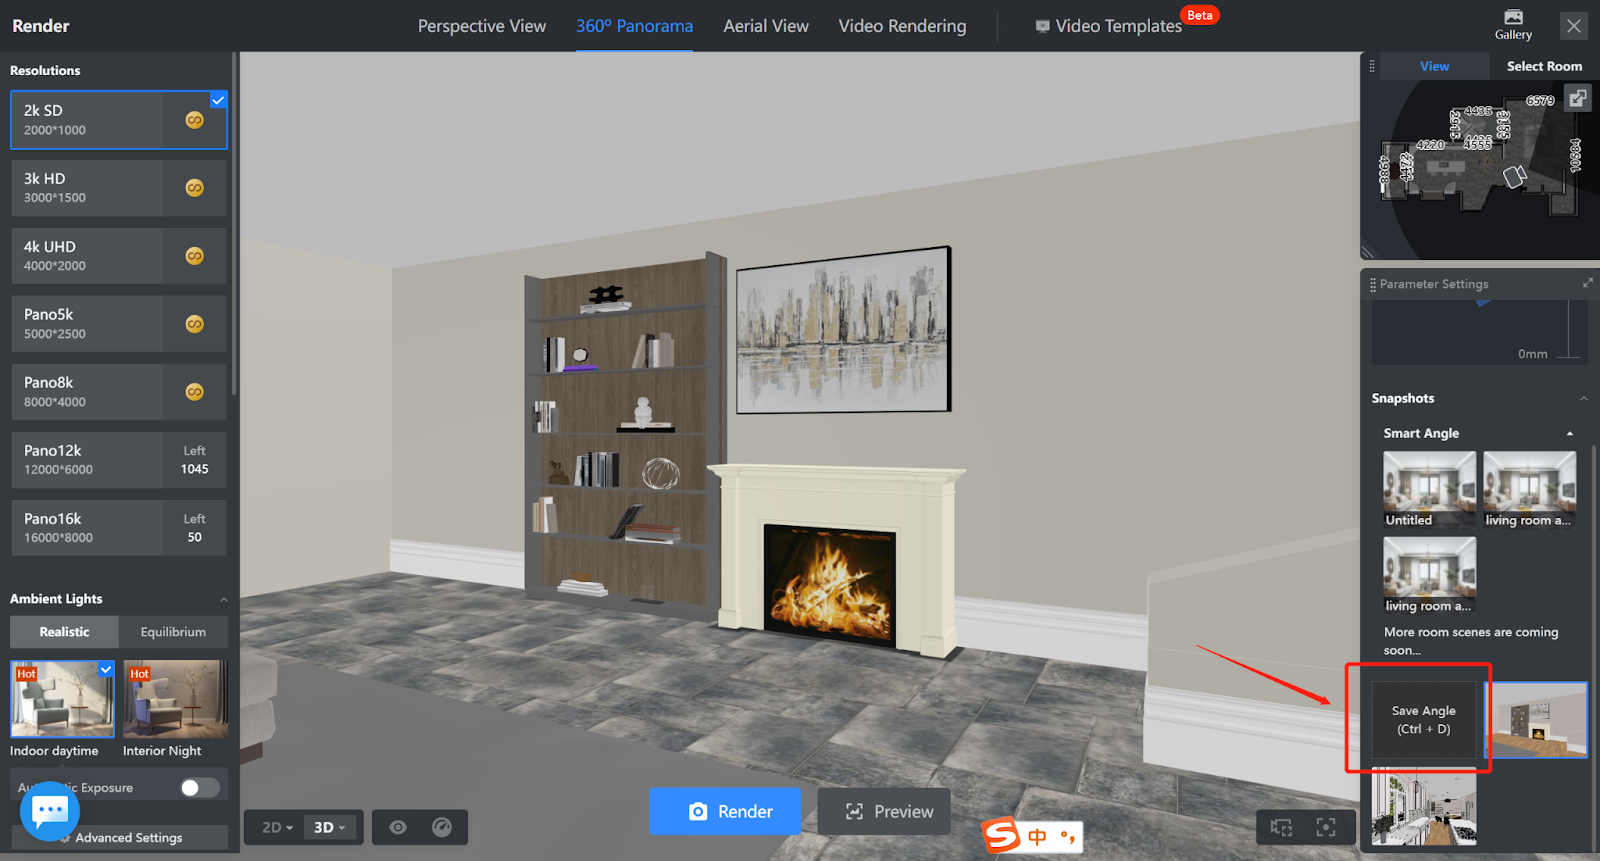
Below are the requirements for the panoramas that can be used for Style Substitution as a group.
1) The panoramas that you choose all belong to the same room scene.
2) The camera angles and positions in the panoramas are set exactly the same.
3) The resolutions of the selected panoramas may vary.
To make sure the cameras in the panoramas that you select for Style Substitution are in the same angle and position, you can click Save Angle at the bottom of the Snapshots section in the right-side pane when you get done with the first rendering of the panorama group. This way, you can have the same camera settings for your next few renderings of the panorama group.
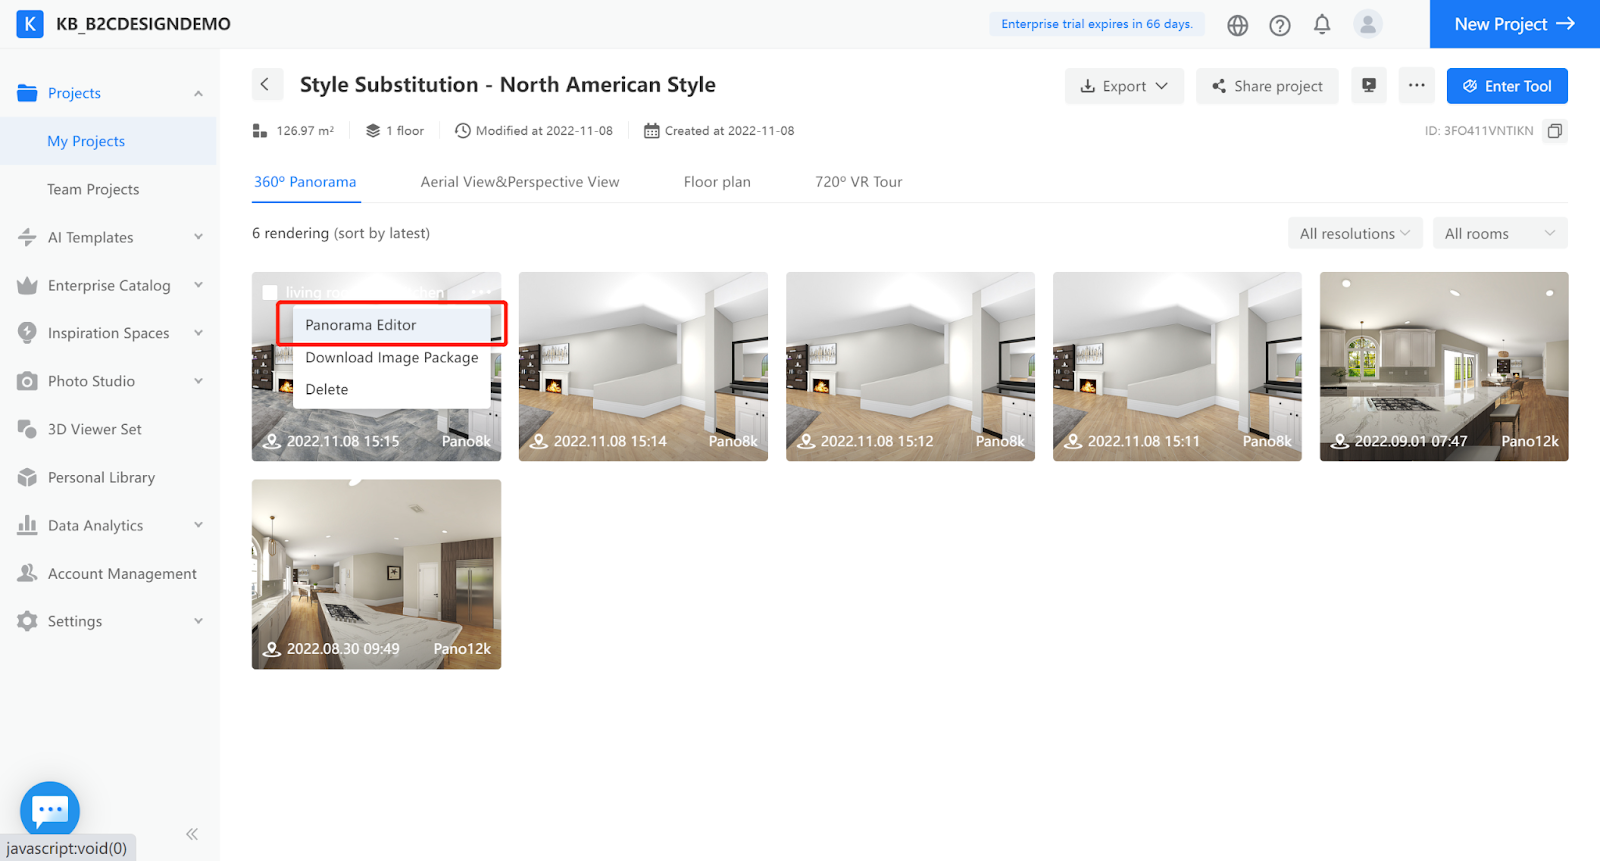
4. In the Saas backend, click My Projects in the left-side navigation pane. Select a project and click View Project.
In the details page of the project, click on the thumbnail of a panorama. In the drop-down menu that appears, click Panorama Editor.
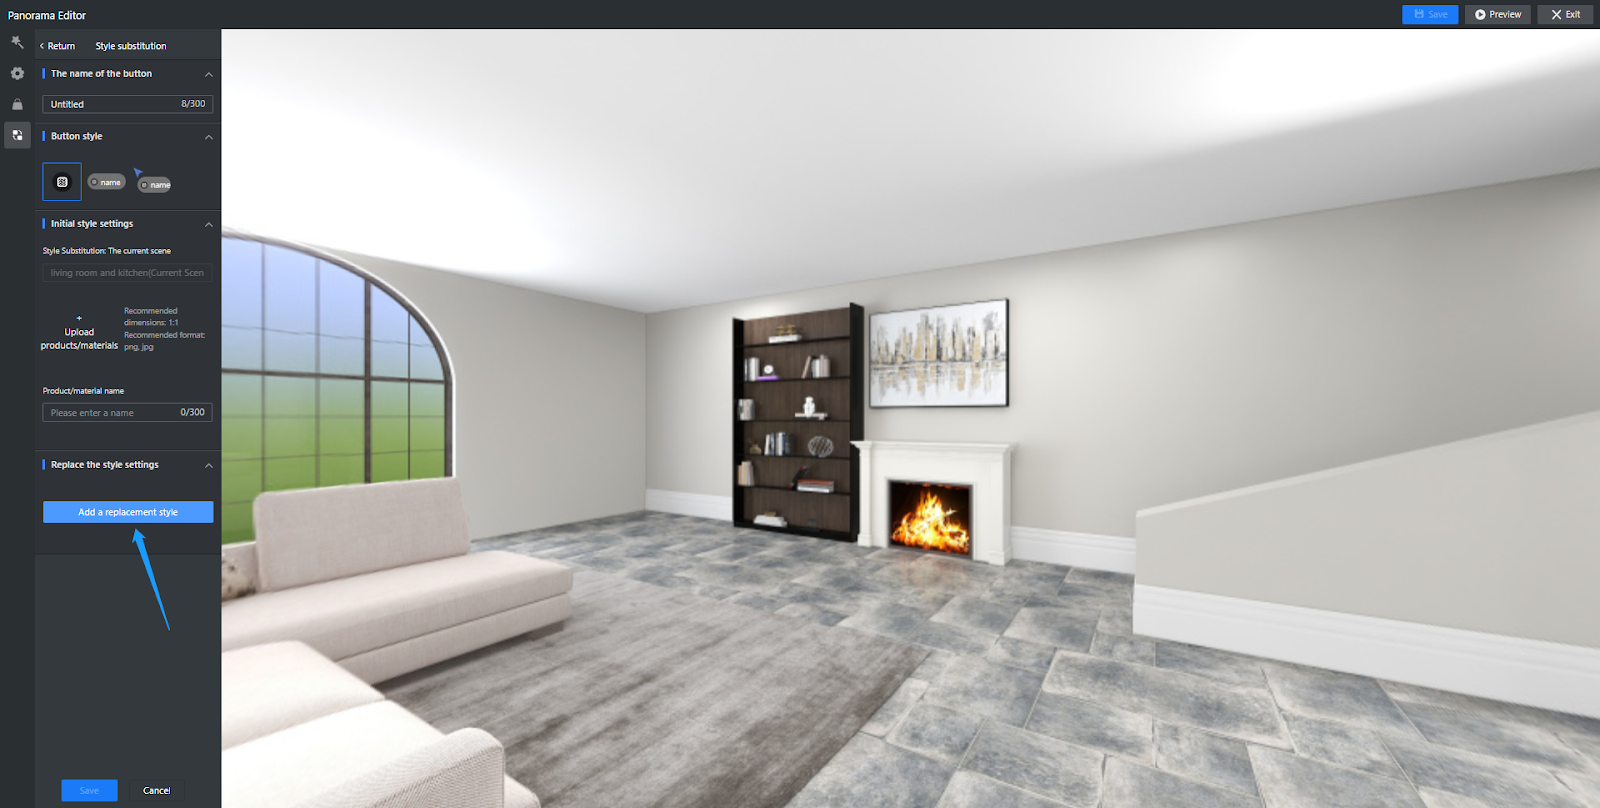
5. In the Panorama Editor page, click the Create Style Substitution button.
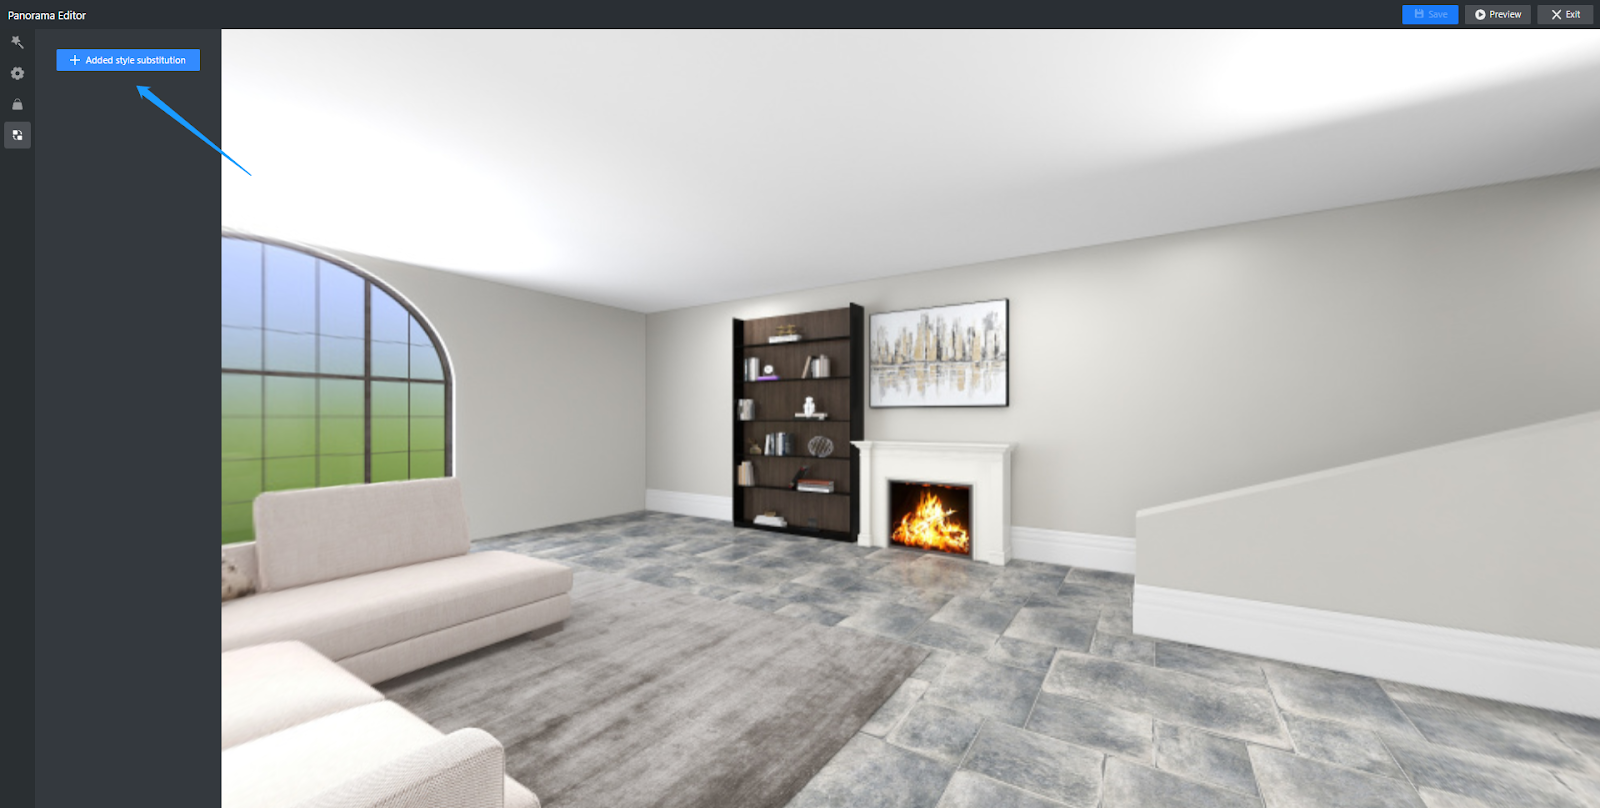
Next, configure the default or initial style settings for the current scene by uploading a product/material from Enterprise Library or your own device, naming the product/material, and setting the name and style of the hotspot users click on to enter Style Substitution.
For example, you want to have an offset tile paving pattern on the floor of the current panorama. Simply enter “Floor with offset tile paving pattern” or other similar names in the Product/Material Name field. Then, select a texture map for offset paving accordingly after clicking the Upload Product/Material section.
You can also customize the name and style of the button that users click on to enter this panorama for Style Substitution. The button can be a mere hotspot of thumbnail or one with a name that you give.

6. Afterwards, click the Add Style for Substitution button down below and select another panorama in the group, followed by the same steps to name another product/material for substitution, select and upload the corresponding texture map, and customize the name and style of a new hotspot button. This goes on till you have configured all the panoramas in the group for style substitution.
When you have configured all the panoramas for Style Substitution, click the Save button in the bottom-left corner of the page. Next, click the one near the top-right corner of the page before you exit the Panorama Editor.
7. When you go back to the panorama, you will find the Style Substitution hotspot in the scene.
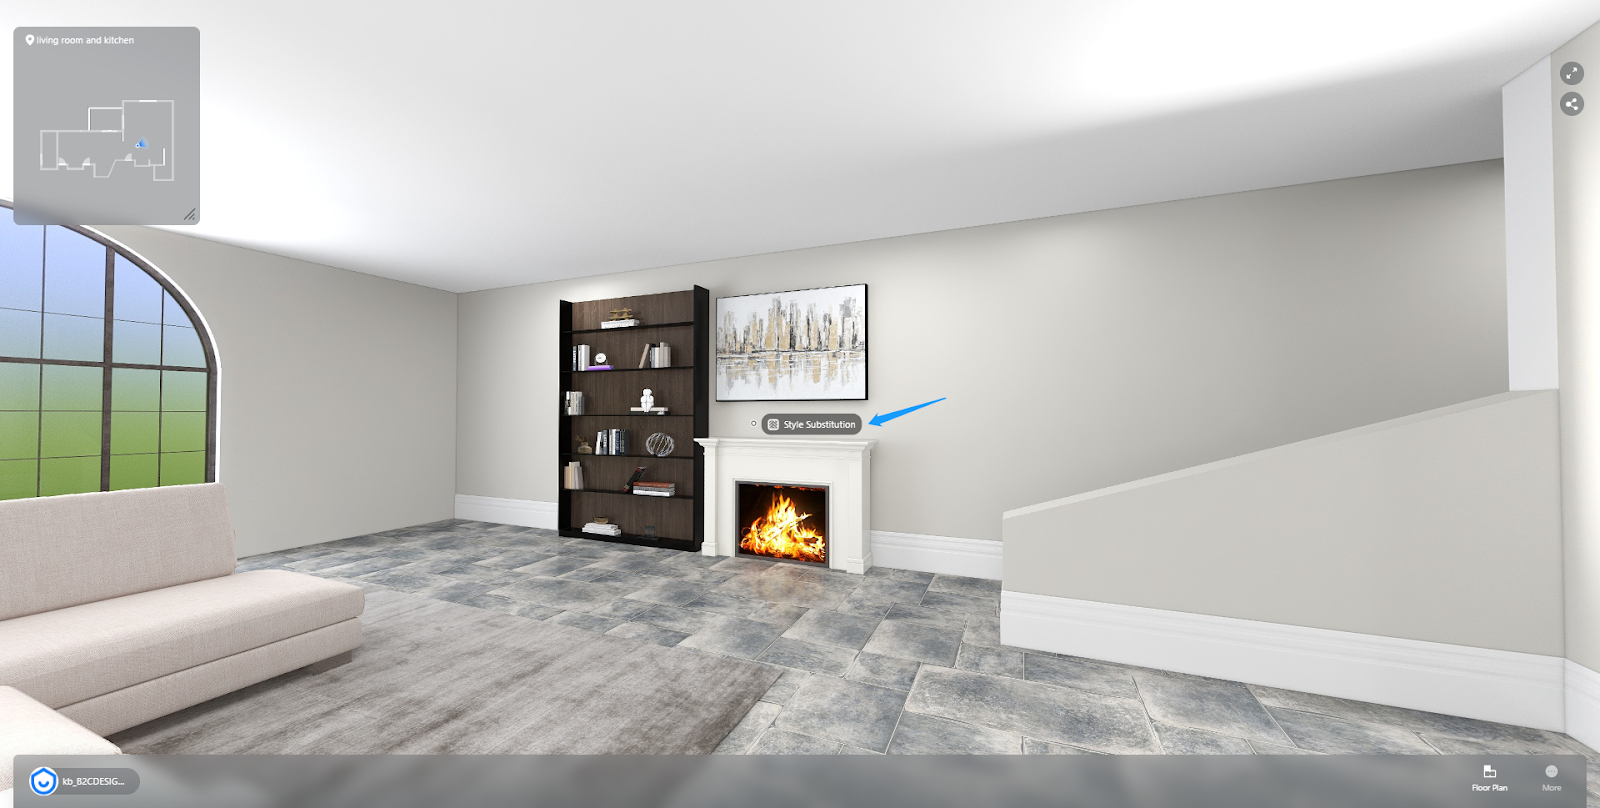
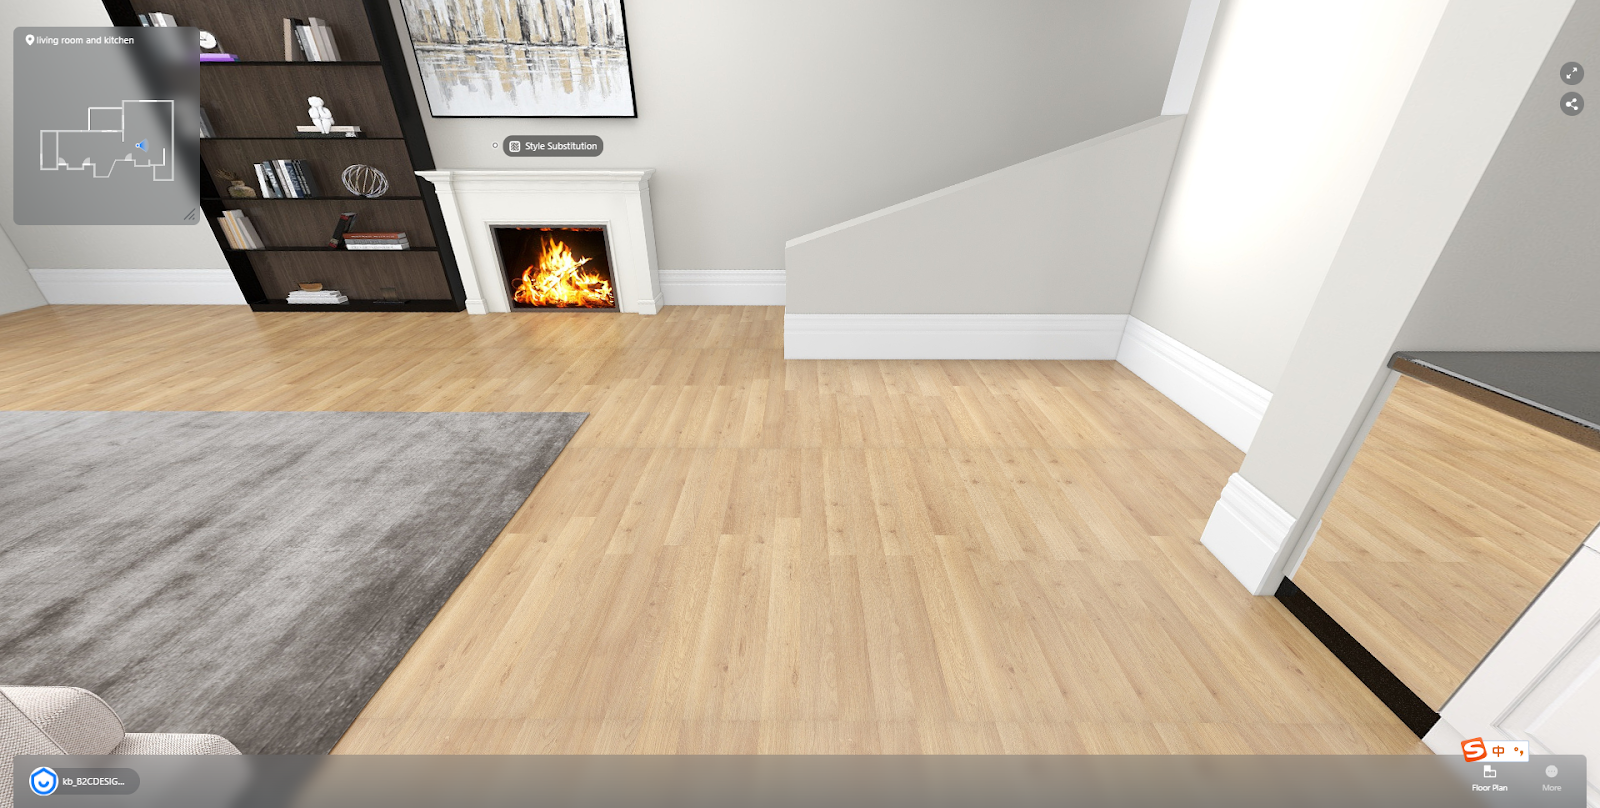
8. Click on it, and you can switch to a panorama based on the configured style of product/material that you select.
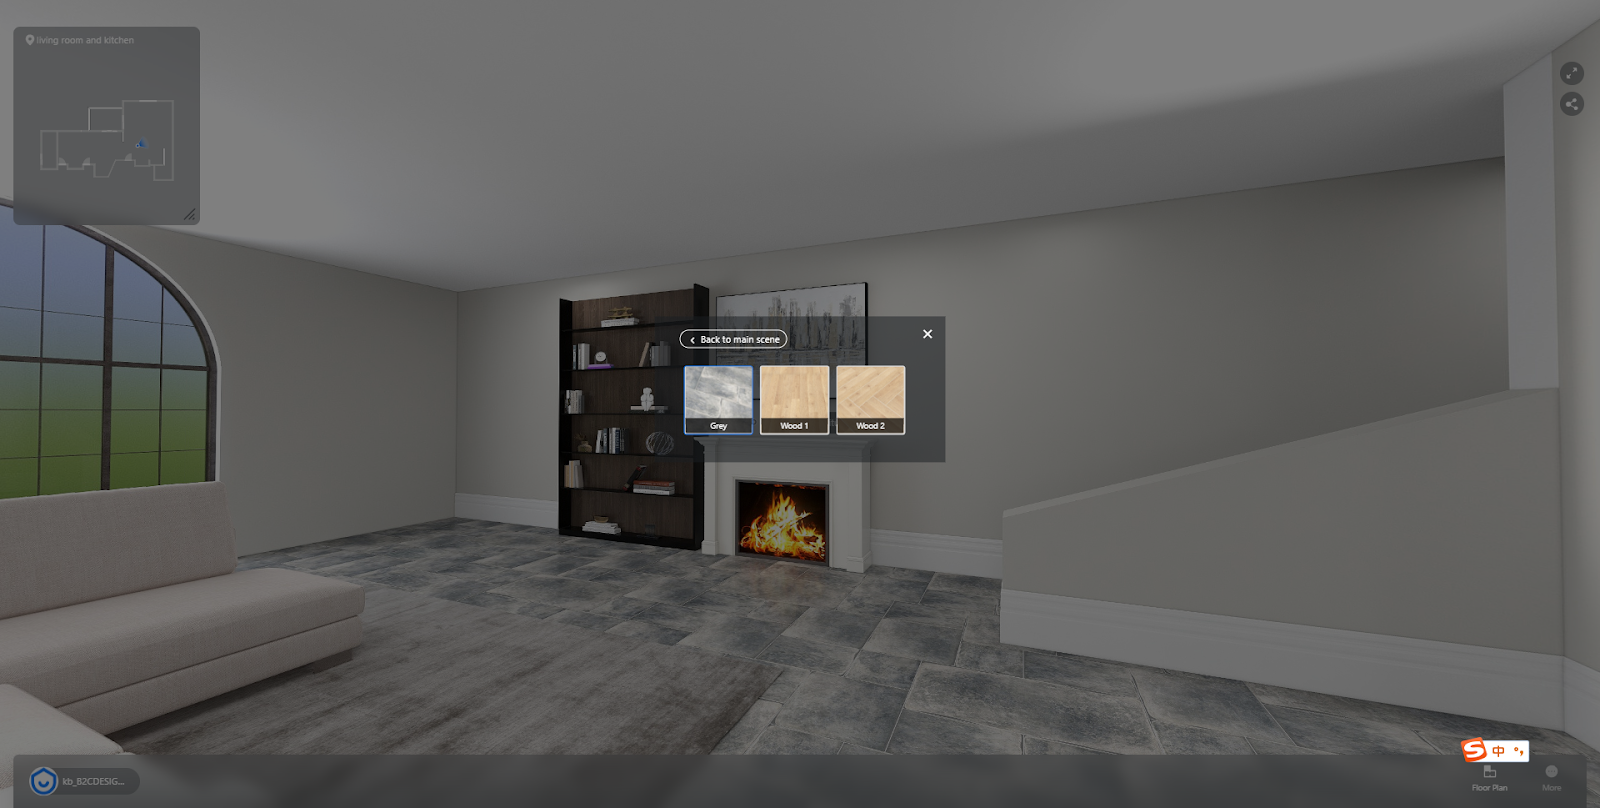
In the example below, we select a style of wood floor previously configured, namely Wood 1, to see what the floor will look like with this pattern in the panorama scene.
Note: The Style Substitution feature cannot be used in combination with Product Replacement at the moment. Please be careful while using the feature.