Overview
If you are an enterprise user, the Photo Studio Dimming Tool allows you to add lights, create and adjust lighting as well as customize the lighting effects. This way, you will be able to shoot photos that look more realistic and natural, reflecting details of real scenes.
Access
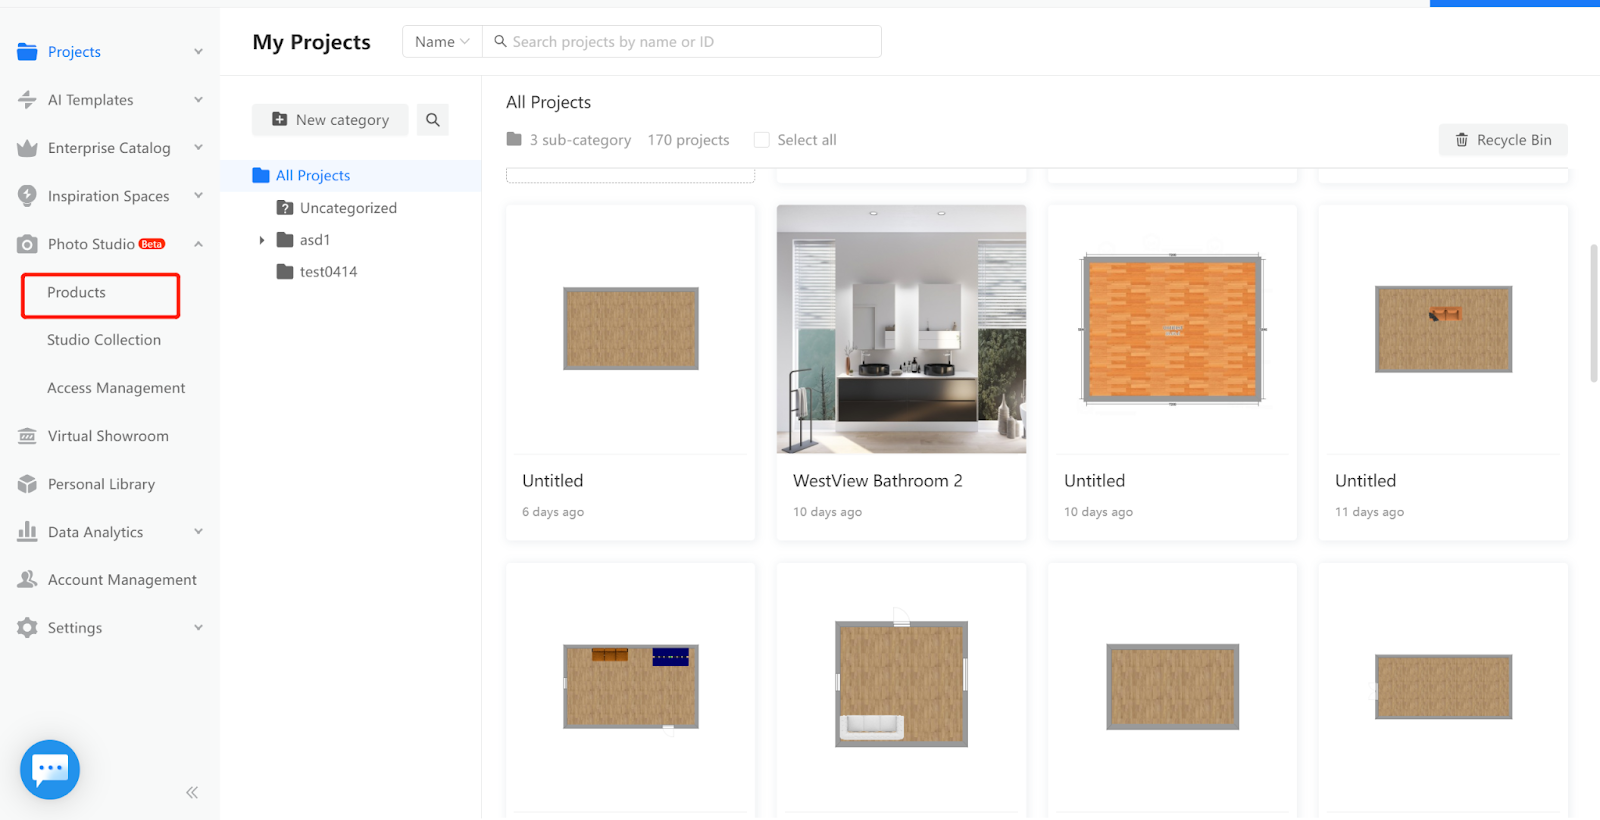
1. Log into your Coohom enterprise account. In the left-side navigation pane, click the Photo Studio icon. In the drop-down menu that appears, click on Products.
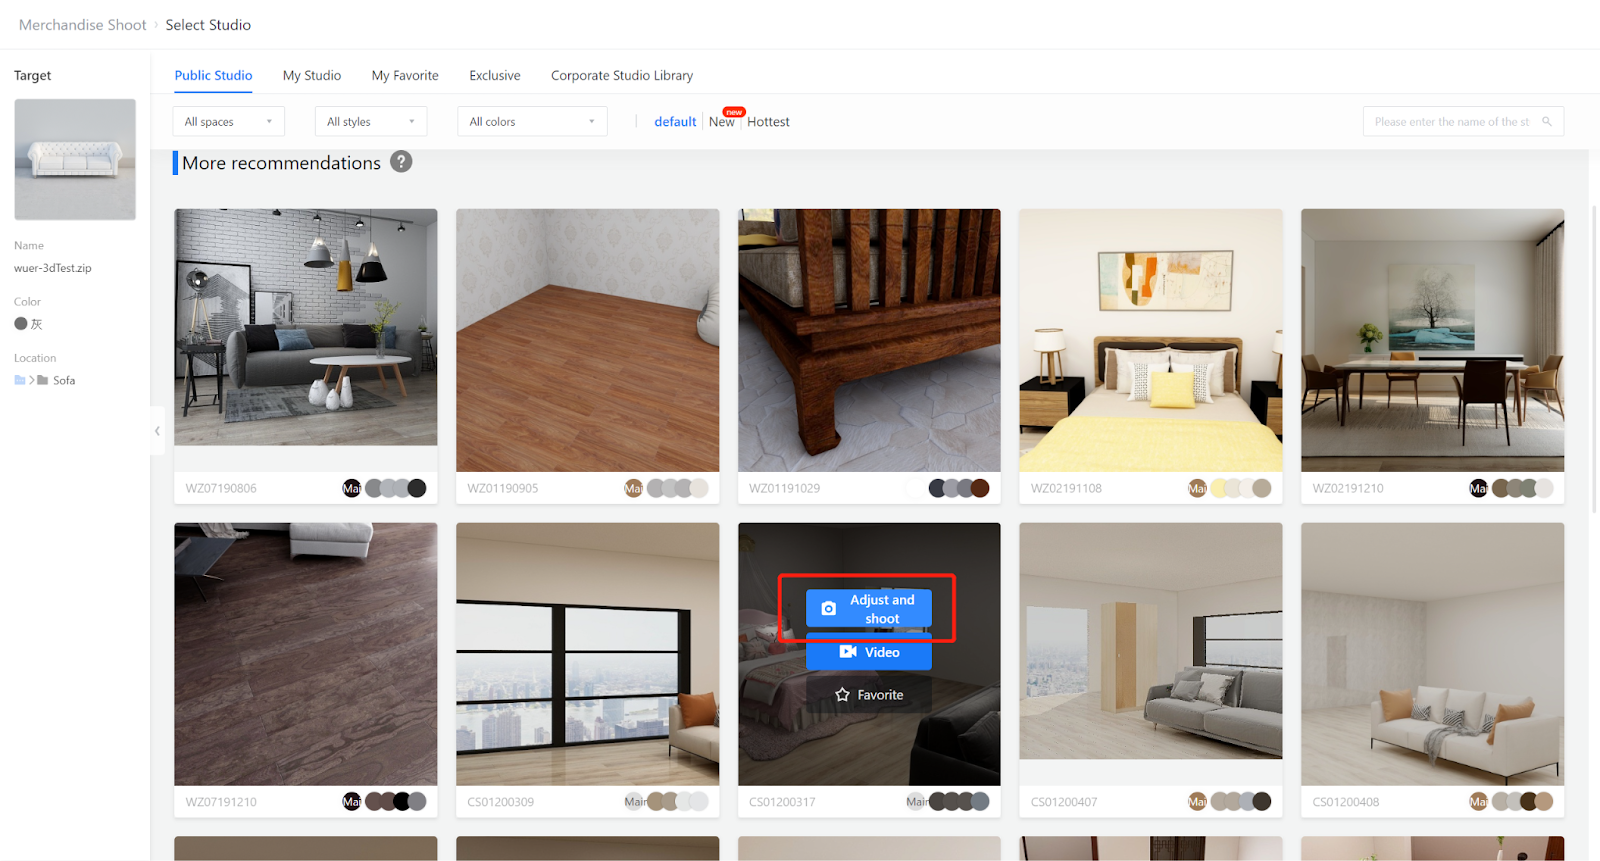
2. Hover your cursor over the preview of the product you want to shoot photos for. Then, click the Studio button.

3. In the page that appears, click on the “Photo” or “Adjust and shoot” button.

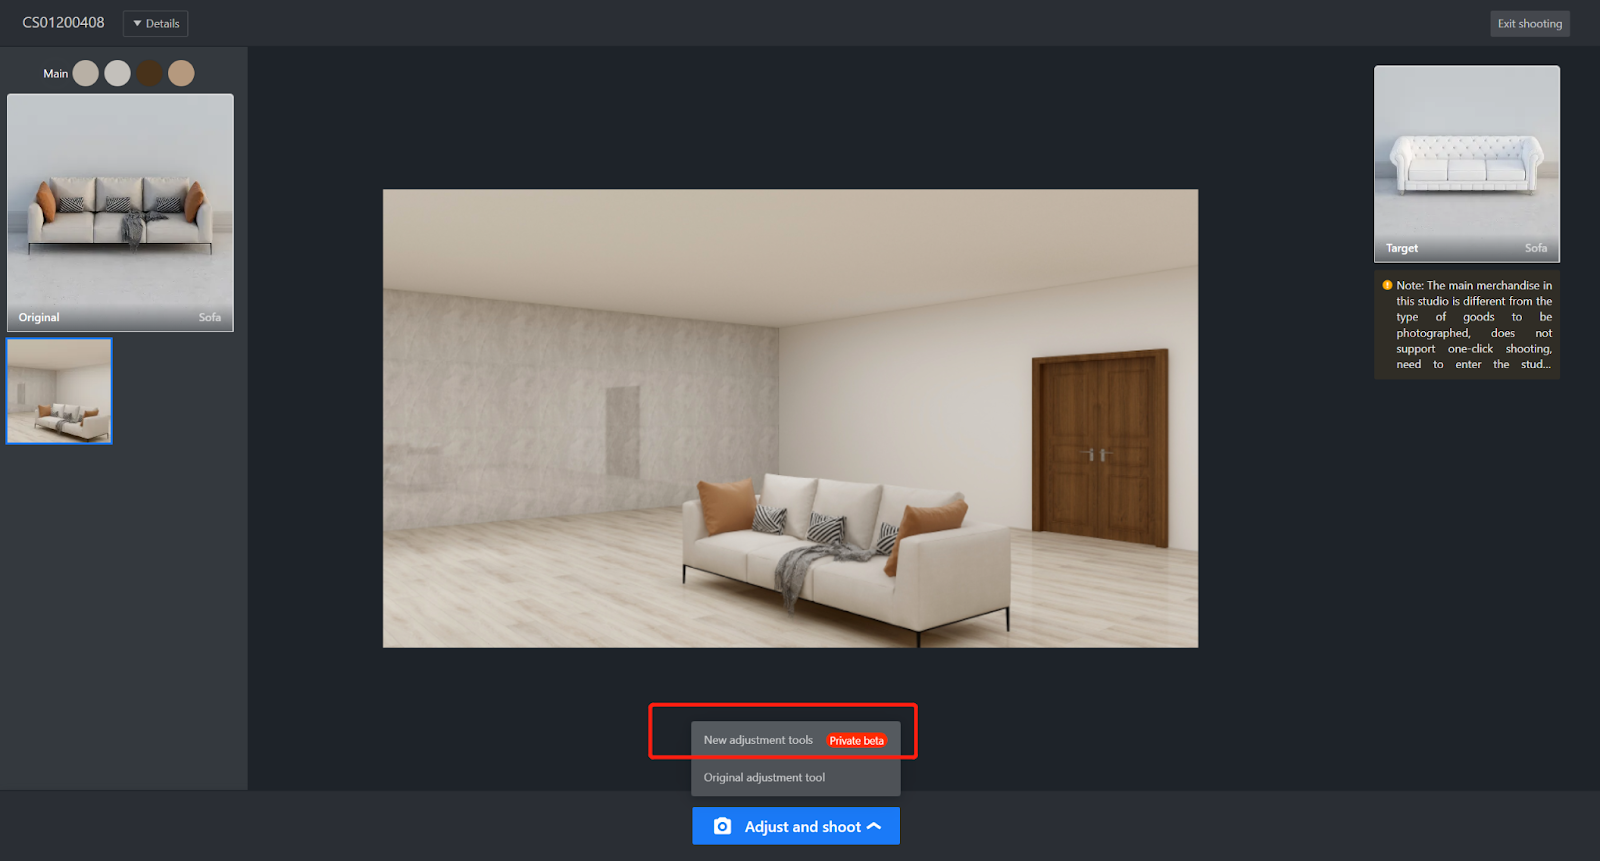
4. If you click the Photo button, then click on the Edit button at the bottom-right corner. Then, choose the “New adjustment tools” option.

If you click “Adjust and shoot”, click on the “Adjust and shoot” button at the bottom. Then, choose the “New adjustment tools” option.
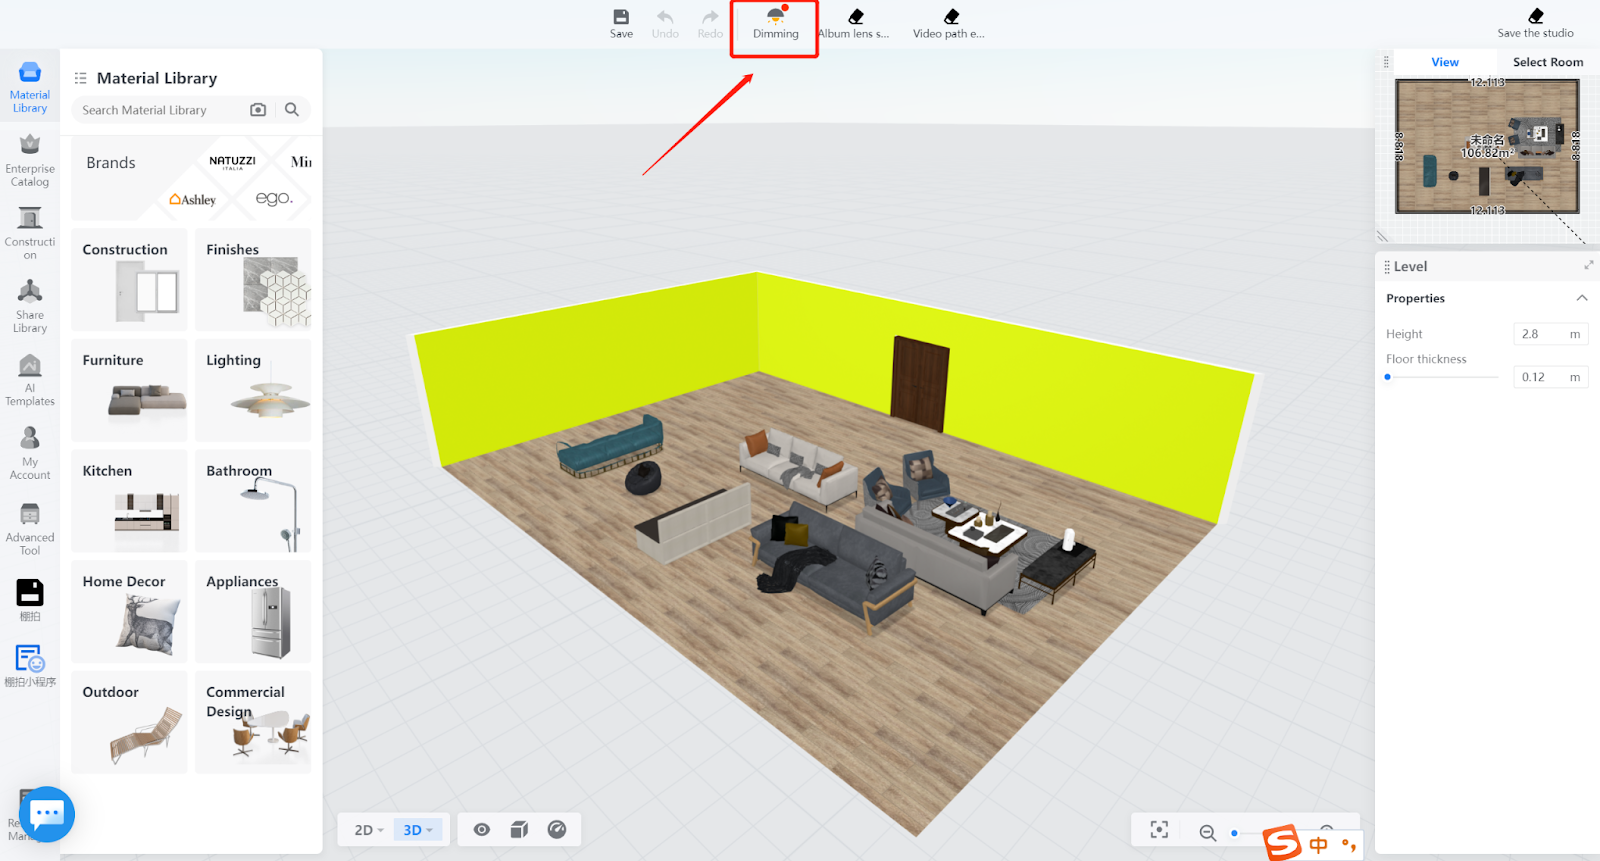
5. On the interface for studio editing, click Dimming on the top bar to start using the lighting adjustment tool.
Features about the Dimming Tool
The lighting adjustment features of the Dimming Tool are similar to those in the design tool. They both support adjustments of Sunlight and Light Source. However, the Dimming Tool includes more than that as it offers the Environment section that allows you to add and edit images of outdoor scenes for your studio.
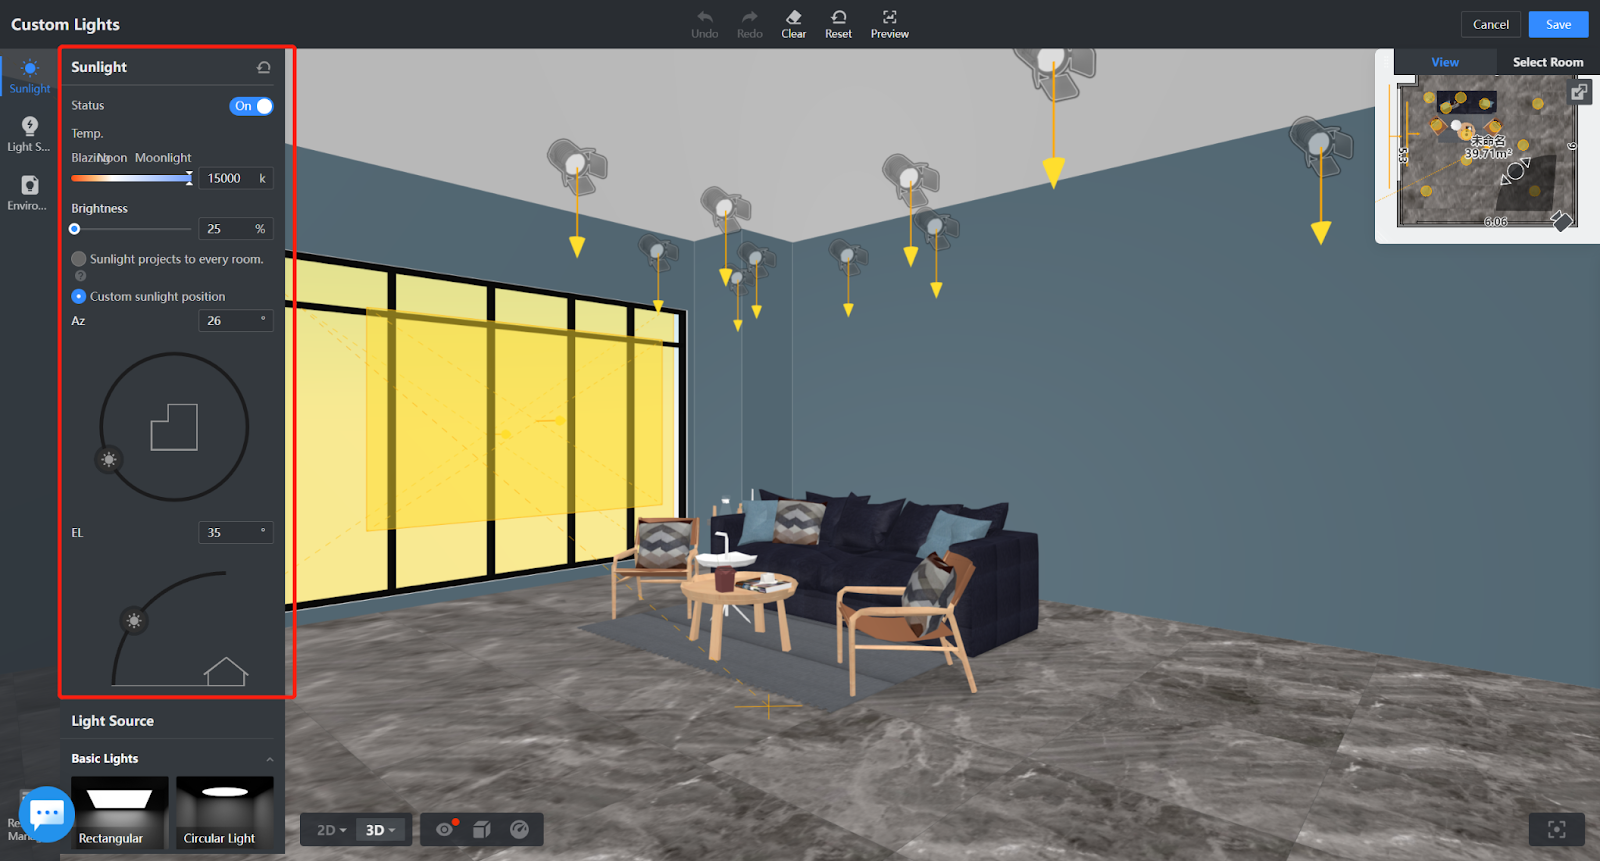
Sunlight
You can choose to enable or disable sunlight in your studio. If you enable it, you can adjust the temperature, brightness, angle, height, etc.
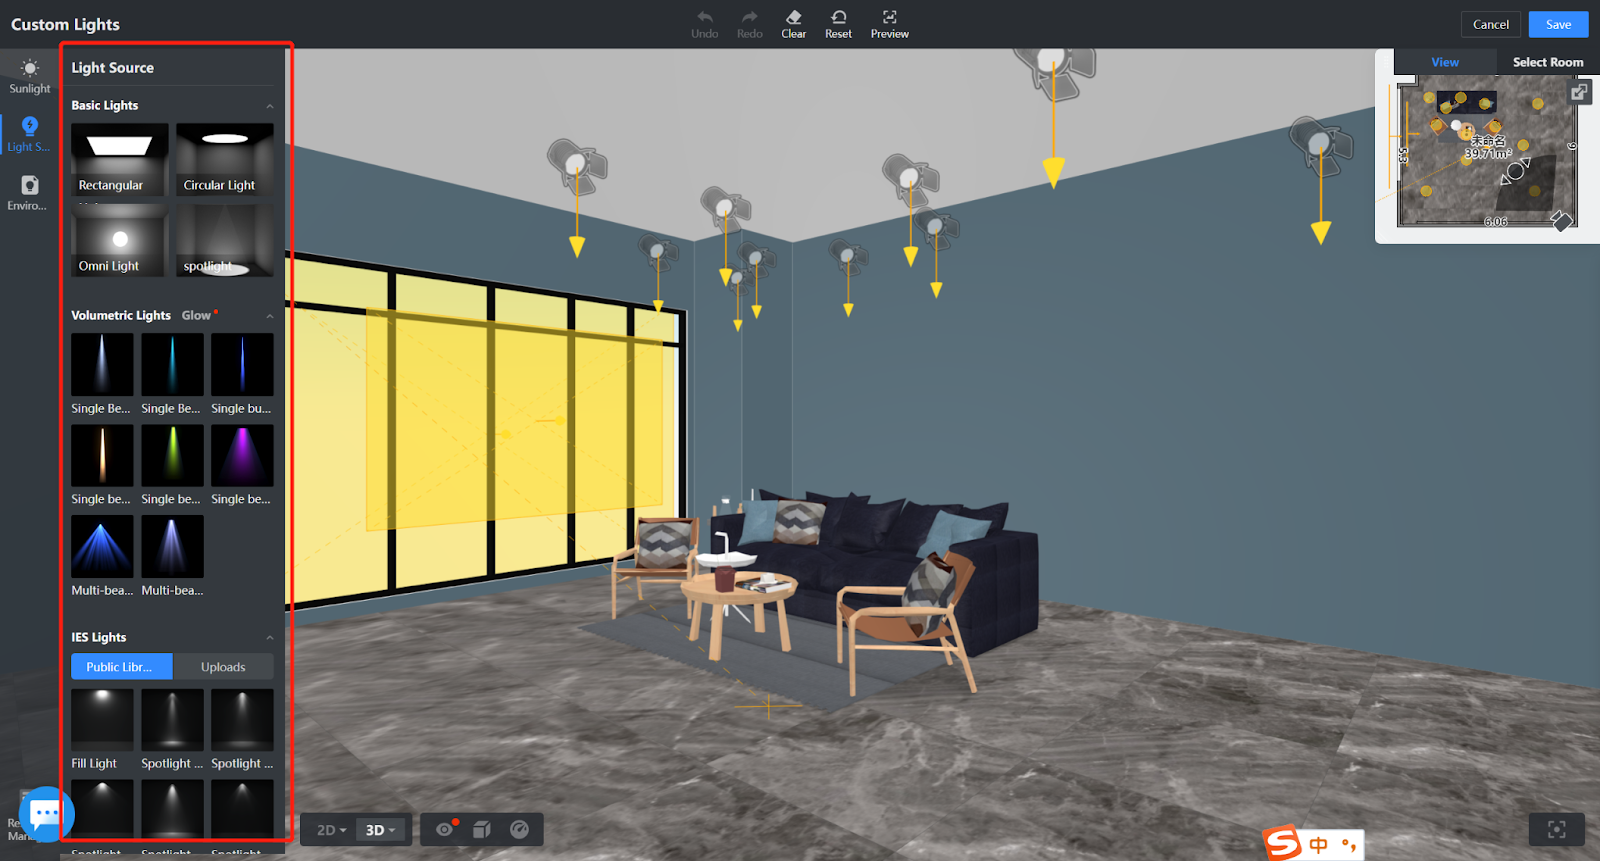
Light Source
Below are the three types of light source available.
-
Basic Lights
-
Volumetric Lights
-
IES Lights: You can select light sources of this type from the public library. You can also upload your own IES lights.
Basic Lights
Volumetric Lights
IES Lights: You can select light sources of this type from the public library. You can also upload your own IES lights.
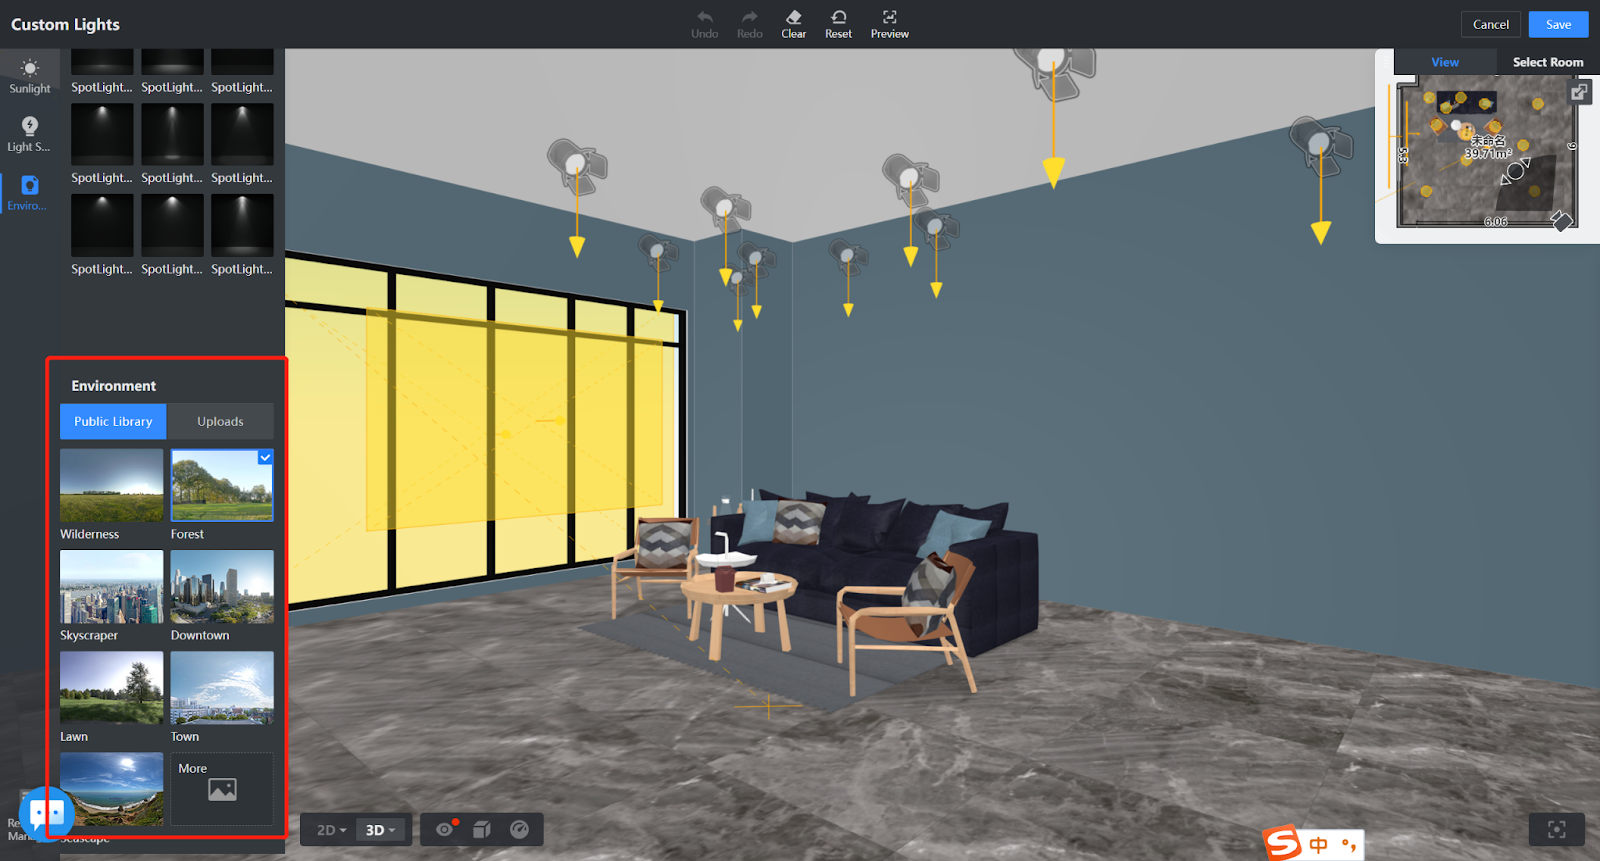
Environment
In the Environment section, you can select images of outdoor scenes from the public library or simply upload images of your own. After that, you can edit the images as needed.
When you have finished adjusting the lighting, click the Save button at the top-right corner before leaving the page.
When you are back to the interface for studio editing, you can make other adjustments. After that, click the “Album lens settings” on the top bar to go back to the photo shooting page. Then, click Shoot Now, and the photos that you shoot will have all the lighting effects that you’ve adjusted for the studio.
The same goes for video shooting. After you adjust the lighting, the dimming parameters will be synced to the studio that you use for video shooting so that the videos that you shoot will have all the effects configured.
