Target Users
-
Admin users of Coohom enterprise account
-
Sub-account users with the permission to upload materials
-
Individual designer account users
Admin users of Coohom enterprise account
Sub-account users with the permission to upload materials
Individual designer account users
What is the Real-time Material Editor?
In the real-time material making tool, you can replace the material of 3D models and adjust its effects in real time. This way, you can switch between various materials in a convenient way and see the change of effects that you configure instantly in the preview section.
Functionalities
-
Real-time adjustment of material parameters
-
Instant preview of effect changes
-
Material creation based on templates without the need to use other maps
Real-time adjustment of material parameters
Instant preview of effect changes
Material creation based on templates without the need to use other maps

Industries covered by material maps
-
Furnishing
-
Finishing/Construction
-
Custom furniture
Furnishing
Finishing/Construction
Custom furniture
Where to upload
You can upload the real-time materials in advance, or simply upload & edit them in Photo Studio Editor.
For enterprise users
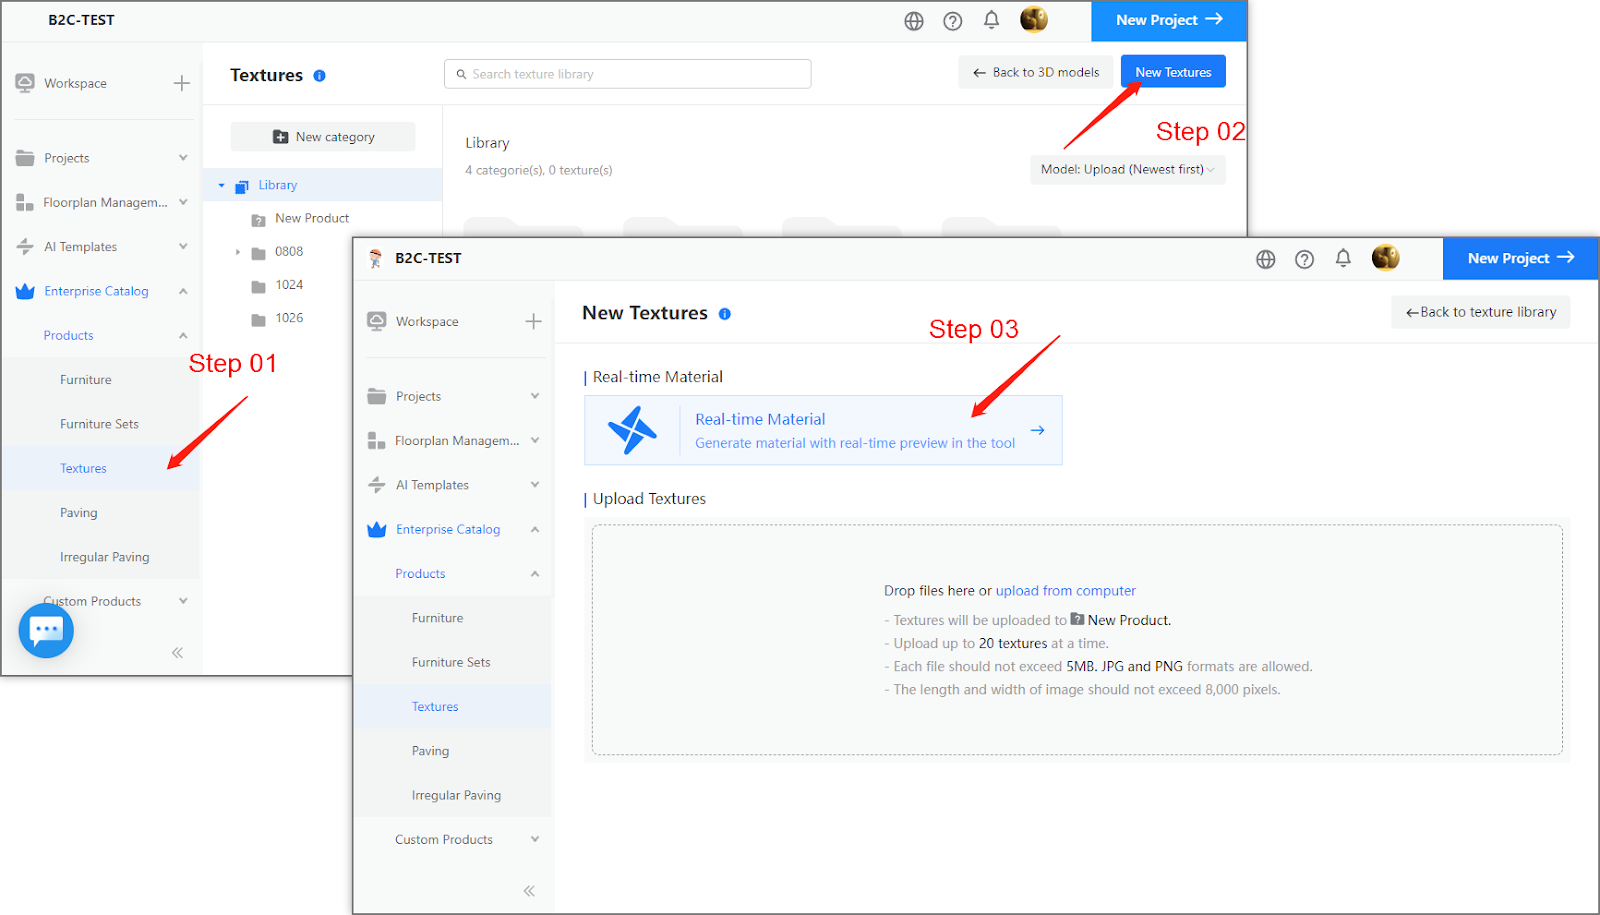
1. In the left-side navigation panel, select Enterprise Catalog. In the drop-down menu, click Textures.
2. In the page that appears, click the New Textures button on the top-right corner.
3. In the New Textures page, click the Real-time Material section near top.
For individual users
1. In the left-side navigation panel, select Personal Library.
2. In the page that appears, select the Textures tab near the top.
3. Click the Upload Textures button on the right part of the page.
4. In the New Textures page, click the Real-time Material section near top.

Real-time Material in Photo Studio Editor
Location: Photo Studio (Products/ Studio Collection) >> Shoot (photo/ video) >> Edit >> Material Replacement
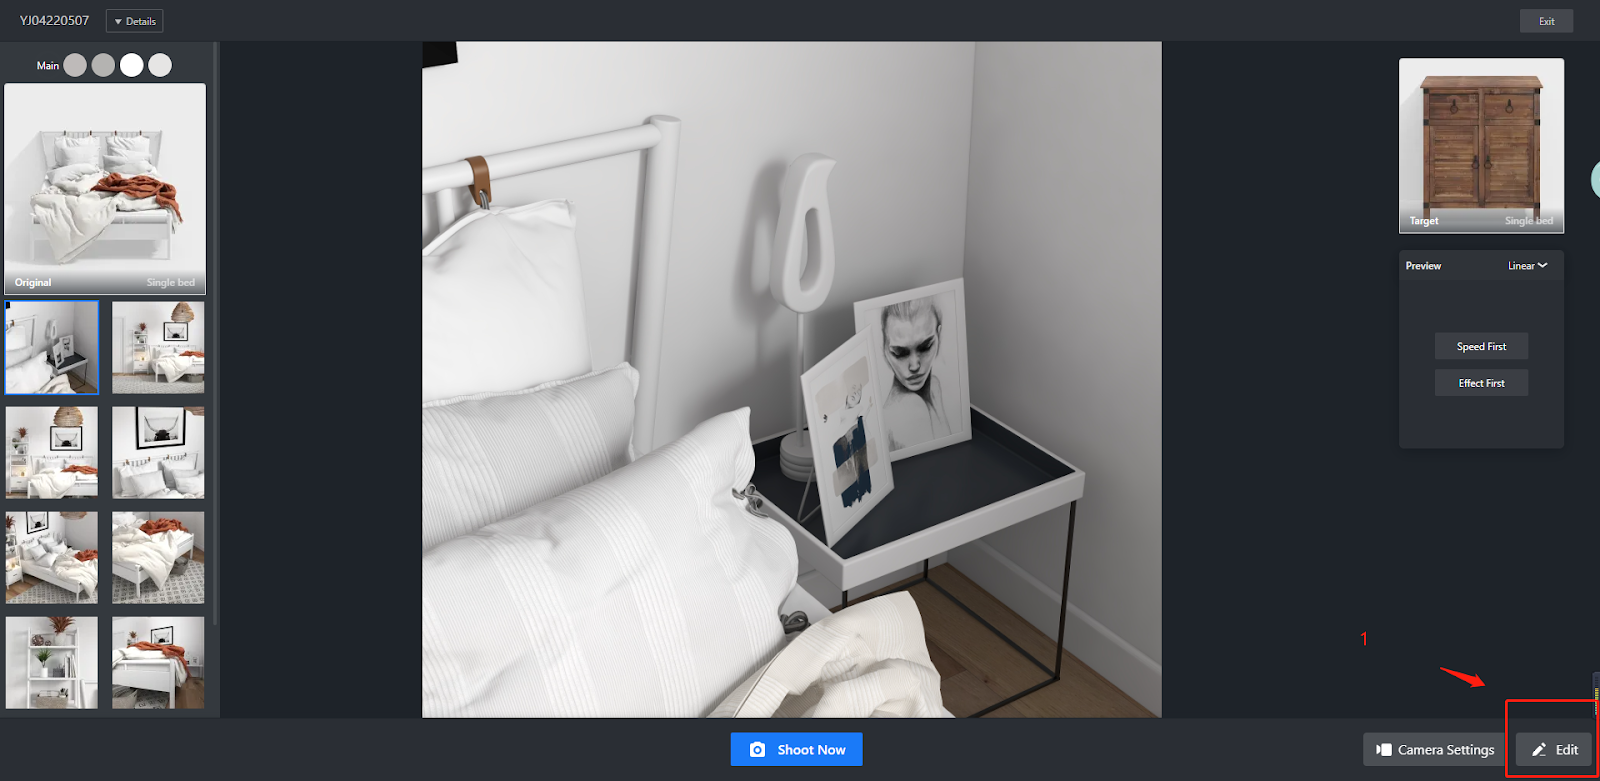
Access 1
[Real-time material creation]
1. Click the Real-time Material icon near the top-right corner of the page.
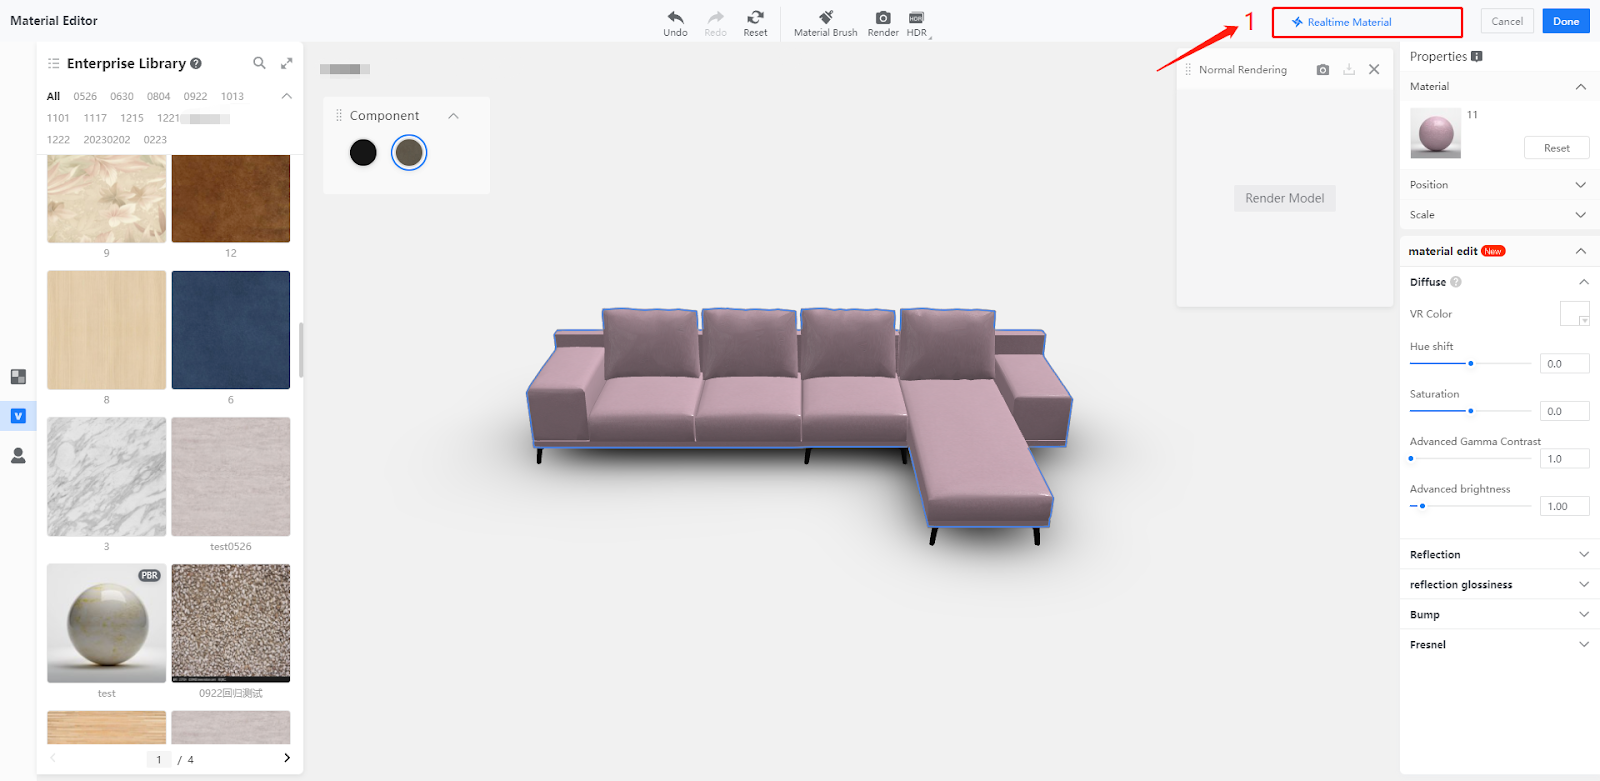
2. Click on the material ball surface to get started
-
You can use enterprise material templates as the base on which you edit and create a real-time material
-
You can also upload material texture maps to edit and turn them into real-time materials
You can use enterprise material templates as the base on which you edit and create a real-time material
You can also upload material texture maps to edit and turn them into real-time materials
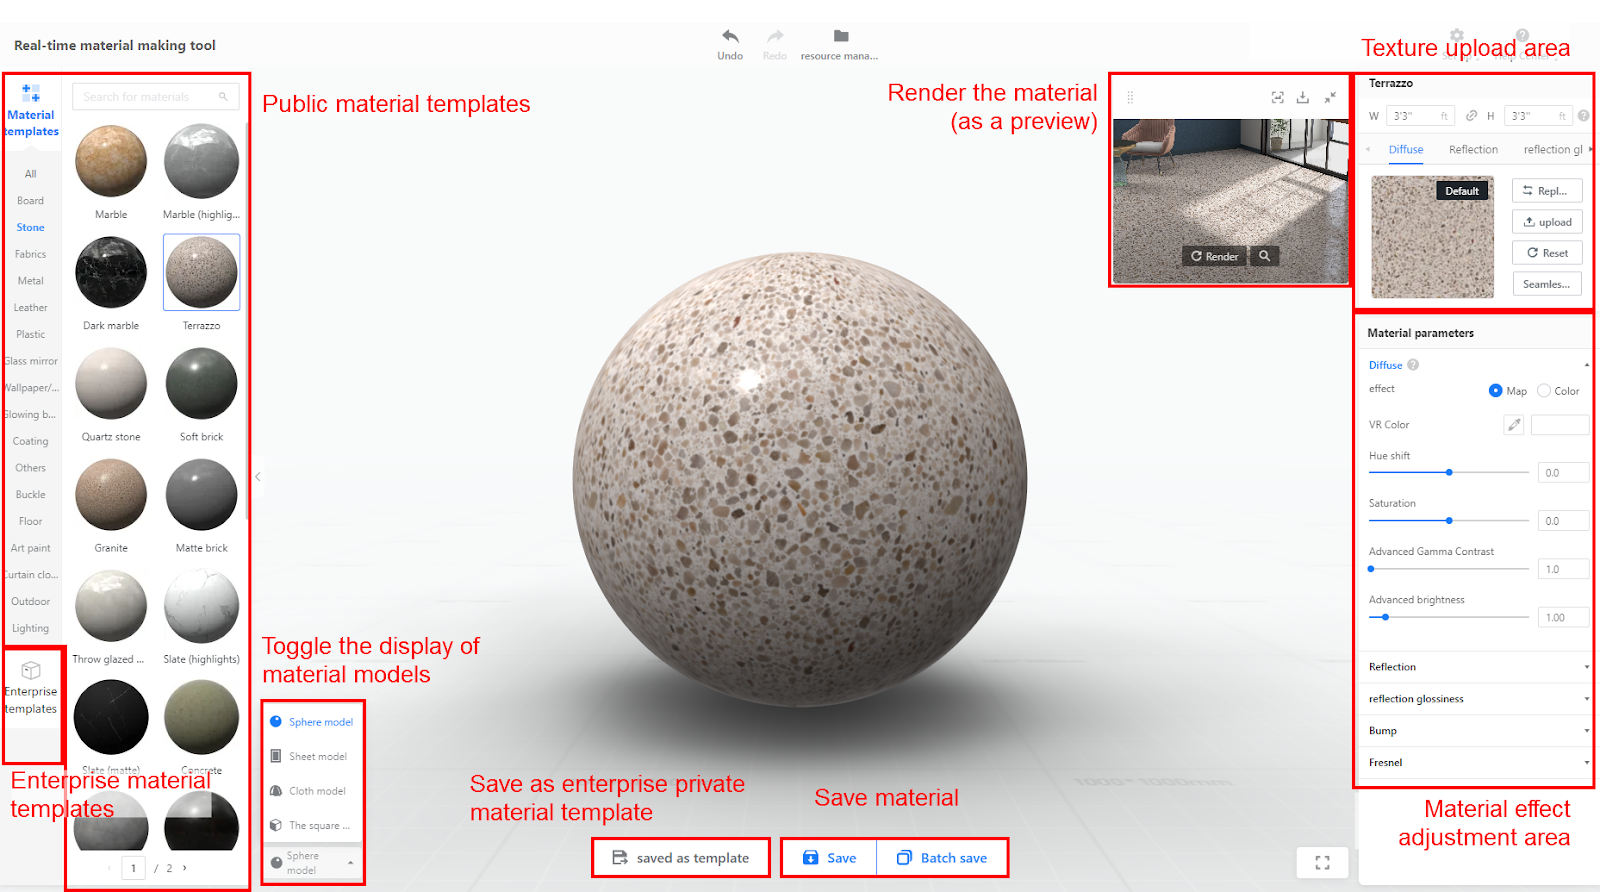
3. You can save an edited material for direct use in future. You can also save it as an enterprise material template, which you can use repeatedly for creating new materials on your own.
Please note that your rendered or adjusted material cannot be retrieved if you quit without saving. We recommend that you save it soon after the rendering or adjustment is done.


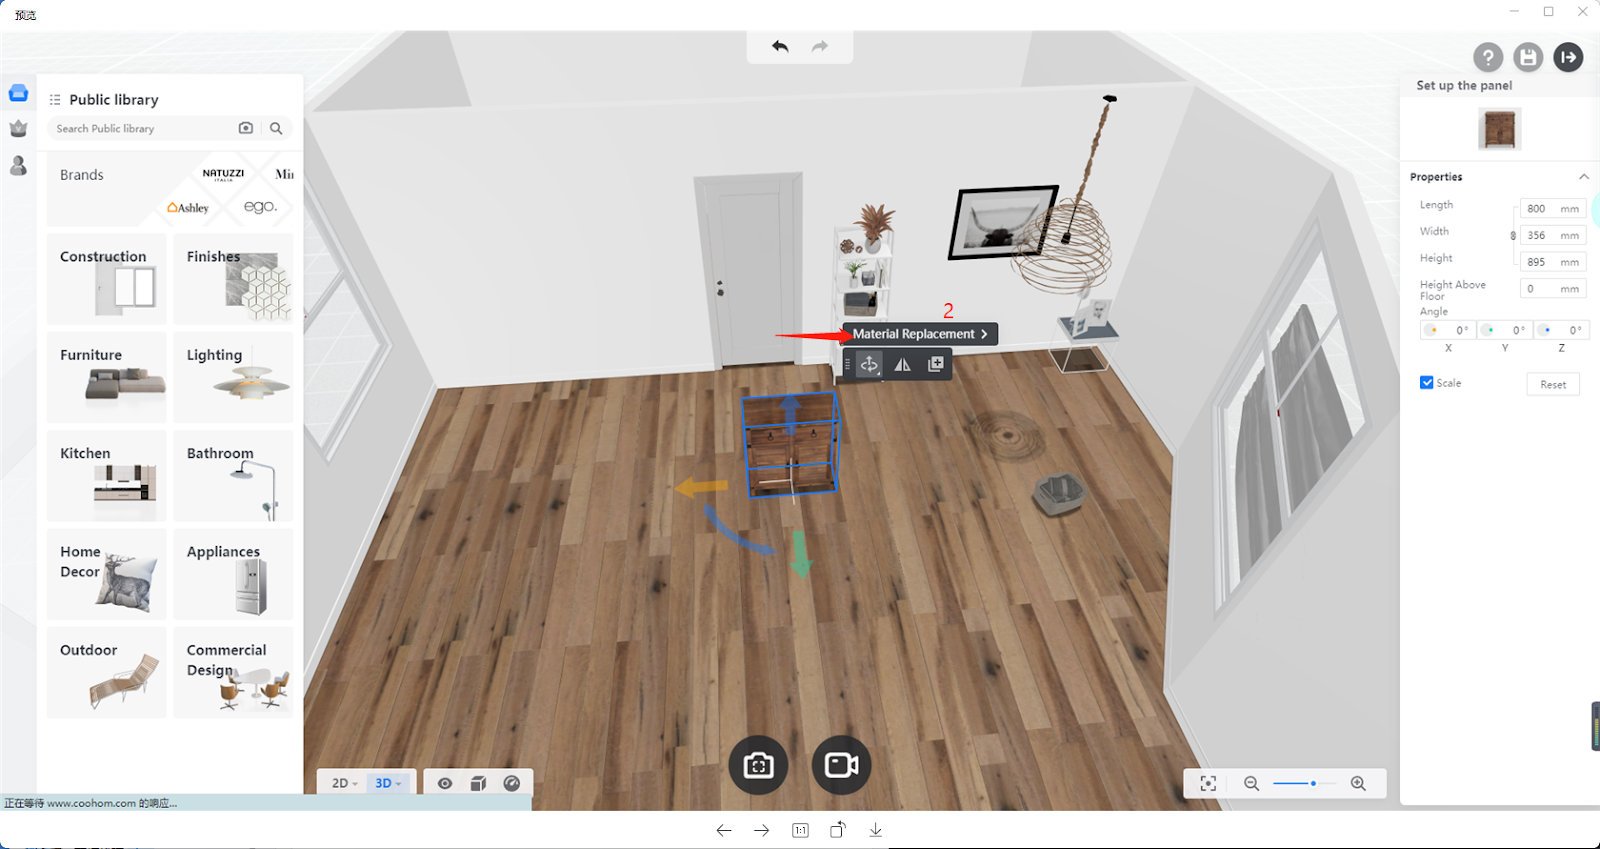
Access 2
【 Real-time Material Editor 】
1. Click on the 3D model in the Photo Studio Editor. In the left-side panel, replace the existing material with the ones in your Enterprise Library.
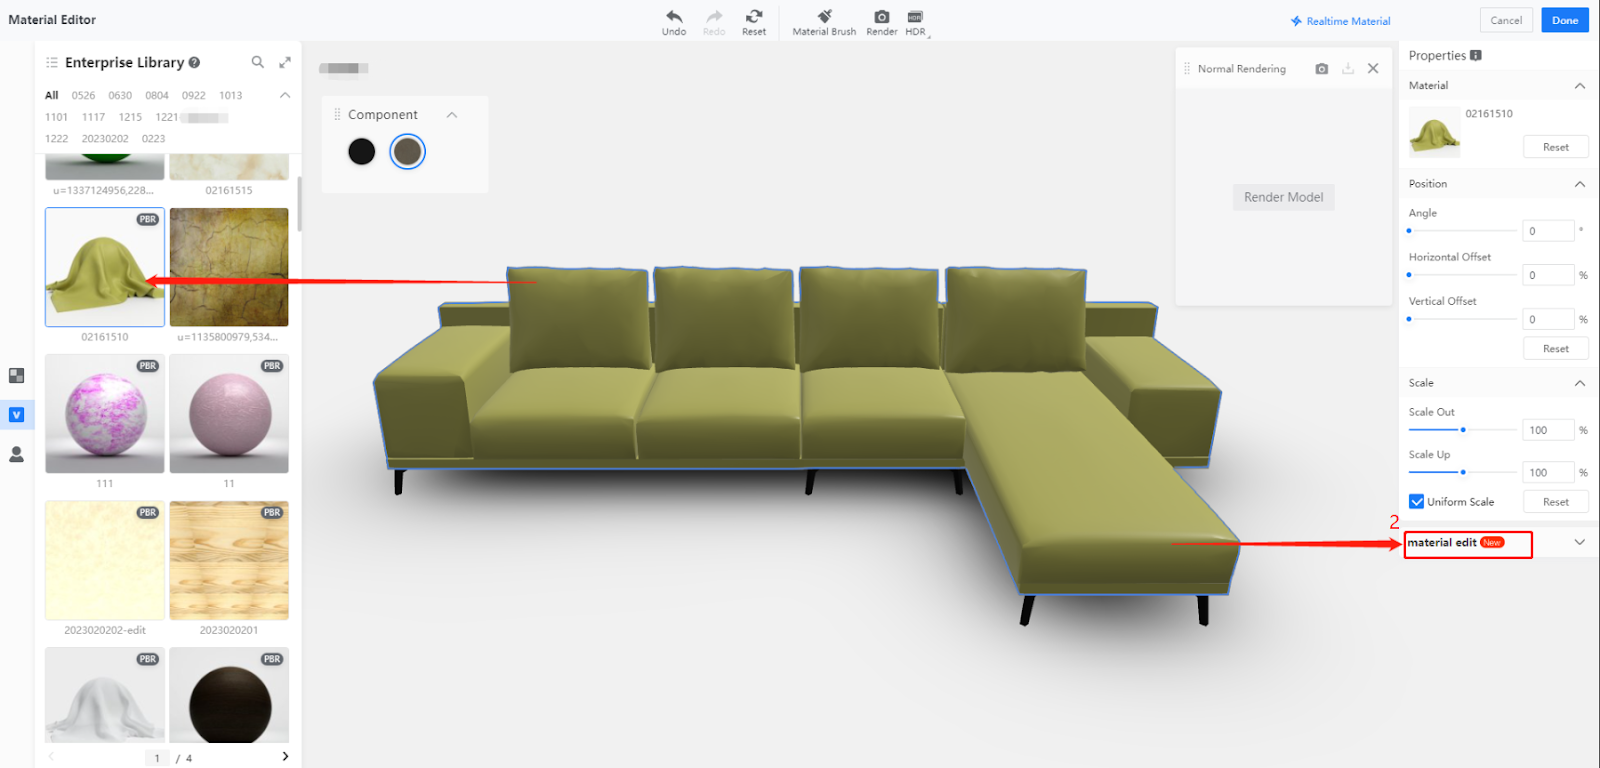
2. Adjust the parameters of the real-time material and check the effect changes instantly made to the model. The category of parameters that you can configure include Diffuse, Reflection, Reflection Glossiness and Bump.
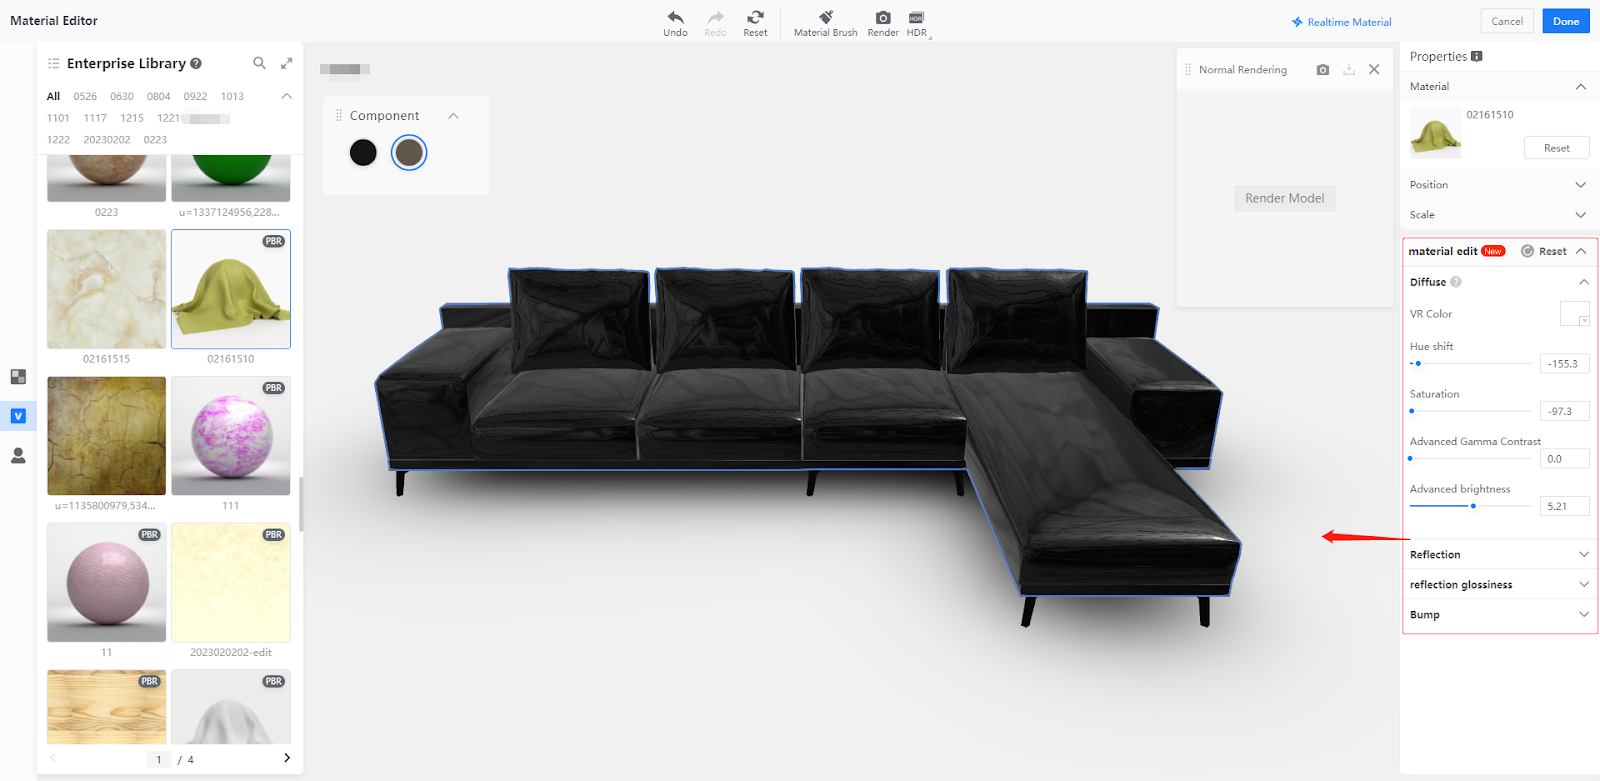
3. Click on the Done button when you have configured all the parameters needed for the selected material. Then, you can go on with the shooting and rendering in the studio.