Overview
The Material Replacement Tool has been upgraded. You can now use the new one instead of the earlier version for your models. The updated features include
-
Full-angle (360°) view instead of 180° view for material replacement
-
Real-time material replacements instead of non-configurable materials, supporting instant preview of effect change
-
Categorizing materials in multiple folders as needed rather than having them in one single folder
Full-angle (360°) view instead of 180° view for material replacement
Real-time material replacements instead of non-configurable materials, supporting instant preview of effect change
Categorizing materials in multiple folders as needed rather than having them in one single folder
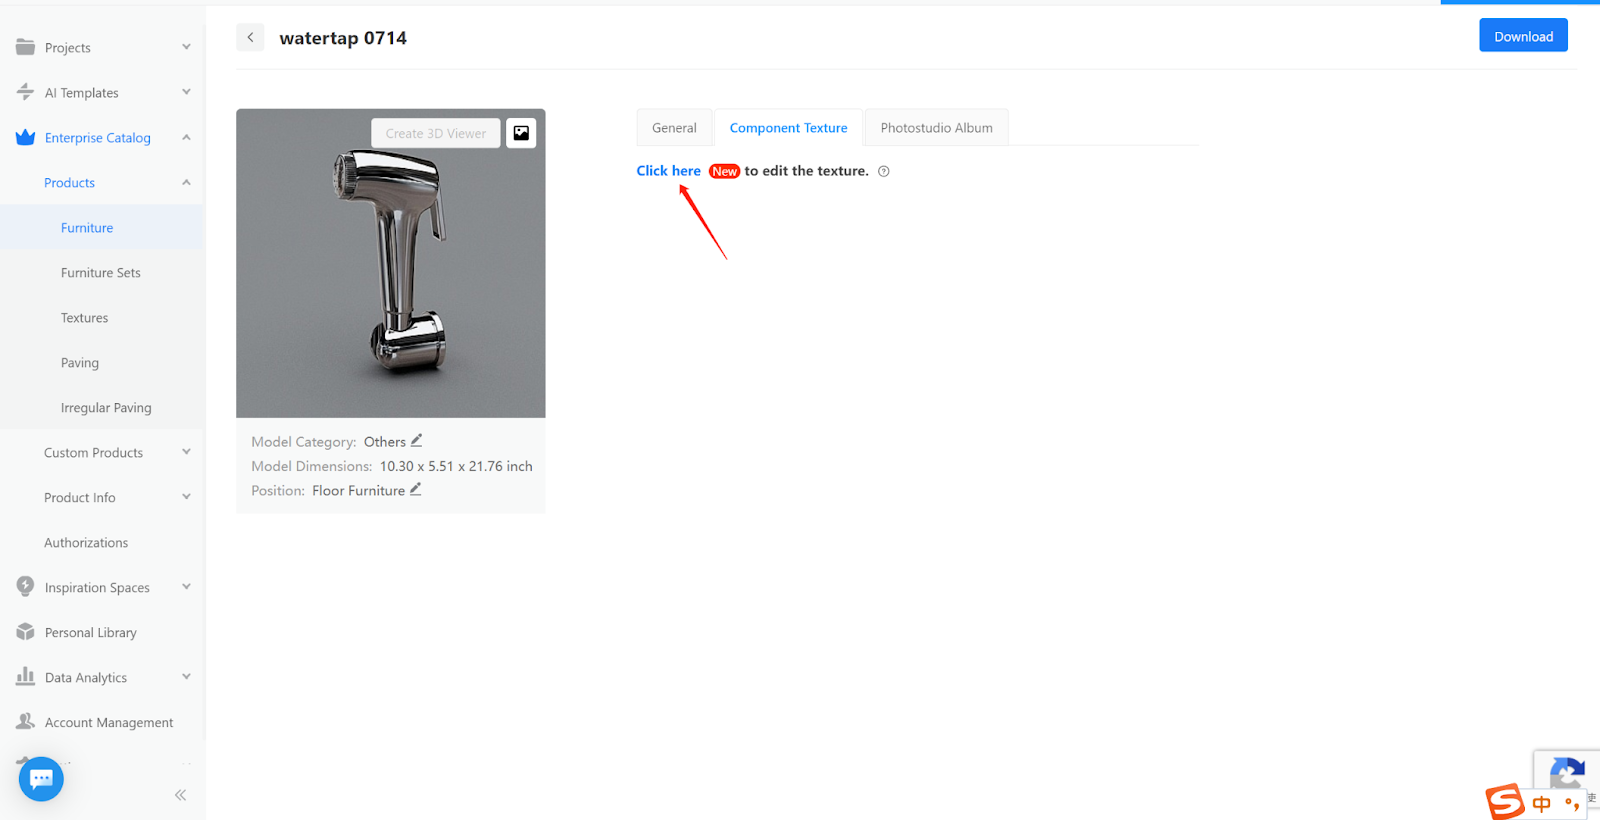
Access
Enterprise Catalog >> Products >> Furniture >> Details of product >> Component Texture >> Click here to edit the texture.
Steps
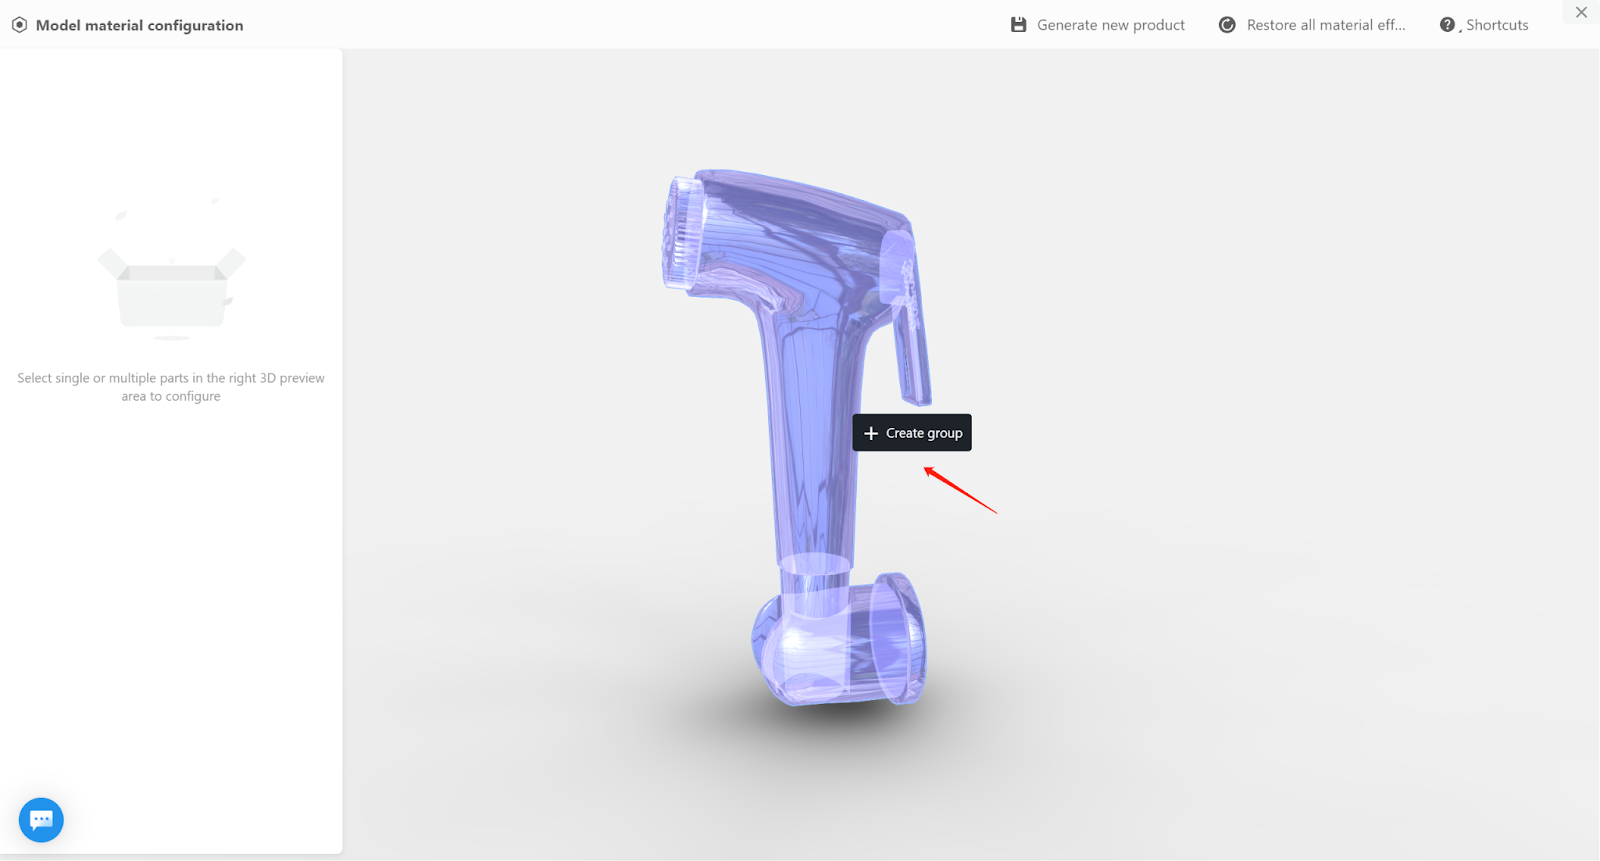
1. Add component
In the central operation area, move your cursor to the section of the model that you want to set as a component. The component is created after you give it a name.
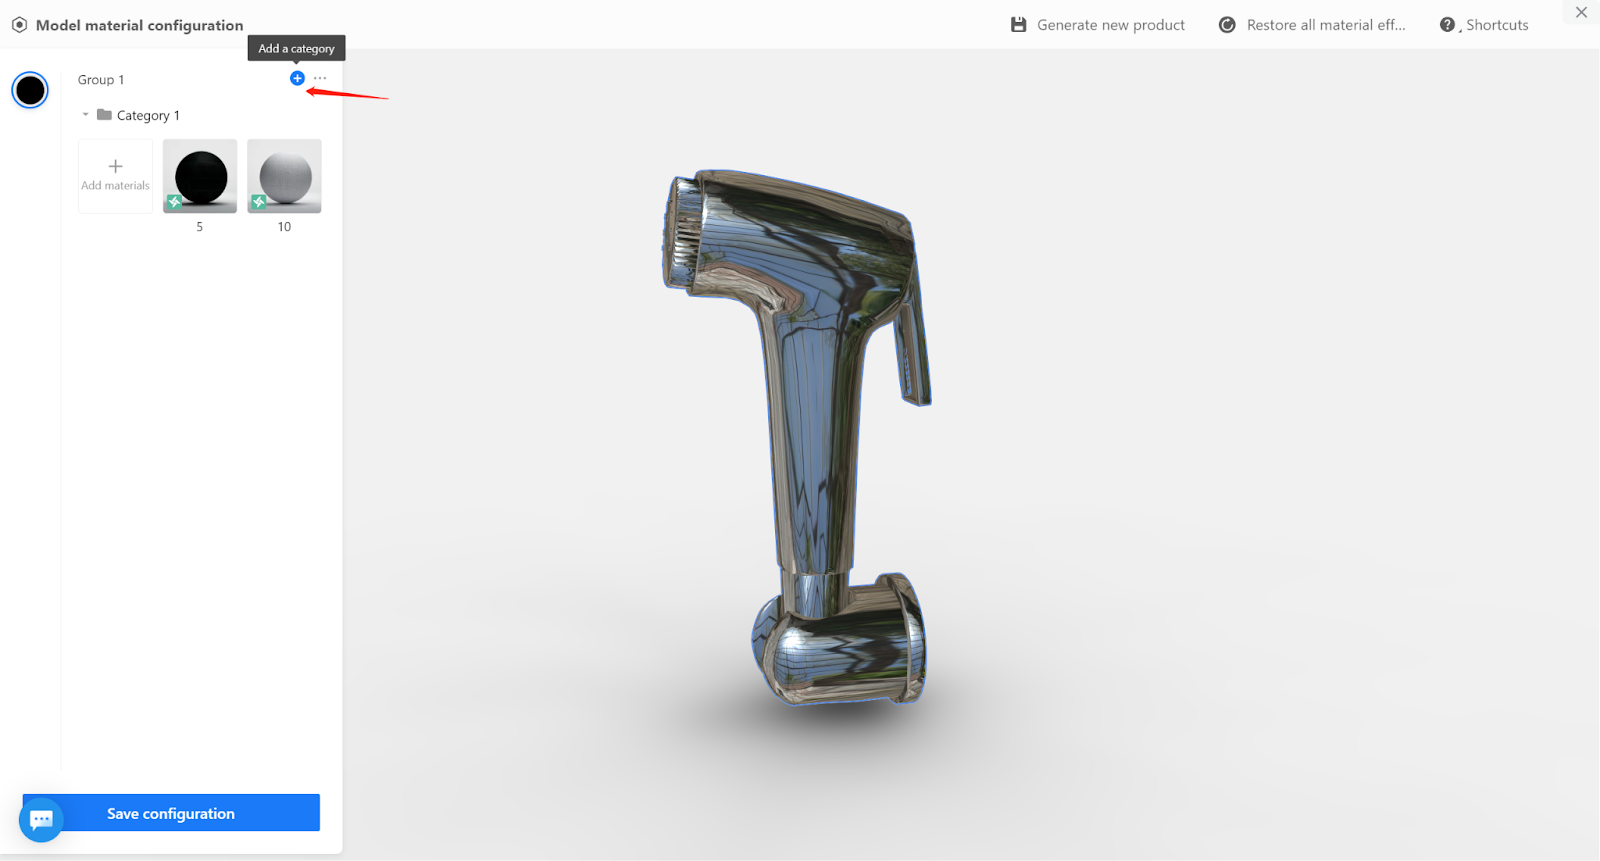
2. Add material
Click the “+ Add material” icon to show all the materials available within the Enterprise Material Library. In the pop-up window, you can
-
go to the Enterprise Material Library to create materials for the component
-
filter materials by groups
-
search for materials by names or serial numbers
-
select some or all materials
go to the Enterprise Material Library to create materials for the component
filter materials by groups
search for materials by names or serial numbers
select some or all materials

Add groups
You can create multiple groups for one component of a model. You can categorize materials in different groups based on the styles they represent.
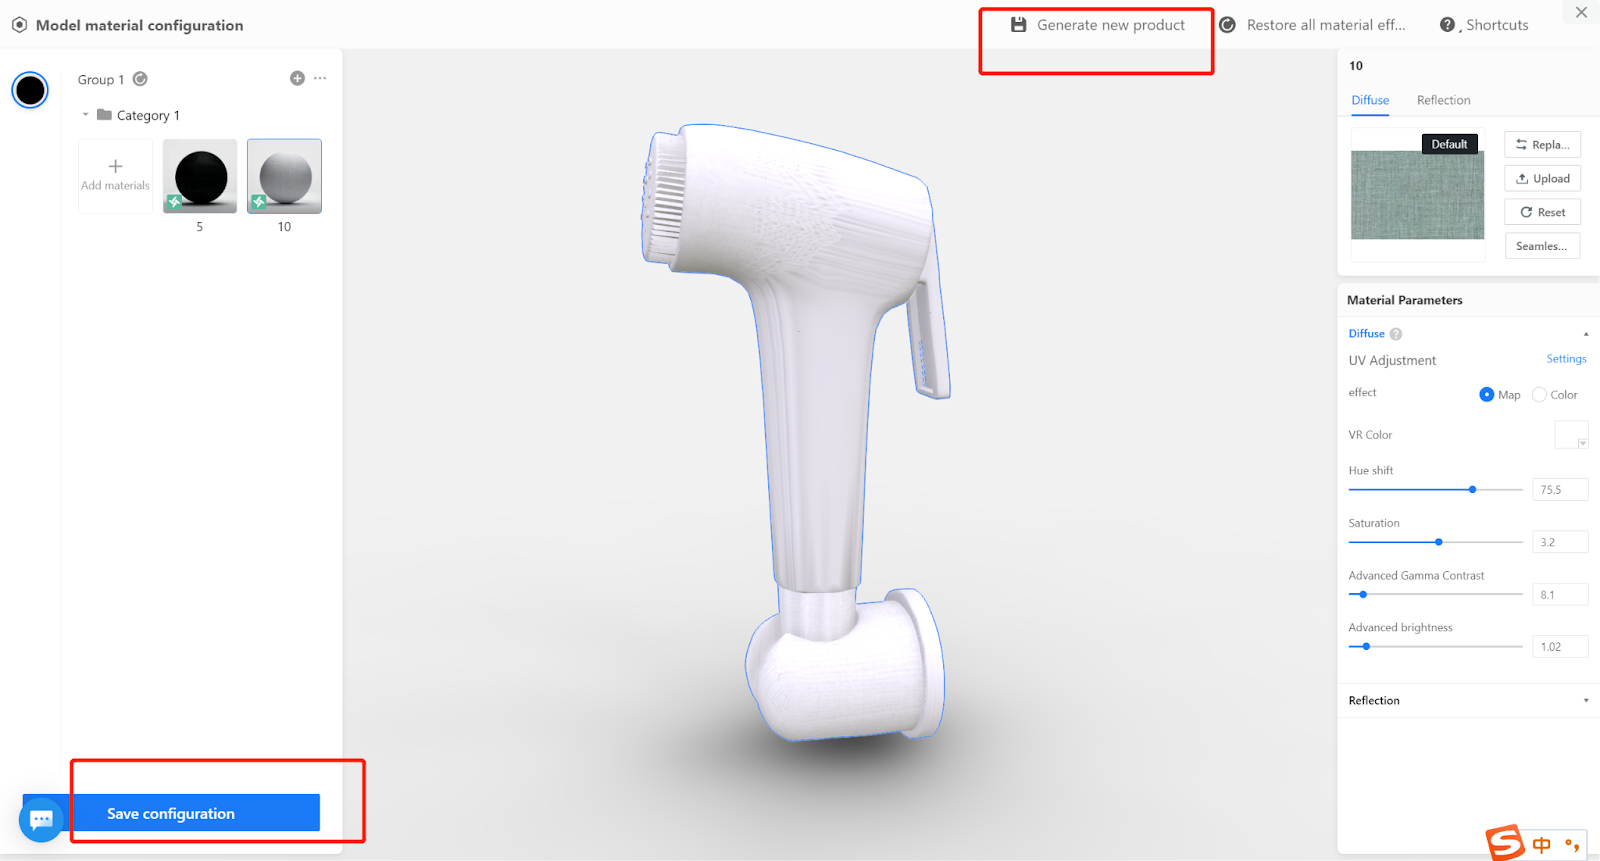
3. Configure parameters (for real-time material only)
You can adjust parameters of one particular material in the right part of the page. As you make adjustments, you can preview the effects in real time.
Below are the categories of parameters that you can configure.
-
Diffuse
-
Reflection
-
Reflection Glossiness
-
Bump/normal
-
Fresnel (controls transparency)
Diffuse
Reflection
Reflection Glossiness
Bump/normal
Fresnel (controls transparency)
4. Save configuration
Click “Save configuration” to link the configuration of multiple materials to the model. In the design tool, you can choose different materials to replace the existing one.
Click “Generate new product”, and the product model will be generated for rendering. All the saved configurations will be applied to the rendered product model