Directory of this page:
II. Function Definition
II. Specific Content
I. Definition of Function
Understand the ways to obtain material textures, the processing methods of material textures, custom furniture material tips, custom furniture material uploading operations, custom furniture mixed material uploading operations, and the application of materials.
It includes:
1.Obtaining material textures
2.Processing material textures
3.Custom furniture material tips
4.Custom furniture material uploading
5.Custom furniture mixed material uploading
6.Application of custom furniture materials
II. Specific Content
-
How to Obtain Material Textures
How to Obtain Material Textures
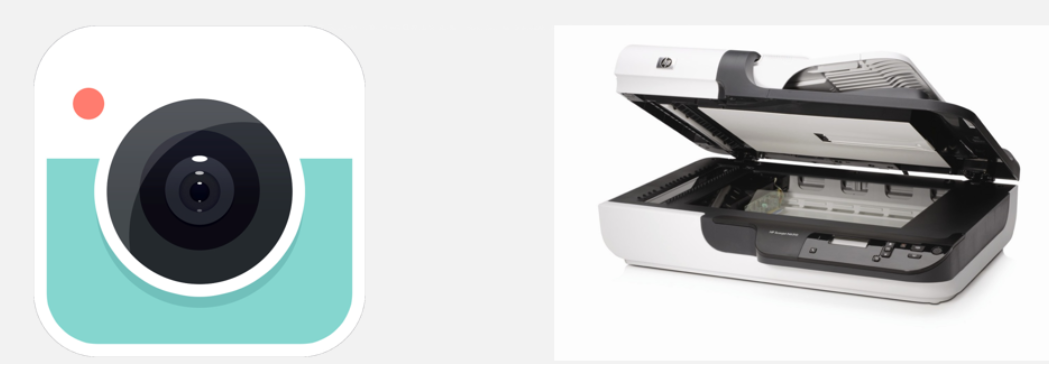
(Take a photo or scan)
1-1. Shooting
Use a professional SLR camera to shoot wood board samples in an environment with uniform light.
Advantages: Strong three-dimensional texture is needed. SLR camera can shoot large surfaces, and texture details can be obvious.
Disadvantages: High technical requirements, high light requirements, high center sharpness in the picture, blurring at the edges, and difficult post-processing.
Shooting – Sample Requirements
-
Board size should be at least 600mm*600mm with complete texture.
-
The board should have no defects or dirt.
-
The sample texture should be beautiful and represent the product’s texture.
Board size should be at least 600mm*600mm with complete texture.
The board should have no defects or dirt.
The sample texture should be beautiful and represent the product’s texture.
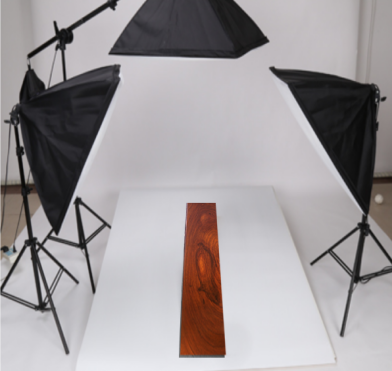
Shooting - Lighting arrangement:
-
Use three soft light boxes, making the three lights set at right angles to illuminate the product from three directions.
Use three soft light boxes, making the three lights set at right angles to illuminate the product from three directions.
-
The camera should be secured on a tripod and shoot the physical object at a 90-degree angle.
-
Surrounding objects can also be included in the shot for post-processing.
The camera should be secured on a tripod and shoot the physical object at a 90-degree angle.
Surrounding objects can also be included in the shot for post-processing.
Shooting - Common problematic textures:
Skewed texture direction

Glossy highlights causing noticeable glare
(Non-flat) images with perspective
1-2. Scanning:
Scanning equipment is required. Detailed introduction is omitted.
-
Processing material textures
Processing material textures
Plugin processing: convenient and simple, suitable for regular pattern textures, but has a higher loss of texture.
Photoshop processing: more complicated to operate but has better restoration of material and lower texture loss.
①How large should the texture resolution be? - Texture resolution should not exceed 5000*5000 pixels.
②How large should the texture file be? - The texture file should not exceed 5MB.
③How large should the channel image be? - Same as above.
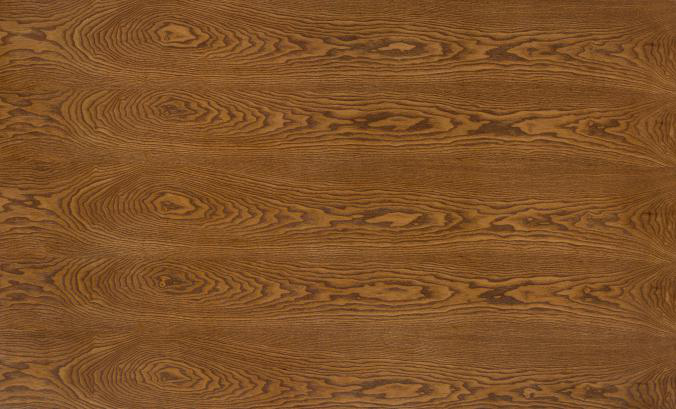
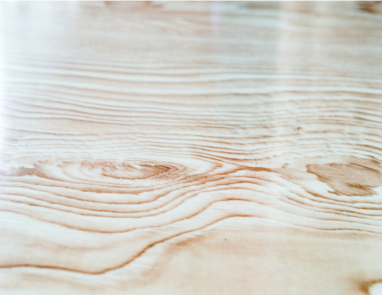
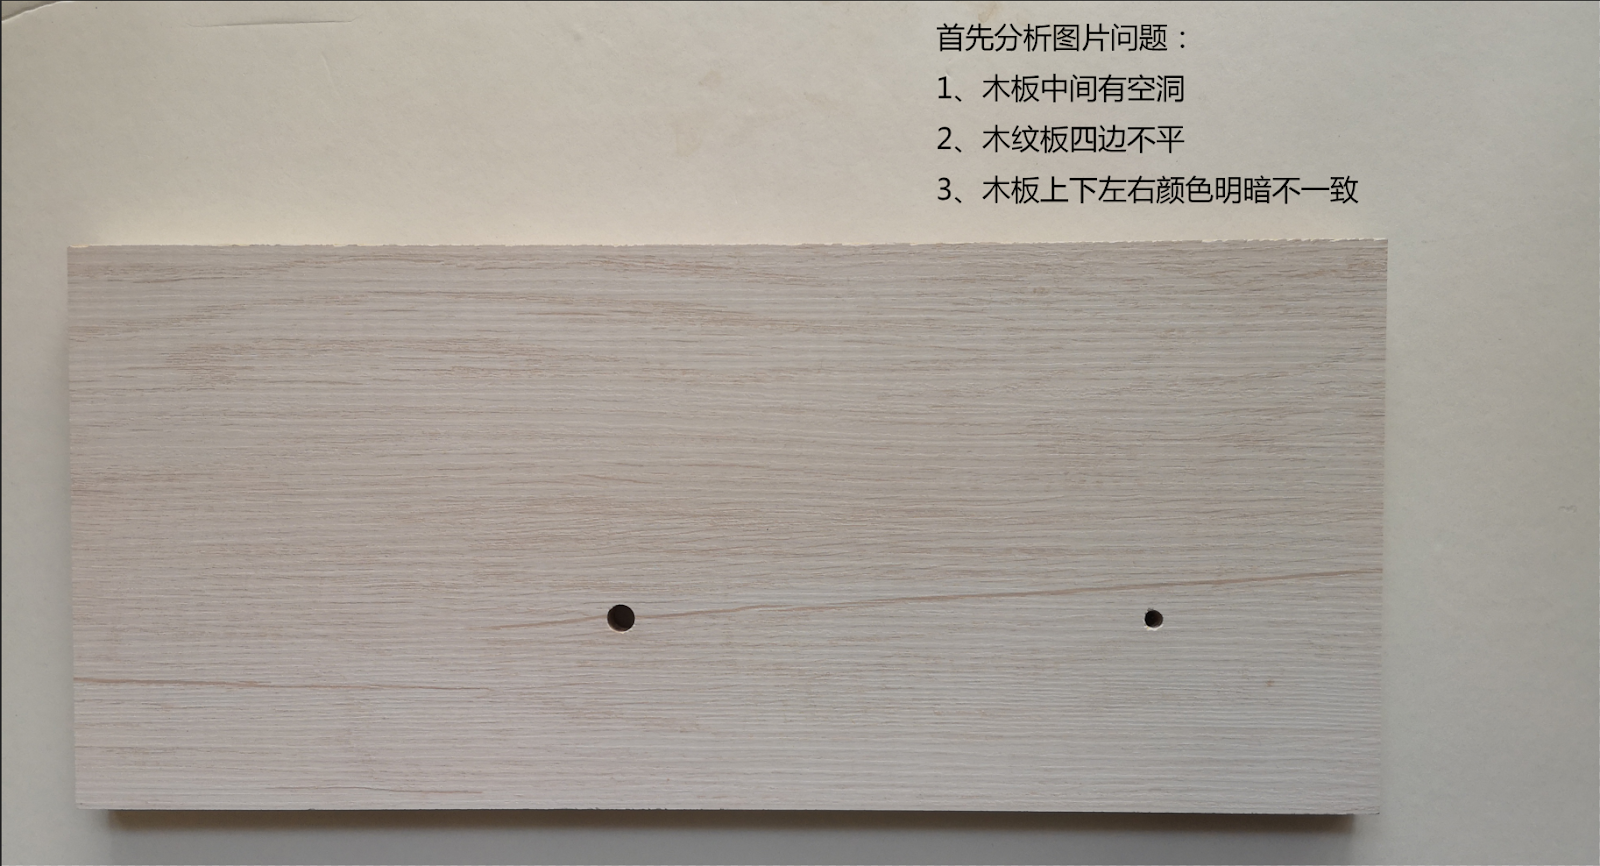
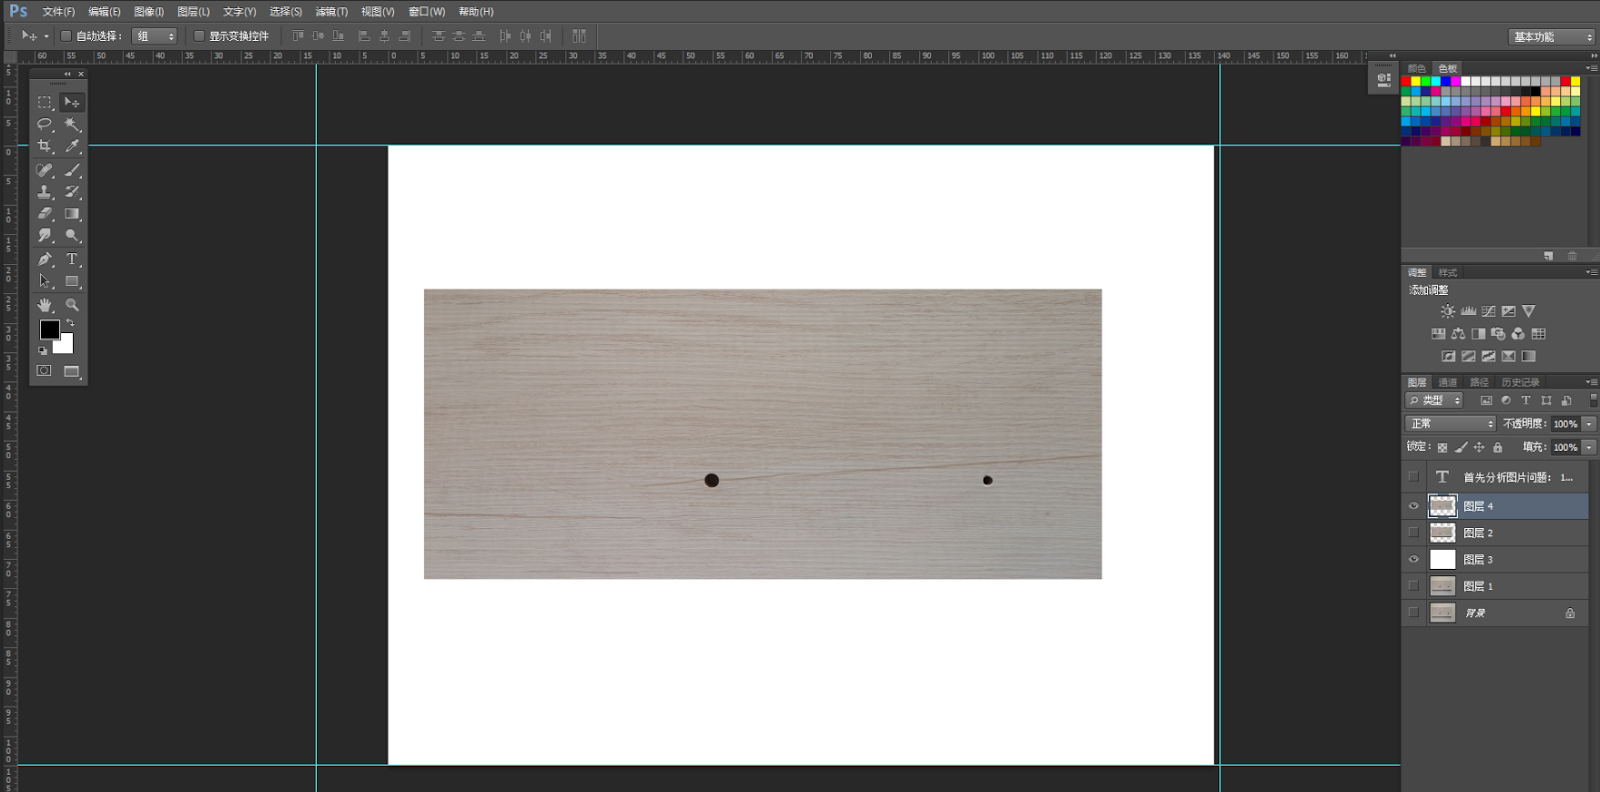
Original photo:
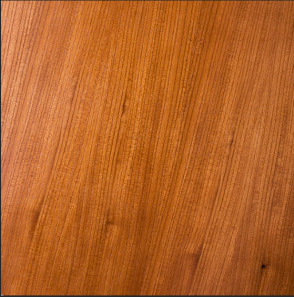
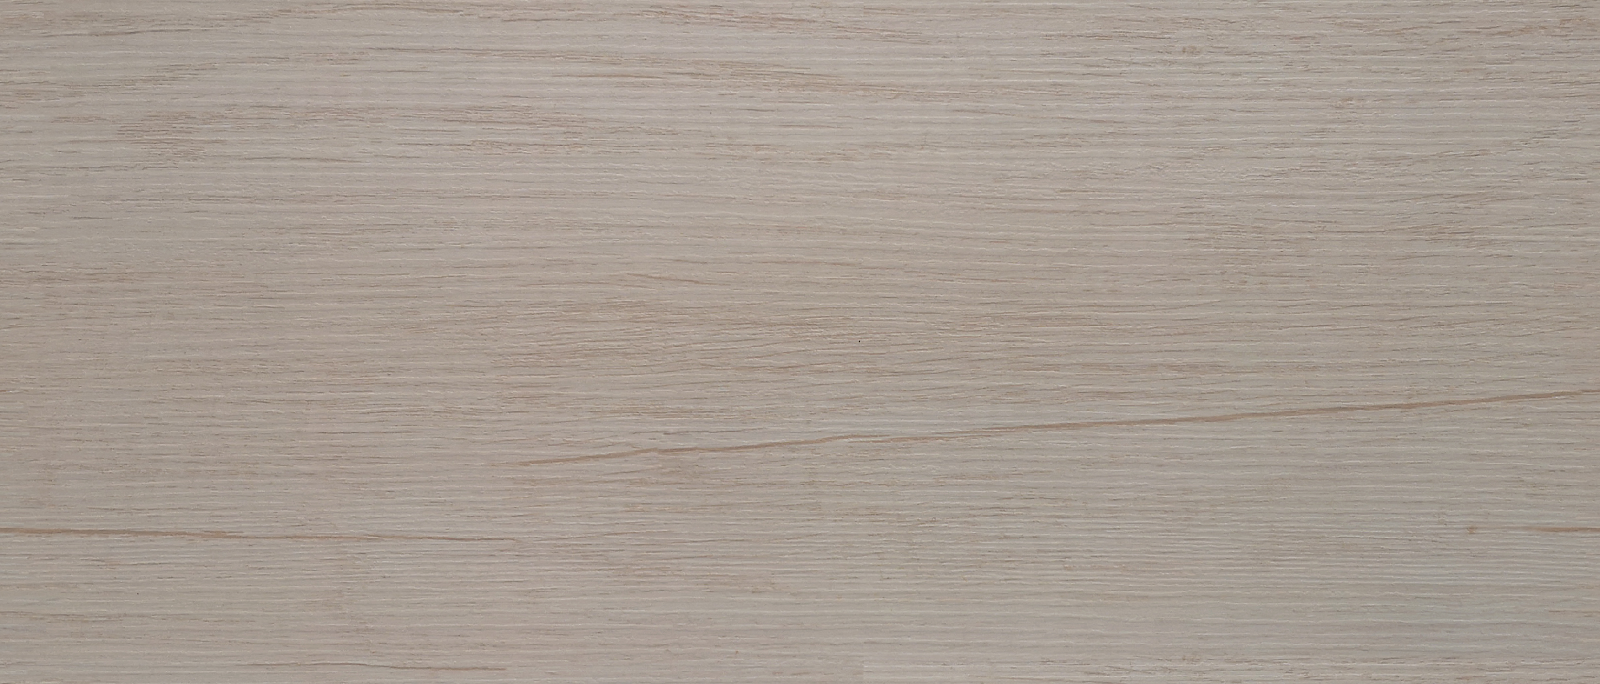
Processed photo:
Firstly, analyze the original photo:
-
There is a gap in the middle of the wooden board
-
The wood grain is uneven on all four sides
-
The color of the wooden board is not uniform
There is a gap in the middle of the wooden board
The wood grain is uneven on all four sides
The color of the wooden board is not uniform
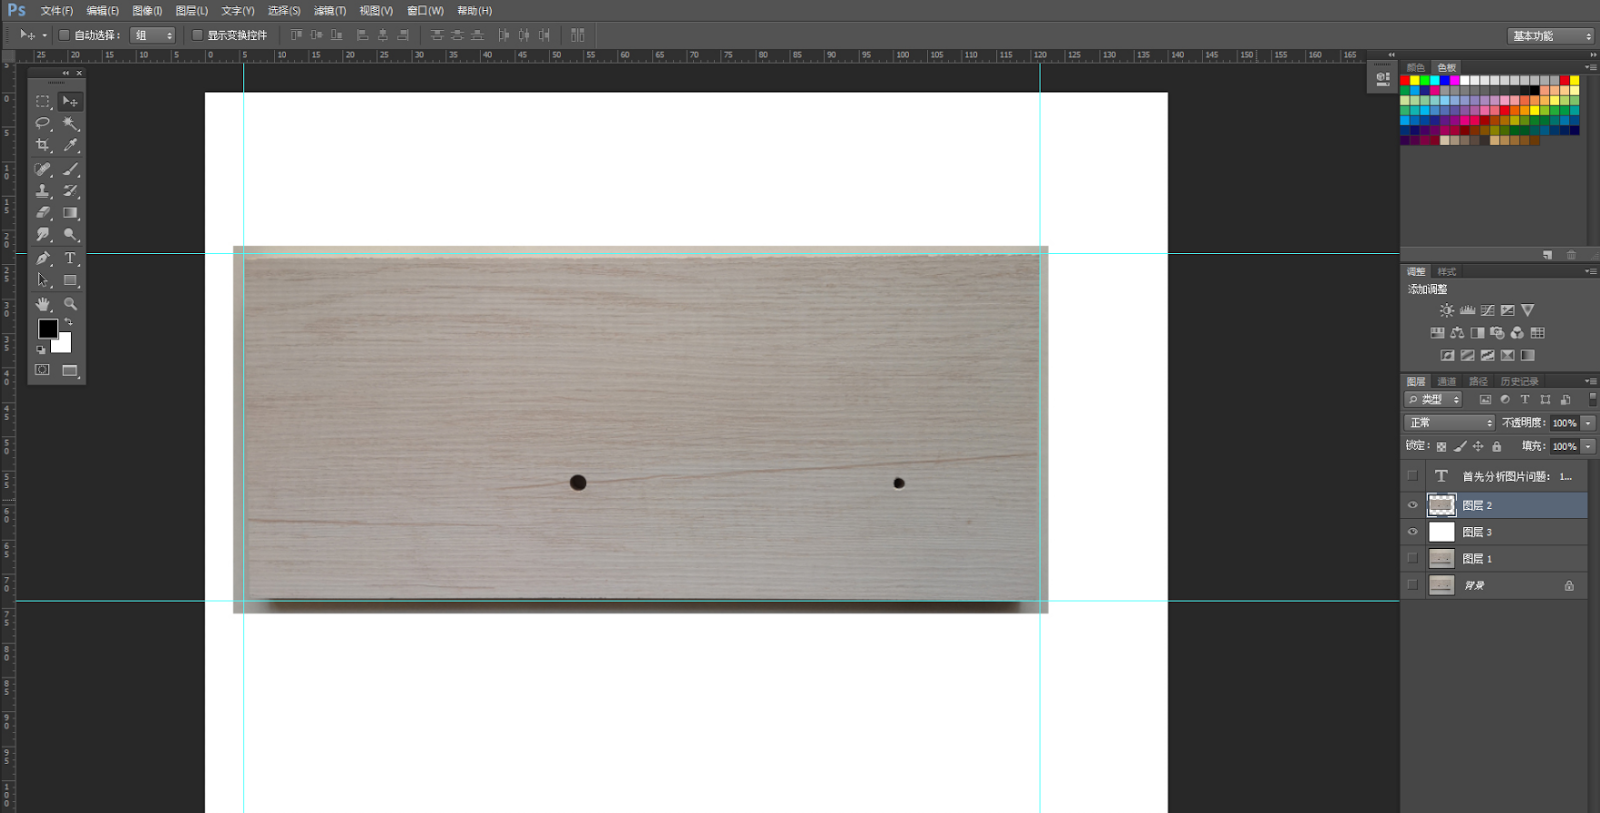
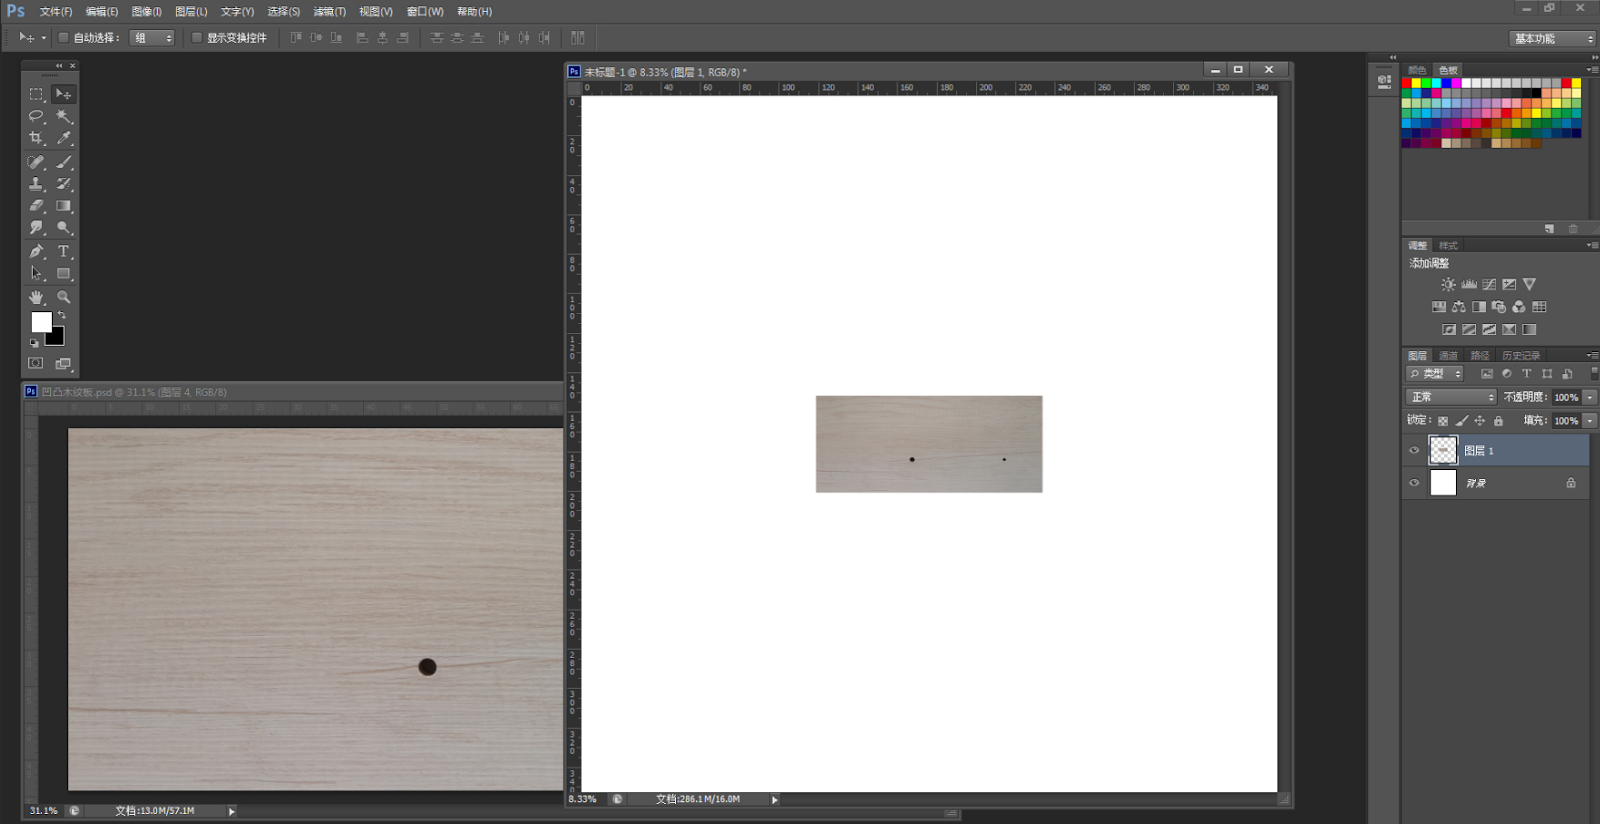
Step 1.01: Correct the four sides of the wood grain board.
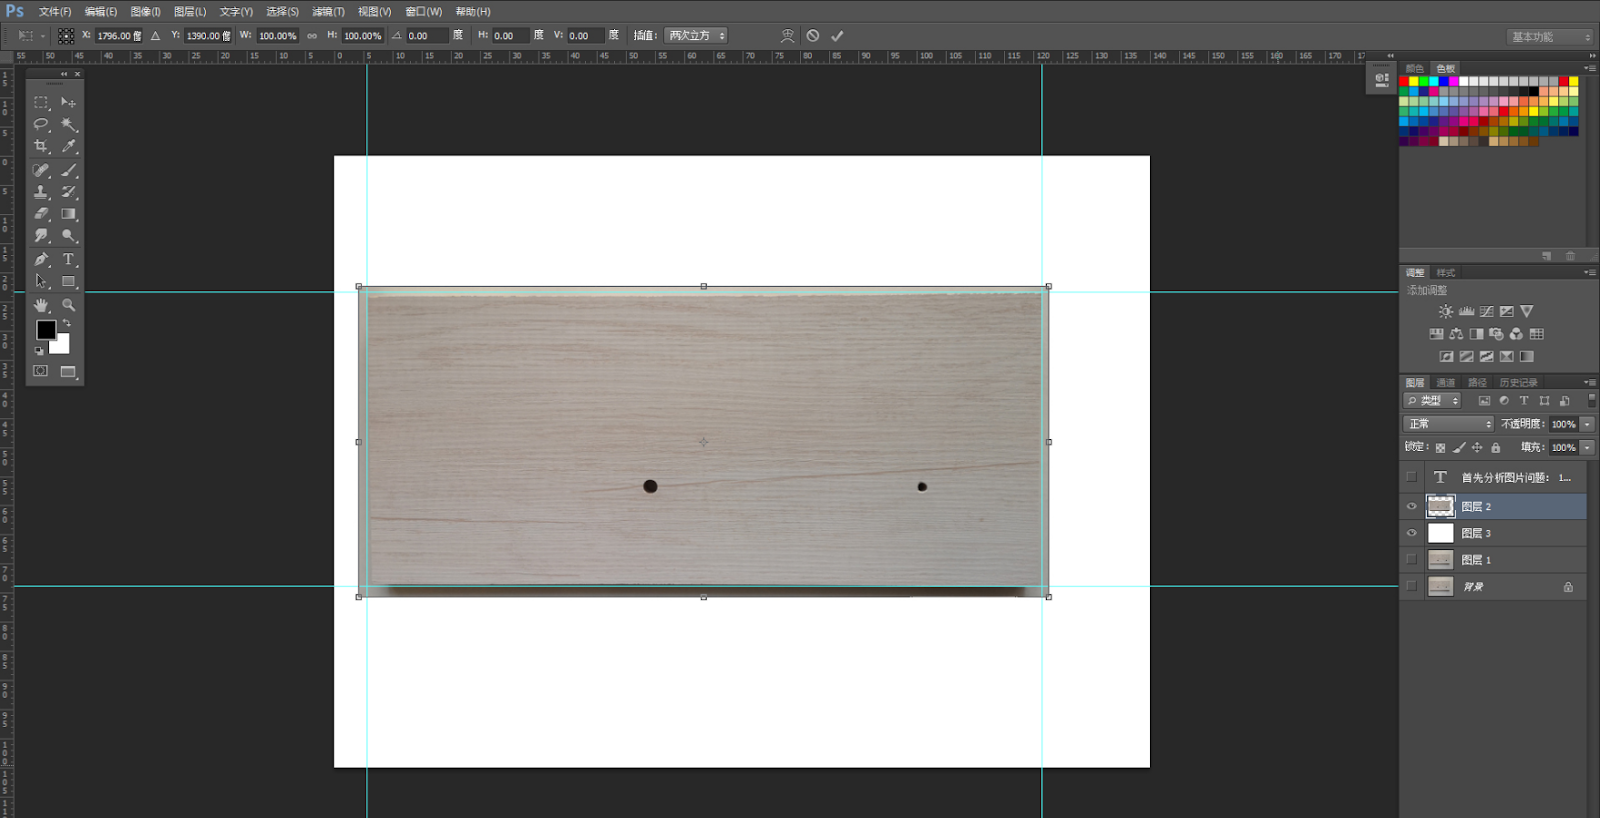
Step 1.02: Correct the four sides of the wood grain board by using Ctrl+T and holding down Ctrl+Shift to drag the corner point to the appropriate position.
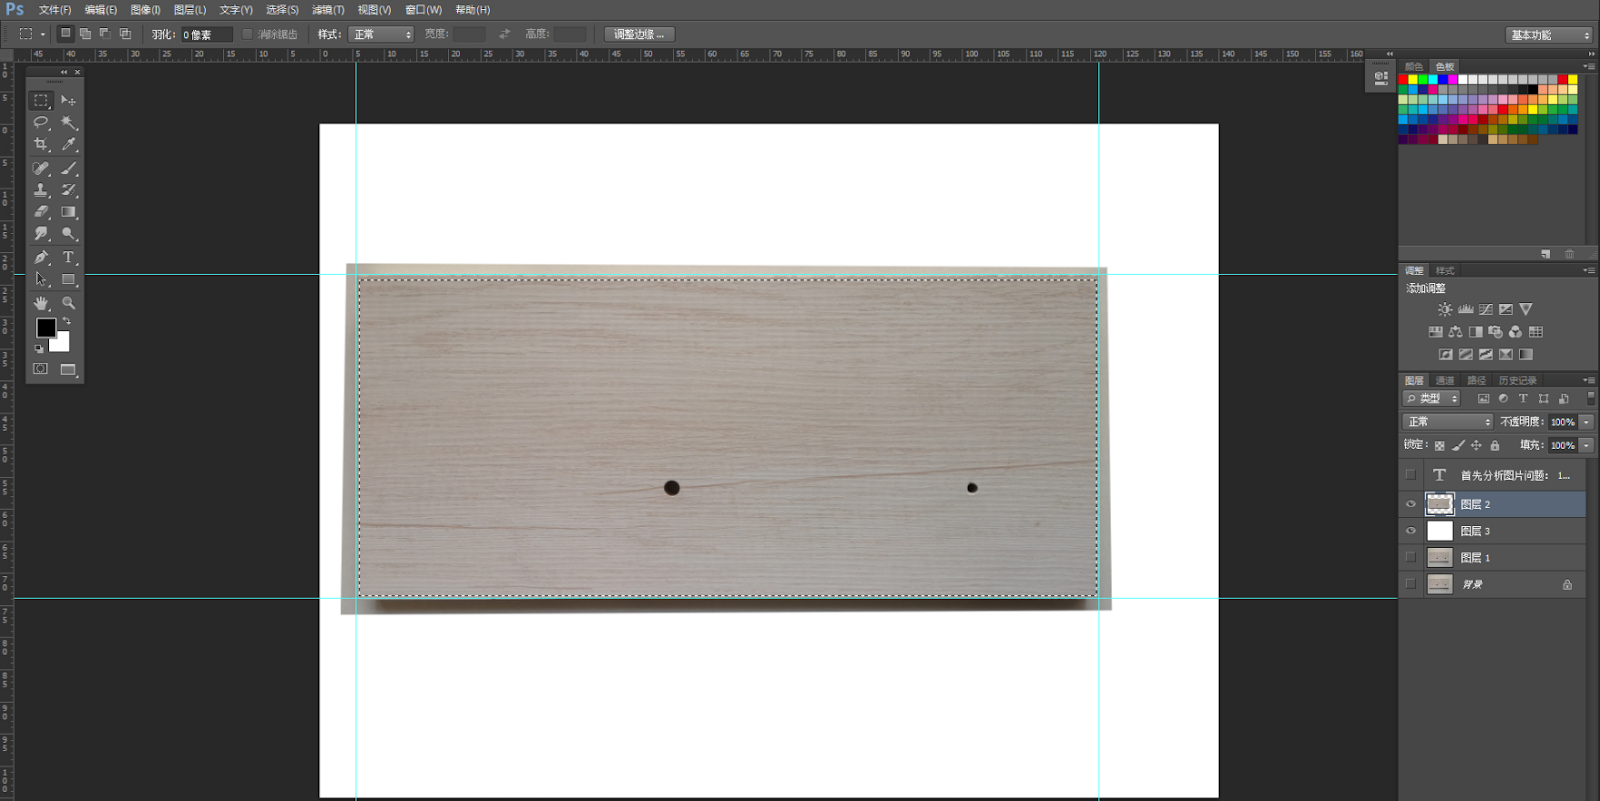
Step 1.03: After the correction of the four sides of the wood grain board, select the central correction part of the selection area.
Step 1.04: Copy a layer for the center correction part of the selection area.
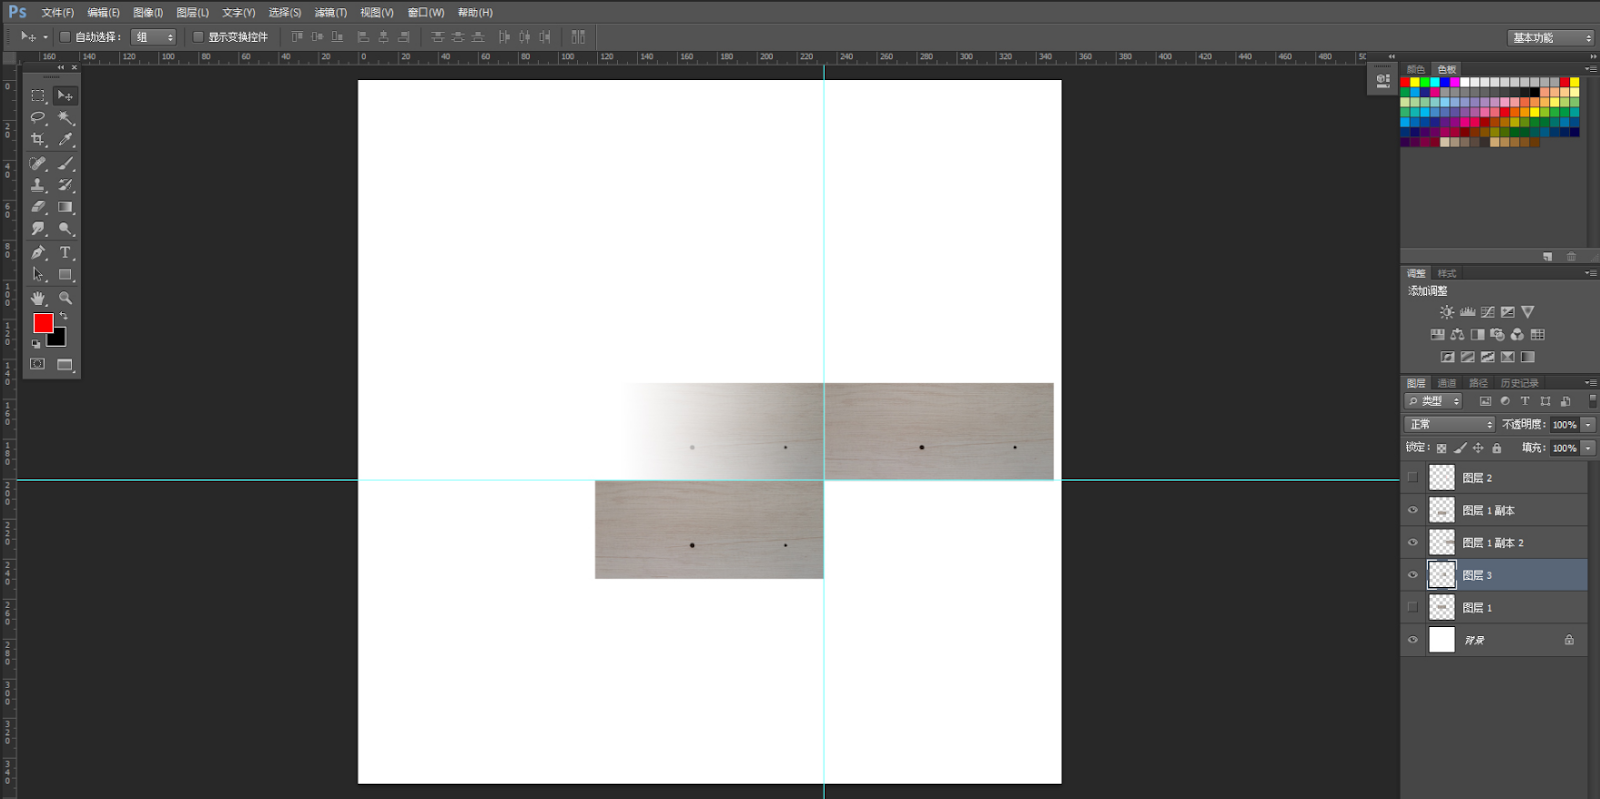
Step 2.01: Correct the brightness and darkness of the four sides of the color and create a larger canvas.
Step 2.02: Drag the corrected image to a newly created larger canvas.
Step 2.03: Copy two layers and splice them together to find the brightness and darkness and color difference.
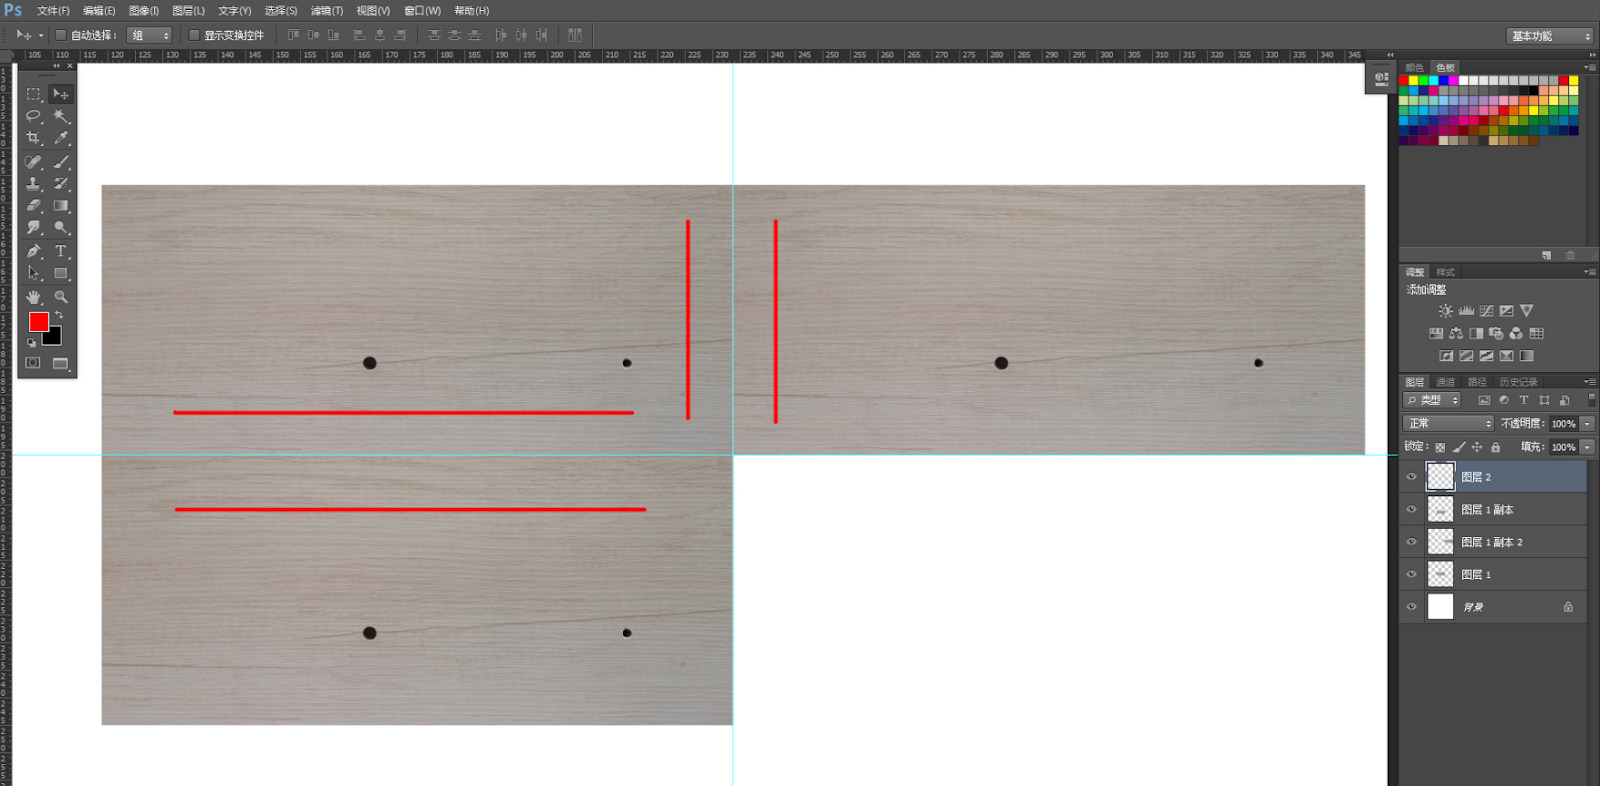
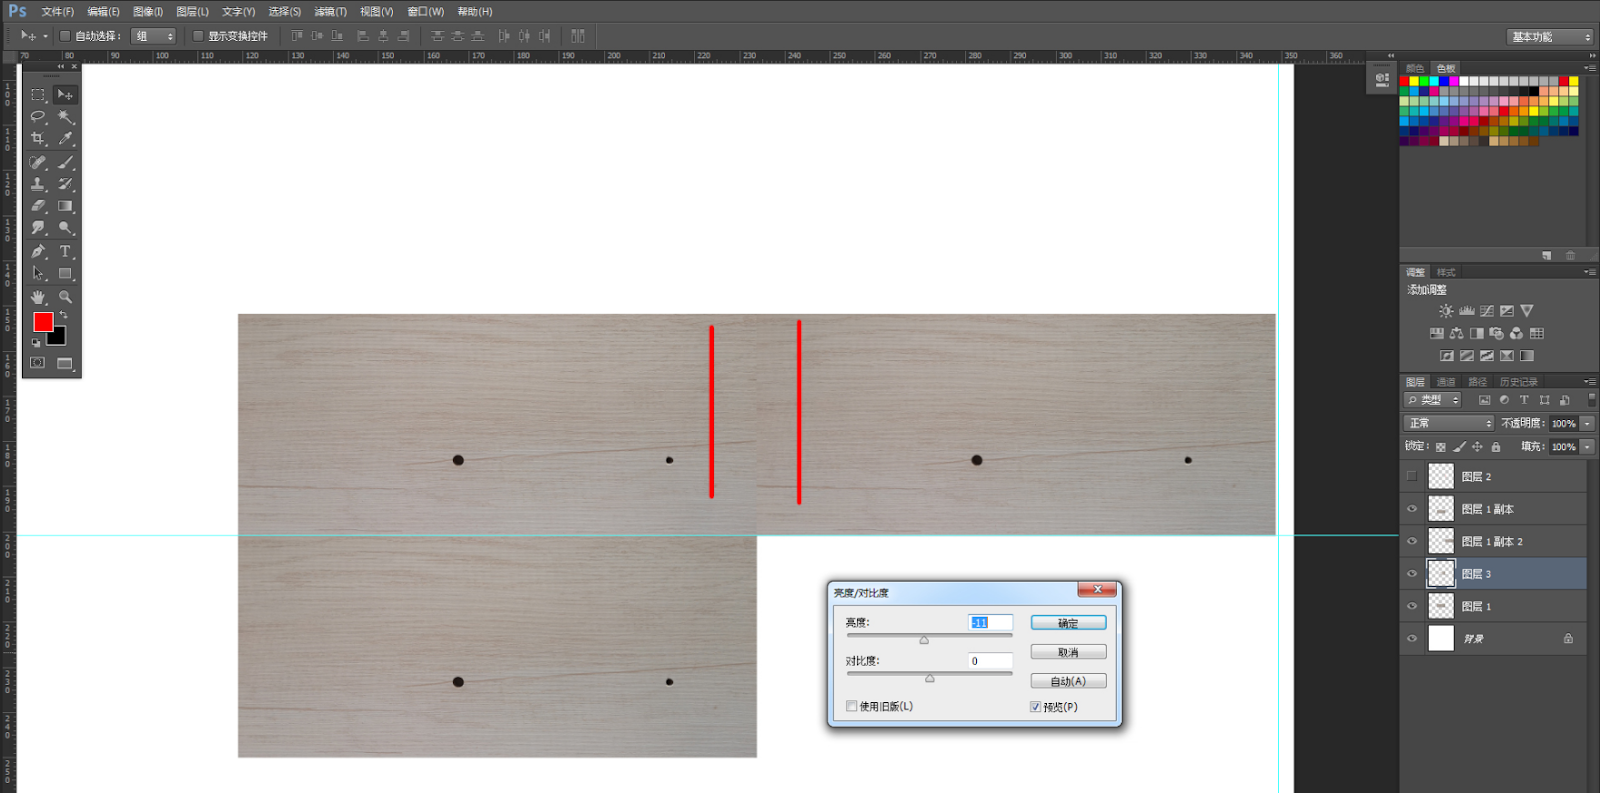
Step 2.04: Correct the four sides of the color shade, do gradient selection, copy the area with shade difference.
Step 2.05: In mask mode, press Q key to switch to selection status.
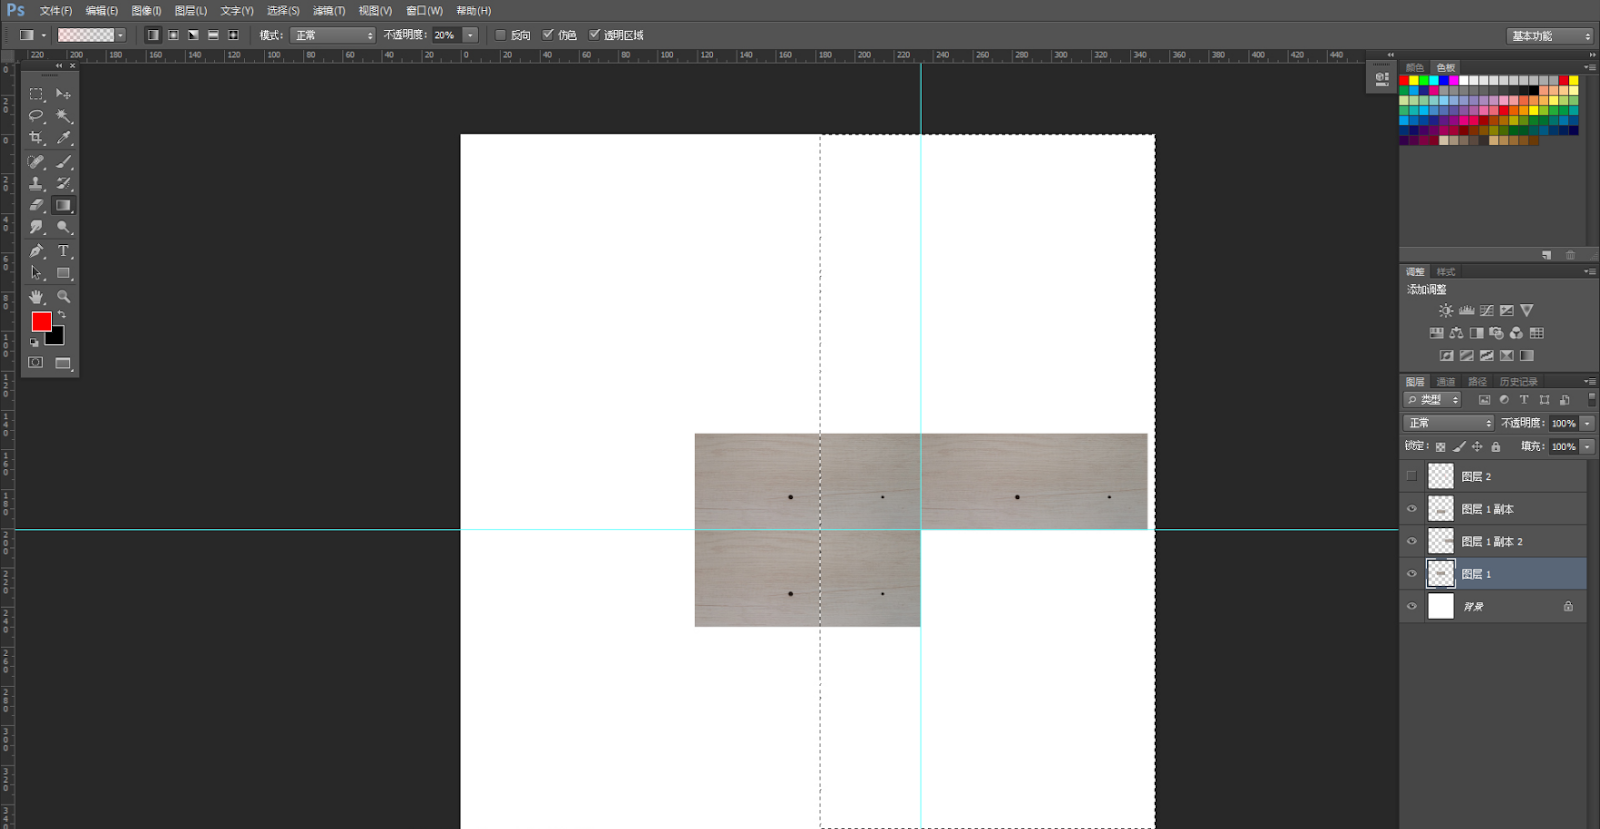
Step 2.06: In the selection status, copy the layer.
Step 2.07: Adjust brightness, contrast, and color so that the left and right are consistent.
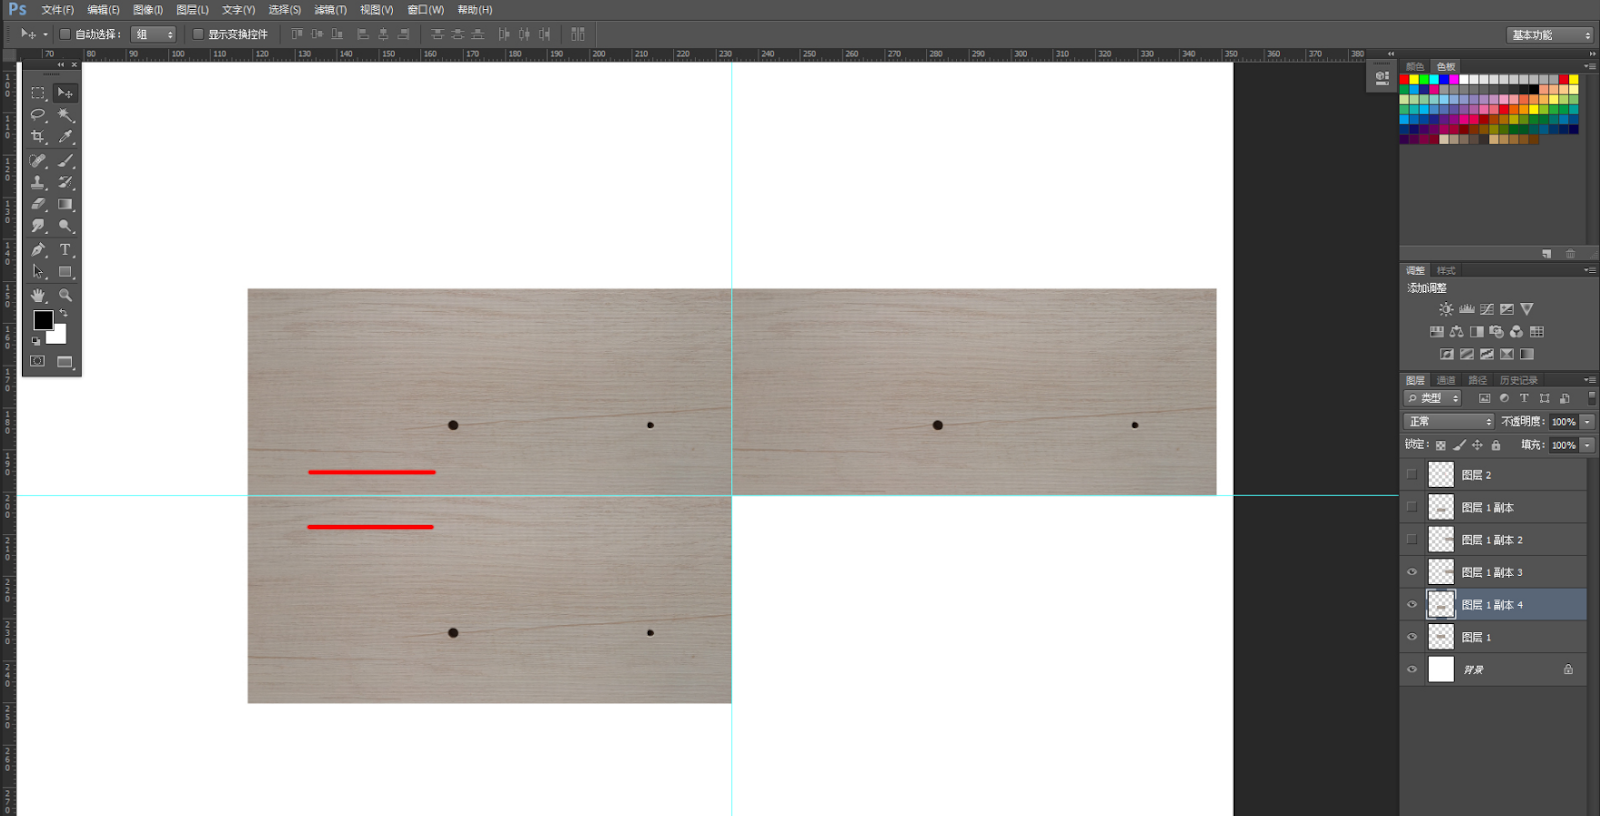
Step 2.08: Correct the four sides of the color shading as above to deal with the lower color shading.
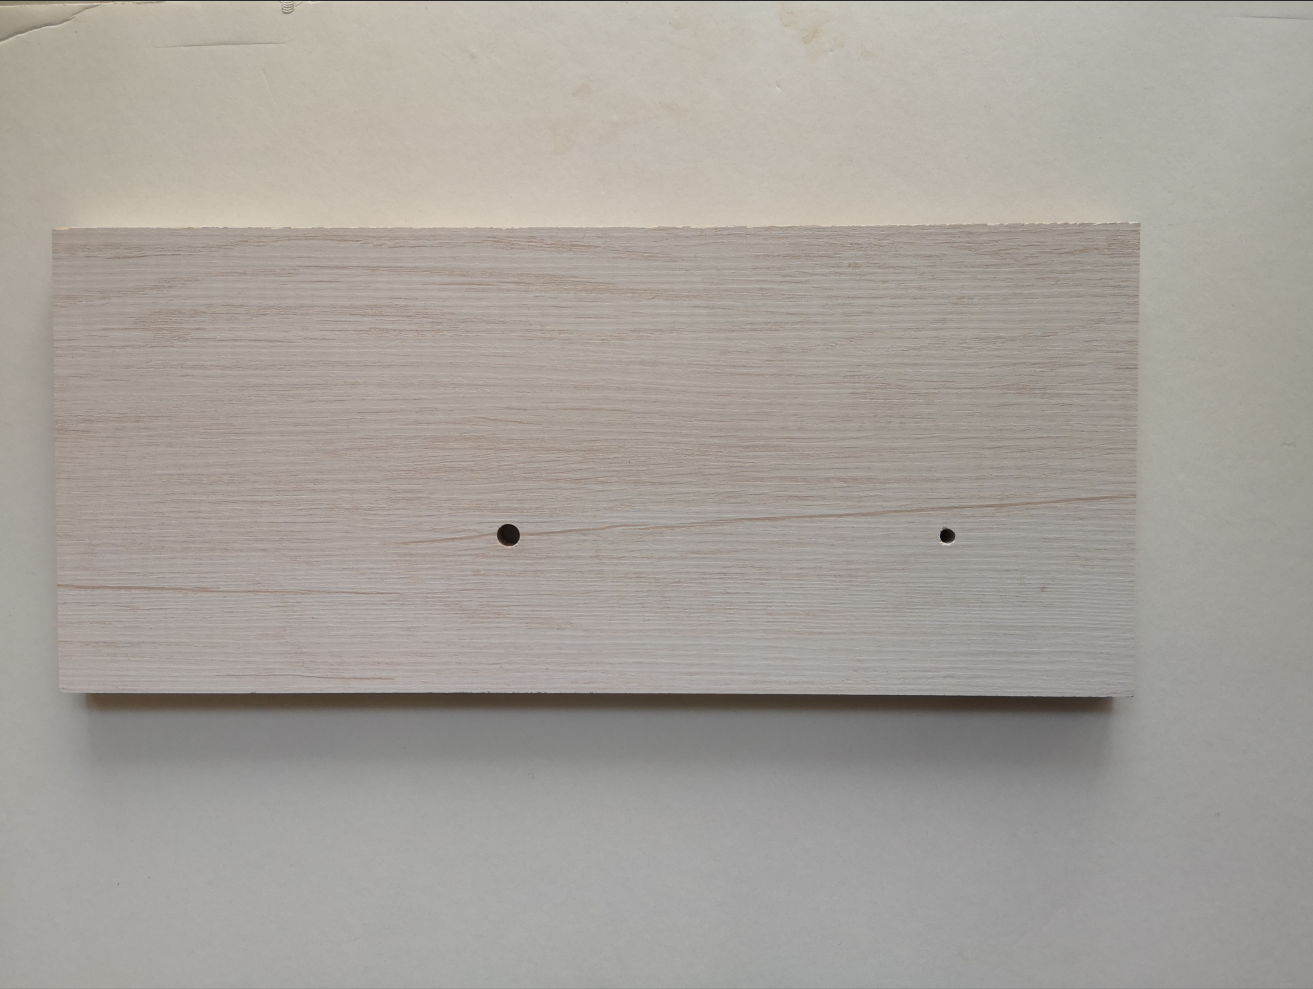
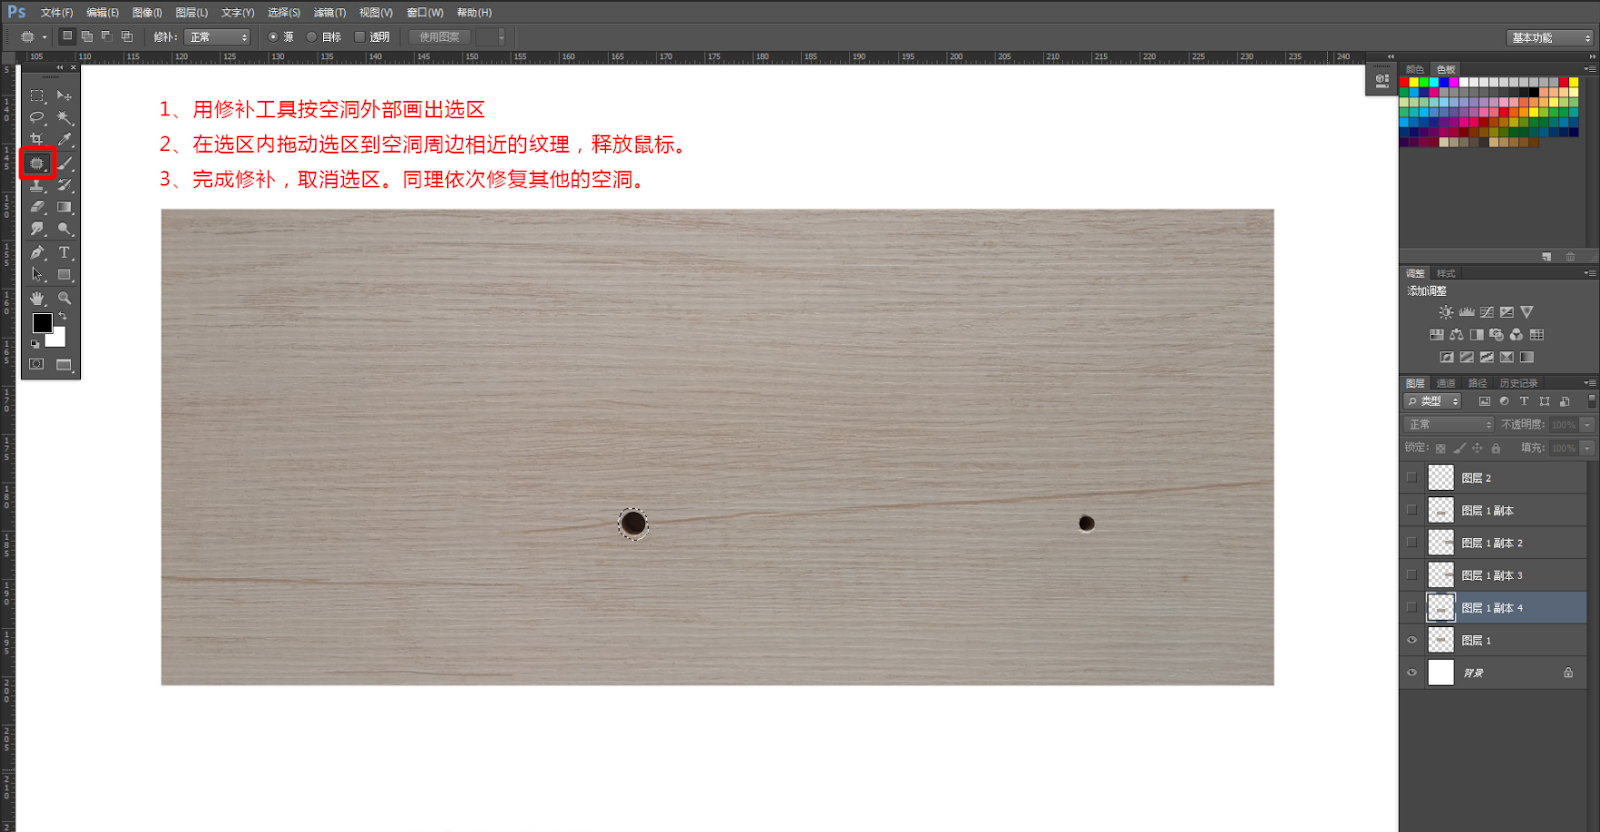
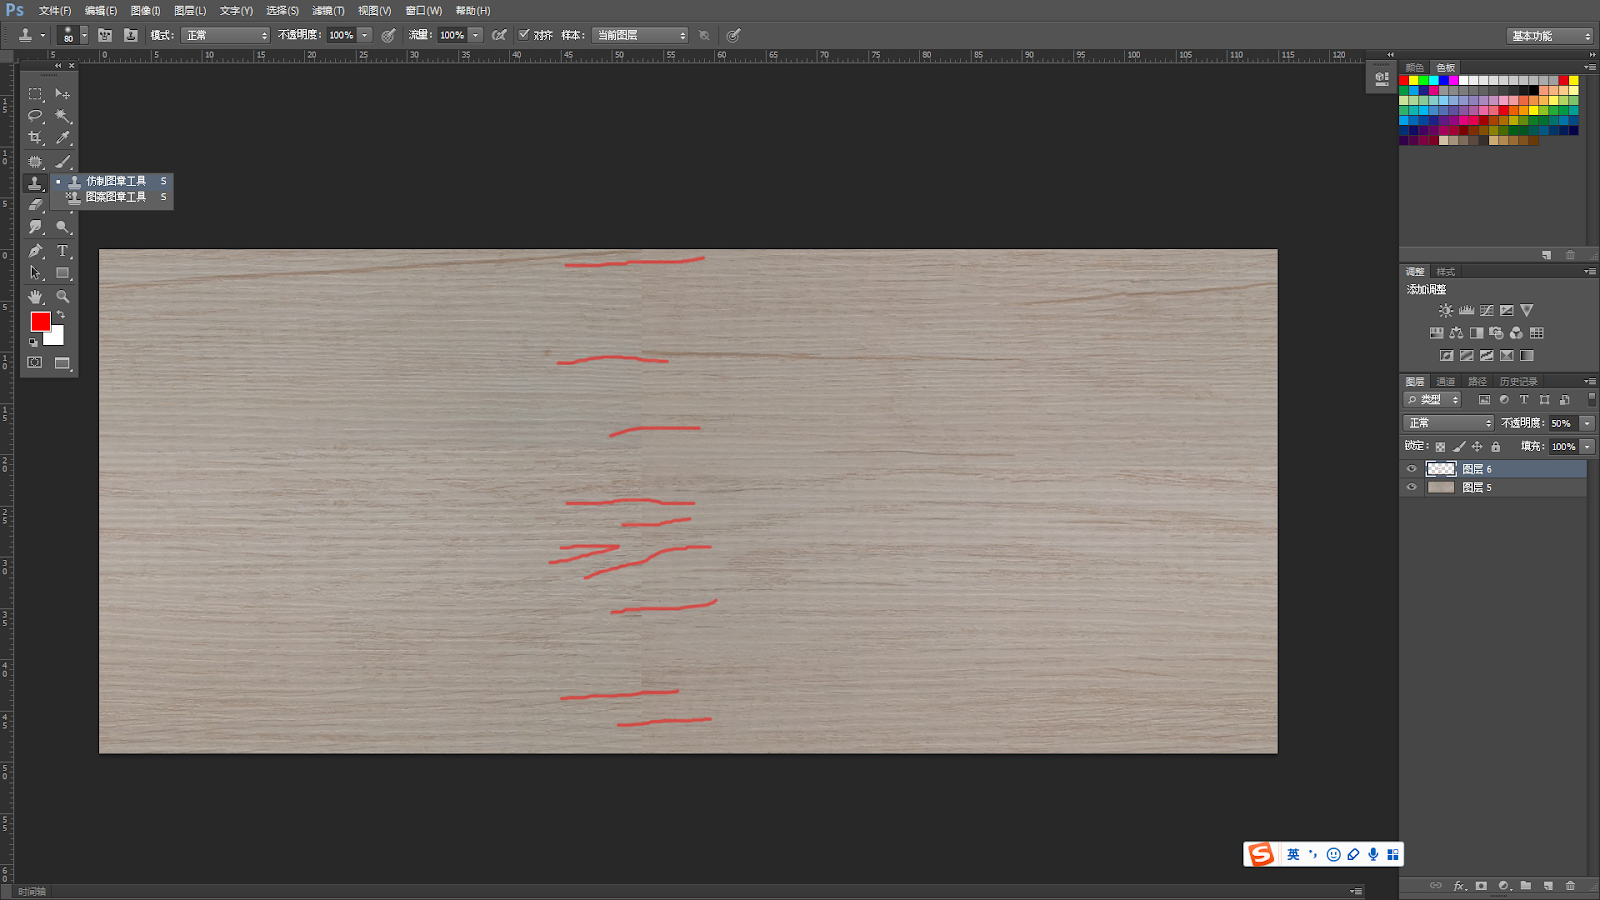
Step 3.01: Repair holes.
-
Use the patch tool to draw a selection outside the area.
-
Drag the selection inside the hole to a nearby texture.
-
Complete the repair, cancel the selection, and use the same method to repair other areas at once.
-
Use the patch tool to draw a selection outside the area.
Drag the selection inside the hole to a nearby texture.
Complete the repair, cancel the selection, and use the same method to repair other areas at once.
Step 4.01: Delete extra layers around the four corners continuously, crop excessive canvas, and check image size.
Step 4.02: Process four-sided continuous menu: filters/other/displacement.
Step 4.03: Process four-sided continuous displacement horizontally and vertically, setting the numbers to half of the original pixel size.
Step 4.04: Process four-sided continuous horizontal directional texture, and copy similar regions nearby to repair the seam.
Step 4.05: Analyze the vertical seams of the four-sided continuous pattern, using the clone stamp tool to link the main texture naturally.
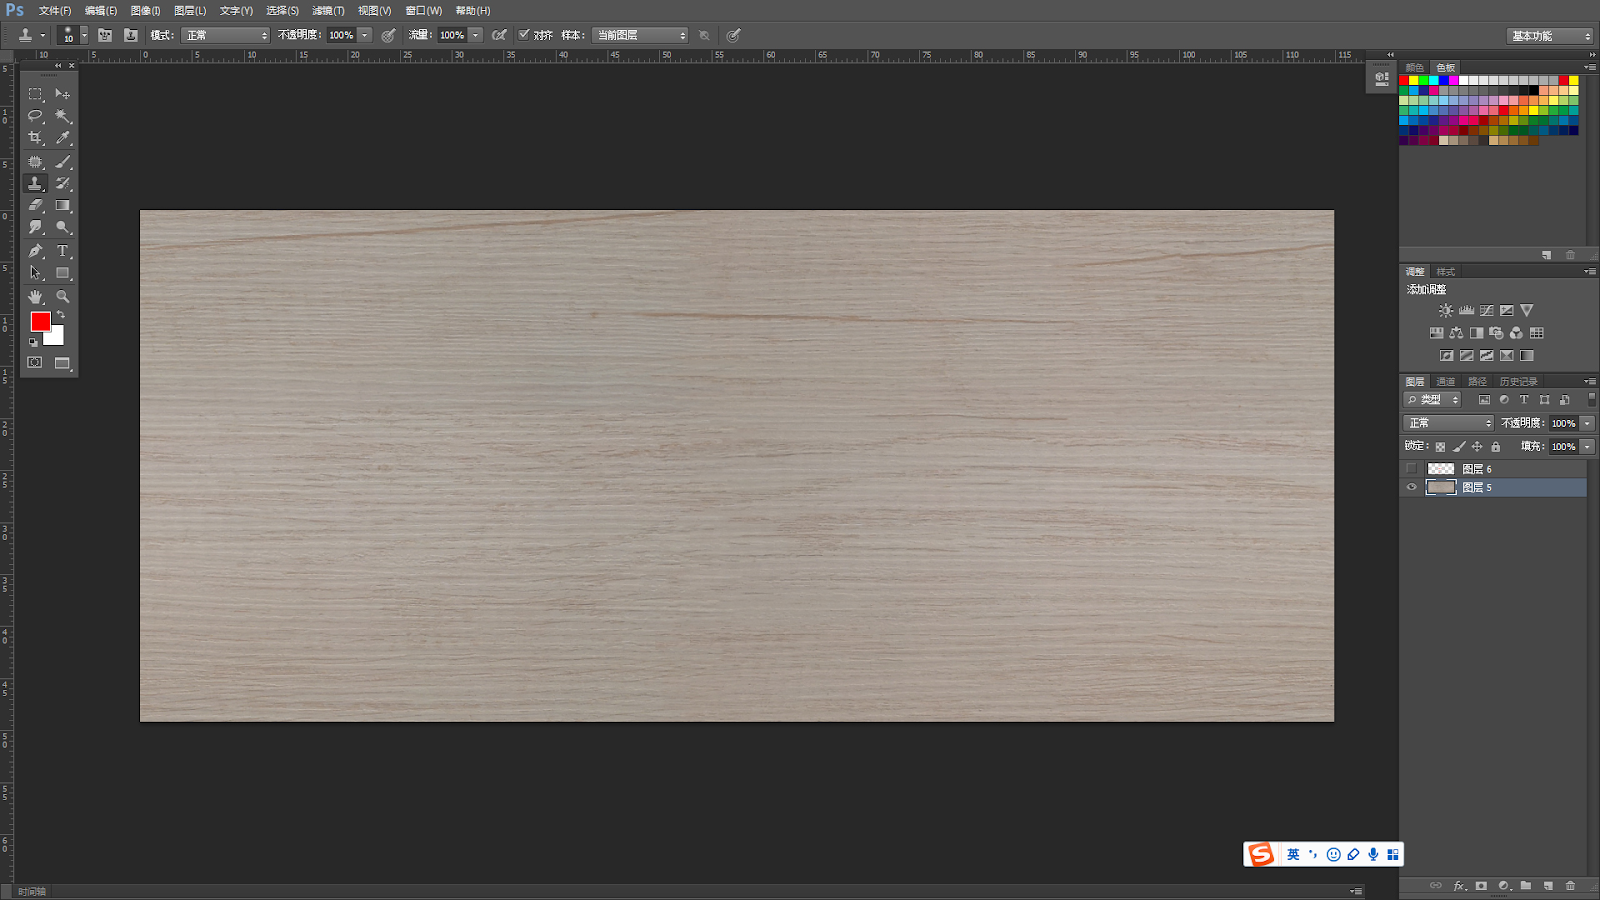
Step 4.06: Treat the appearance of the completed continuous four-sides.
Step 4.07: Revert back the displacement values to their original state, completing the four-sided continuous processing.
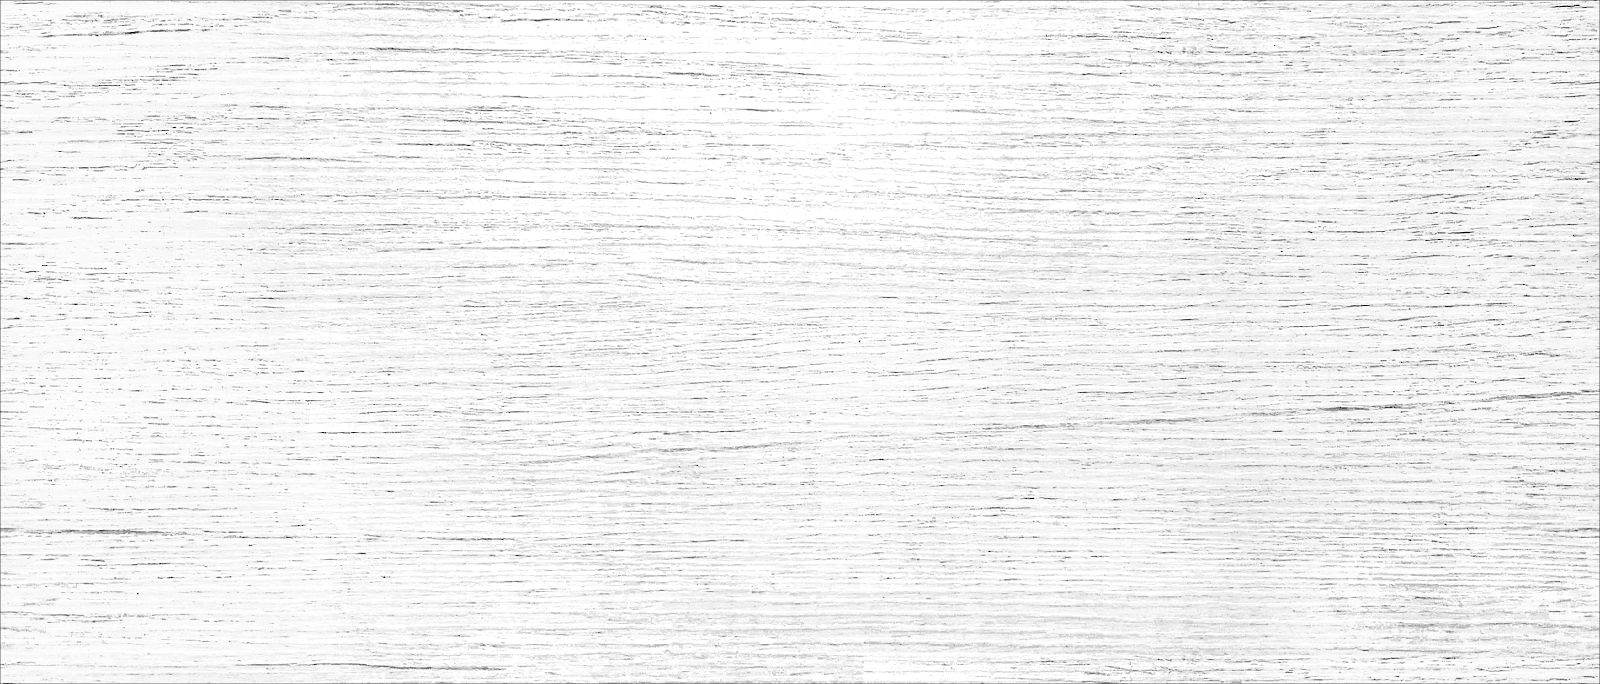
Step 5.01: Copy a layer of black and white bump channels, go to the menu "Image/Adjustments/Black and White" to create black and white bump channels.
Step 5.02: Observe the texture on the image; there is a biased red color that cannot be directly converted to black and white.
Step 5.03: Highlight the red color in the bump map and makethe corresponding black and white become white, leaving the concave black and protruding white.
Step 5.04: Strengthen the black and white contrast and adjust the black and white region with the "Image/Adjustments/Curves" menu.
Step 5.05: Black and white bump channels have been adjusted.
Question: Why use the final processed four-sided continuous texture to create black and white bump channels?
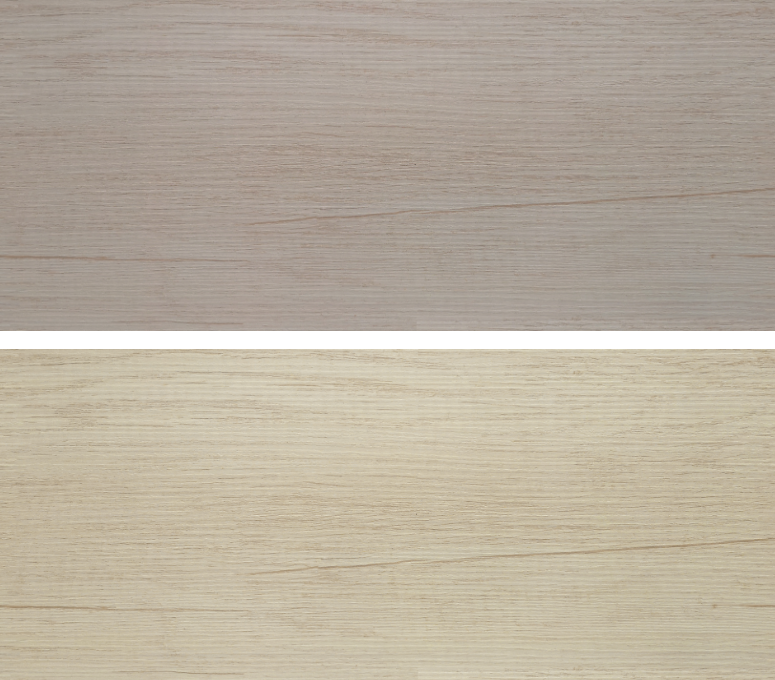
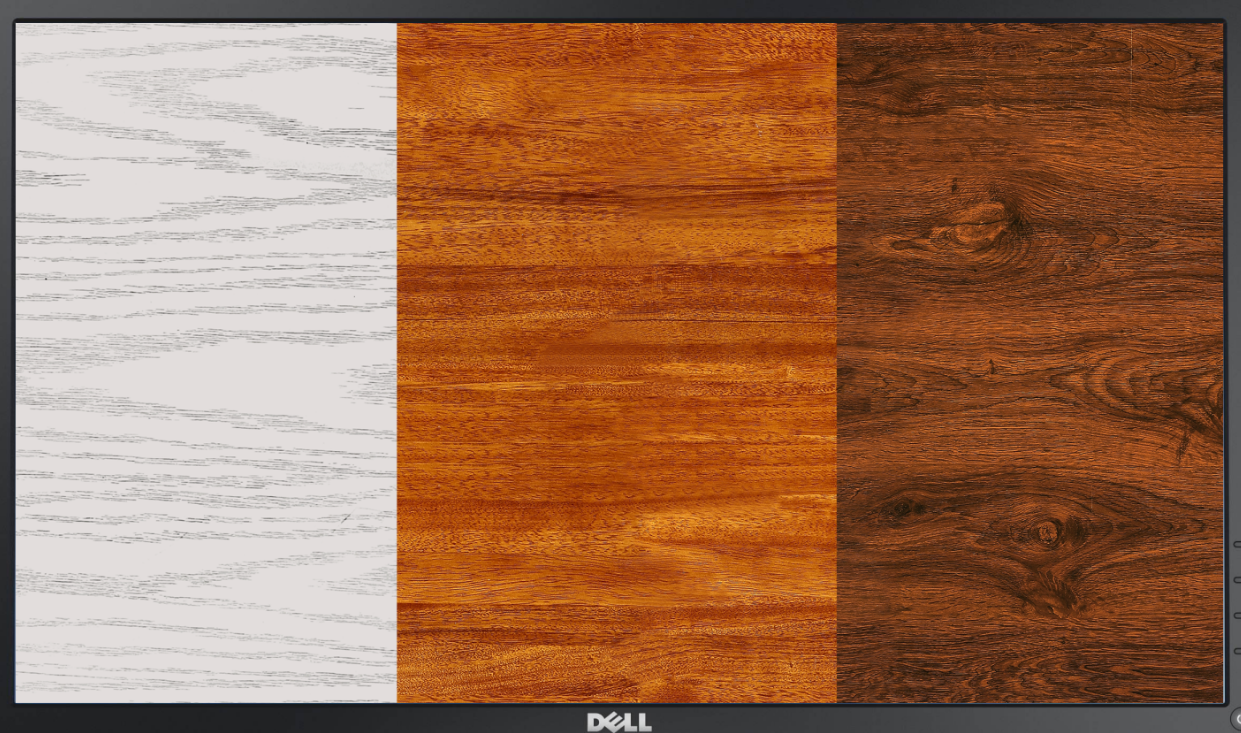
Photos taken by a camera usually have a color difference problem, so it's best to get an object for color correction.
Before color correction

After color correction
Different phones may display the same texture differently.
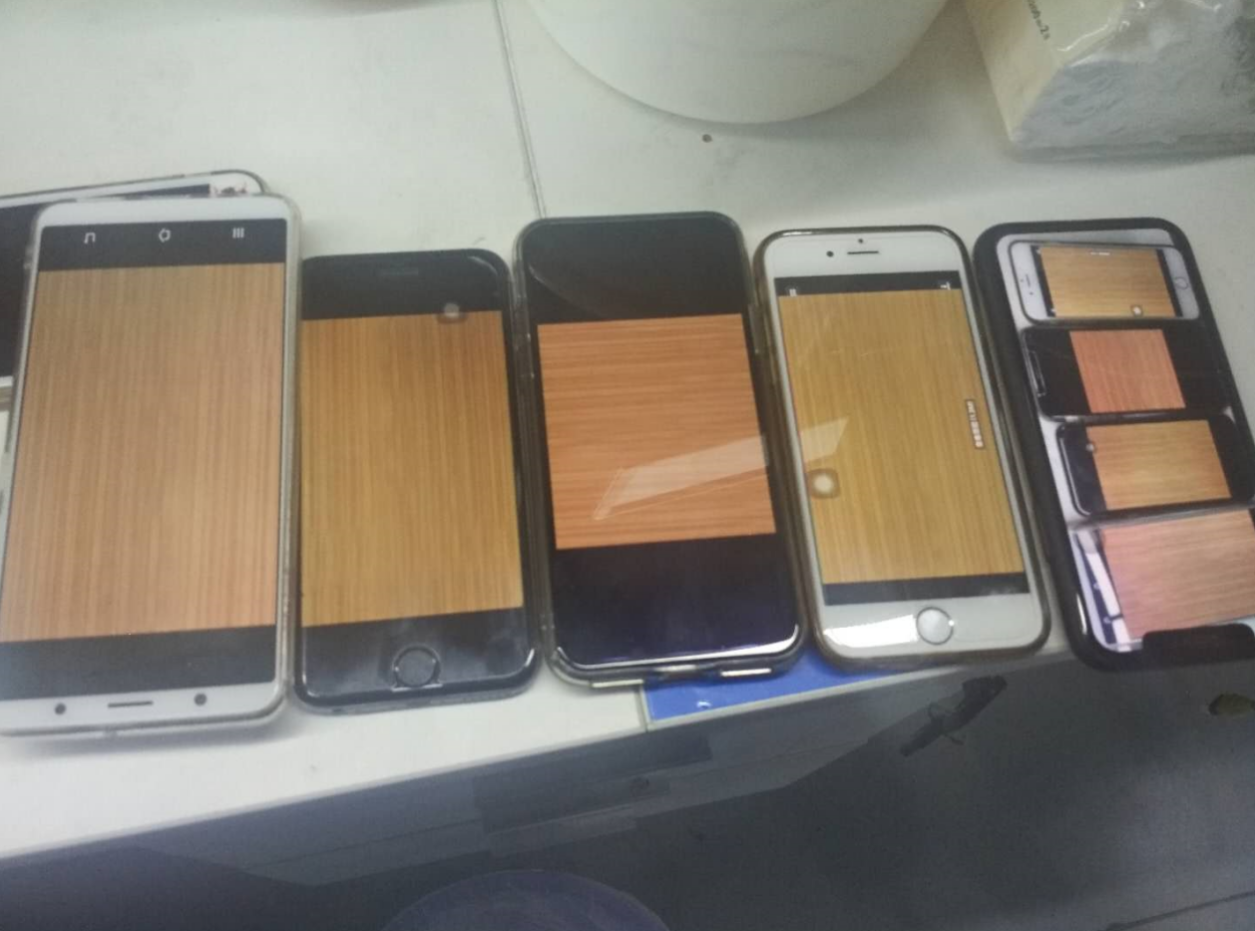
Therefore, it is recommended to confirm the color on a computer.
Material tips for the custom furniture:
3-1. What materials are available for the custom furniture?
Material categories include stone, board, glass, metal, fabric, flooring, etc.
3-2. What effects can be achieved with custom materials?
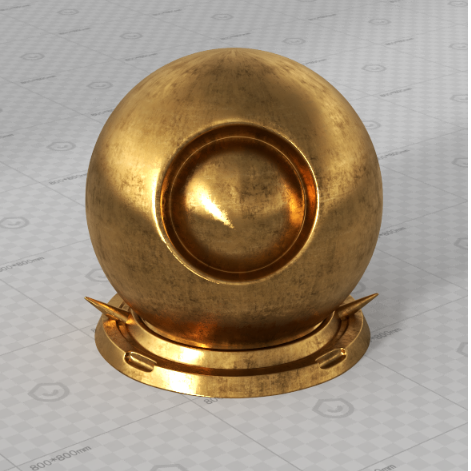
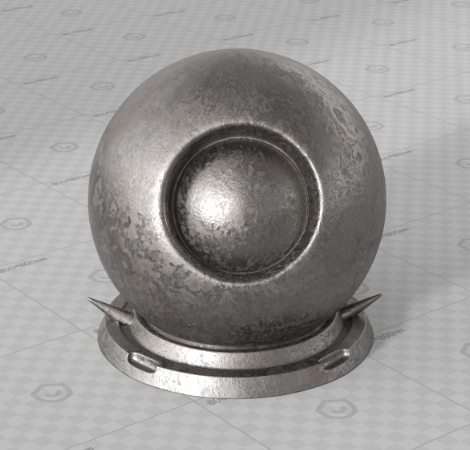
3-2-1: Metal
Brass
Iron
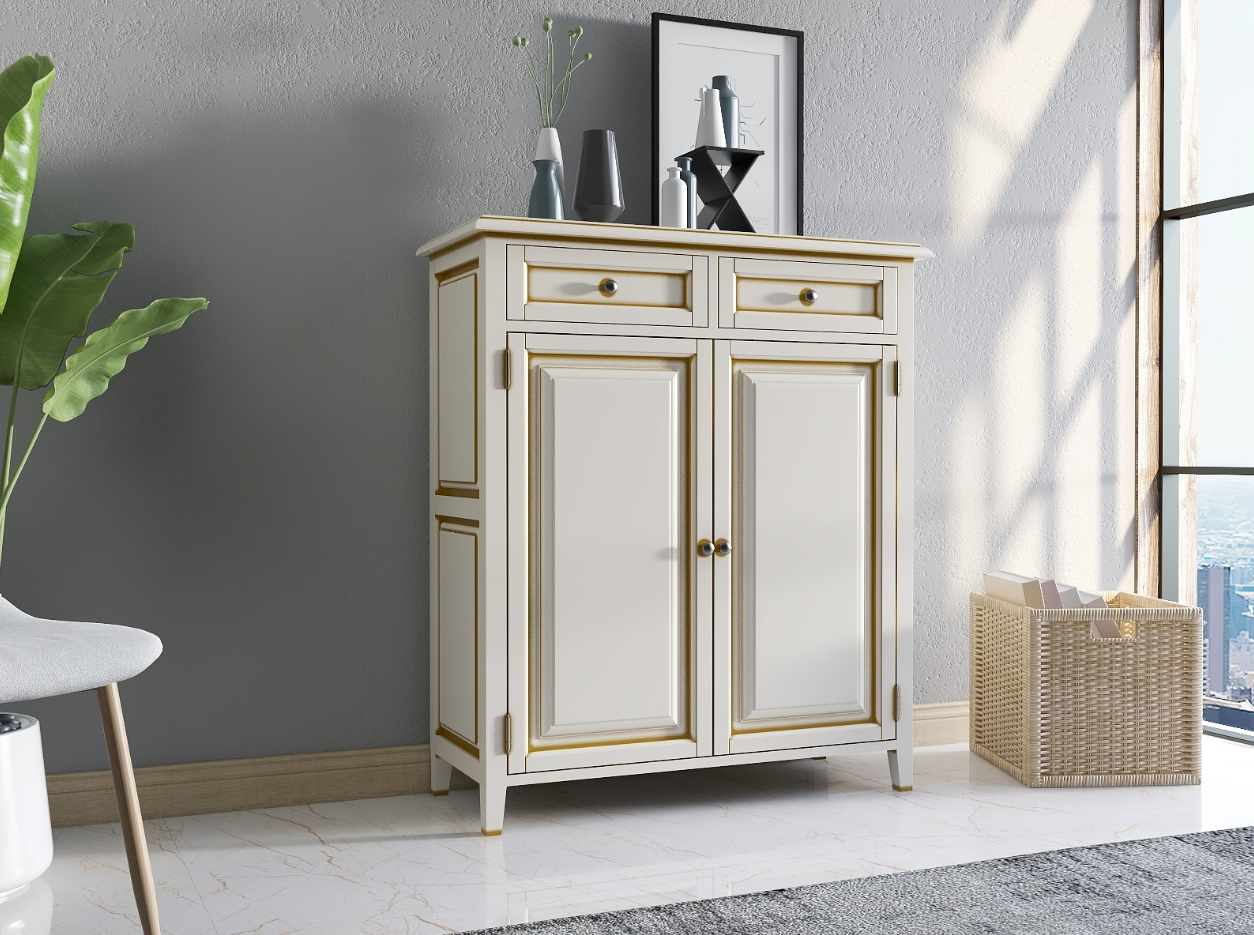
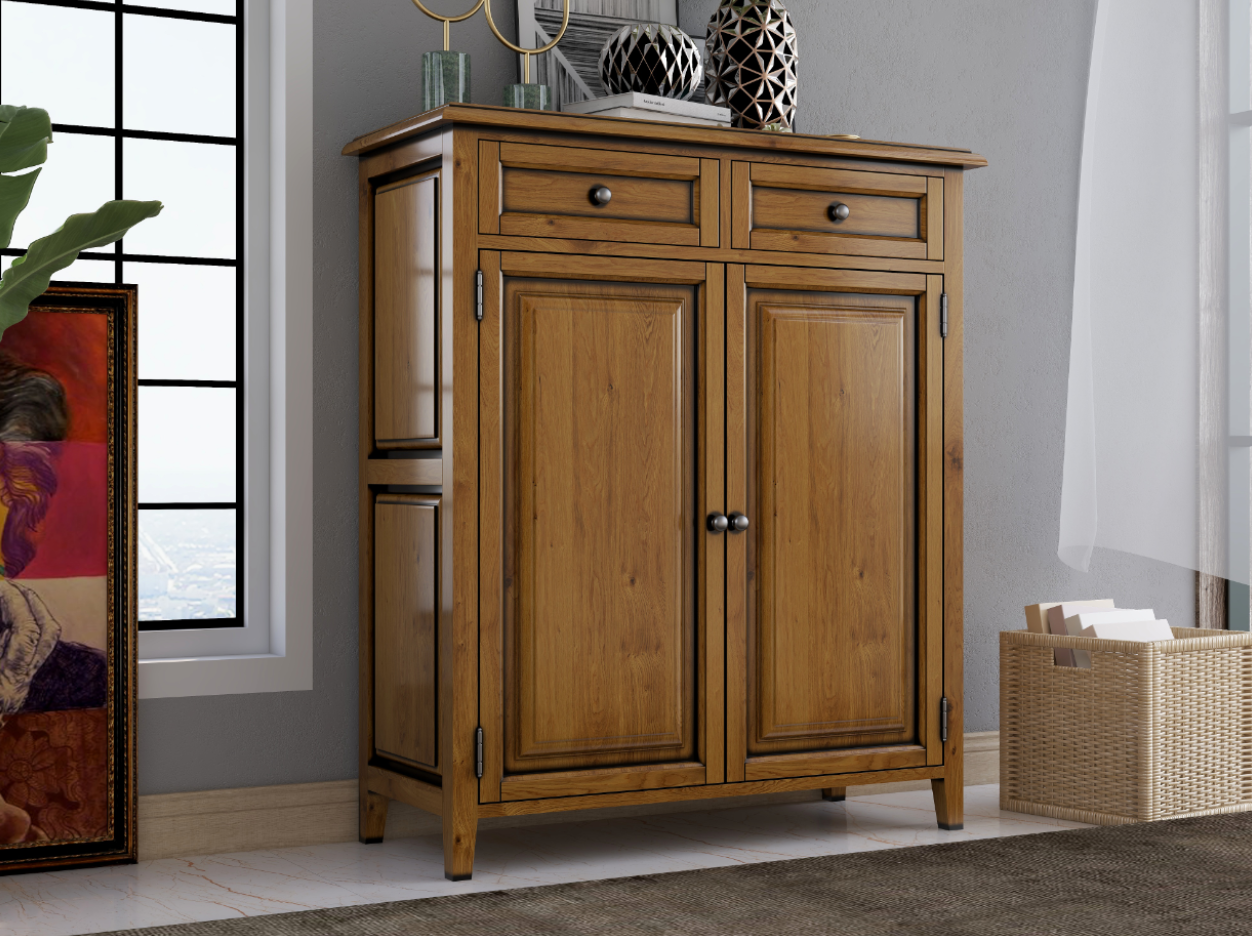
3-2-2 Panel section
Solid color paint (bronzing)
Solid wood paint (patina)
3-2-3 Glass section
Frosted glass
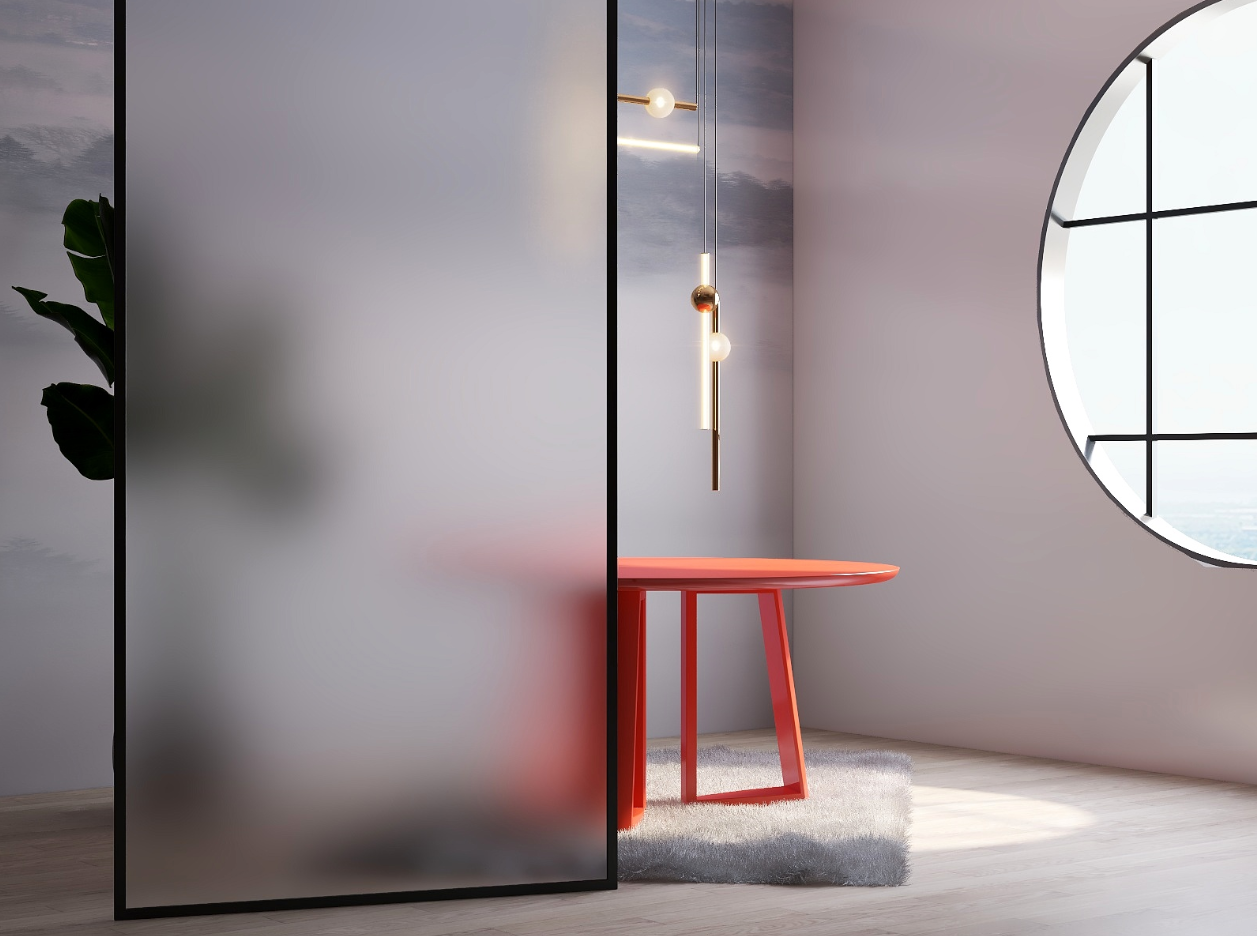
Glass-metal film
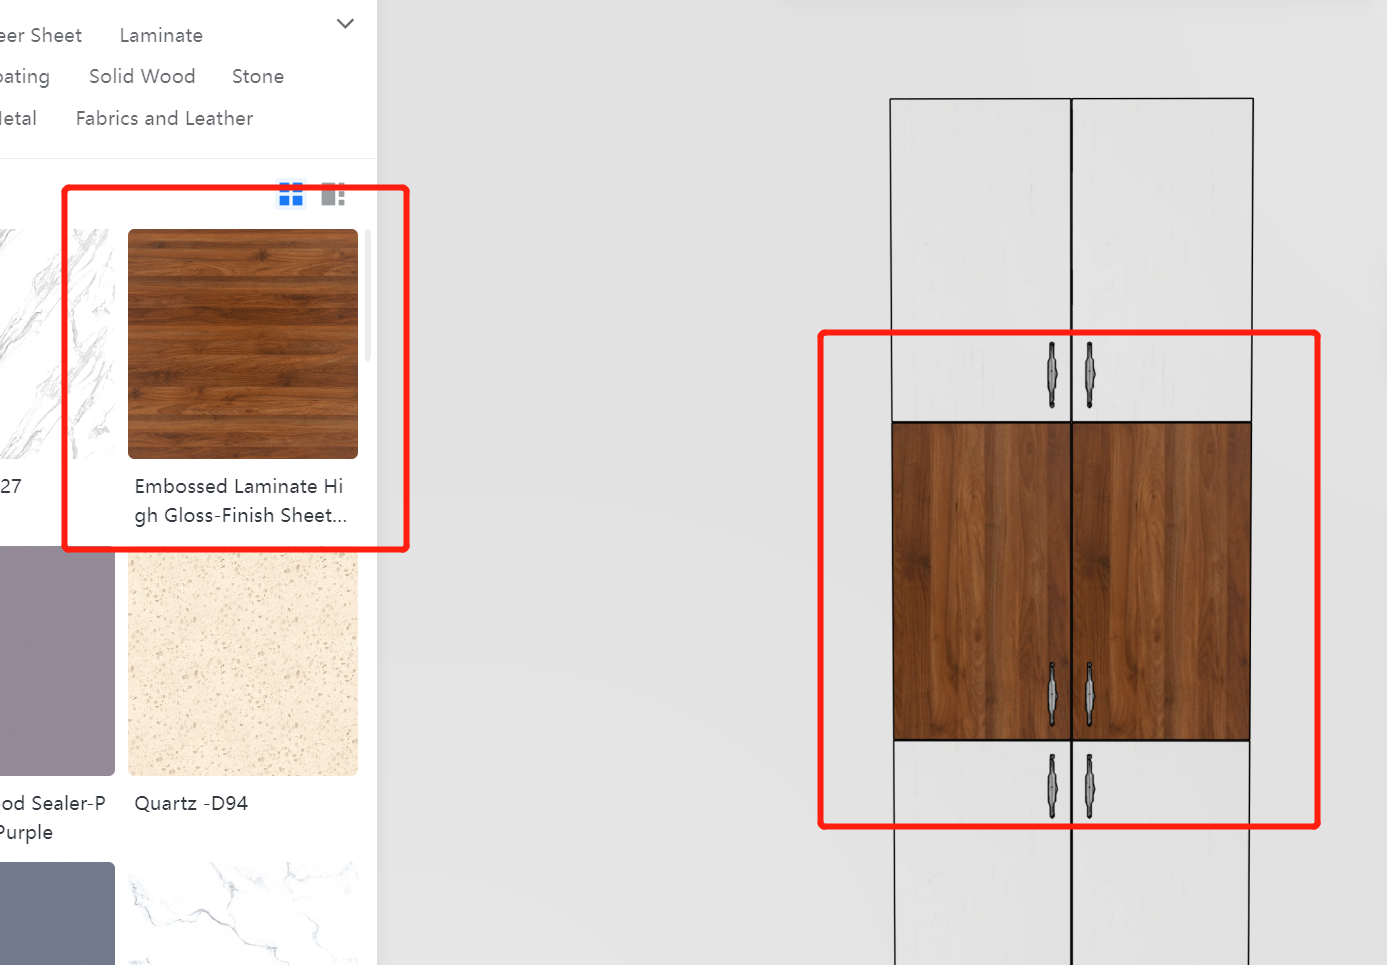
3-3. Panel texture uploaded according to horizontal stripes
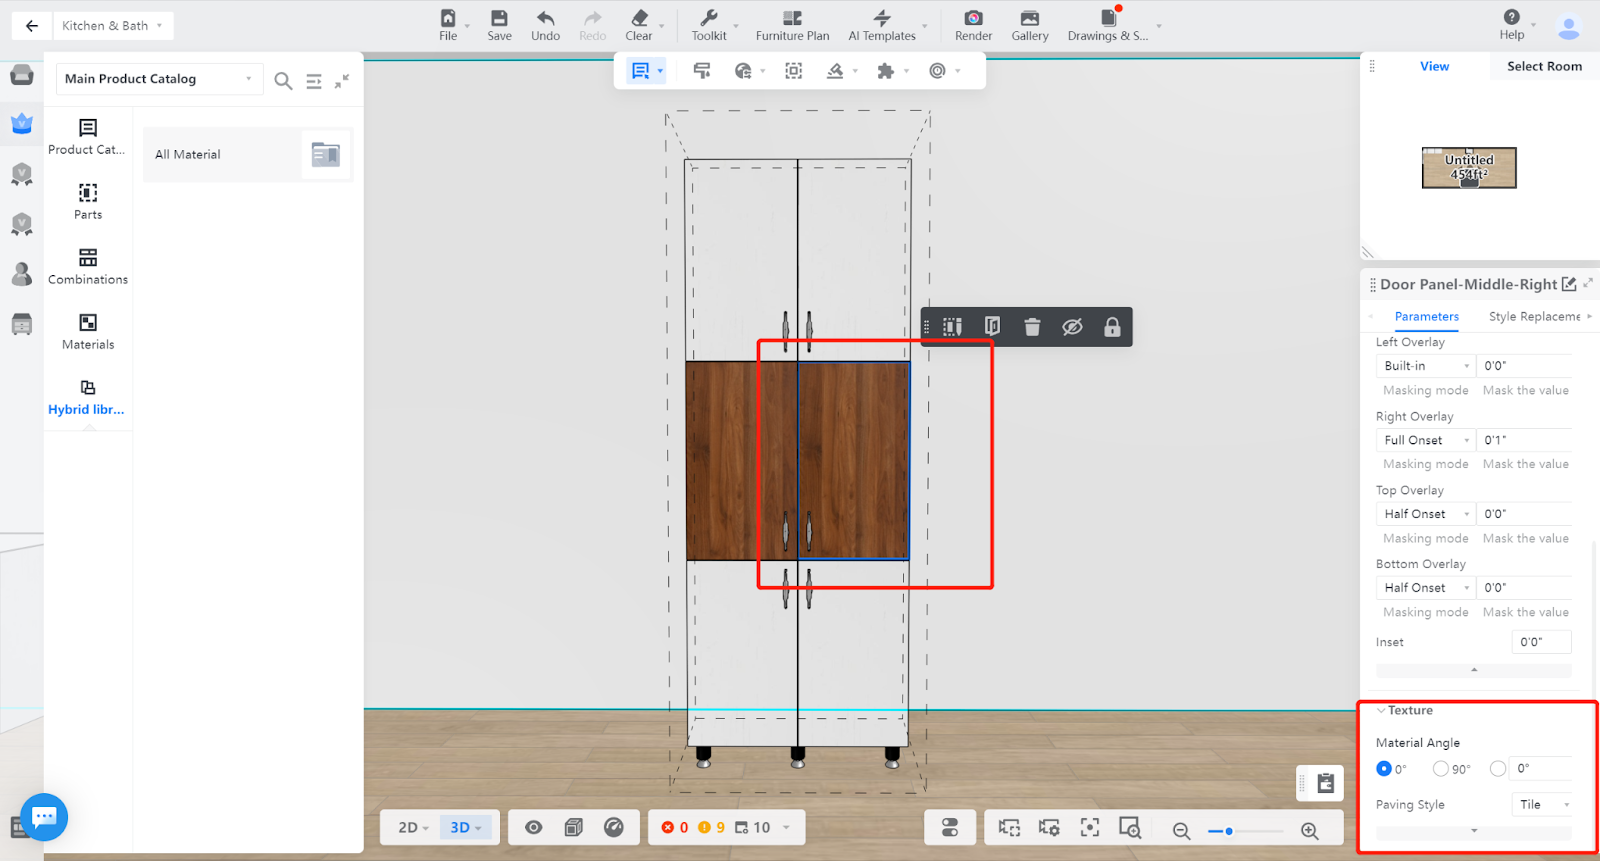
Attention! When uploading materials for custom furniture, it should follow the standard of horizontal stripes! You can adjust the texture angle of the model by modifying the horizontal and vertical textures in the tool.
Attention! Horizontal and vertical stripes can also be adjusted in the tool!
In the custom furniture tool, you can modify the texture of "all panels" and "flat doors."
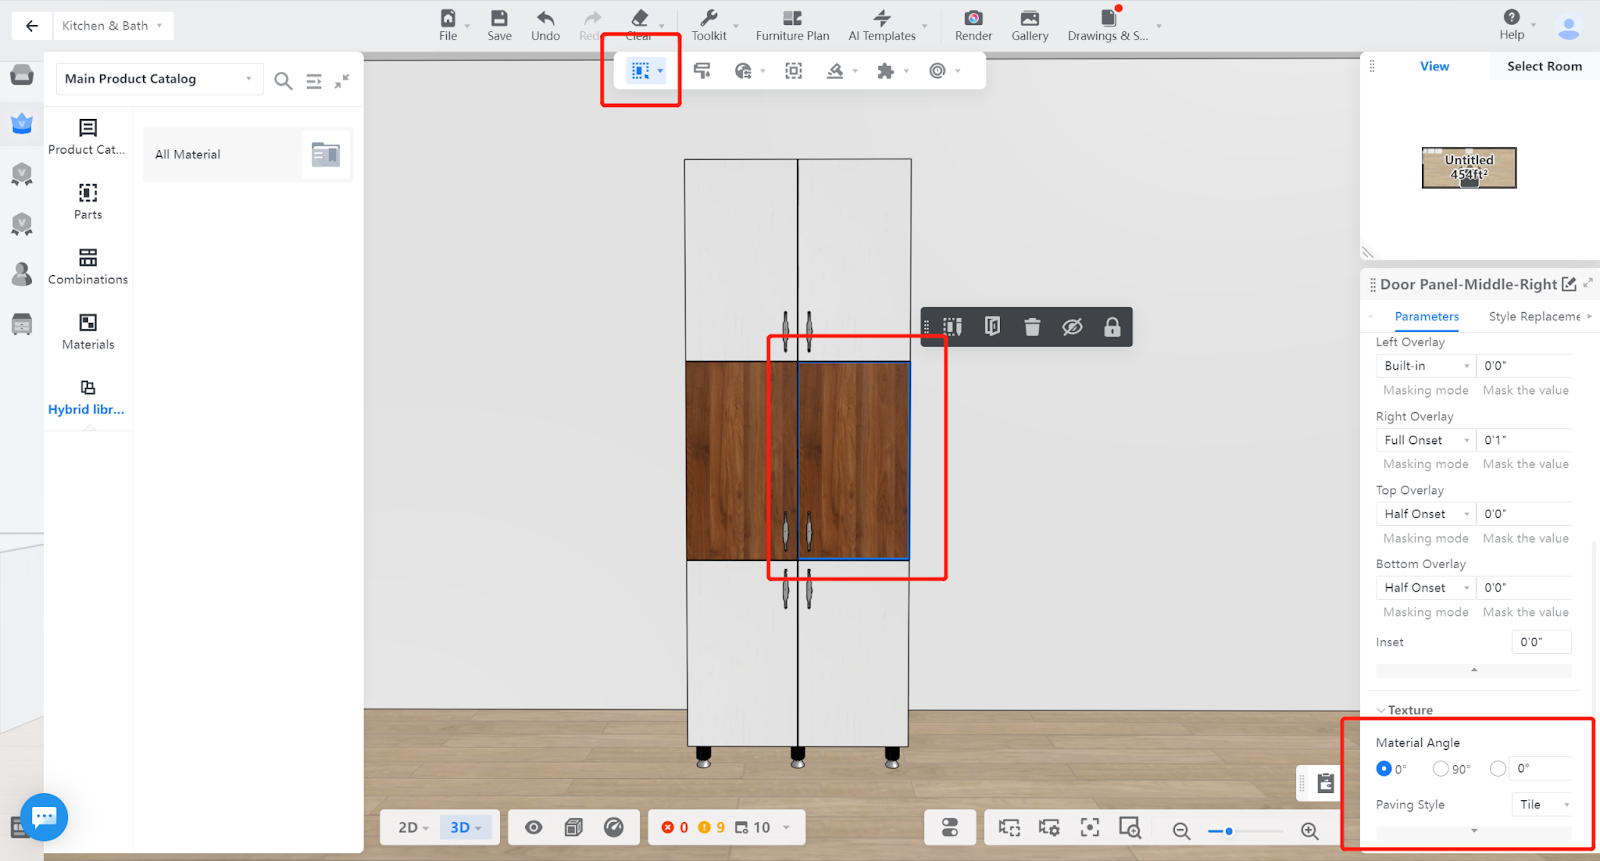
Flat door: Double-click to select the door panel-navigate to the flat door under the navigation tree and select the flat component-material texture advanced settings.
4.Material texture upload
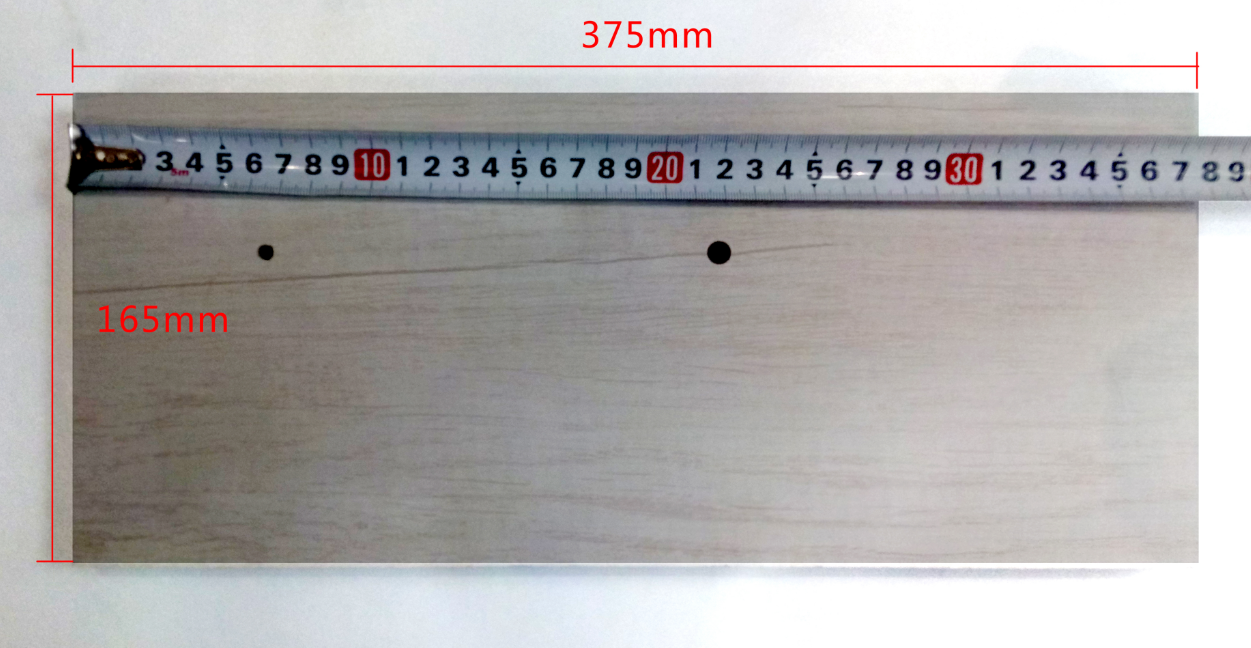
※ Texture size
The size of the uploaded texture refers to the actual length and width of the photographed panel (to ensure that the texture ratio is not enlarged/reduced).
Ruler measurement
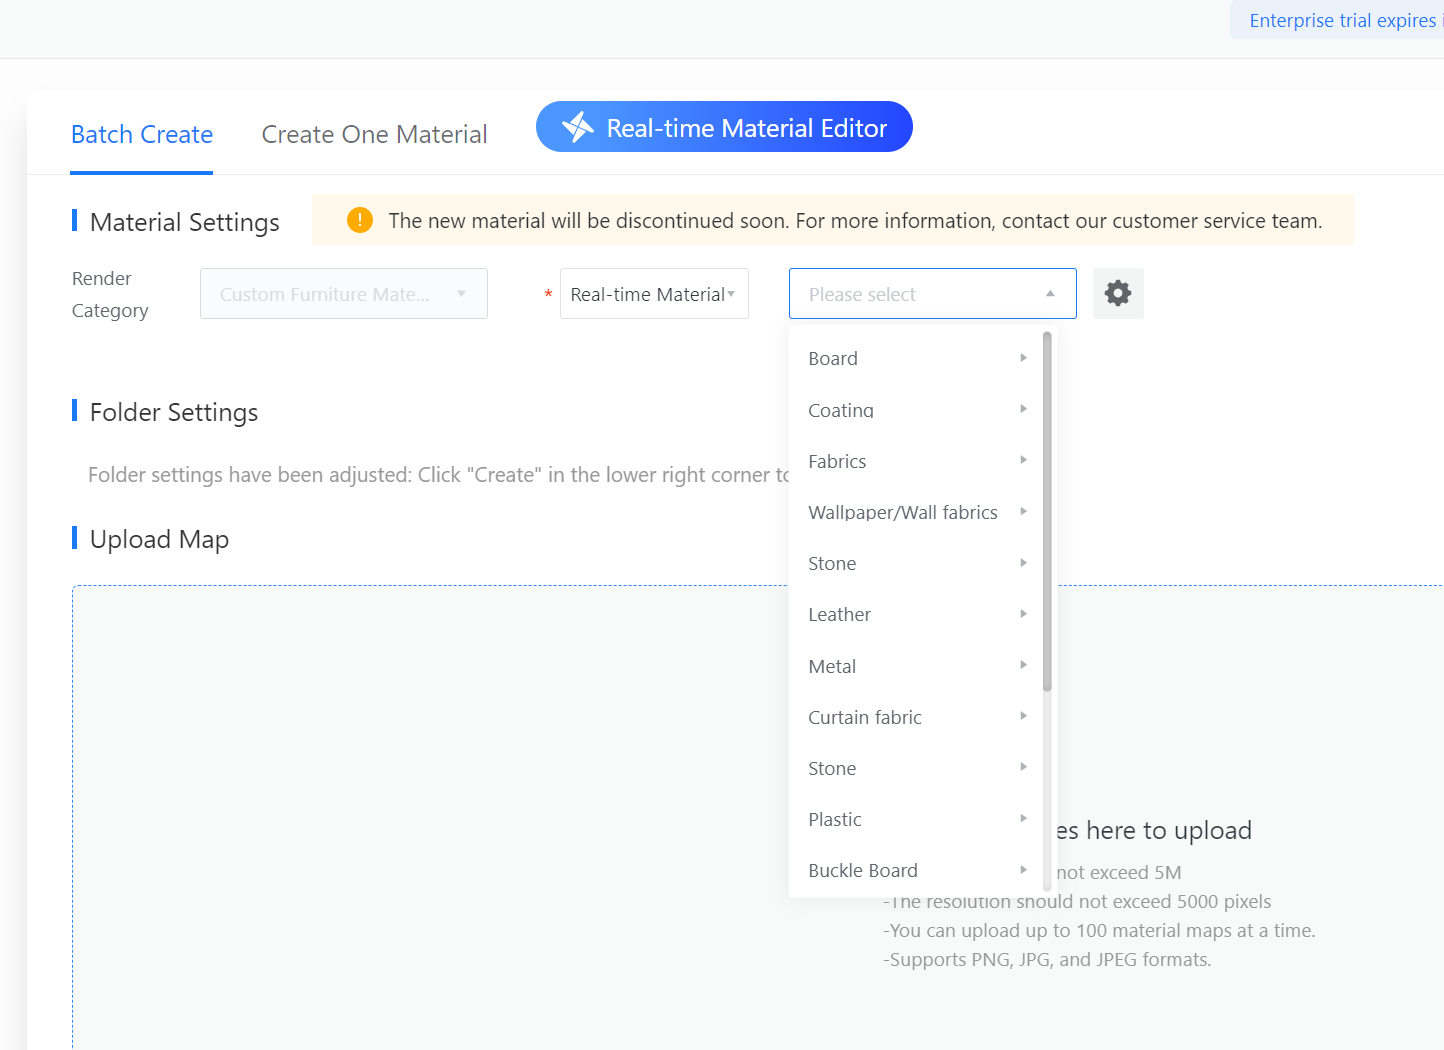
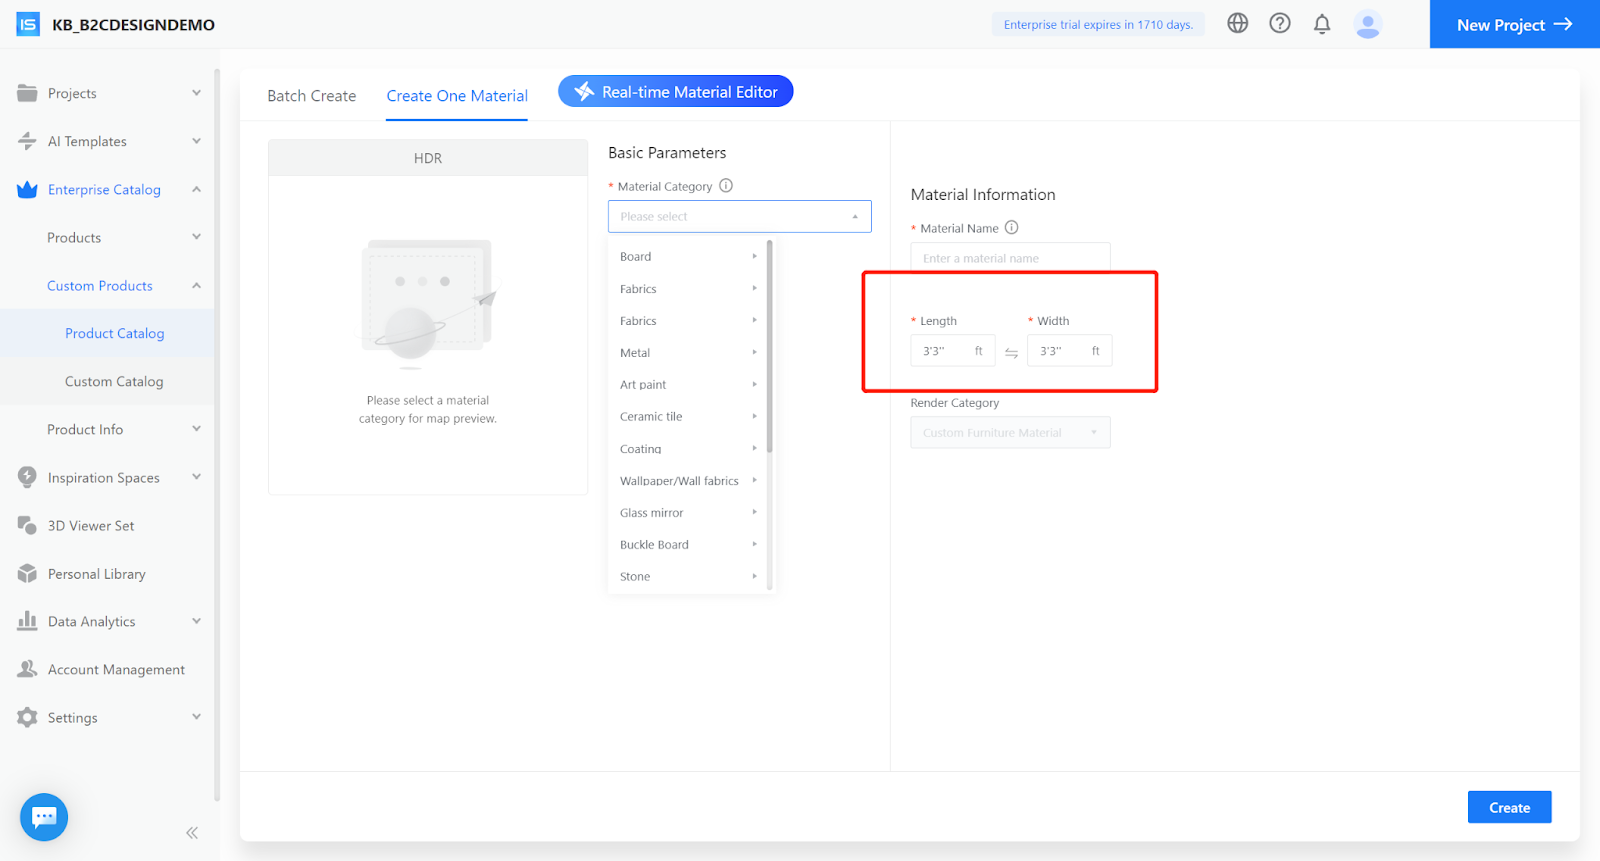
4-1 Custom furniture material upload
Step 1: Enter the custom furniture material upload entrance
Enterprise background → Custom Product → Materials
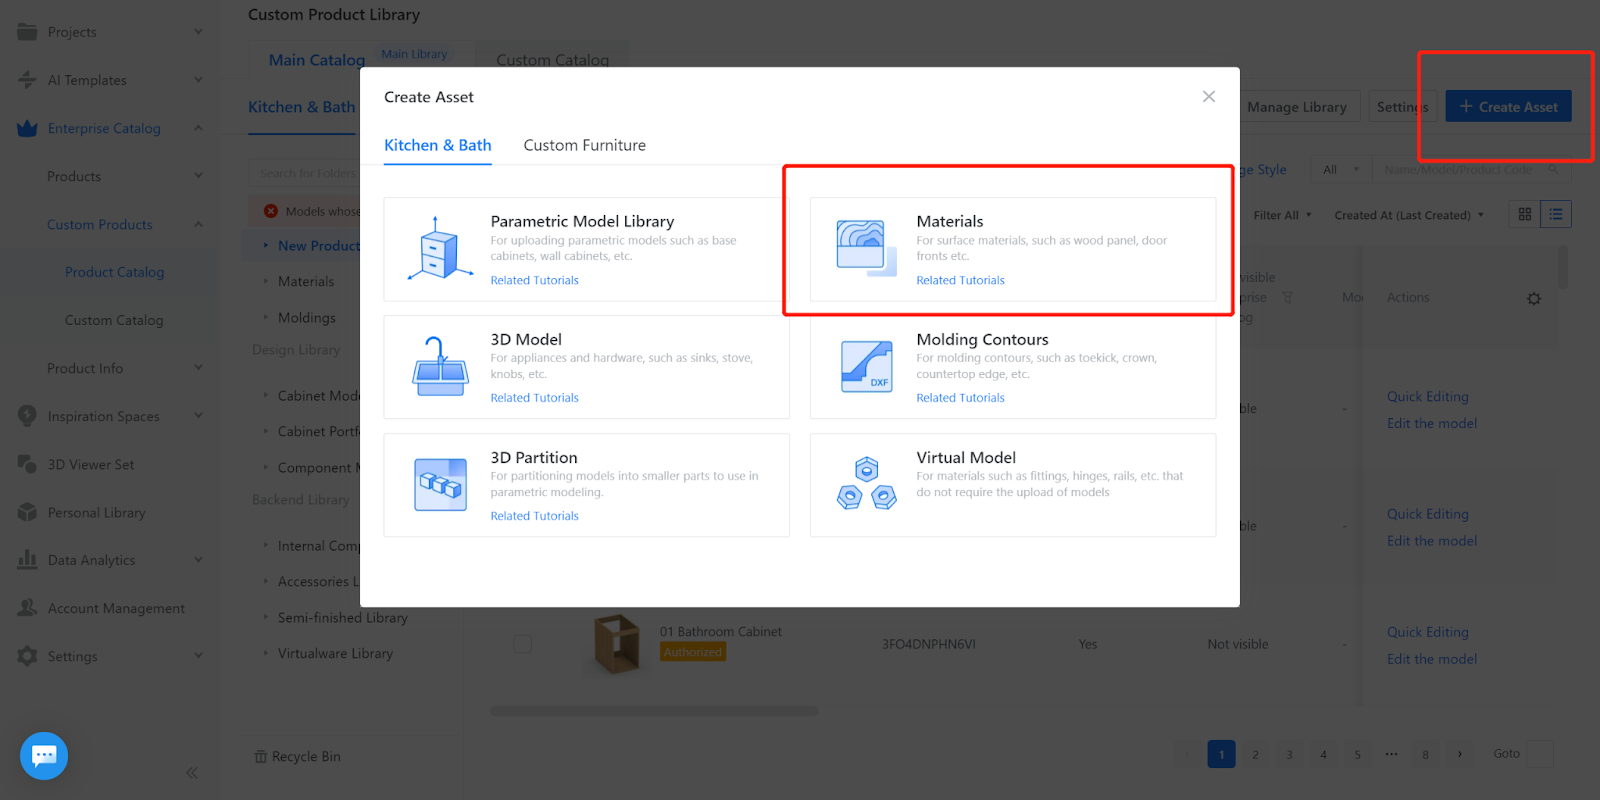
Tips: There is a tutorial link at the entrance
Step 1: Enter the custom furniture material upload entrance
Select material category → Modify diffuse map → Preview effect → Confirm material name and size information;
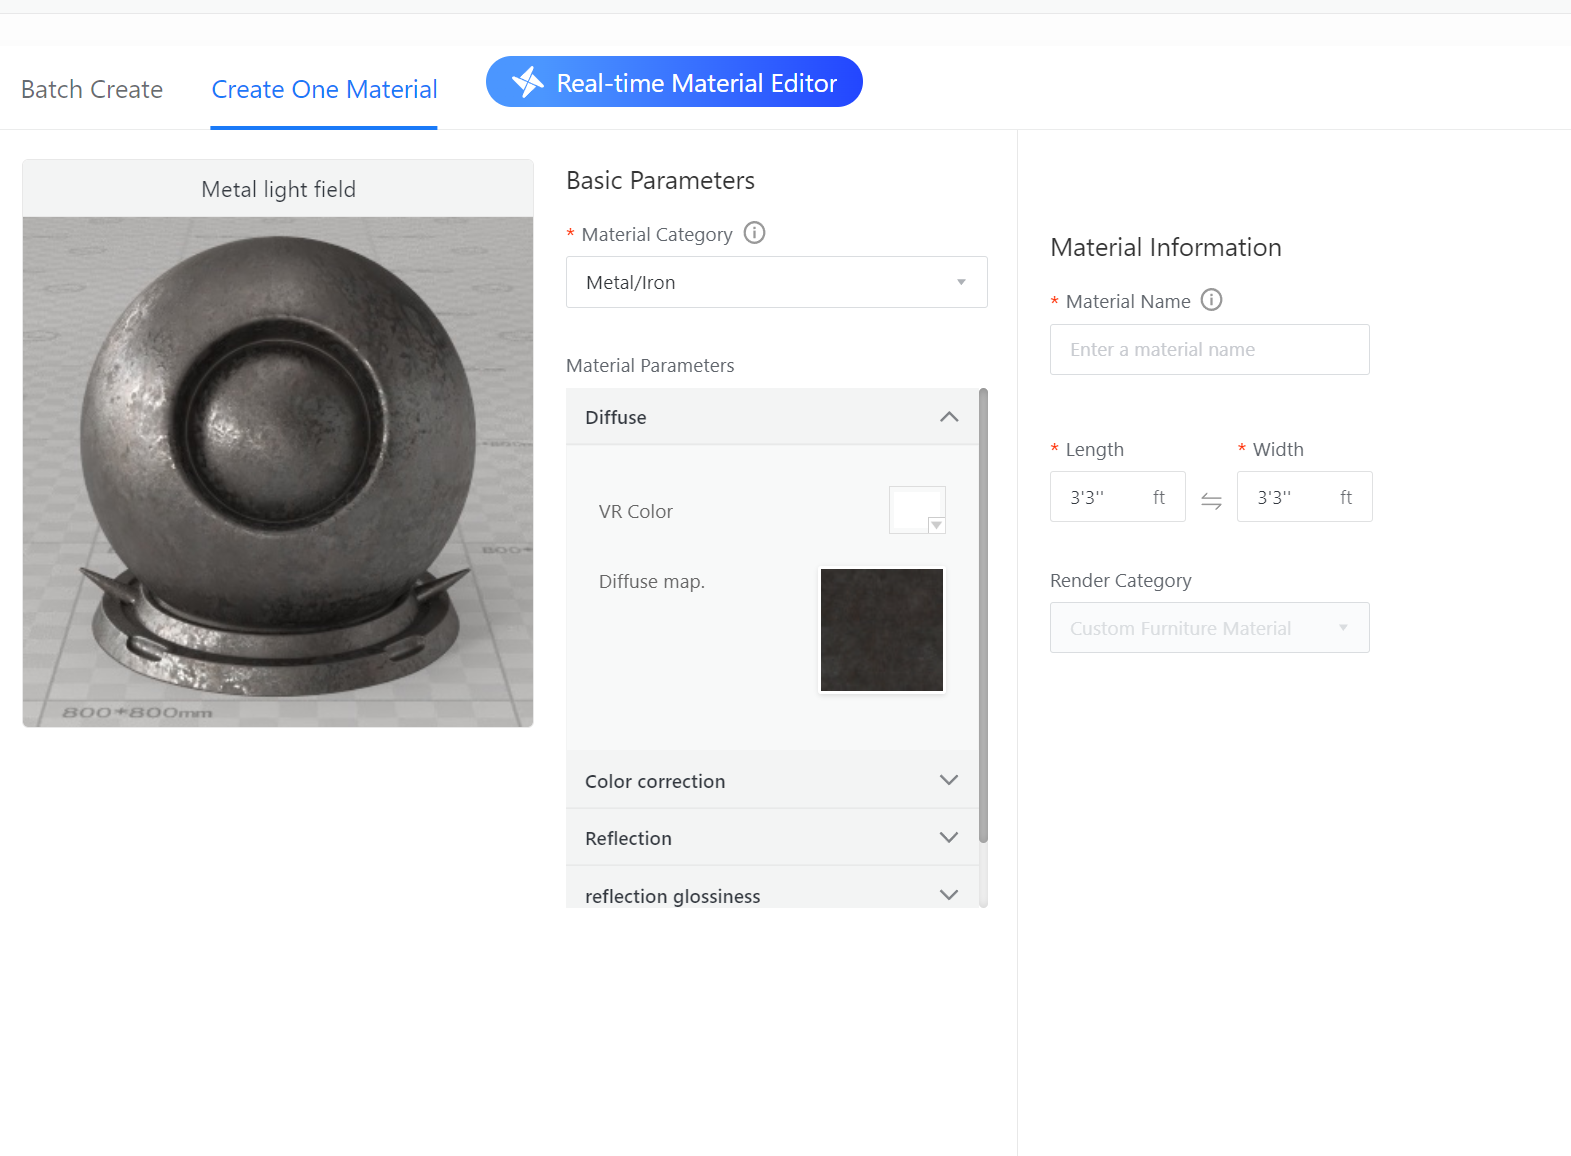
Tips: 1.The size of the texture file is within 5M;
2.The pixel of the texture file is within 5000;
3.The color mode of the texture file is RGB;
4.The format of the texture file is *.jpg, *.jpeg, *.png, *.bmp, *.jp2, *.jpe, *.dib, *.tiff, *.tif; In principle, the higher the pixel of the texture file within the specified range, the better.
Mixed material
The production process of mixed materials is still the same as the old version, and there have not been any changes. Some entrances to upload mixed materials are missing. Now only support texture library, enterprise material library, and custom furniture.