- Helpcenter
- Version 5.0
-
Getting Started
-
Model Library & Asset Management
-
News & Product Update
-
Kitchen, Bathroom, Closet, Custom Modelling
-
[Enterprise] 3D Viewer & Virtual Showroom
-
Payment & Billing
-
Version 5.0
-
Upload & Export
-
Personal Account
-
Photo & Video Studio
-
Material&Component
-
Floor Plan Basic
-
Images/Videos & Light
-
Tips & Tricks
-
Privacy & Terms
-
Inspiration Spaces
-
Testimonials
-
Construction Drawings
-
AI Tools
-
Customer Service Team
-
Projects Management
-
FAQ
-
Coohom Online Training
-
Lighting Design
Cloud Design 5.0: How To Draw An Arch Wall With Outer Curve And Inner Straight Line?
1. Function Introduction
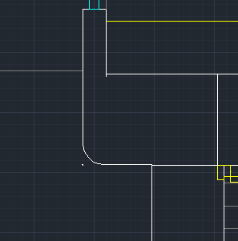
As shown in the figure below, when designing, there is often a need to draw curved walls. So how to draw such a wall? Below is a small tip that can be used as a reference.
2. Target users
All users
3. Operation Steps
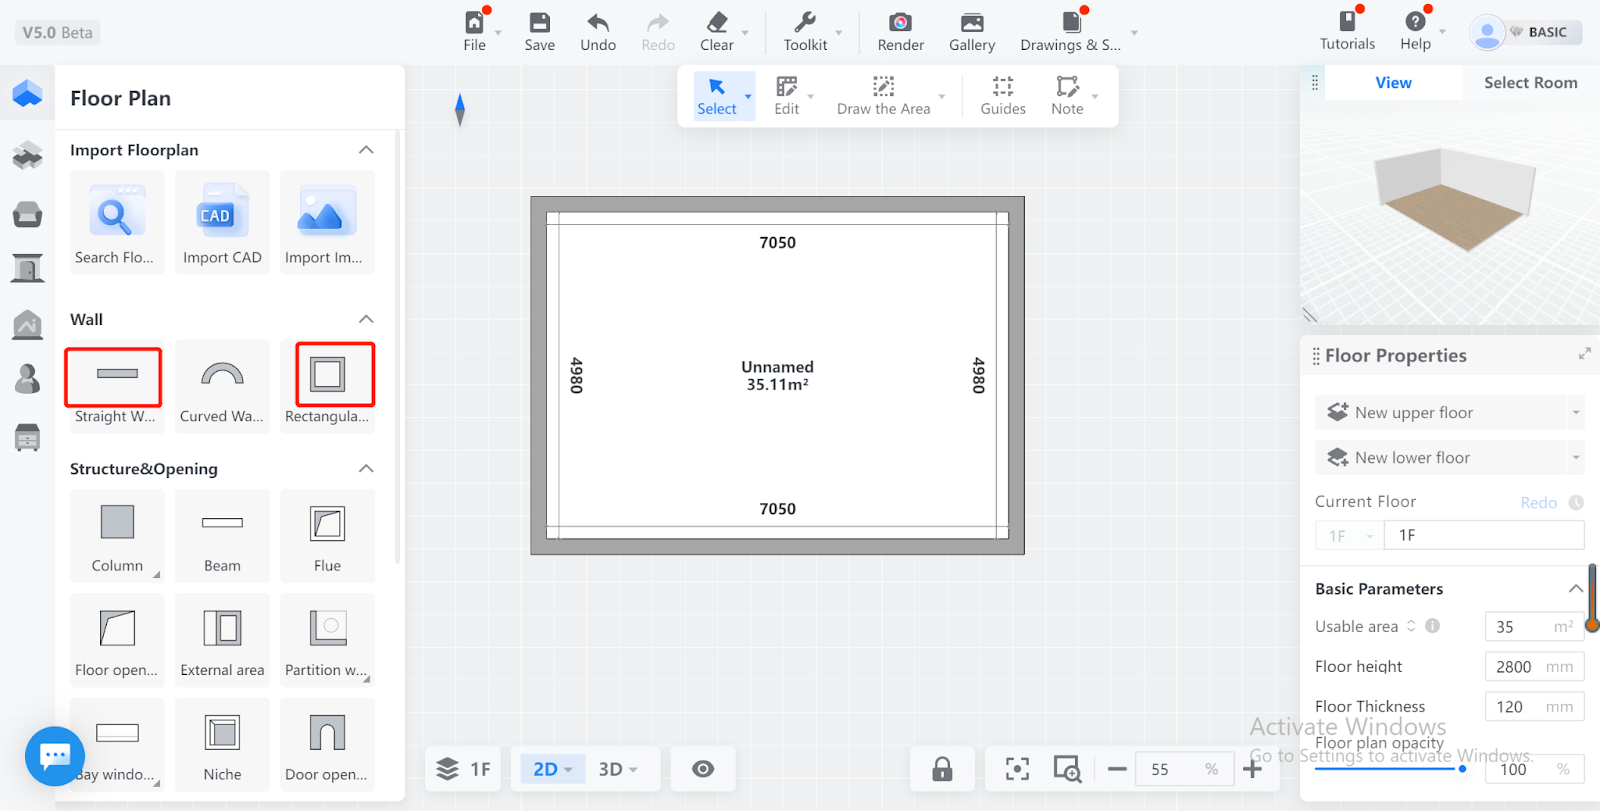
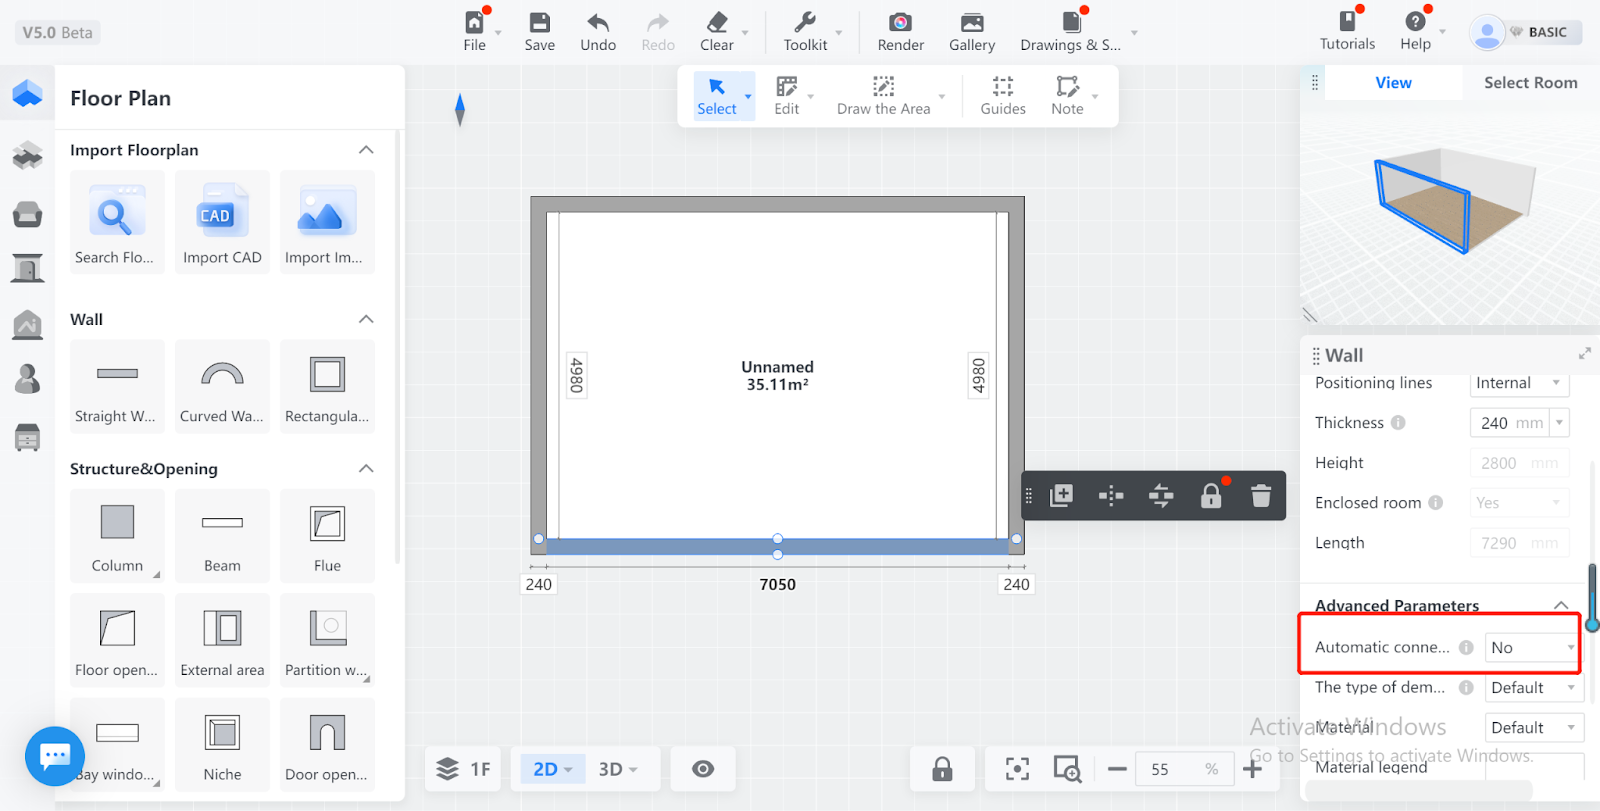
Step 1: Use the straight wall or rectangle wall tool to draw the wall first.
Step 2: Select one of the wall segments and set the automatic connection to "No".
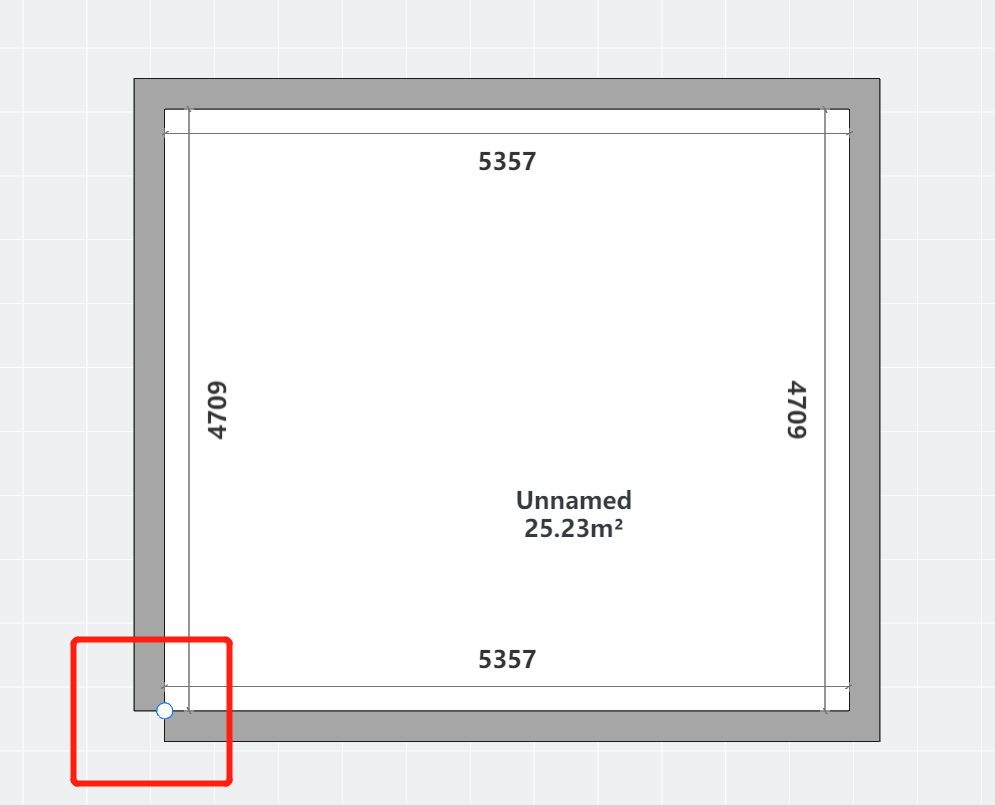
Step 3: Move the wall to separate the originally intersecting two walls and modify it to a staggered connection, as shown in the figure.
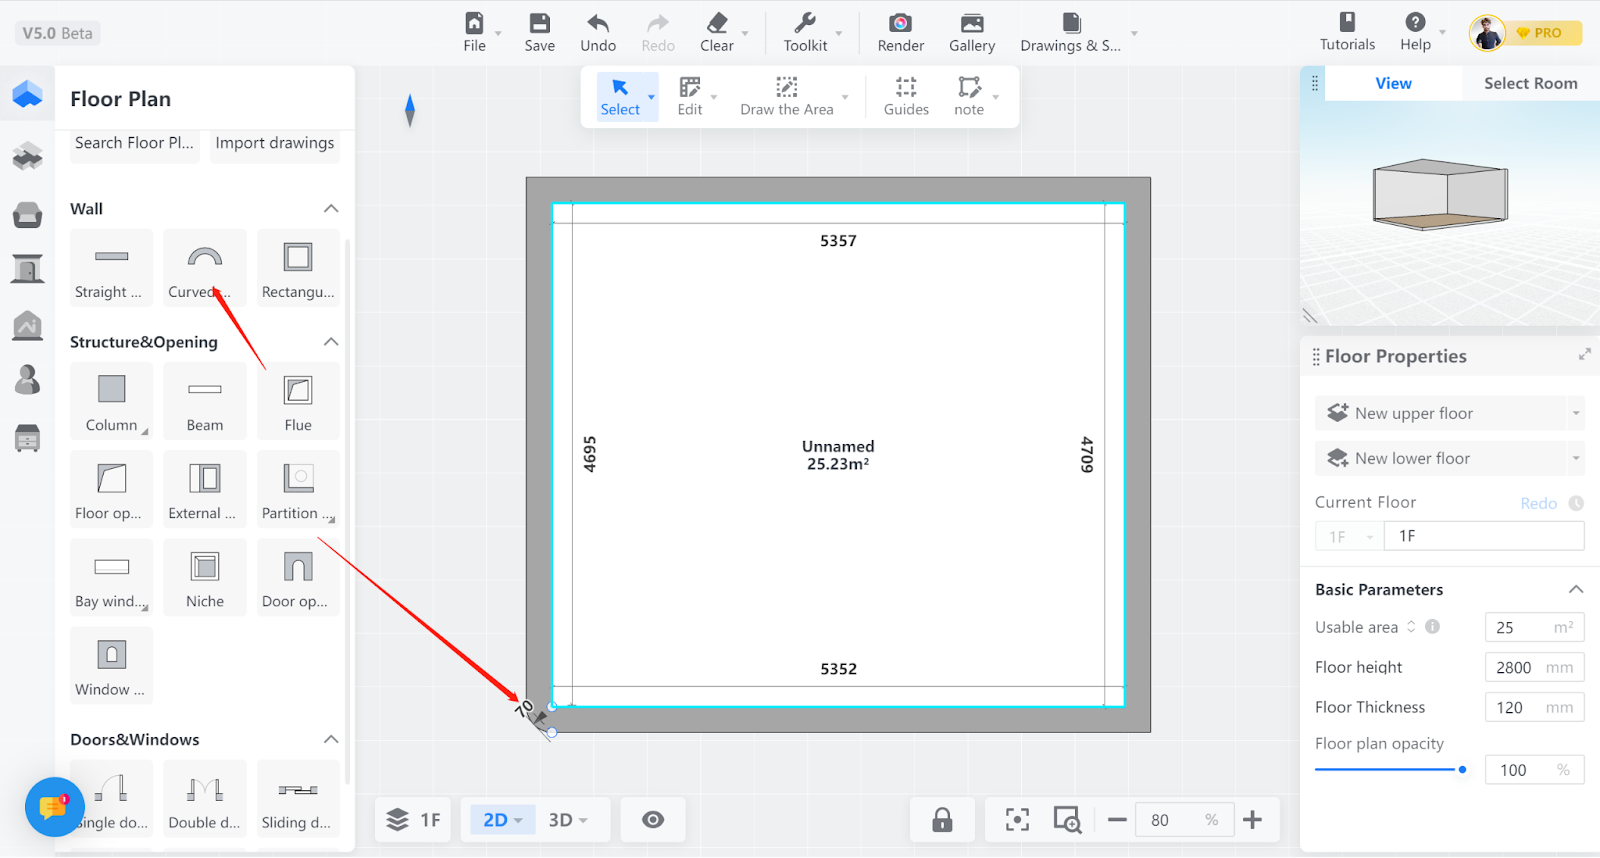
Step 4: Click the arc wall tool to draw the wall again, and modify the thickness of the wall to 239. Here, you need to subtract 1 from the original wall thickness, and the logic is that the radius cannot be equal to the wall thickness. For example: If the original wall thickness is 260, the wall thickness needs to be set to 259 when drawing an arc wall, and so on.
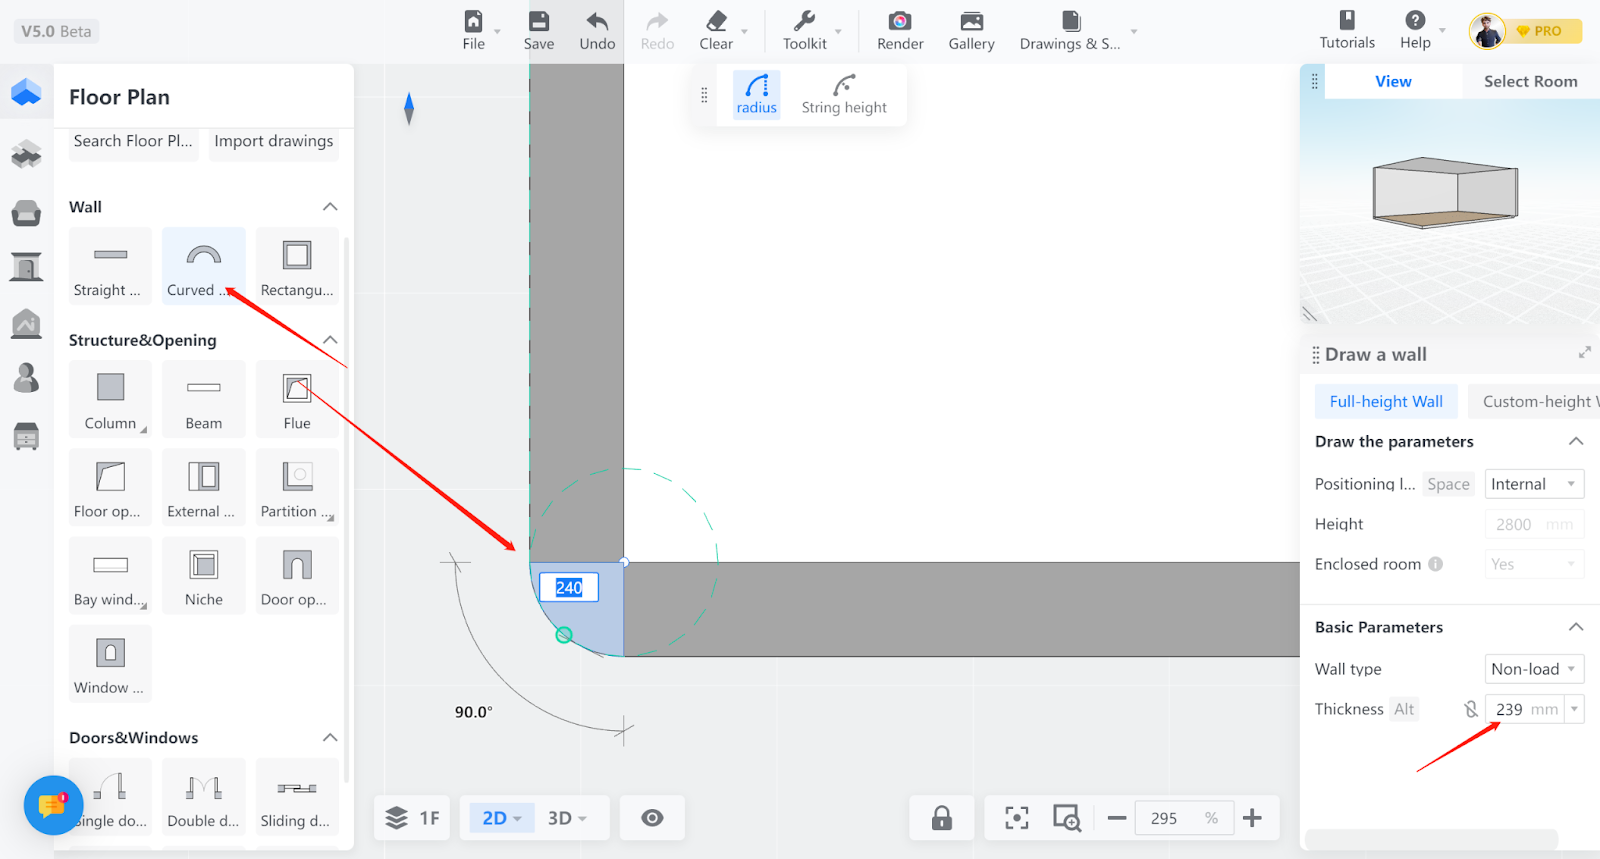
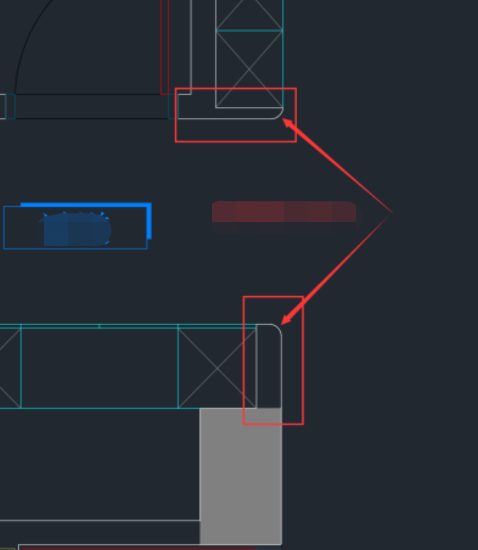
Step 5: Click the arc wall tool and use it to connect the missing corner position. Finally, you will get the effect shown in the figure.