【Construction Drawing】 Floor Plan Supports Displaying Shadow
Overall
In the new version of the floor plan tool, it is now possible to add shadows to walls and furniture. The inclusion of shadows in floor plans adds a significant level of depth, greatly enhancing the aesthetic appeal of the layout.
Aim User
All Coohom Users
Step
Within the 【Floor Plan Drawings】, you can access the shadow menu located in the left. From there, you have the option to selectively or collectively enable shadow settings for both “Wall Shadow“ and “Furniture Shadow”. As you make your selections, the floor plan will automatically generate shadows based on the placement of walls and furniture items.

Tips:
-
PNG downloads now support the display of shadows, while JPG and PDF downloads currently do not offer this feature.
PNG downloads now support the display of shadows, while JPG and PDF downloads currently do not offer this feature.
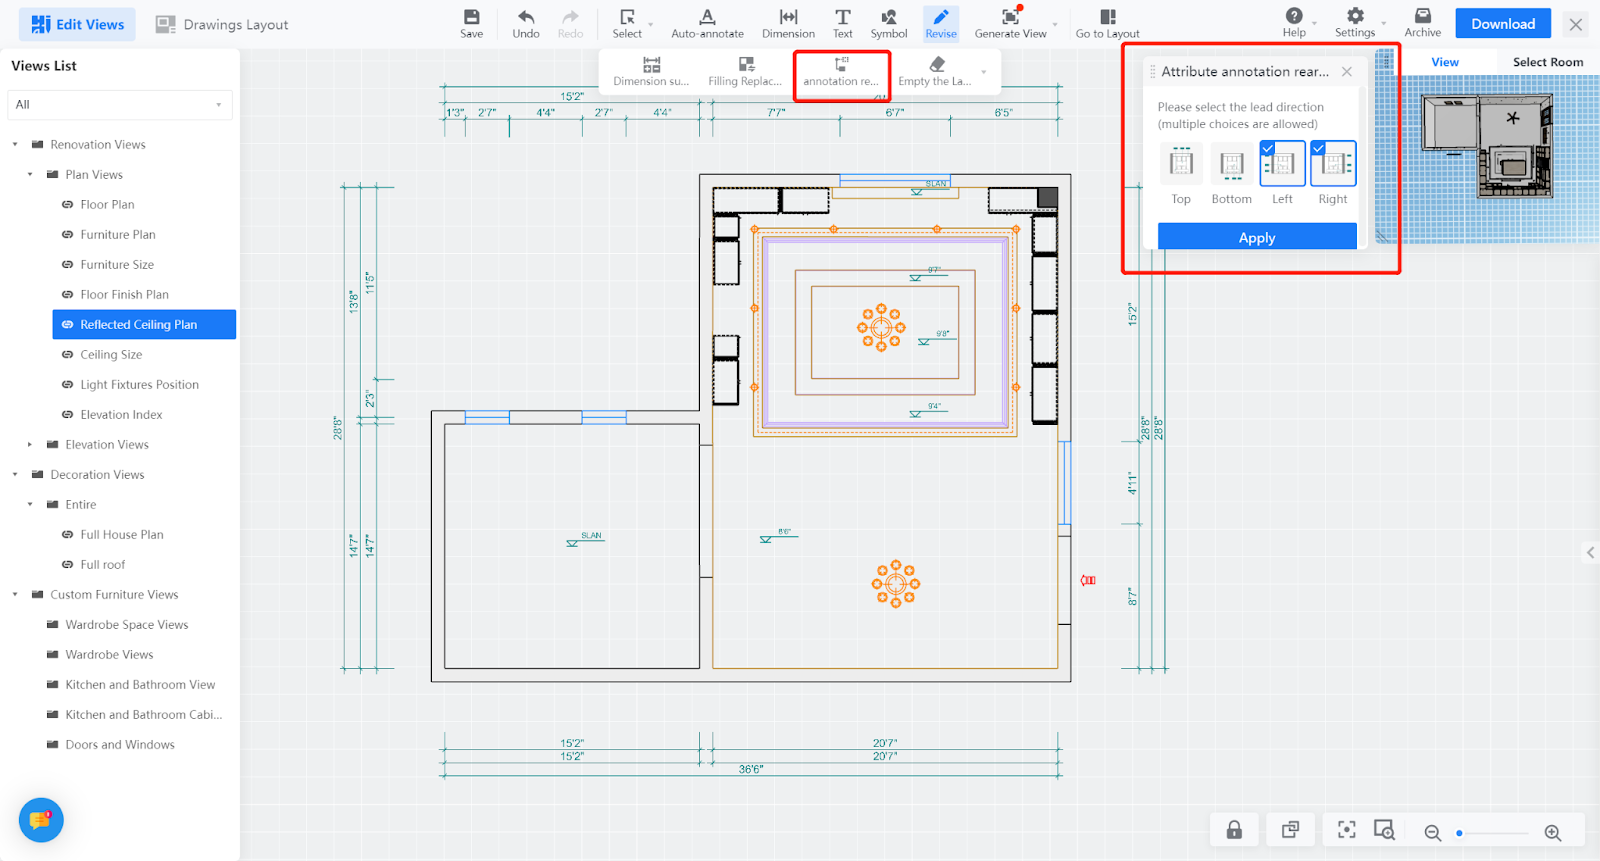
【Construction Drawing】Annotation Repositioning Function
Overall
Users can quickly adjust the direction of automatic annotation leaders to make the layout more reasonable.
Tips:
-
The currently supported views are floor plan view, ceiling plan view, elevation view, and wall positioning view.
The currently supported views are floor plan view, ceiling plan view, elevation view, and wall positioning view.
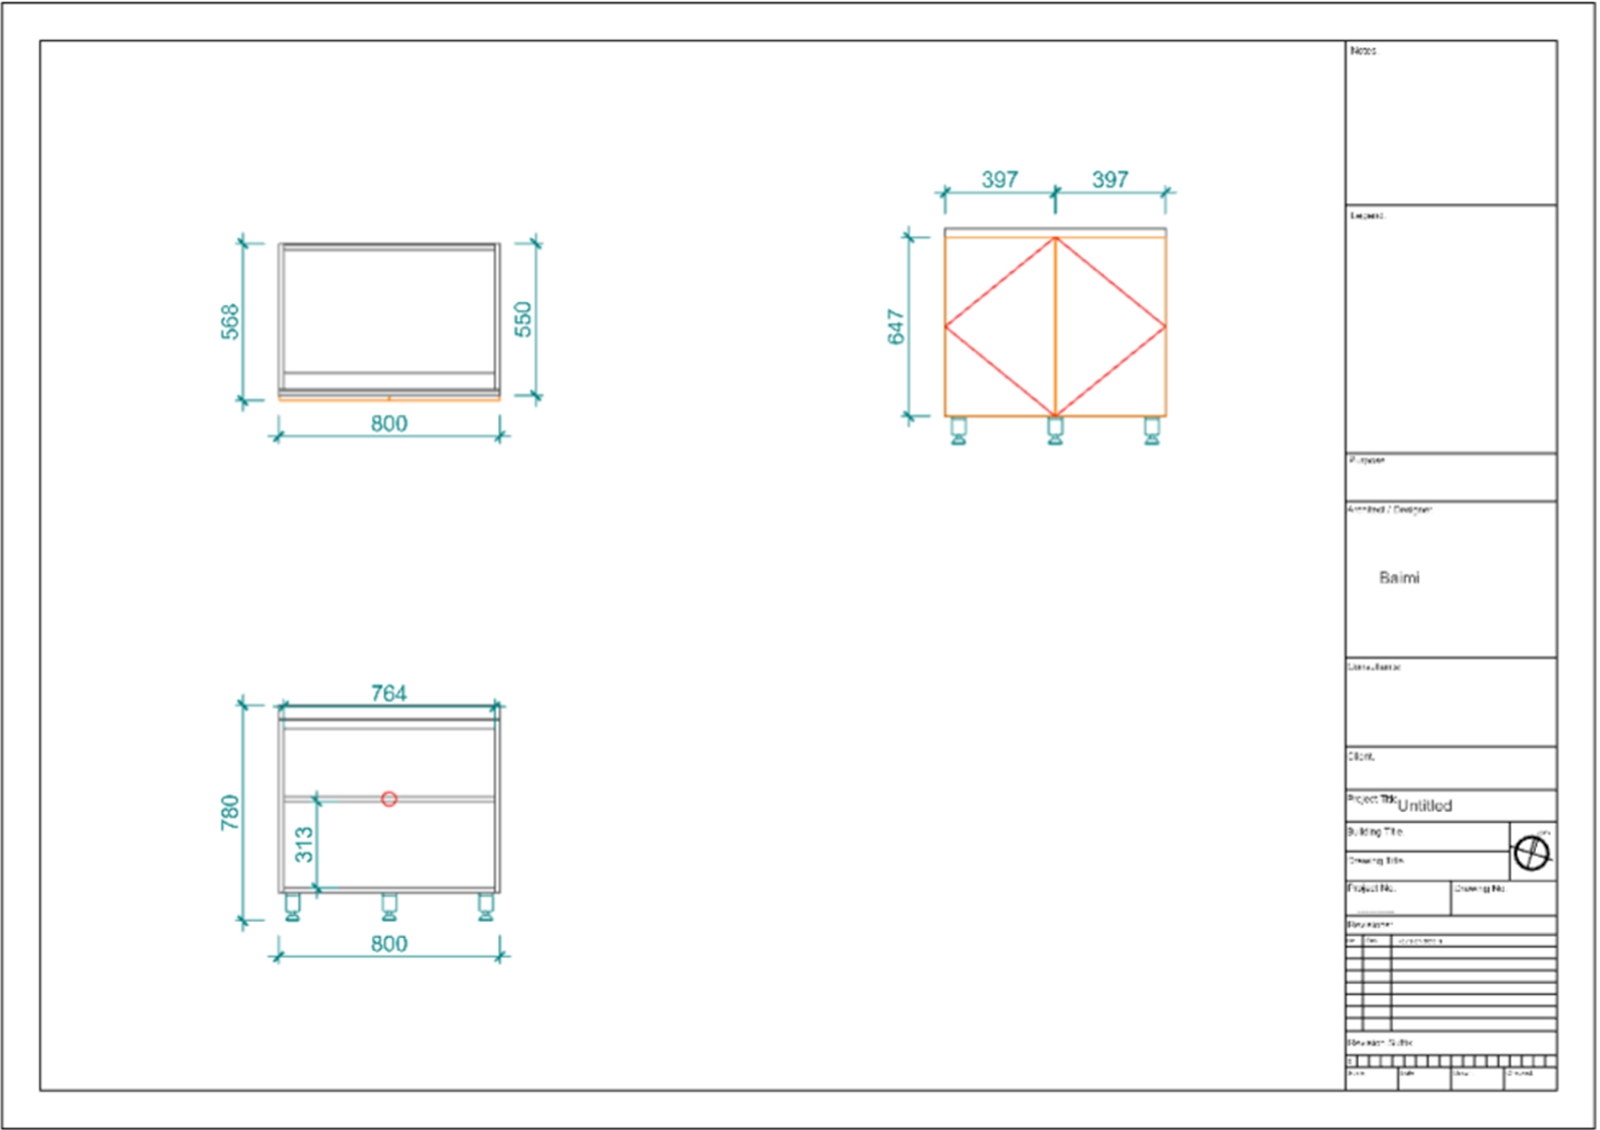
【Construction Drawing】 Optimization of Drawing Splicing Effect
Overall
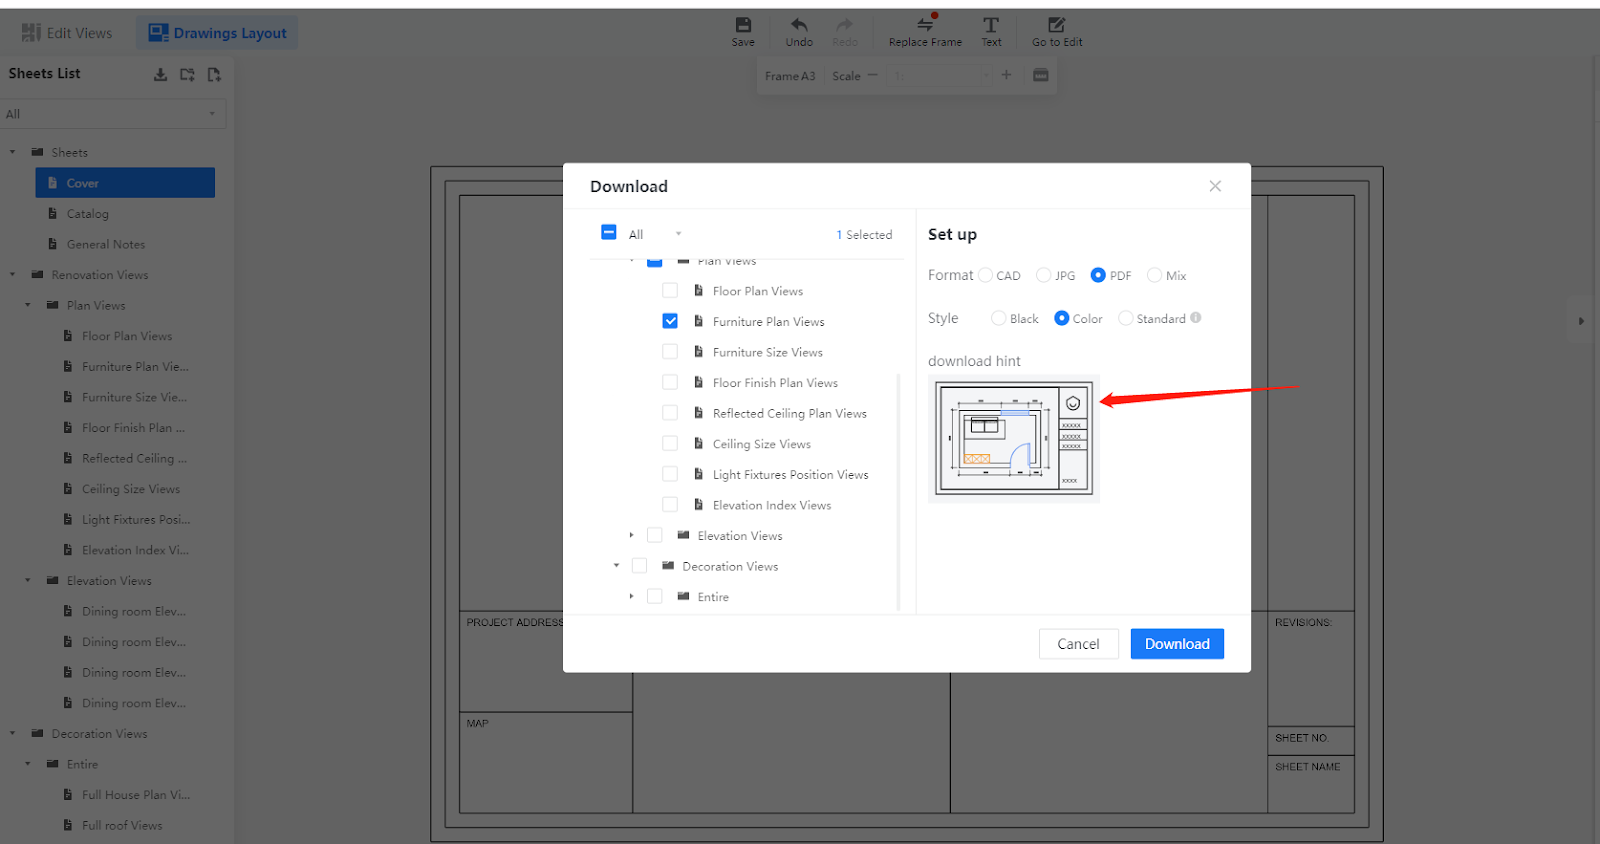
Optimized the problem of excessive blank space in custom spliced drawings, and arranged the layout of the hard decoration material table‘s ’drawing more reasonably.
Aim Users
All Coohom users
Steps
Optimized the problem of excessive blank space in custom spliced drawings
-
Background: Previously, there was a problem with excessive blank space in custom spliced drawings, which resulted in low efficiency in utilizing the drawings
-
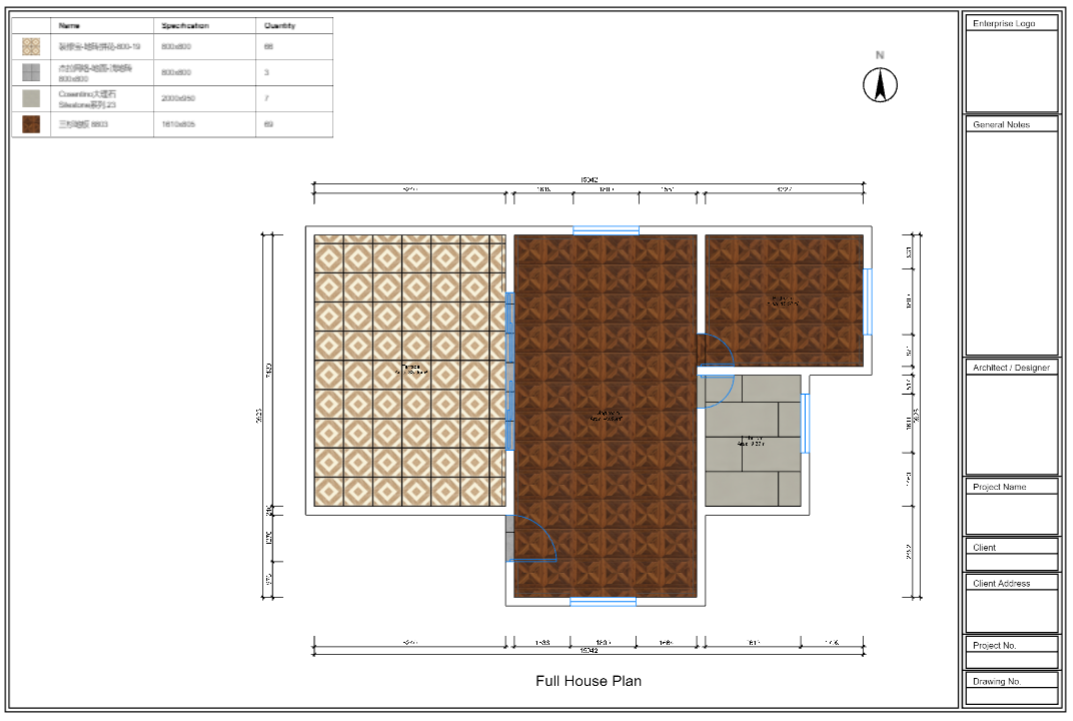
Before optimization: excessive blank space
Background: Previously, there was a problem with excessive blank space in custom spliced drawings, which resulted in low efficiency in utilizing the drawings
Before optimization: excessive blank space
-
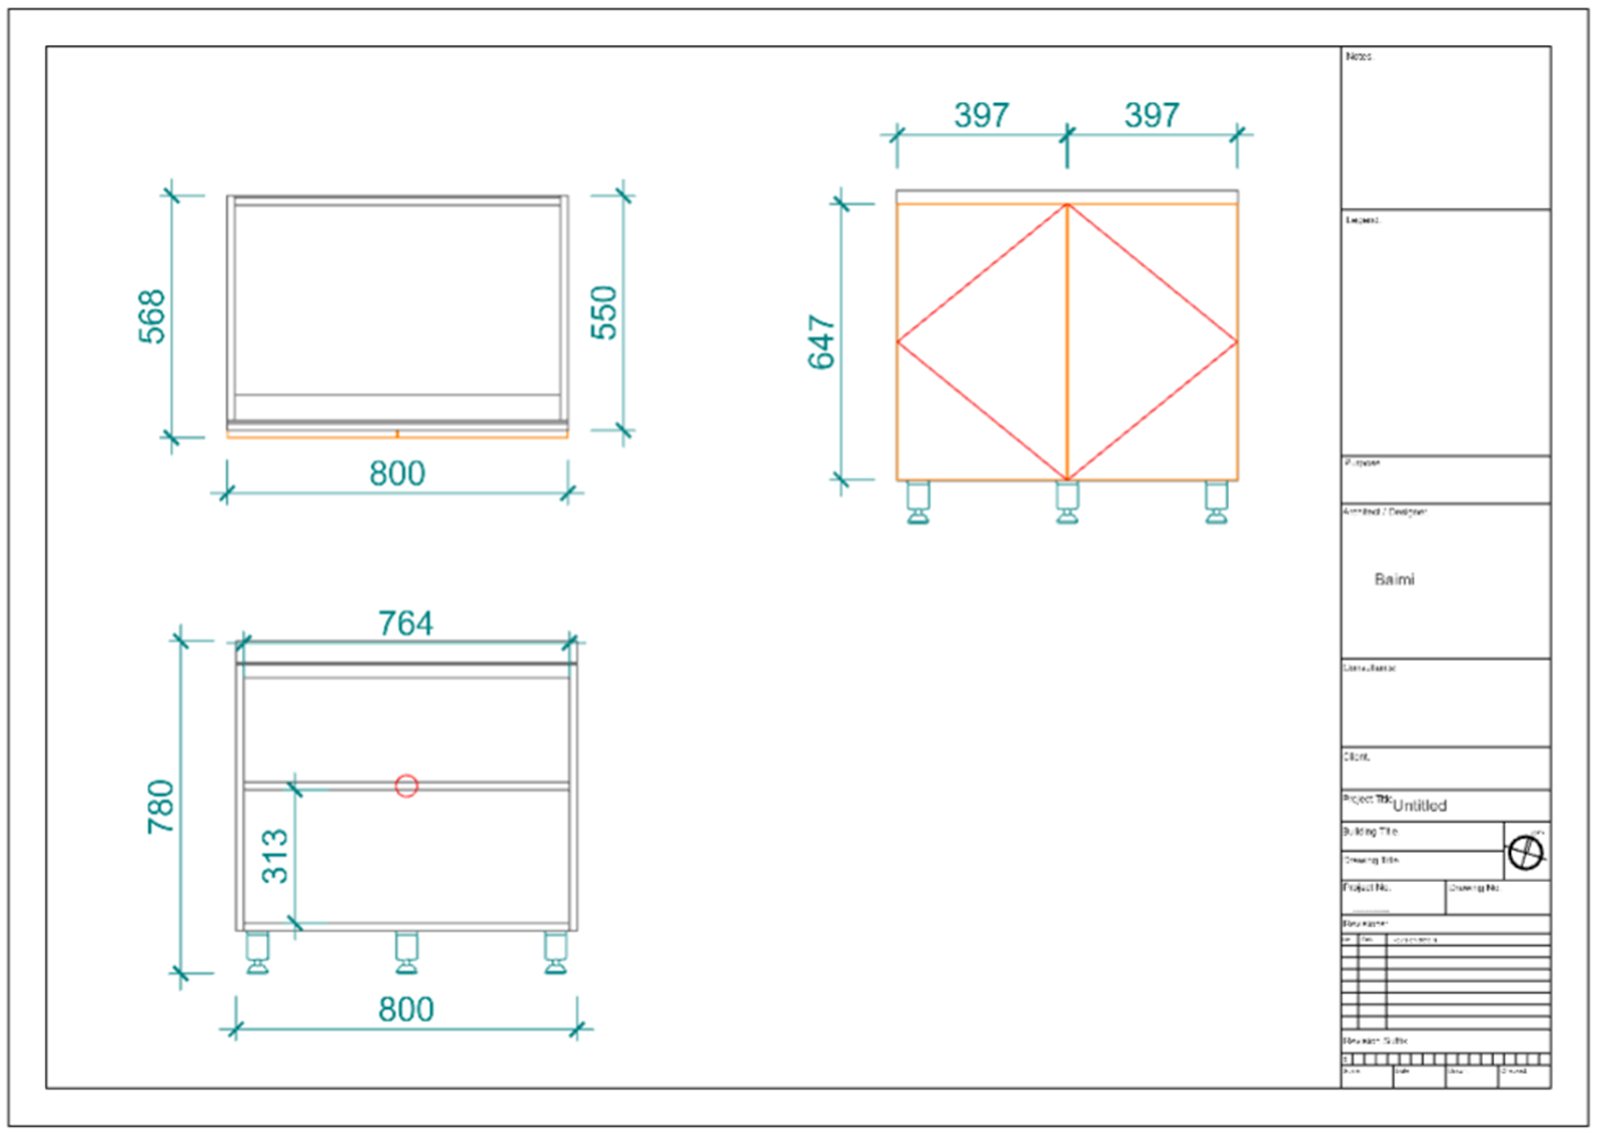
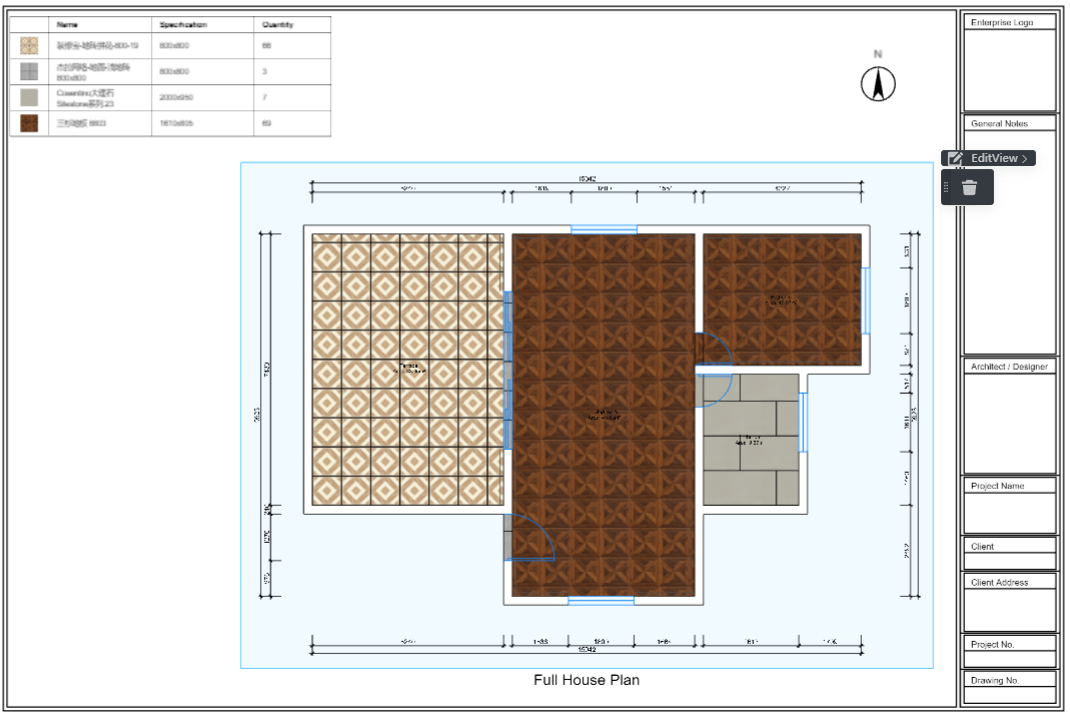
After the update: The blank space is reduced, and the layout of the views is more reasonable
After the update: The blank space is reduced, and the layout of the views is more reasonable
The drawing with the hard decoration material list is spliced, and the layout is more reasonable.
-
Background: After splicing the hard decoration material list, there was too much blank space, which caused the proportion of the view content display to be too small
-
Comparison before and after update: The blank space is reduced, and the arrangement of views and tables is more reasonable
Background: After splicing the hard decoration material list, there was too much blank space, which caused the proportion of the view content display to be too small
Comparison before and after update: The blank space is reduced, and the arrangement of views and tables is more reasonable
【Construction Drawing】The Annotation Style Supports ctb File Printing When Downloading PDF Standard
Aim Users
Enterprise with implement services
Steps
【Construction Drawing】Correction of Chromatic Aberration Between Object and Rendered Image
Overall
this solution aims to solve the two common Chromatic Aberration problems encountered in the design scene
-
After rendering: the product color is too light and the texture is not clear
-
After rendering: the material reflection effect is too strong or too weak
After rendering: the product color is too light and the texture is not clear
After rendering: the material reflection effect is too strong or too weak
Aim Users
All Coohom Users
Steps
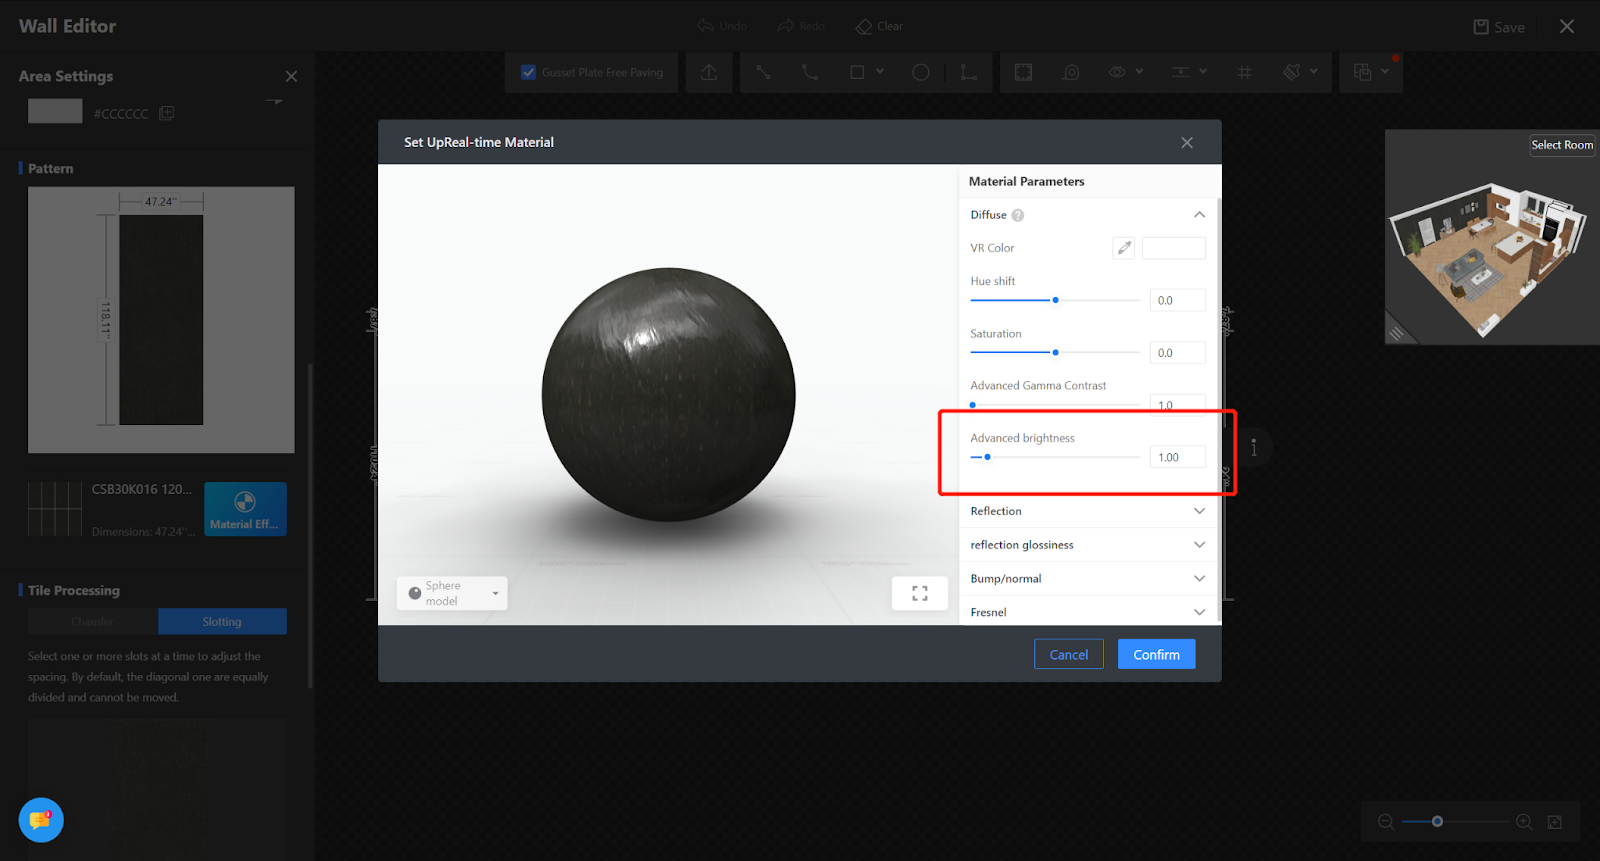
The problem with the product, the color is too light, resulting in a slight color cast and unclear texture
Operable Environment: The tiling mode in the 【Floor Design】, 【Background Wall Design】, 【Ceiling Design】, and 【Paving Editing】 environments
Condition Dependency: Enterprise materials must be real-time materials
1. Click on the material in the tiling state and the material attribute bar on the left. Under the unit style legend, there is a very obvious blue button 【Material Effect Adjustment】.
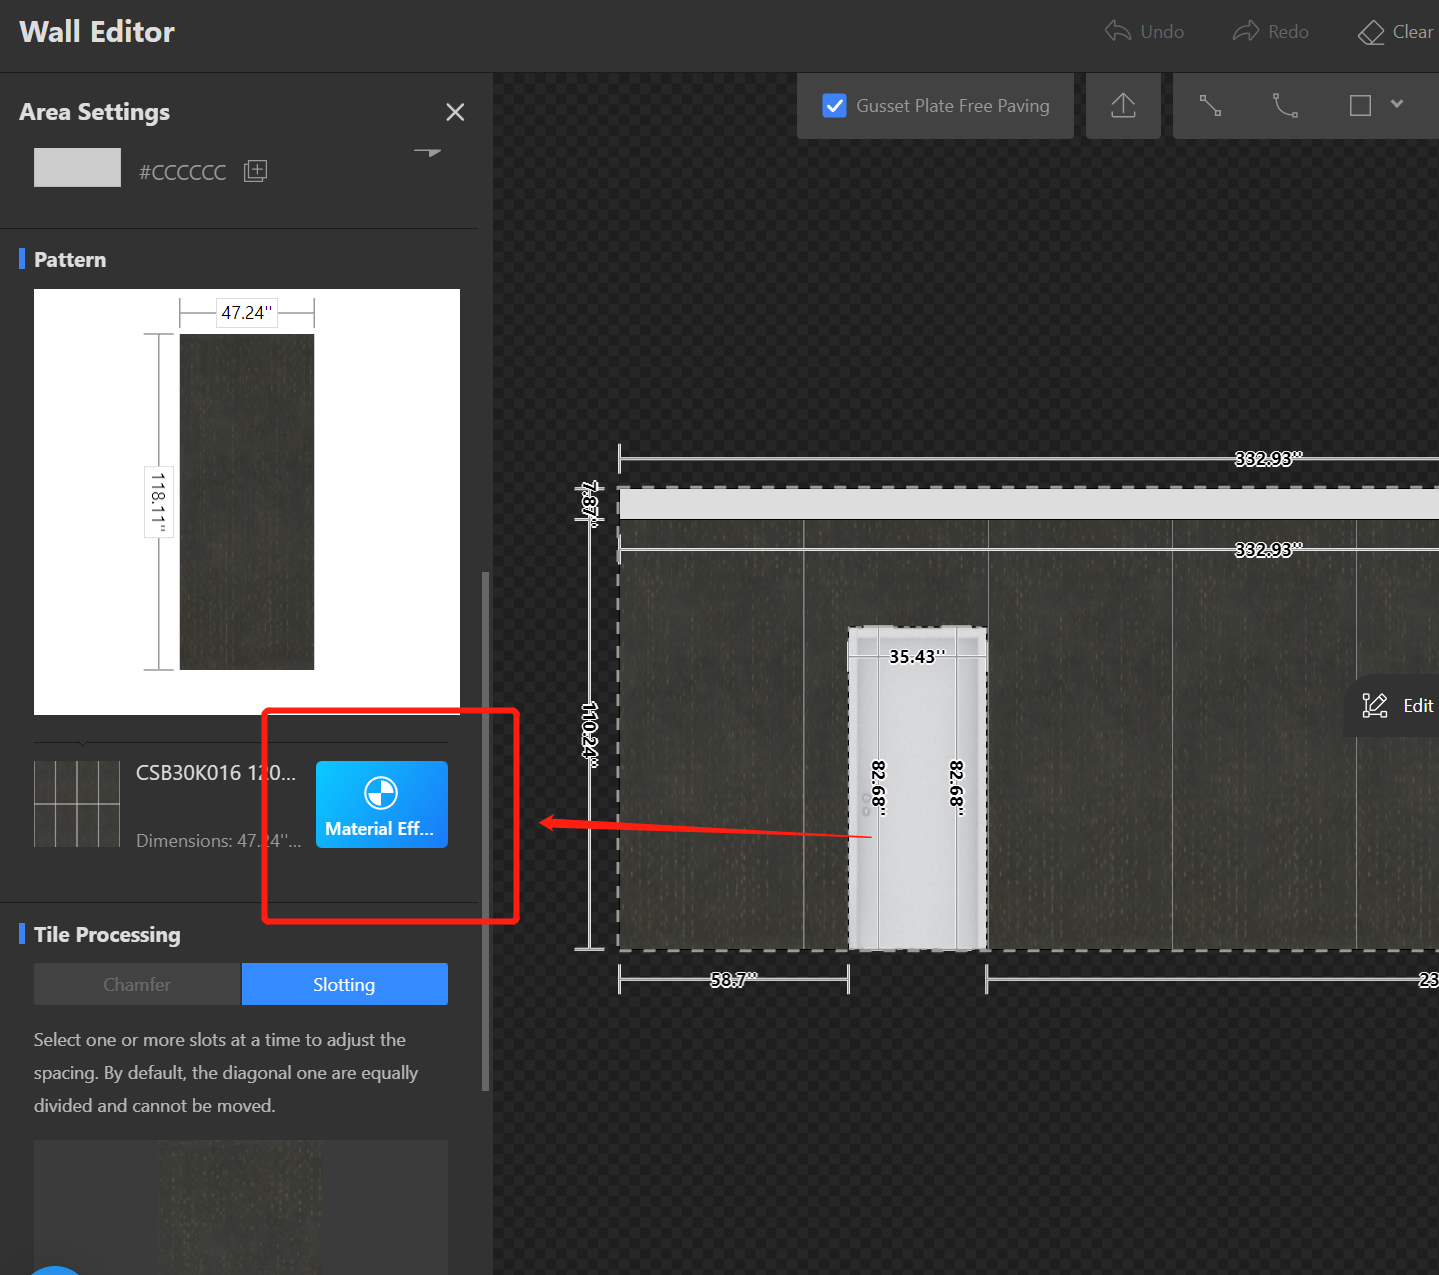
2. Click on it, and show the real-time material setting interface. Select 【Advanced Brightness】, click the drop-down arrow in the input field with your mouse, and adjust it to the appropriate depth that you think is suitable by continuously clicking (if there is a color cast, you can choose to adjust the VR color, and then make fine adjustments through hue and saturation).
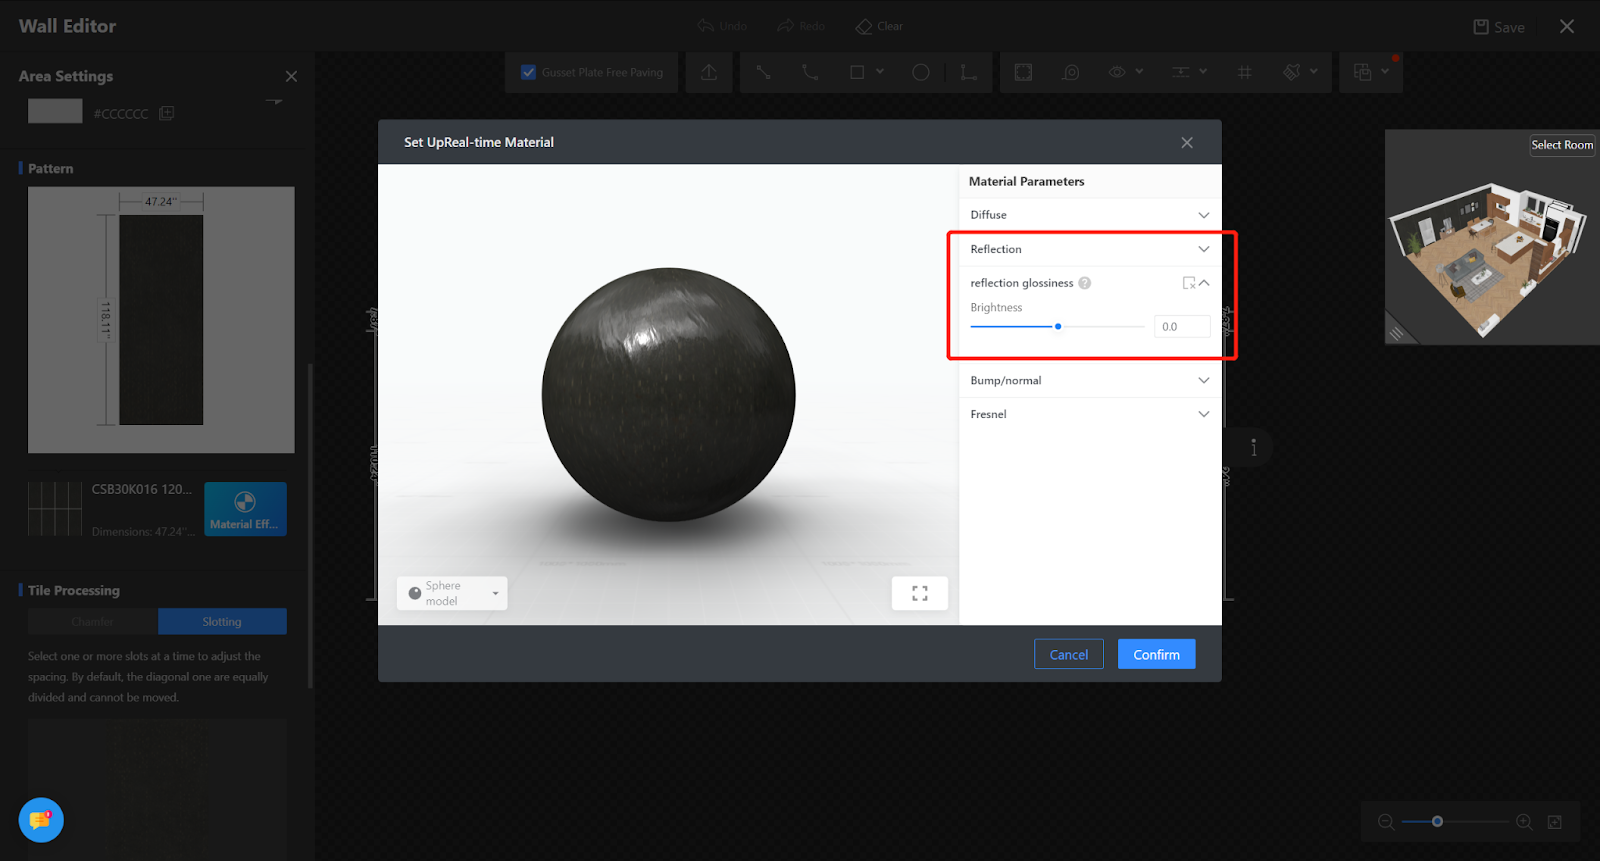
The product reflection is too strong or too weak, causing the material effect to be distorted
Operational steps
1. Follow the same steps as above, Select 【Reflection】and 【Reflection Glossiness】 and 【Fresnel】. Click the drop-down arrow in the input field with your mouse, and adjust it to the appropriate glossiness that you think is suitable by continuously clicking (for soft products, it is recommended to adjust the reflection glossiness for more realism).
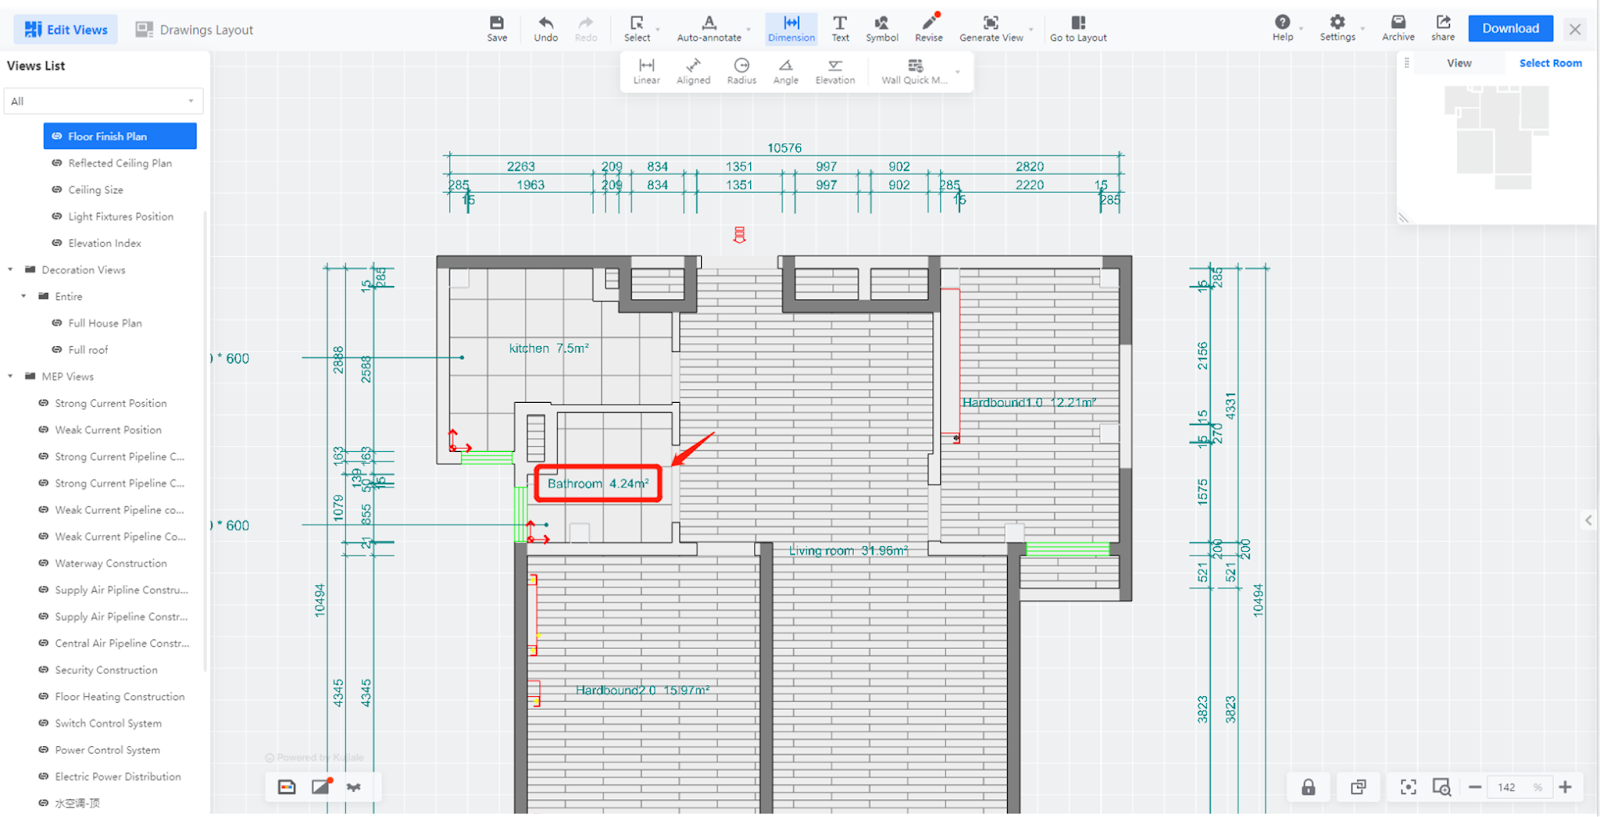
【Construction Drawing】Room information supports more flexible configuration
Overall
This solution aims to provide:
-
Support for filtering small-area information
-
More flexible layout and display of room information
Support for filtering small-area information
More flexible layout and display of room information
Aim Users
Enterprises with implementation services
Steps
【Need to contact the implementation engineer to configure this function】
Support for filtering small areas
-
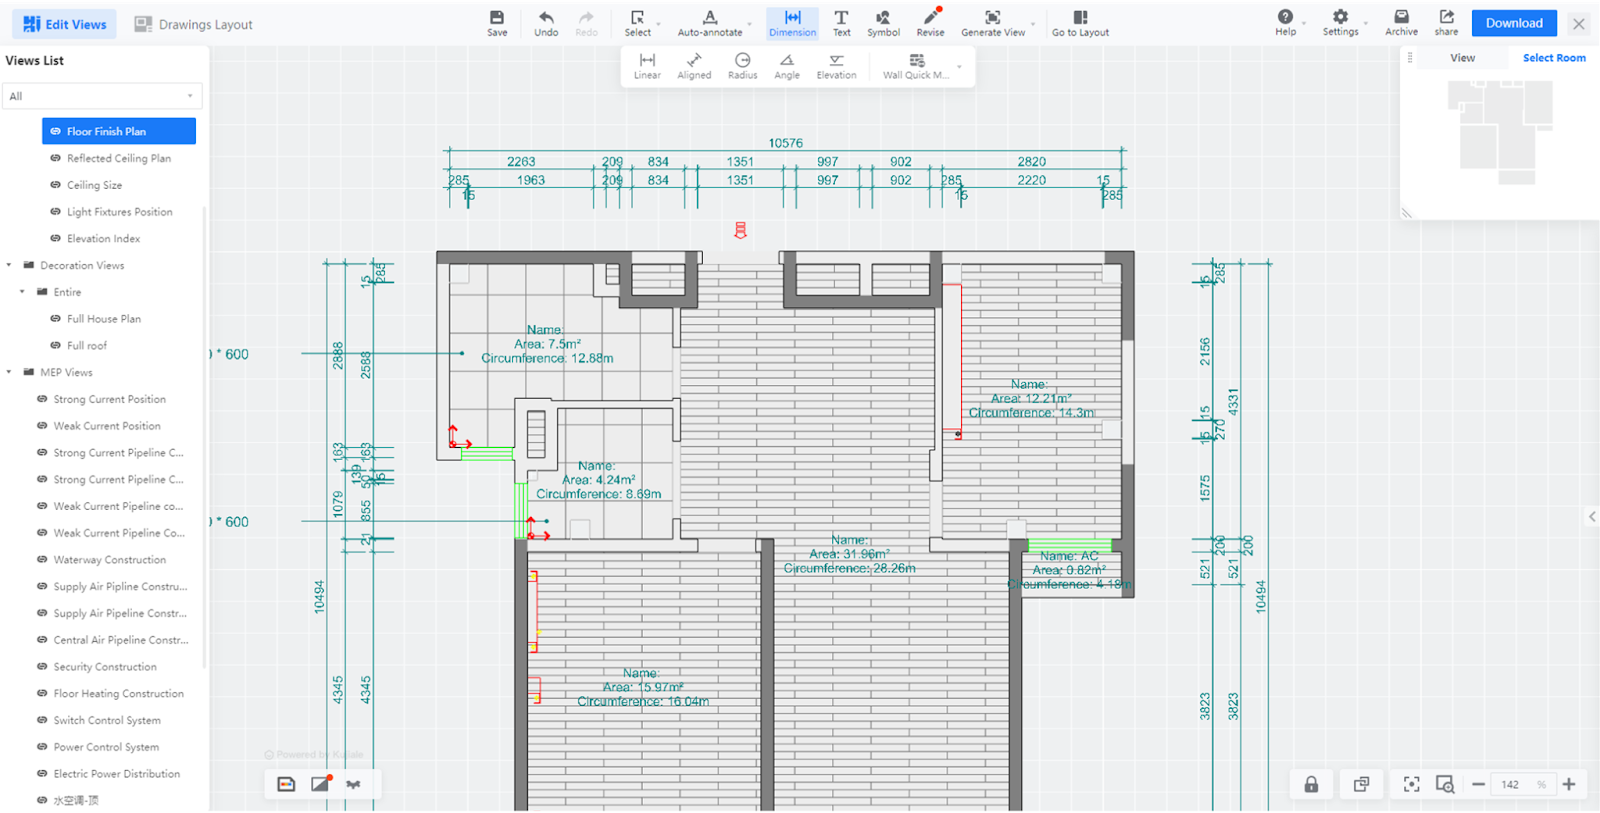
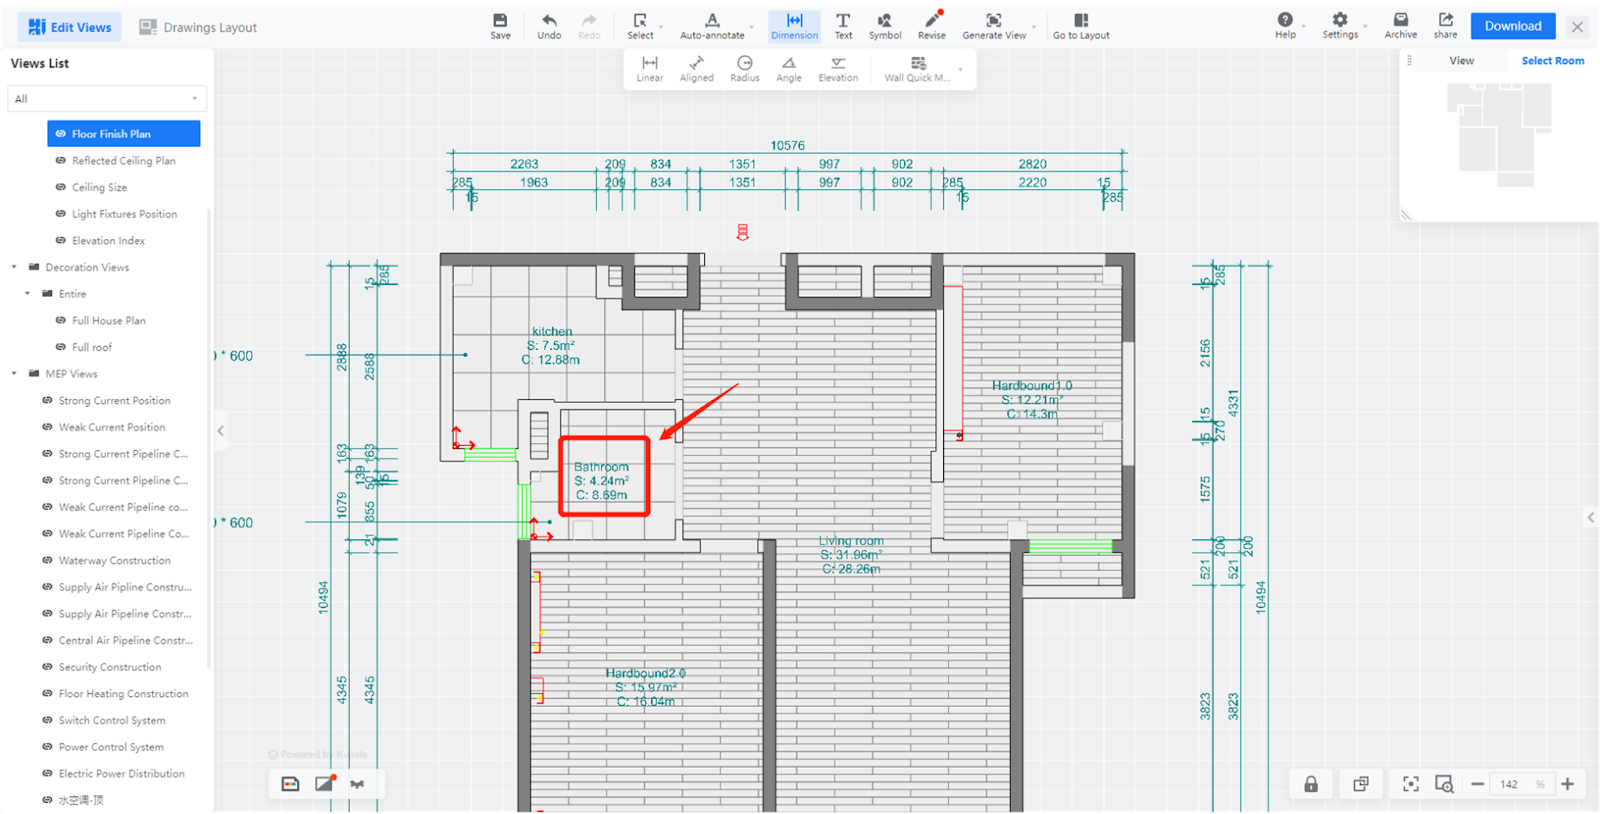
Usage Scenario: For some small spaces (such as equipment rooms and duct slots drawn on walls), it is not desirable to display room information.
-
Through the effect of room information configuration, rooms smaller than 1.6 square meters will not display room information
Usage Scenario: For some small spaces (such as equipment rooms and duct slots drawn on walls), it is not desirable to display room information.
Through the effect of room information configuration, rooms smaller than 1.6 square meters will not display room information
More flexible configuration of room information parameters
Usage Scenario 1:
-
Area and perimeter are represented by symbols
-
Presented through configuration
Area and perimeter are represented by symbols
Presented through configuration
Usage Scenario 2:
-
Display only the room name and area without title, and display them on the same line
-
Presented through configuration
Display only the room name and area without title, and display them on the same line
Presented through configuration