Contents
Definition
Section 1: Library Category
Section 2: Category Settings
Section 3: Definition of Library Category
Definition
Gain a comprehensive understanding of category application rules and plan enterprise libraries more effectively.
Section 1: Library Category
Features:
① The following categories cannot be added/removed/modified.
② The categories of Kitchen&Bath and Custom Furniture custom are the same.
Section 2: Category Settings
The following categories are common ones that need to be set up:
1.Cabinet category settings
2.Component category settings
3.Semi-finished product category settings
4.Virtual model category settings
Section 3:Definition of Library Category
Definition: Collect corresponding models or model-related materials based on category attributes for easier management and application (the operation steps for Kitchen&Bath and Custom Furniture are the same).
-
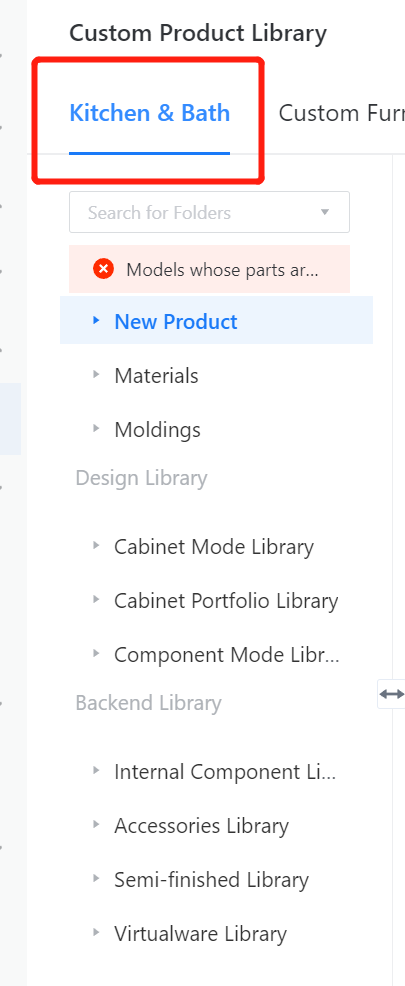
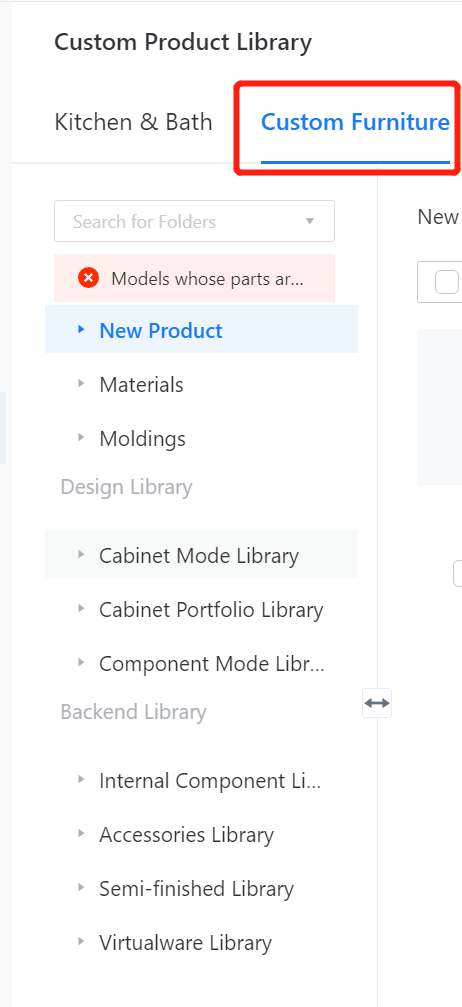
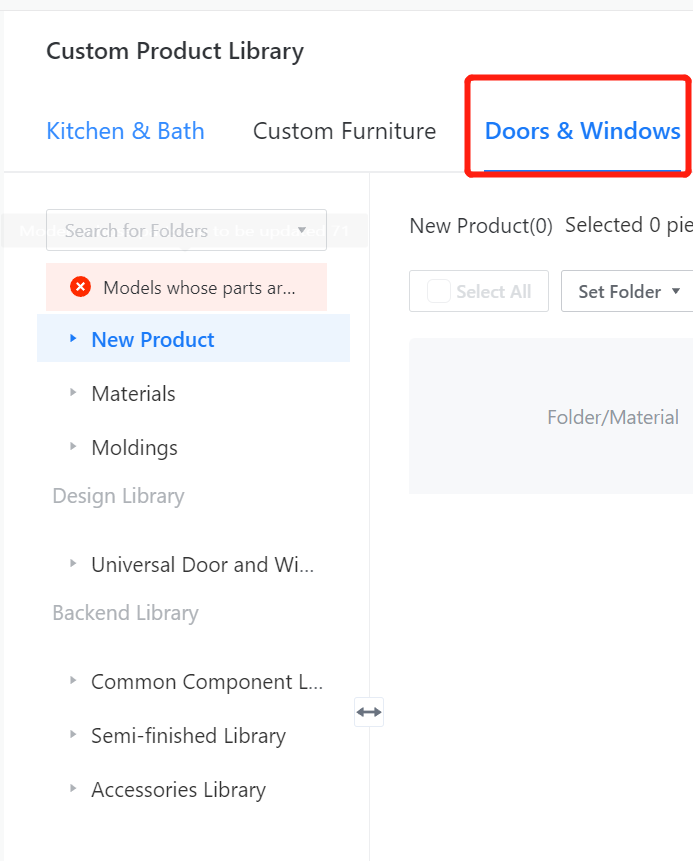
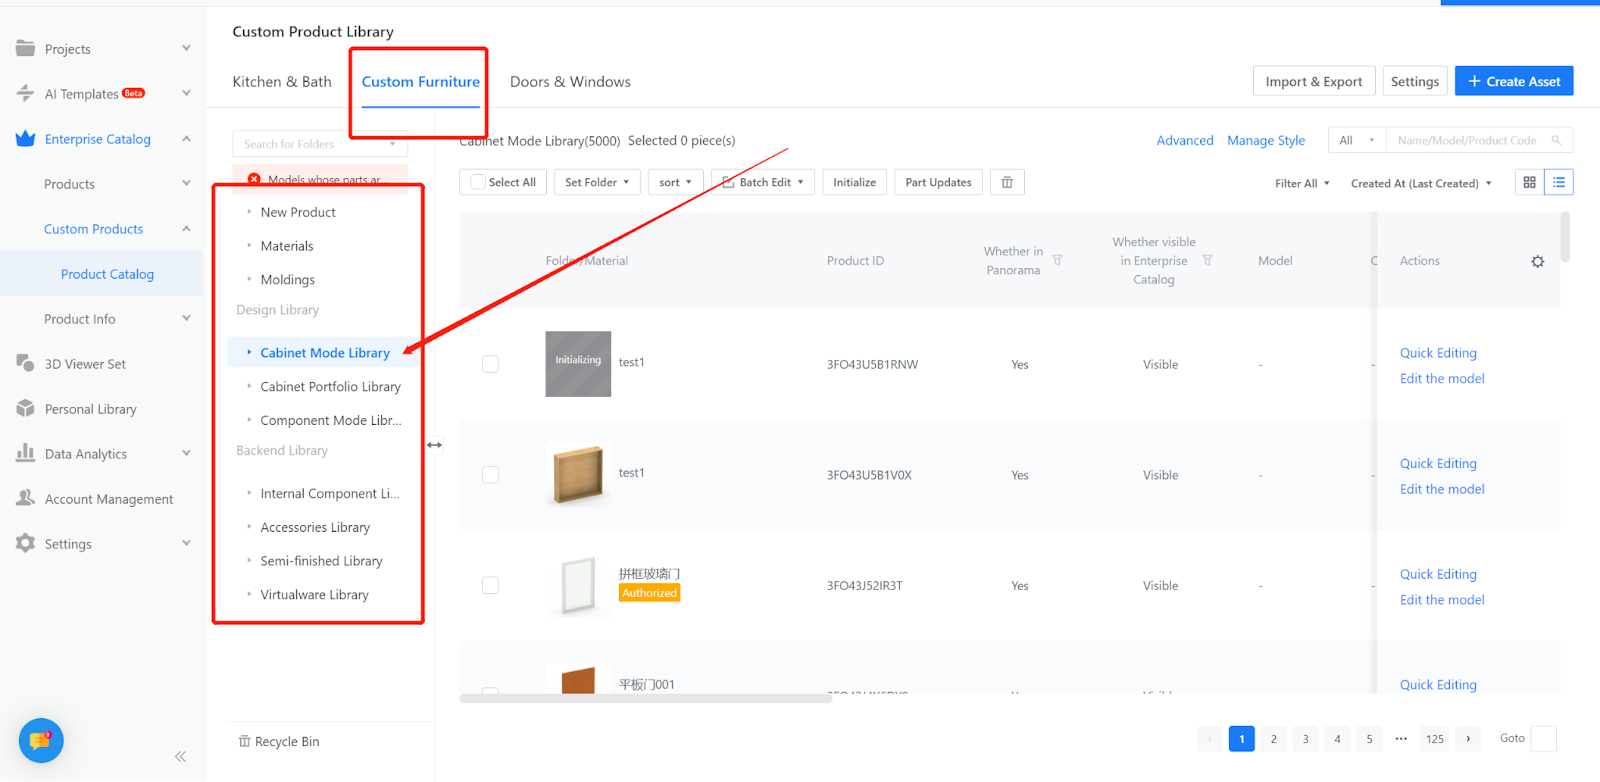
Enter Kitchen&Bath/Custom Furniture:
Enter Kitchen&Bath/Custom Furniture:
Enterprise Catalog-Custom Products-Product Catalog- Kitchen&Bath, Custom Furniture
2.Model category analysis
2.1 Material library: Used to store uploaded material textures, suitable for flat materials, mixed materials, etc. Common examples include boards, stones, glass mirrors, leather, fabrics, metals, wallpapers, etc.
2.1.1 Entrance for uploading material textures:
Custom Products-Product Catalog- Create Asset - Materials
2.1.2 The material library category has three levels, as shown in the figure below. Note: Subdirectories cannot be created within the three levels.
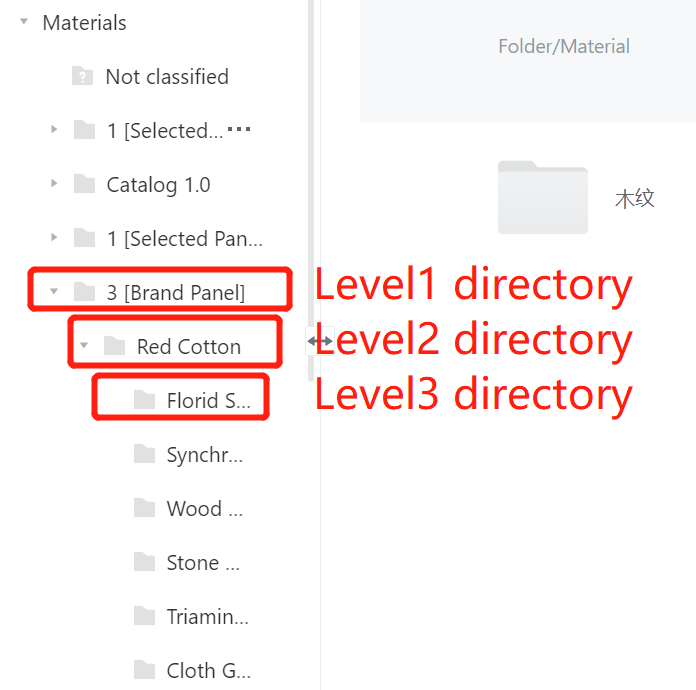
Operation steps:
Create level 1 category: Click the "+" button next to the main category, add a new category, and name it.
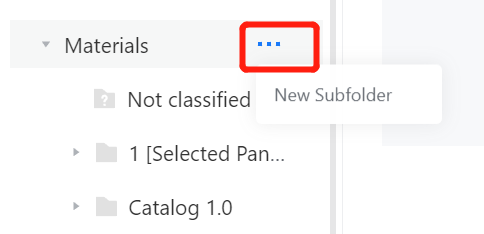
Create level 2 category: Move the mouse over the level 1 category to display ellipses. Click the ellipsis to show options for creating subcategories, renaming, and deleting.
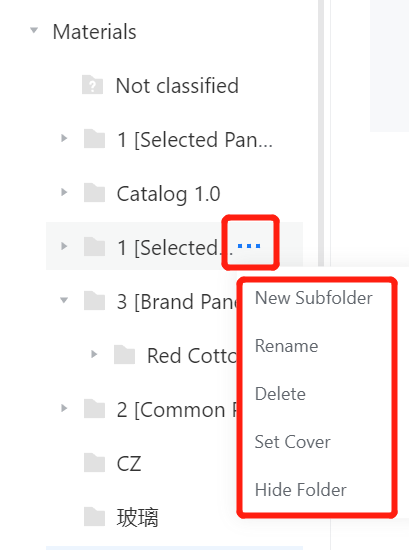
Create level 3 category: Move the mouse over the level 2 category to display ellipses. Click the ellipsis to show options for renaming and deleting (same operation as shown in the figure above).
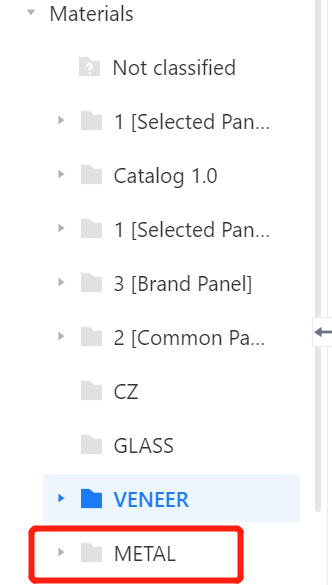
2.1.3 Level 1 categories in the material library can be moved up and down.
Operation steps: Move the mouse over any category ("Metal" for example). When the mouse icon changes to , hold down the left mouse button and drag the folder ("Metal") to another position.
2.2 Molding library: Used to store template-like materials such as crown molding, baseboards, light moldings, decorative moldings, etc.
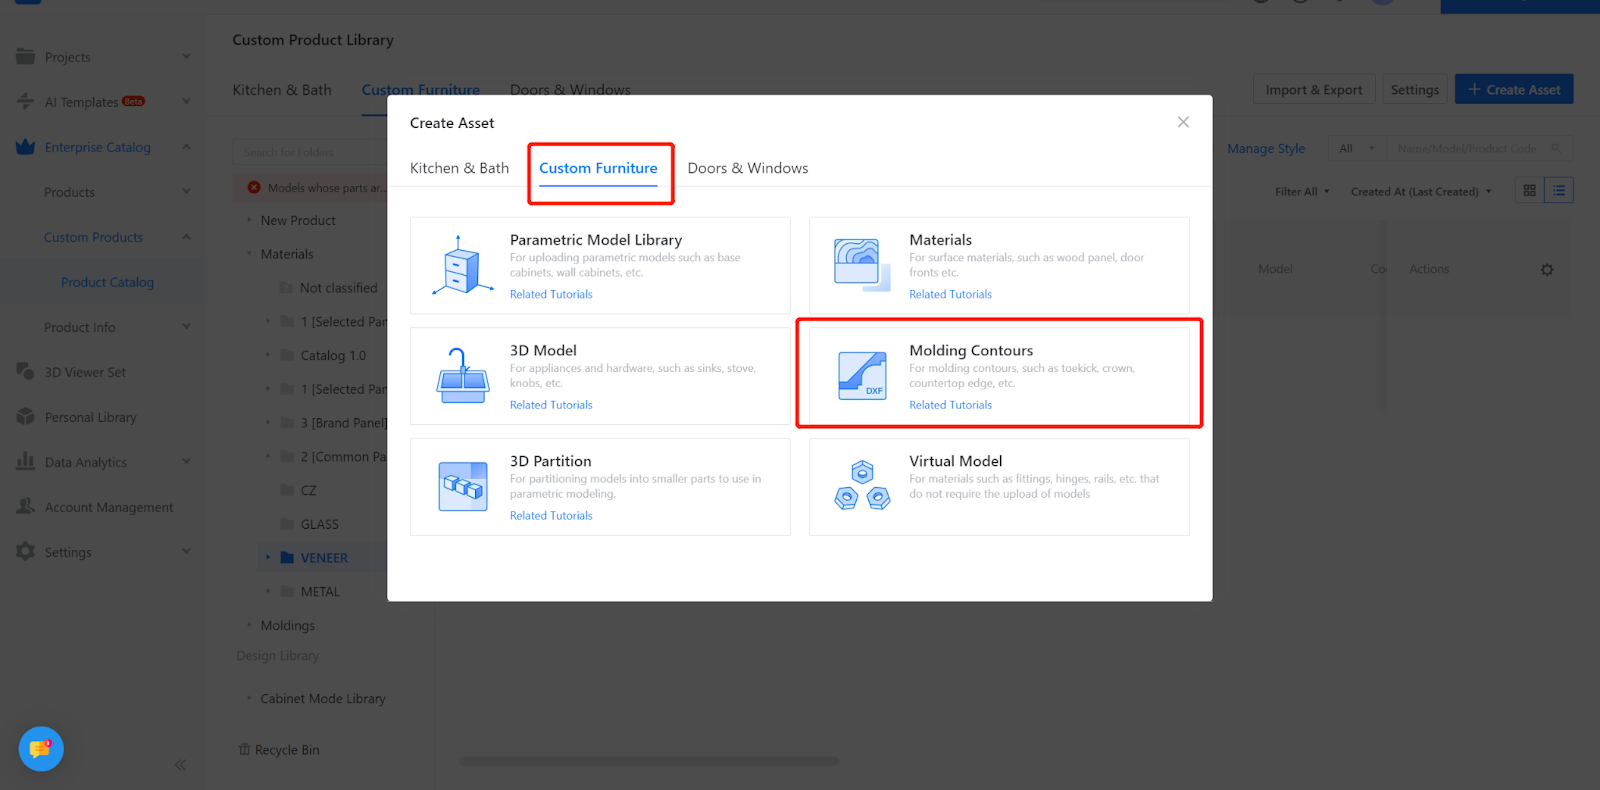
2.2.1 Entrance for uploading Molding Contours: Custom Furniture - Create Asset - Molding Contours.

2.2.2 The hierarchy and quantity of molding libraries and model libraries, as well as the methods for creating and modifying them, are the same as the operations mentioned above.
2.3 Model library: Includes parametric models, 3D models, and virtual models, divided into front-end models and back-end models.
2.3.1 Front-end:
Models that can be individually dragged and used in the front-end cabinet mode. Creating and saving are done in the cabinet mode library.
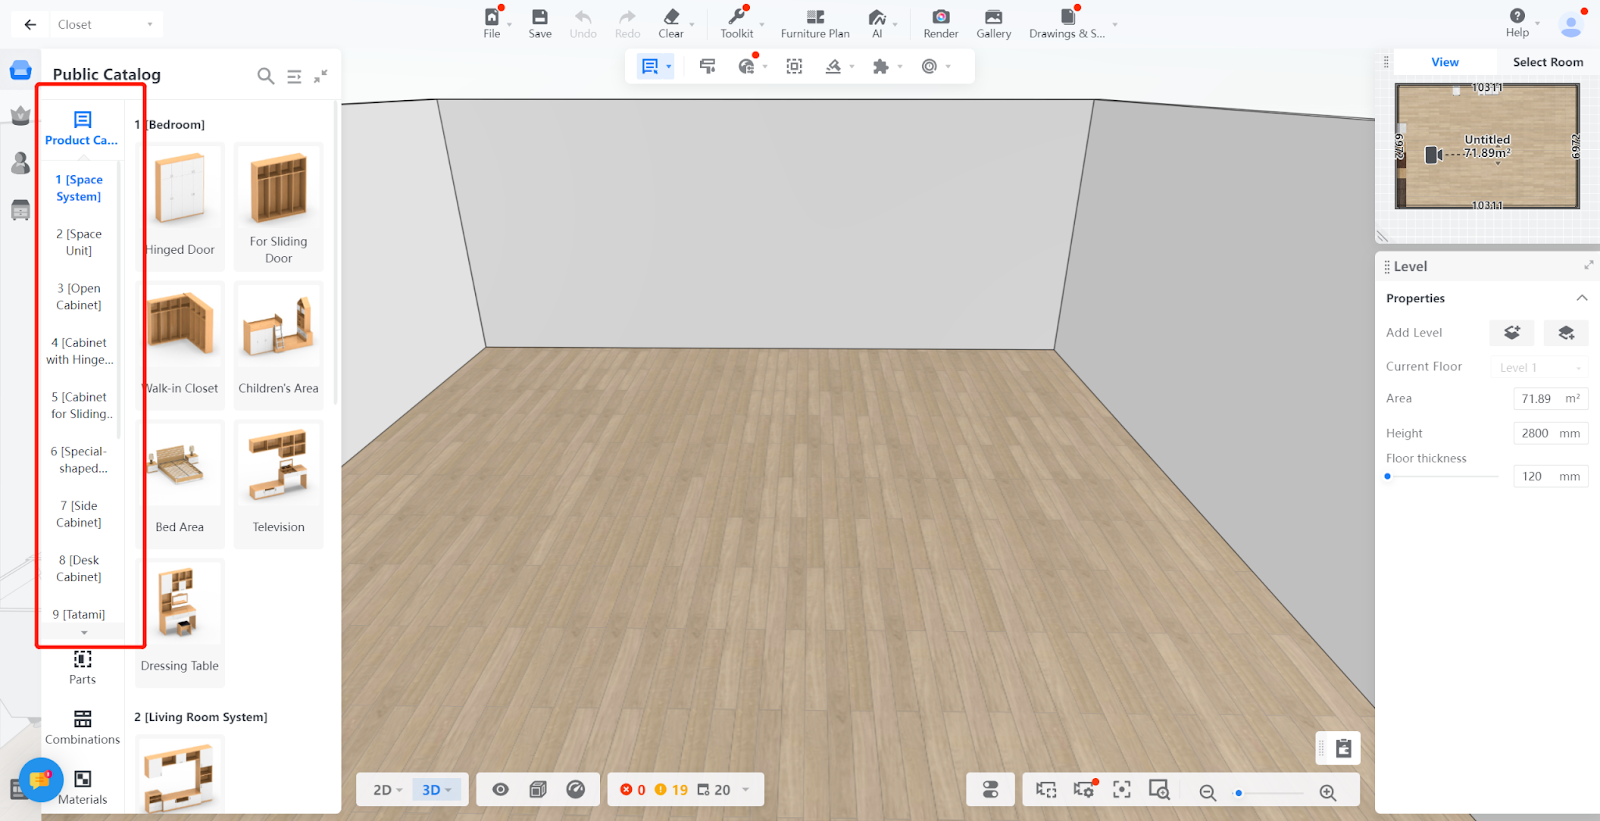
2.3.2 Entry of Furniture Modeling : Custom Furniture - Create Asset - Parametric Model Library -Design Catalog- Furniture
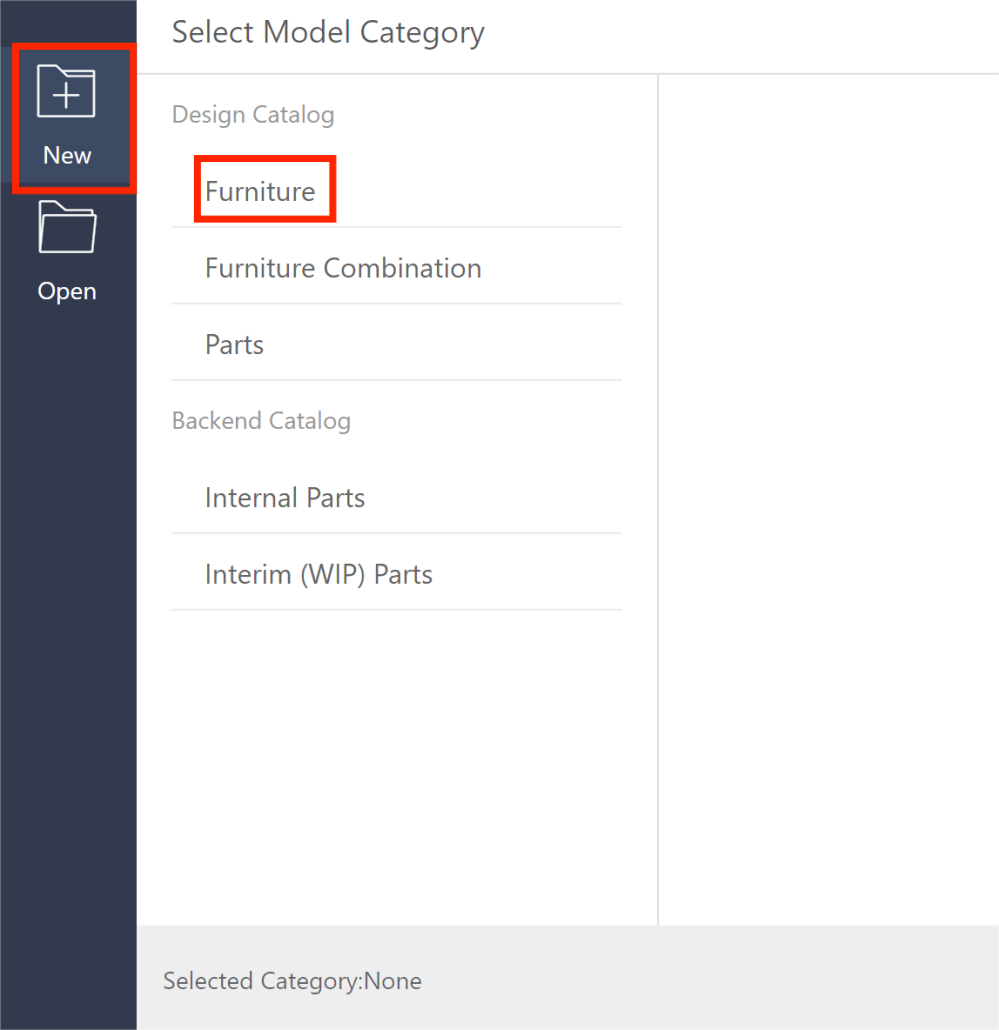
2.3.3 In the Furniture Library, the steps for creating, naming, deleting, moving up and down, and operating the material library are the same.
2.4 Furniture Combination:
Model combinations saved in the frontend tool collection are retrieved and used in the backend.
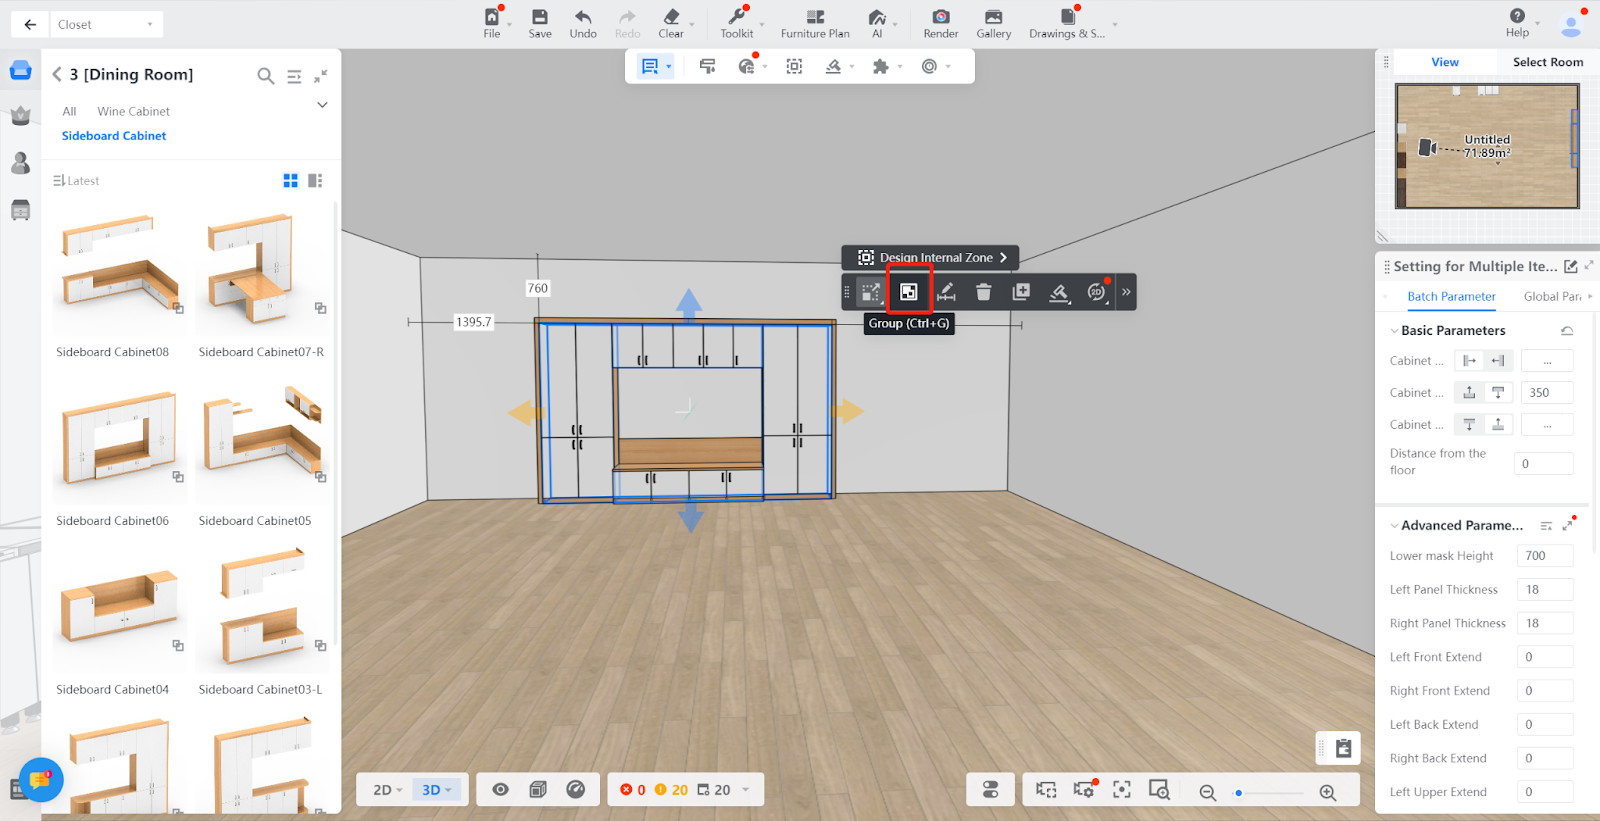
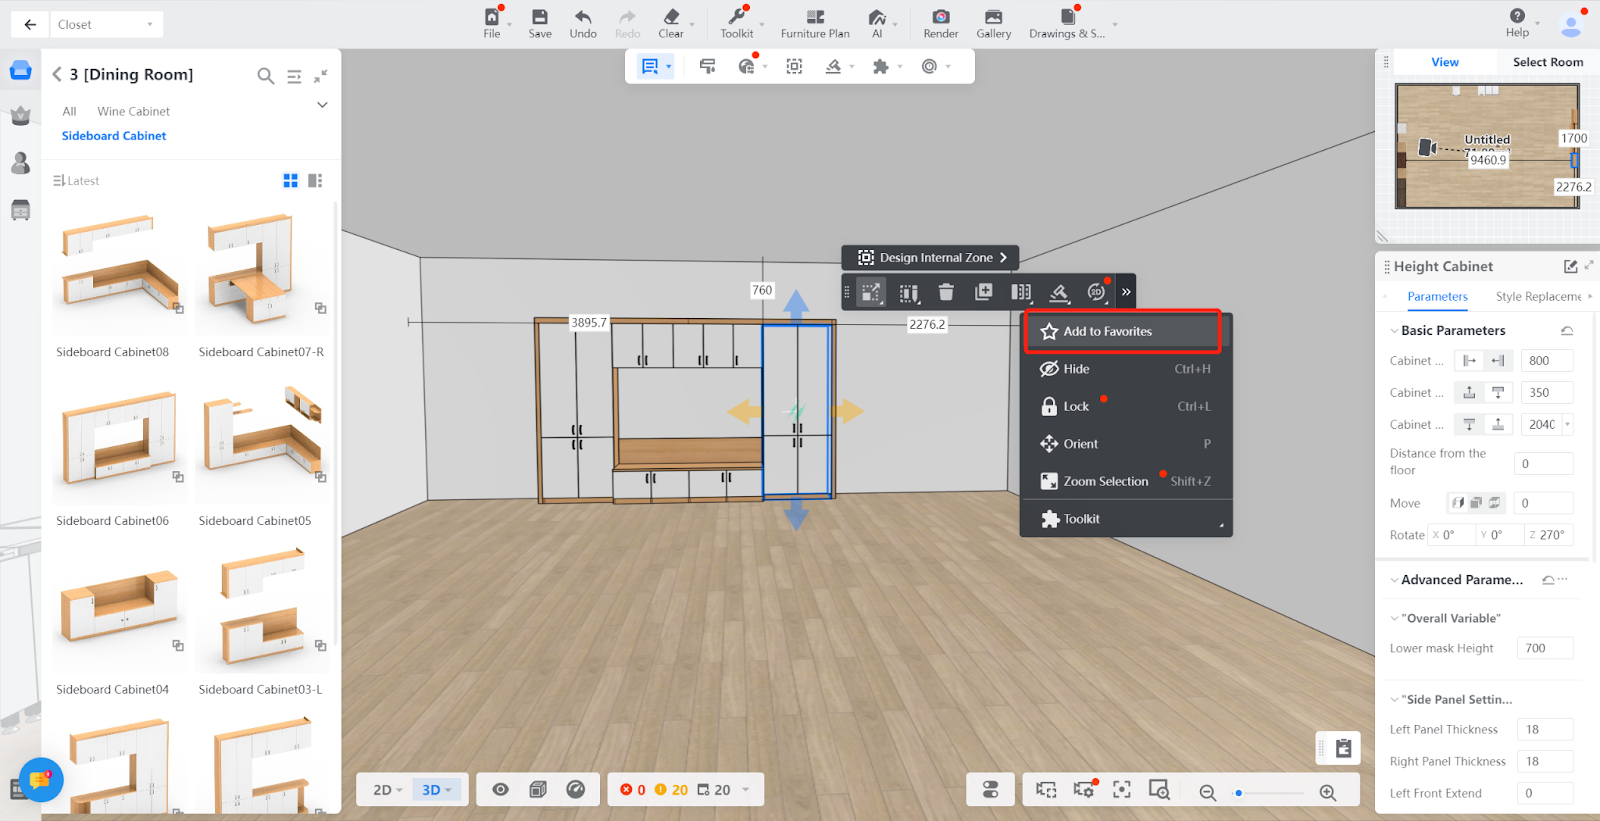
2.4.1 In the frontend interface, hold down the Shift key to select two cabinets, right-click to display the combination icon, click on "Combine" to create a combined cabinet.
2.4.2 In the frontend interface, right-click on the model and select "Add to Collection" - a pop-up collection classification window will appear - click "Confirm".
2.4.3 In the backend collection, select the cabinet combination saved earlier, and click "Add to Frontend".
2.4.4 Click on the Furniture Combination Library and find the combination we just added to the frontend.

2.4.5 Open the frontend interface, and you can see the model we just added to the frontend.

2.5 Parts:
Models under the Parts Library are used as component models in the frontend tool. When creating them, models of the following categories need to be saved under the Component Model Library, such as drawers, clothes rails, cornices, normal panels, built-in cabinets, back panels, space combinations, and concealed doors.
2.5.1 Entry of Parts : Custom Furniture - Create Asset - Parametric Model Library -Design Catalog- Parts
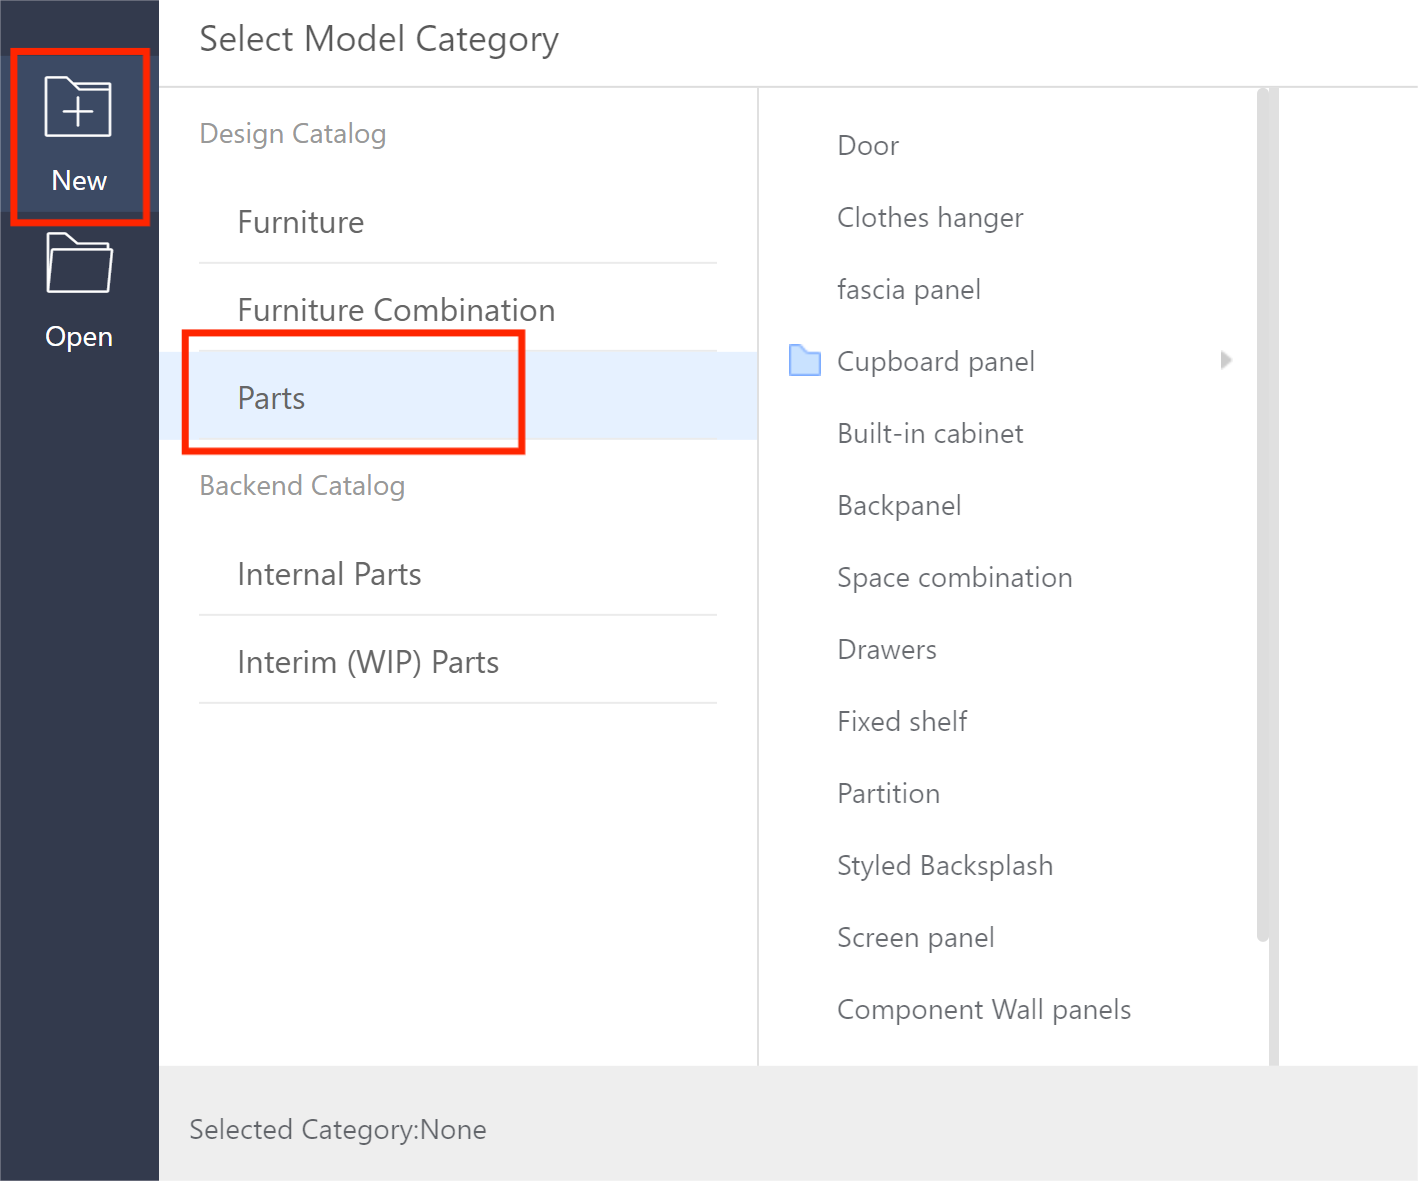
2.5.2 The Parts Library is similar to the Material Library. It has three levels of categories. You can create subcategories, rename, and delete at the first and second level categories. For the third-level category, you can only rename and delete. The steps are the same as operating the Material Library.
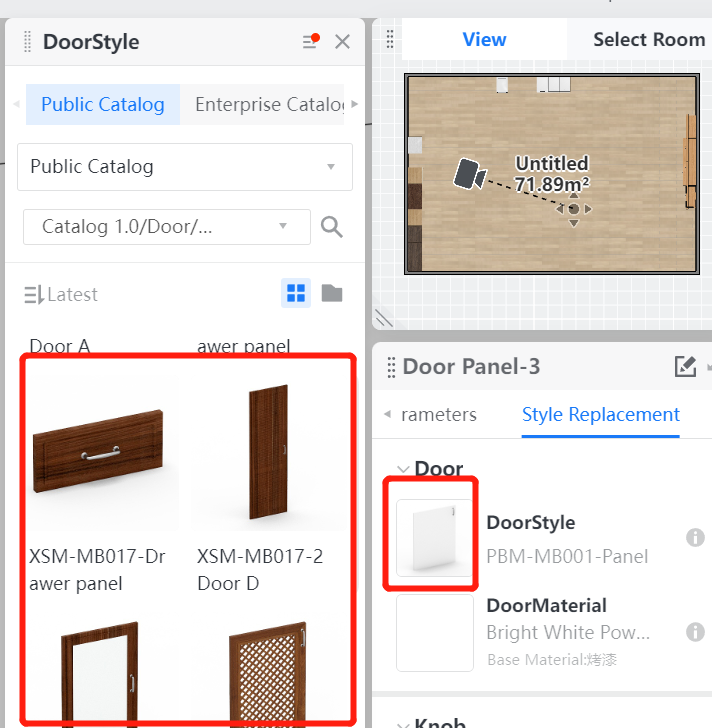
2.6 Internal Parts:
Models that are replaced need to be saved in the Internal Parts. When creating them, models of the following categories need to be saved under the Internal Parts: wardrobe drawer panels, built-in cabinets, door cores, guides, vertical frames, horizontal frames, sliding door waistlines, handles, etc.
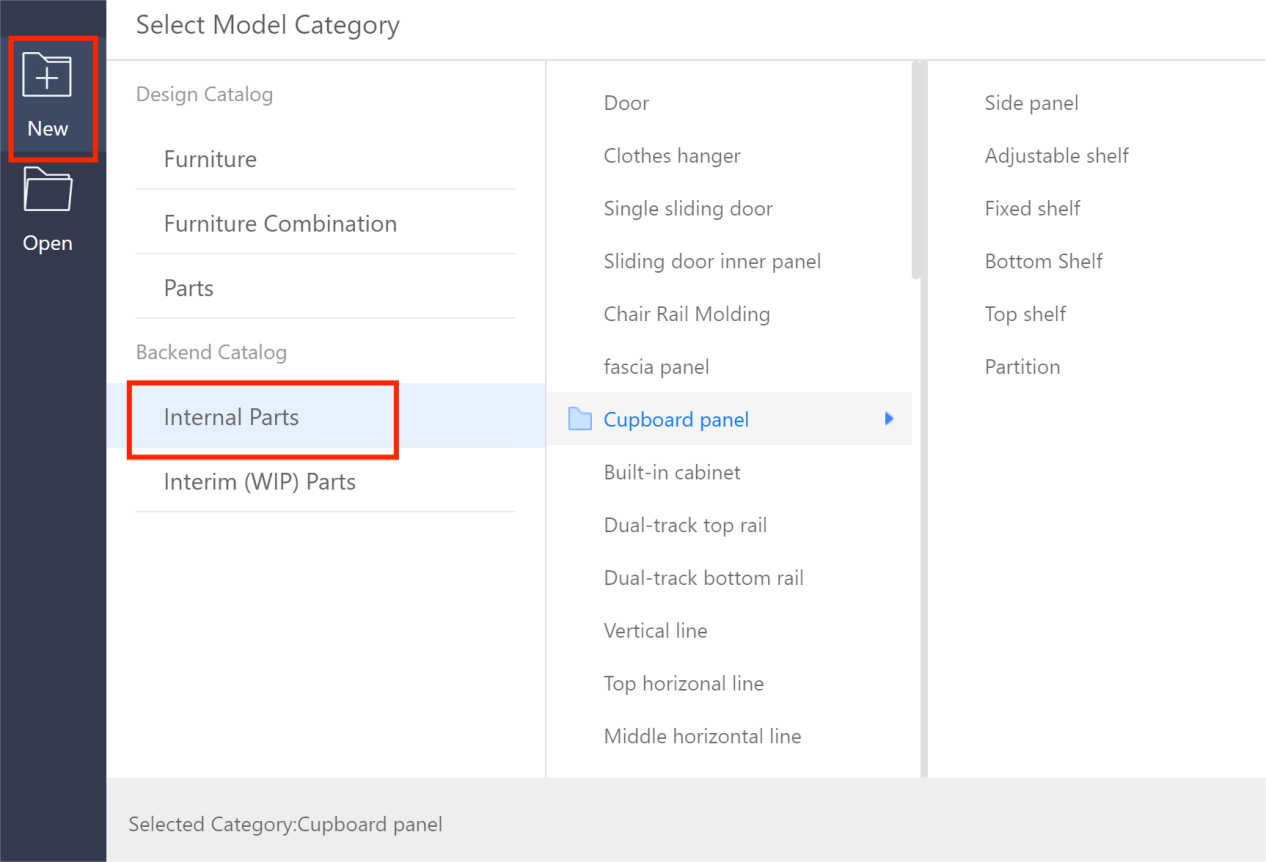
2.6.1 Internal Parts Entry: Custom Furniture - Create Asset - Parametric Model Library - New-Internal Parts
2.6.2 The Internal Parts is similar to the Material Library. It has three levels of categories. You can create subcategories, rename, and delete at the first and second level categories. For the third-level category, you can only rename and delete. The steps are the same as operating the Material Library.
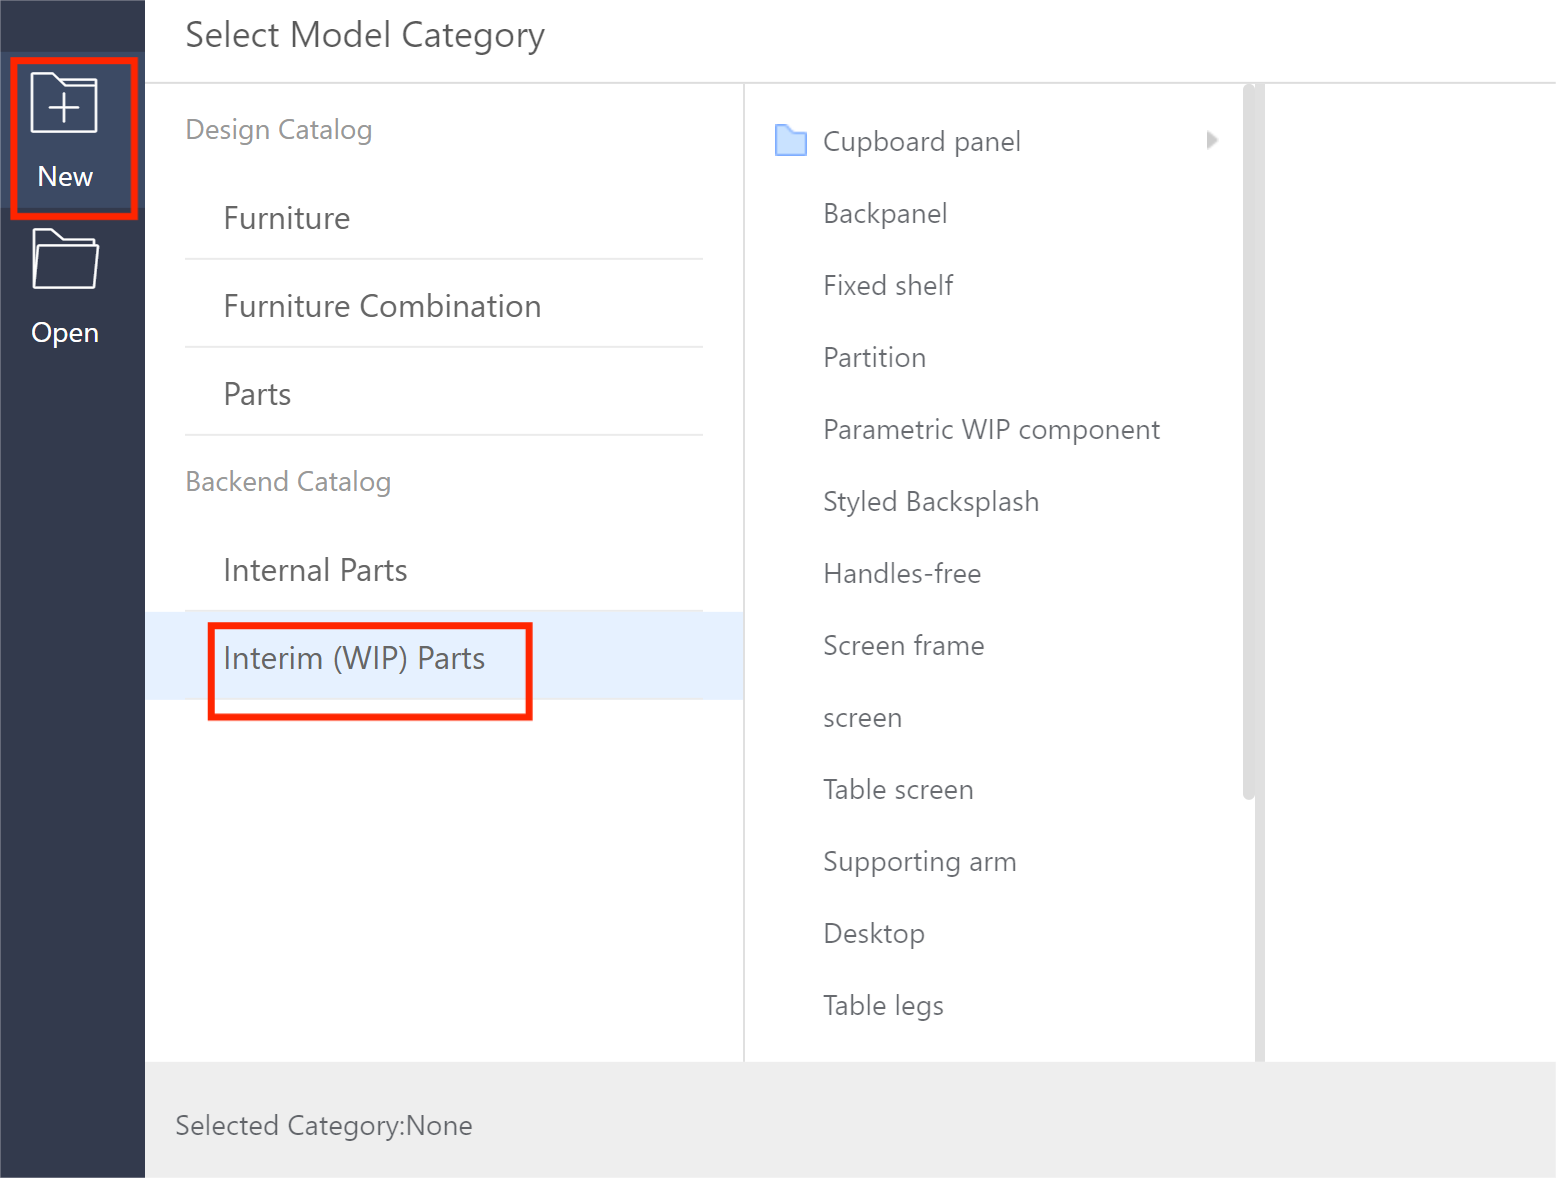
2.7 Interim Parts: It is not used as a separate module in the frontend tool, nor is it used as a replacement module in the frontend tool. It is only called to build other models in the modeling editor. All models created under any category can be saved in the Interim Parts theoretically.
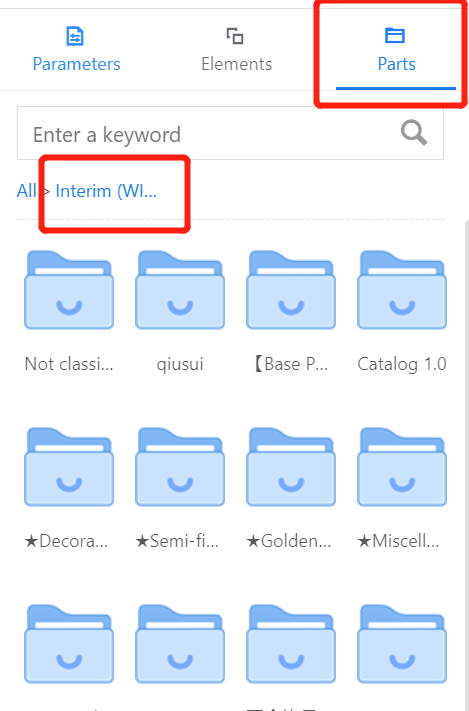
2.7.1 Cabinet Model Modeling Entry:
Custom Furniture - Create Asset - Parametric Model Library - New-Interim Parts
2.7.2 The steps for creating, naming, deleting, moving up and down, and operating files in the Interim Parts are the same as in the Material Library.
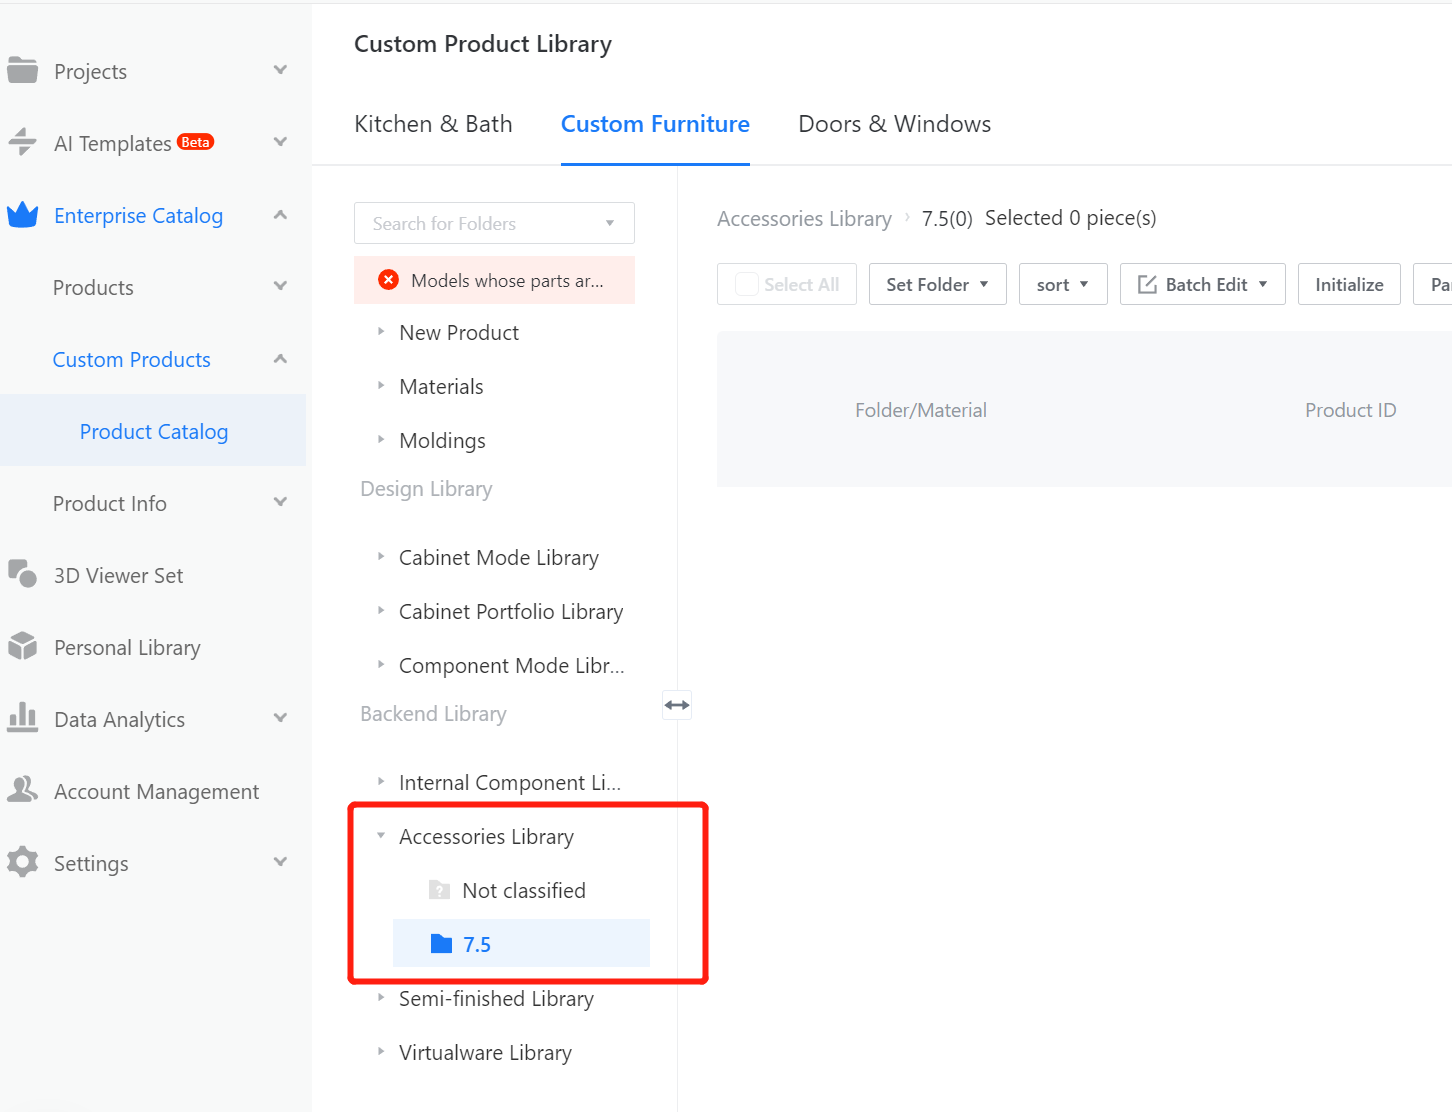
2.8 Accessory Library: Mainly used to save uploaded 3D models, such as hinges, three-in-ones, etc.
2.8.1 Accessory Library Entry: Custom Furniture - Create Asset - 3D Model
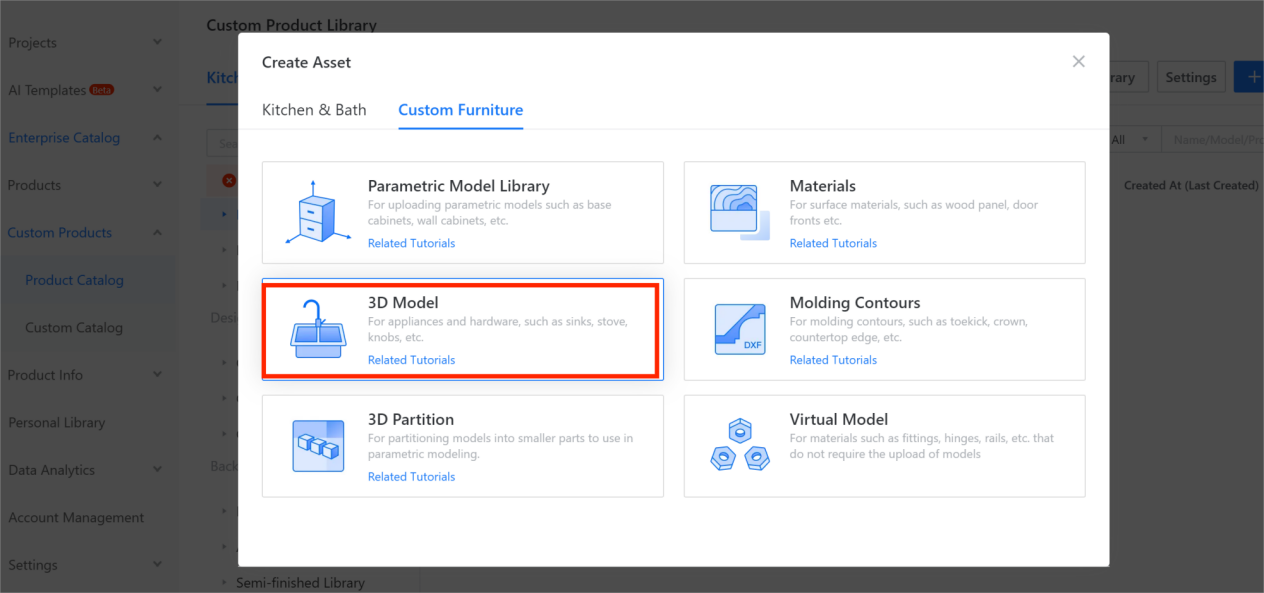
2.8.2 Accessory Library is similar to the Material Library, with three levels of categories. The first and second levels allow creating sub-categories, renaming, and deleting. The third level only allows renaming and deleting. The steps for operating the Accessory Library are the same as those for the Material Library.
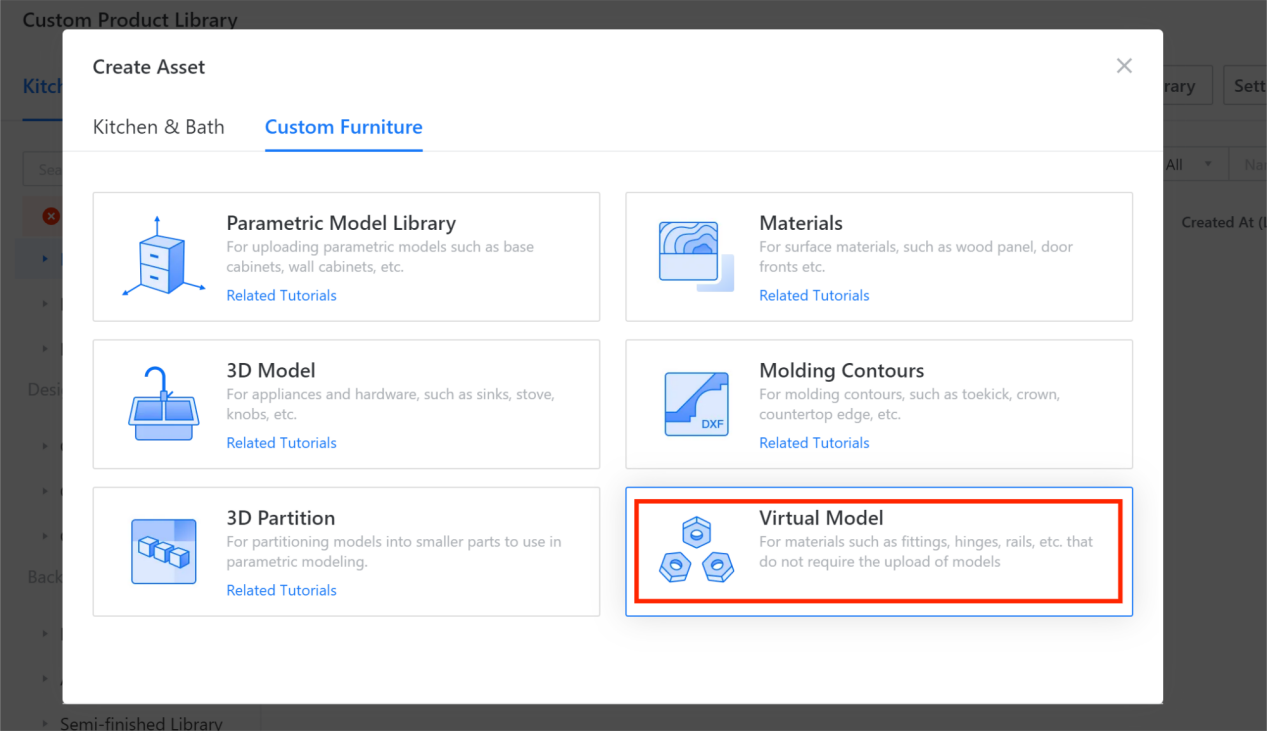
2.9 Virtual Model Library: It is mainly used to store uploaded virtual models (not displaying actual models), such as hinges, guide rails, etc.
2.9.1 Entry to the Virtual Model Library: Custom Furniture - Create Asset - Virtual Model
Creating, naming, and deleting files in the Virtual Model Library, as well as moving up and down, follow the same steps as the Material Library.
2.10 Cabinet Mode Collection: It is mainly used to save models collected by the front-end. These saved models are stored in this library.
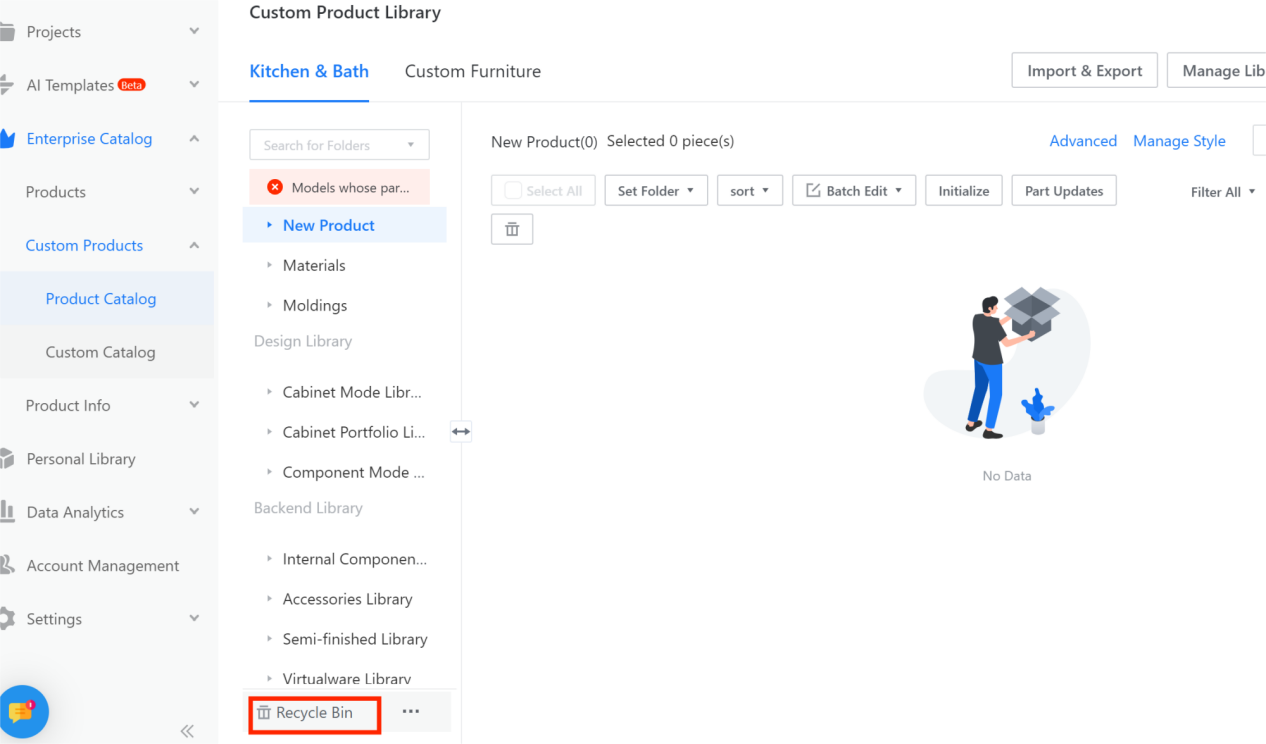
2.11 Recycle Bin: Models deleted from the Molding Library, Material Library, Cabinet Mode Library, Cabinet Combination Library, Component Mode Library, Internal Component Library, Semi-Finished Product Library, and Virtual Component Library are all saved in the Recycle Bin. Models in the Recycle Bin can be restored.
Section 2: Category Settings - Setting the Parametric Model Type and Category
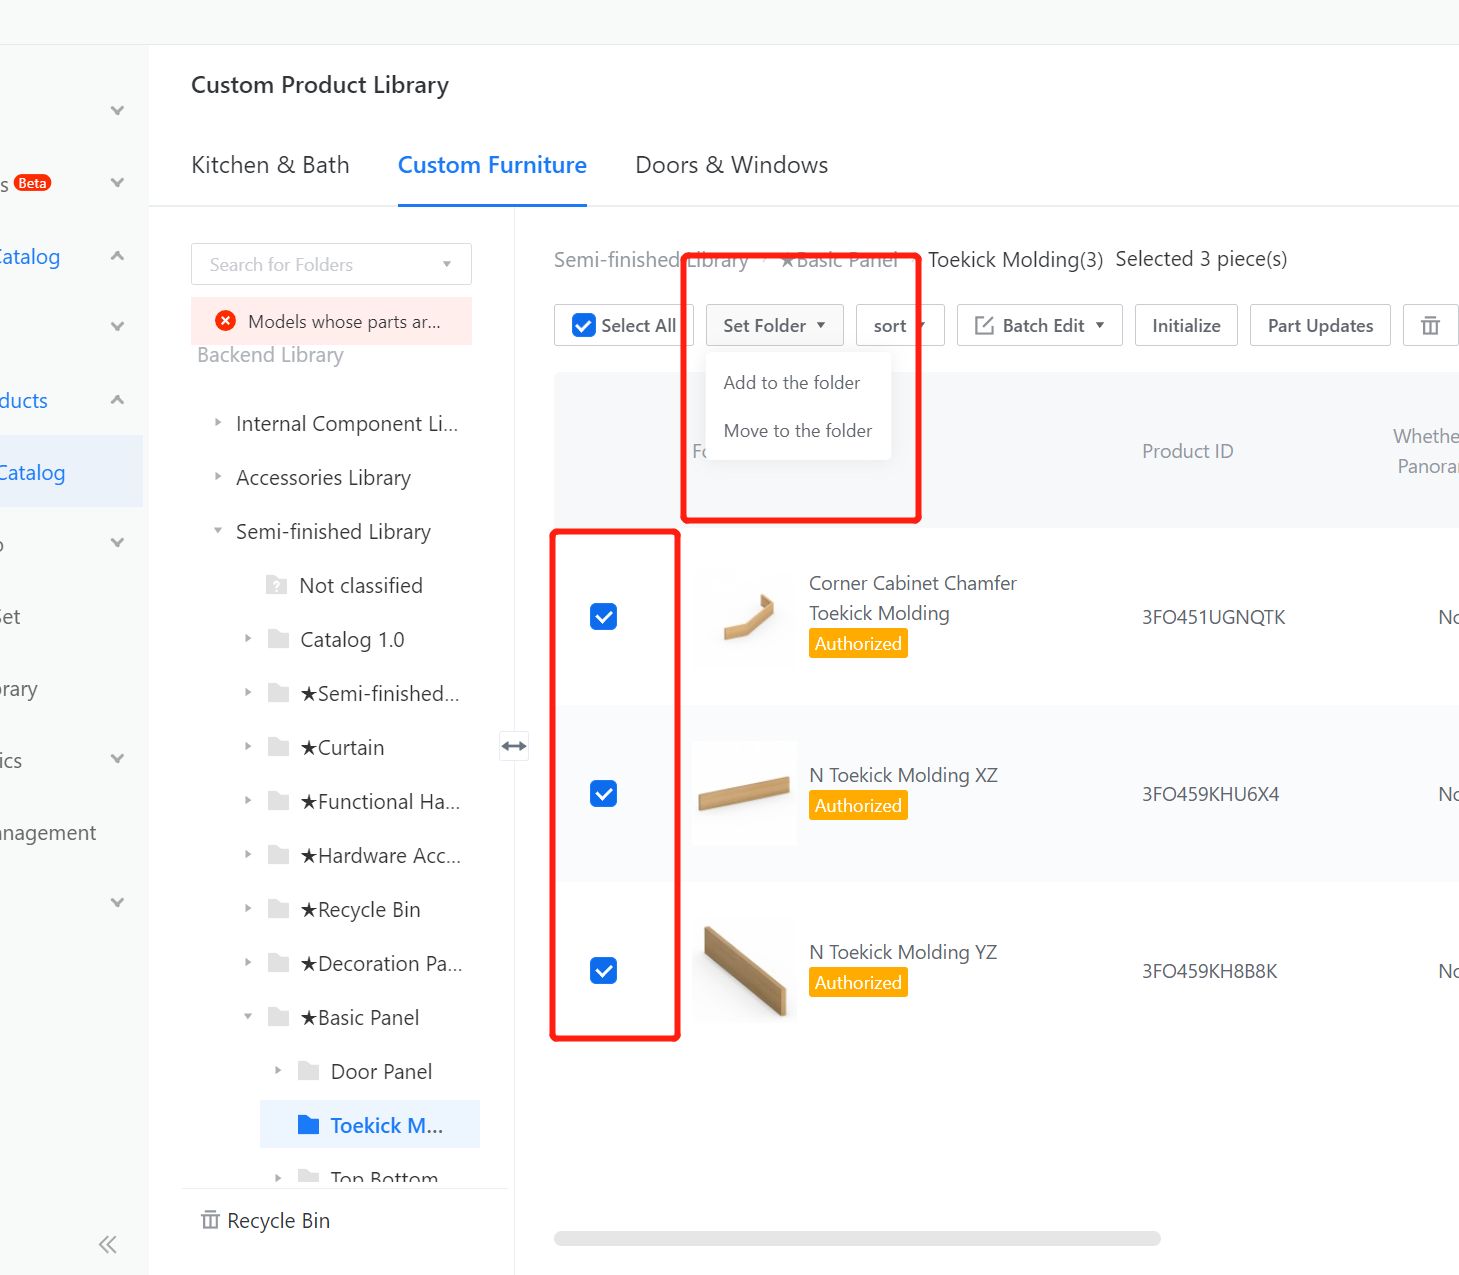
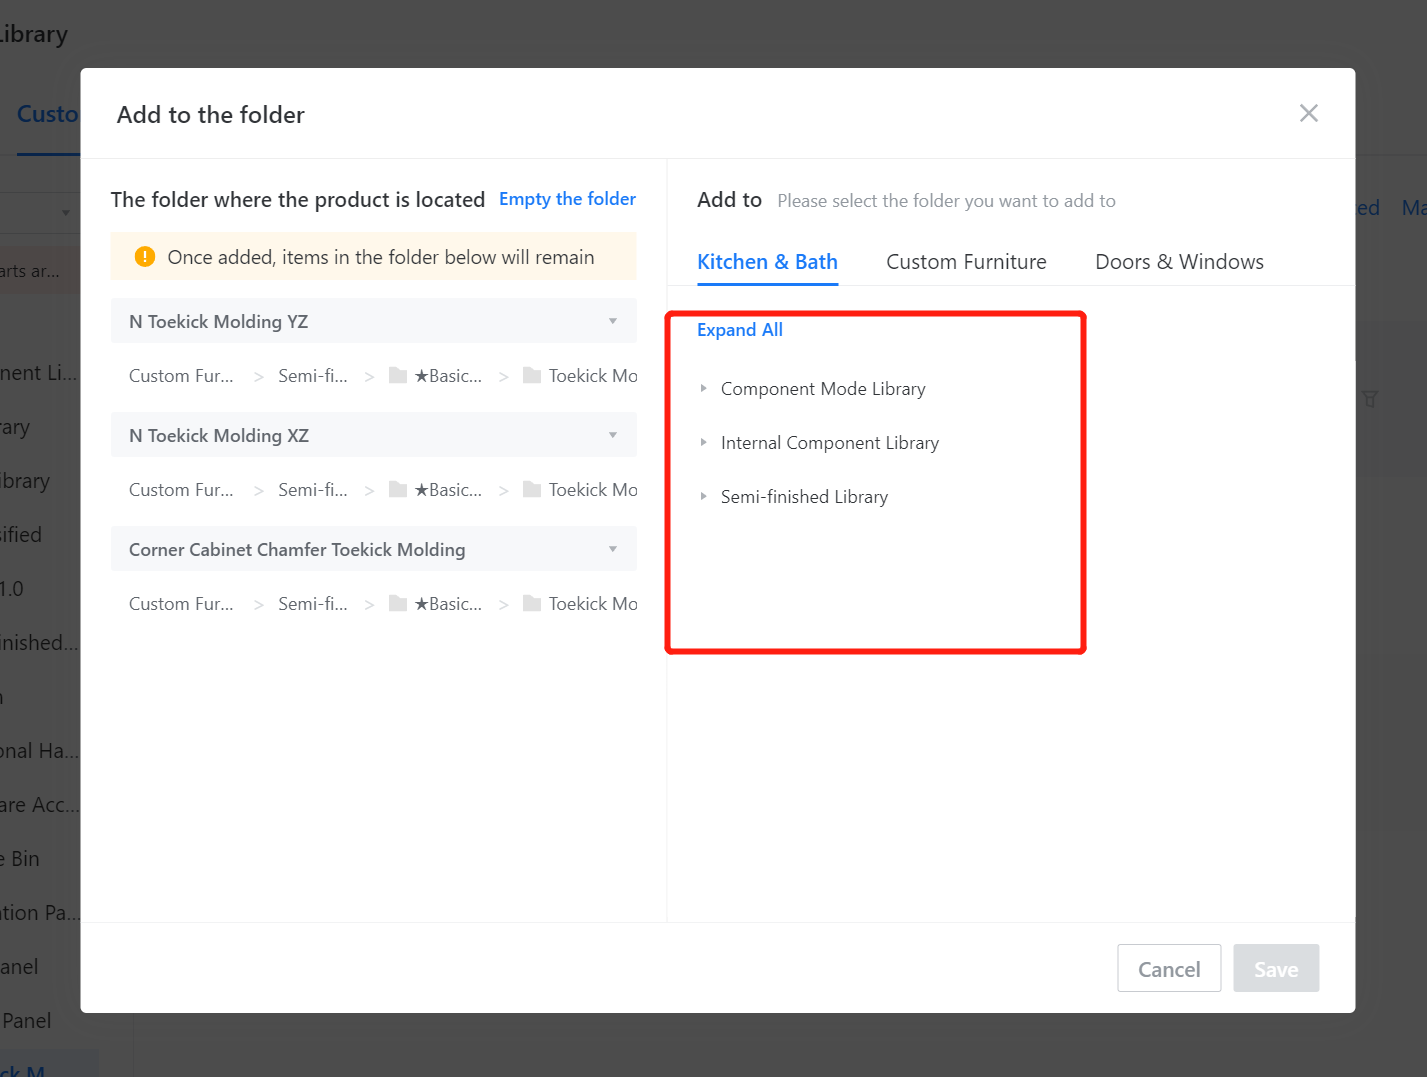
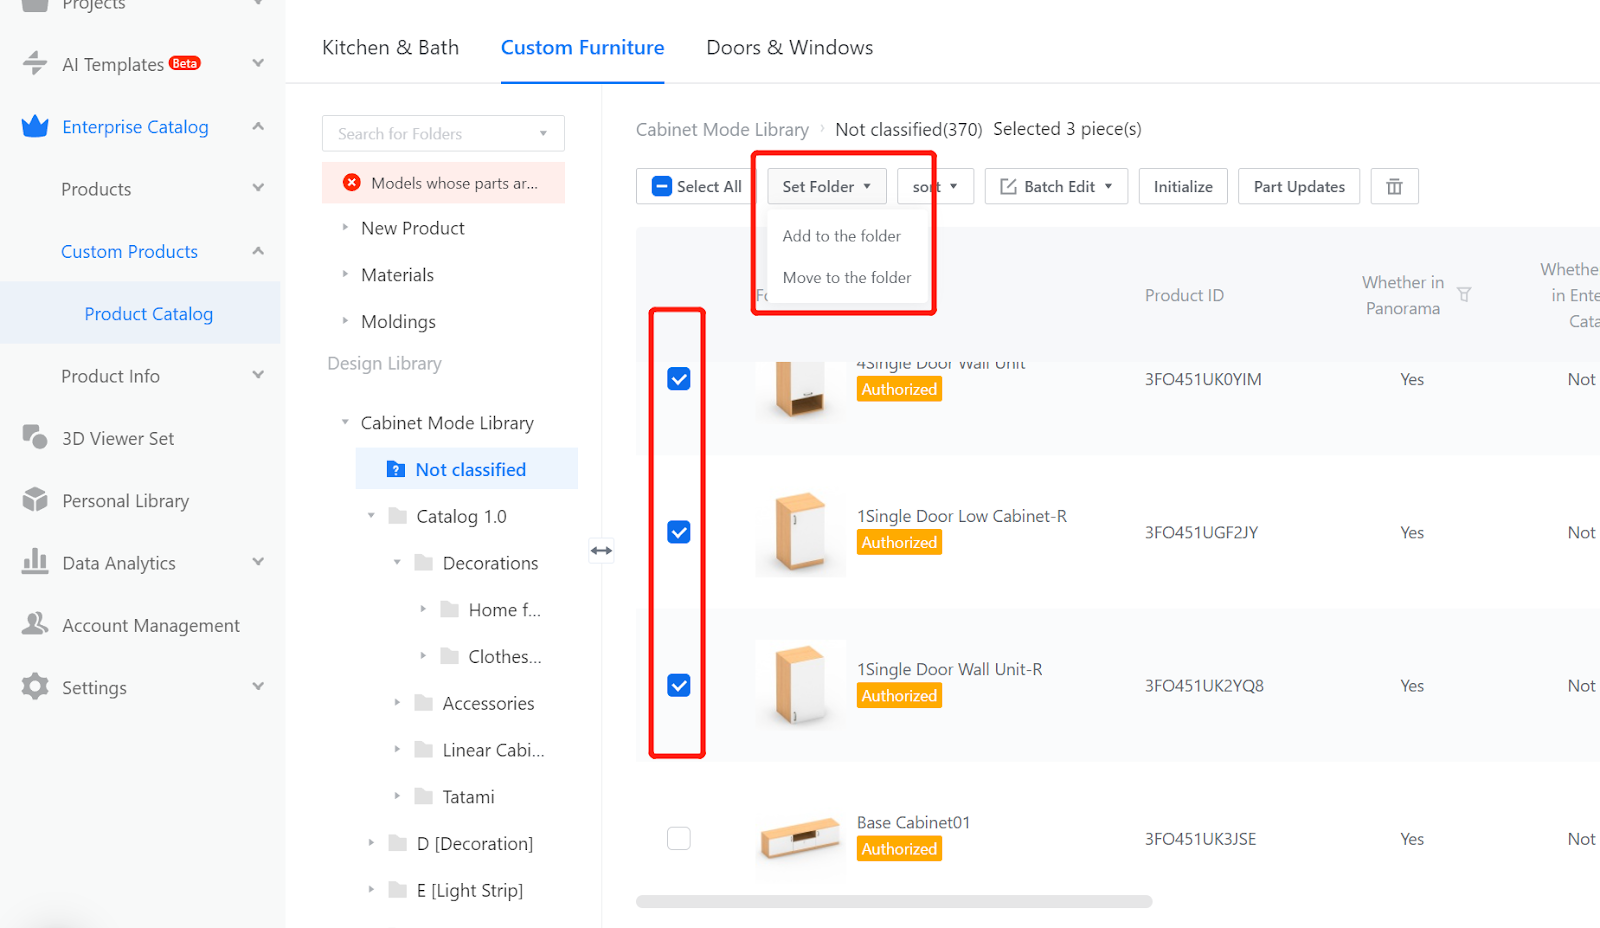
Setting Categories: Similar to the move/copy function, first select the models that need to be moved/copied, then click on "Set Category."
2.1 Set Category: By selecting the corresponding folder, the models can be moved/copied to the selected folder.
2.2 Models in the Cabinet Mode Library and Cabinet Combination Library can be moved or copied by setting the folders.
2.3 Models in the Component Mode Library and Internal Component Library can be moved or copied by setting the folders.
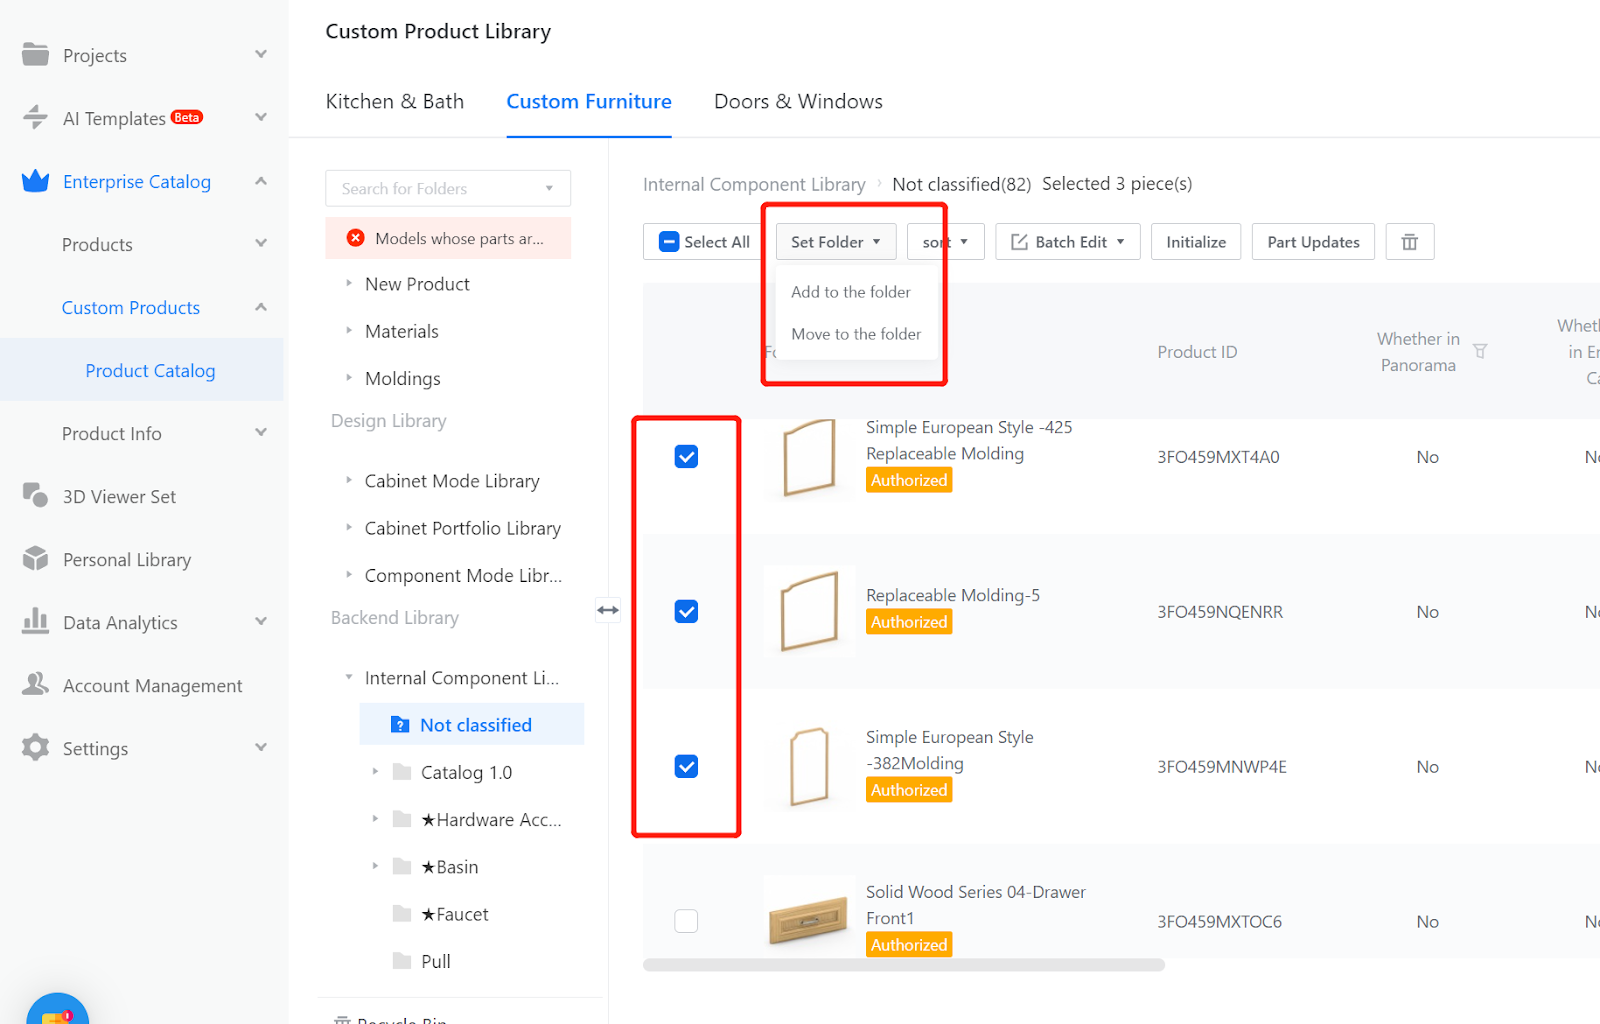
2.4 3D models in the Semi-Finished Product Library can only be set categories within the Semi-Finished Product Library mode. Board models in the Semi-Finished Product Library can be moved to the Internal Component Library or Component Mode Library by setting the folders.