Contents
I. Definition
II. Function Entry
III. Procedures
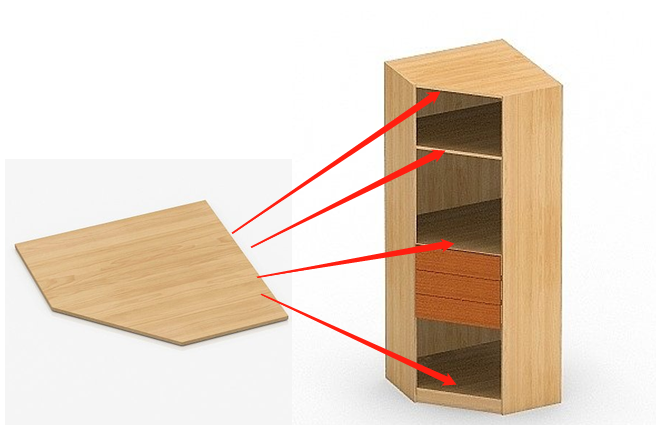
I. Definition
A pentagon base panel is one of the basic components used in modeling pentagon cabinets.
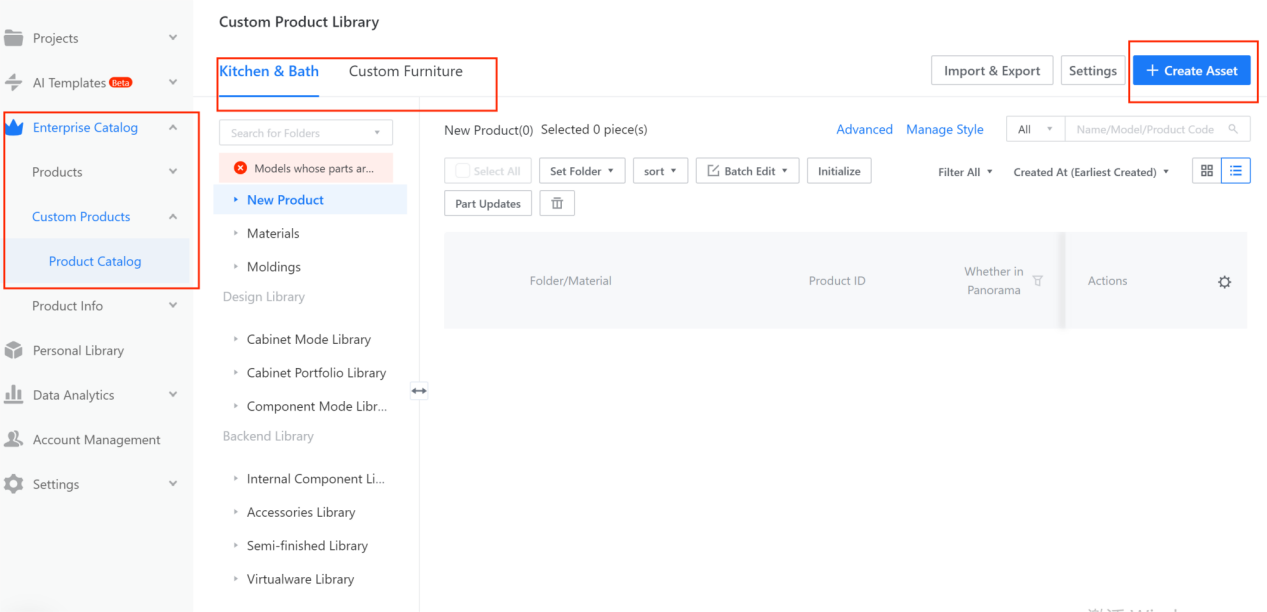
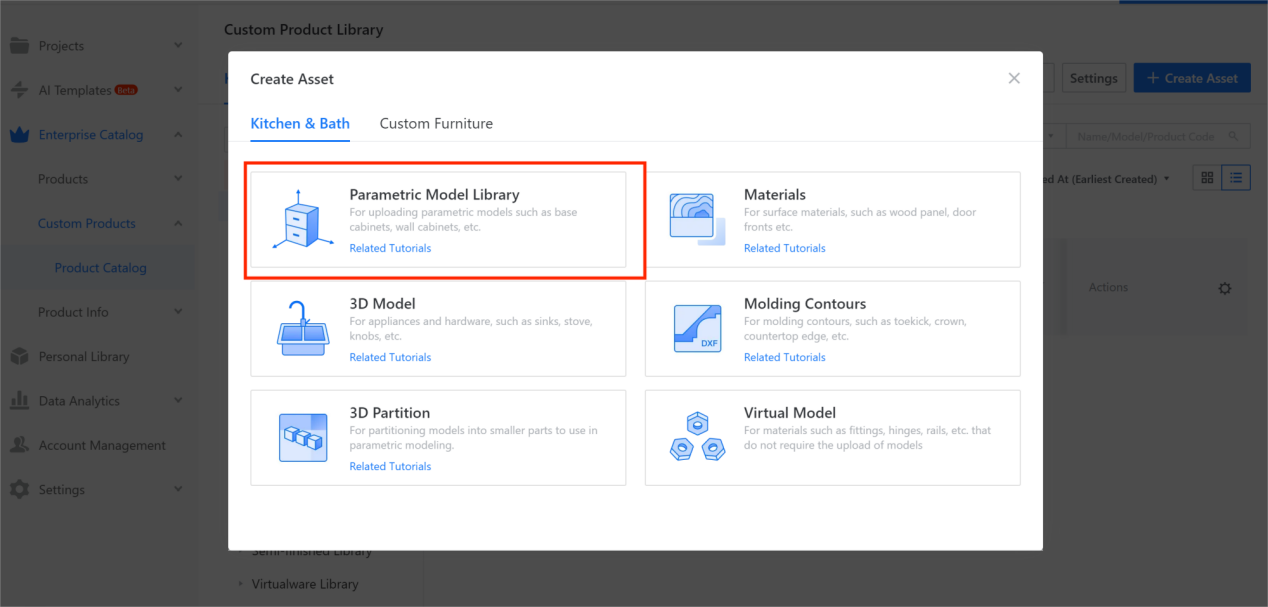
II. Function Entry
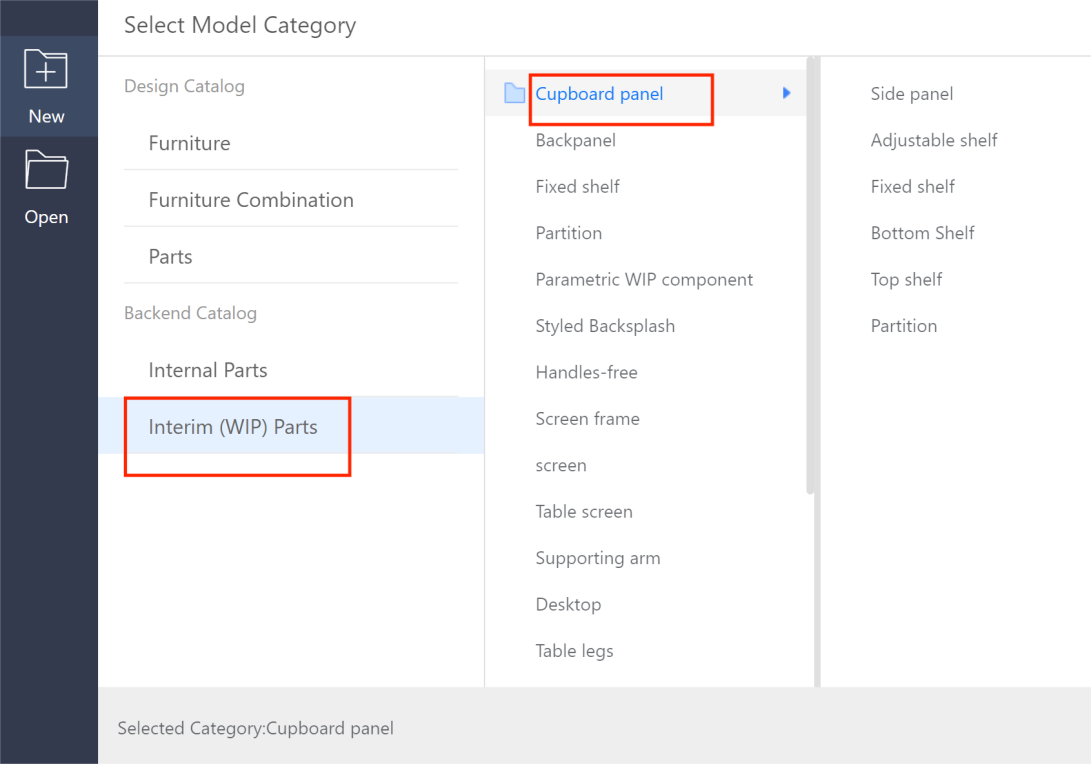
Enterprise Catalog-Custom Products-Product Catalog- Kitchen&Bath, Custom Furniture-Create Asset- Click “Parametric Model Library”-New- Interim(WIP) Parts- Cupboard Panel
III. Procedures
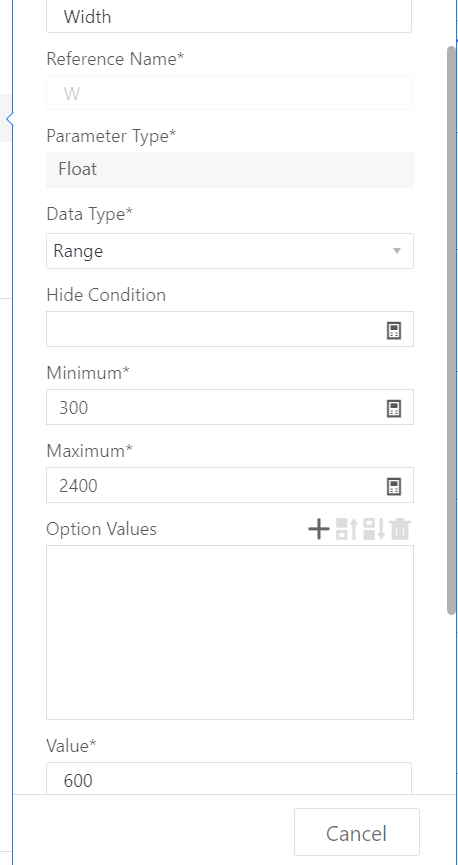
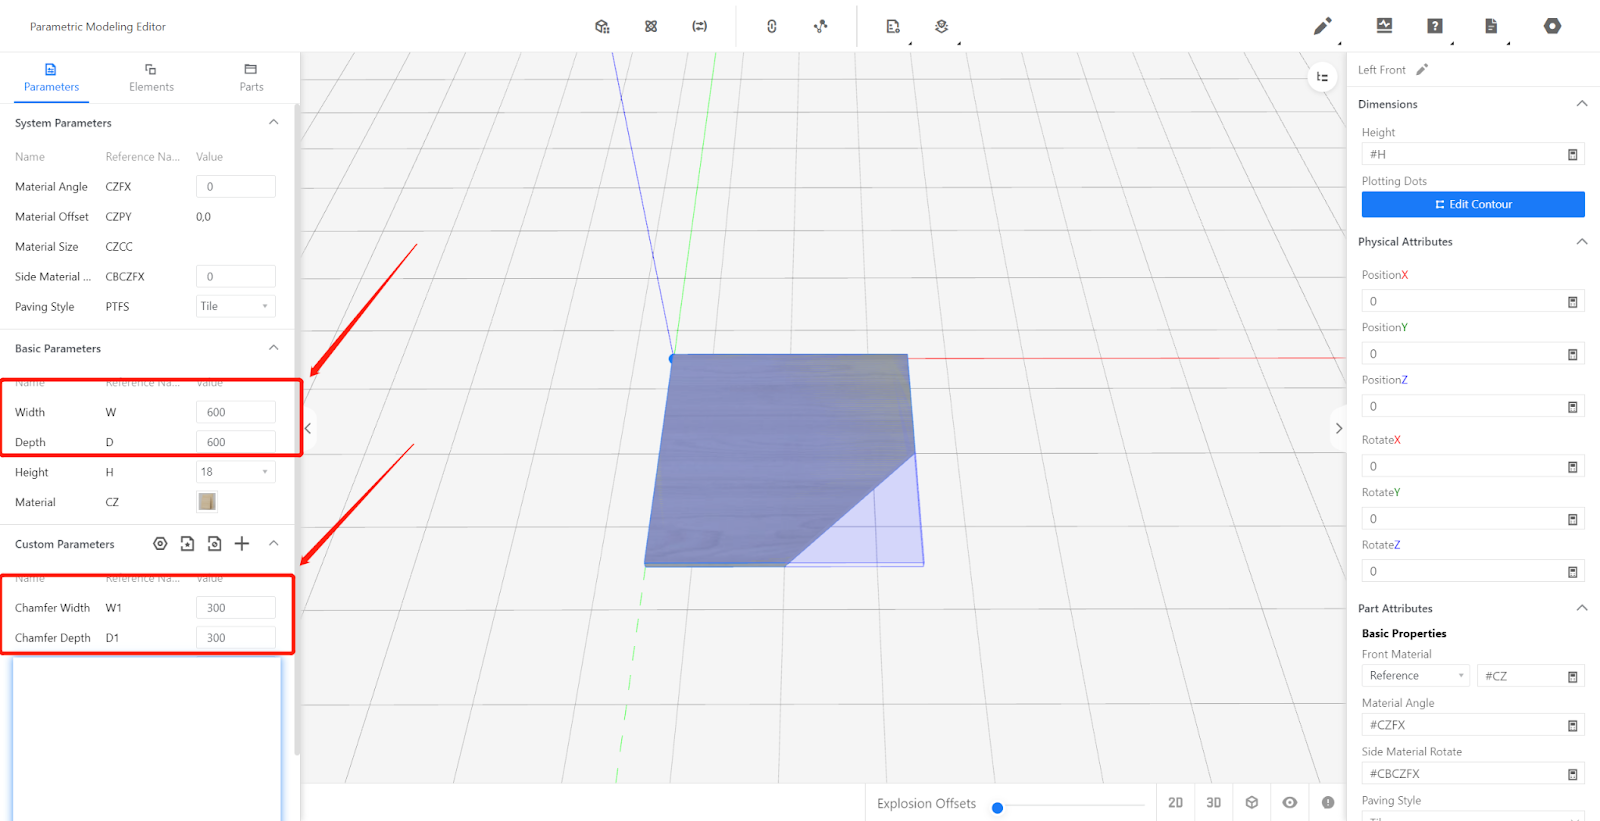
2-1. Width (W): Represents the dimension along the X-axis, usually set as a range (e.g., 300 to 2400, current value: 600).
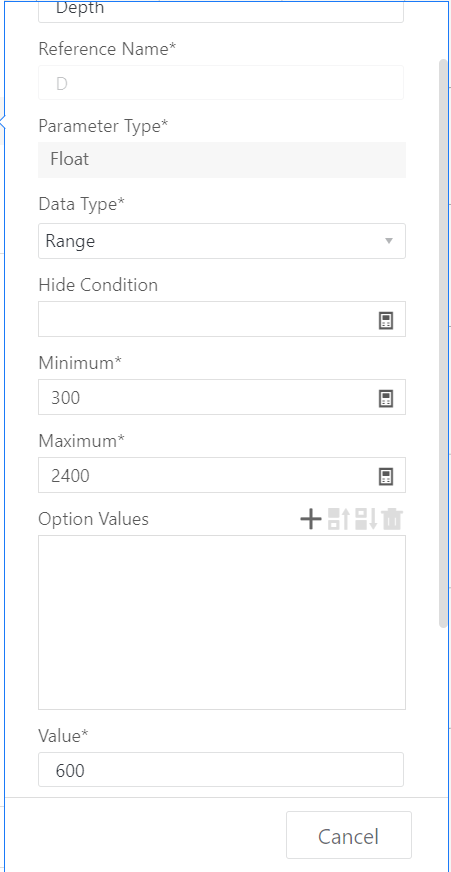
2-2. Depth (D): Represents the dimension along the Y-axis, usually set as a range (e.g., 300 to 1200, current value: 600).
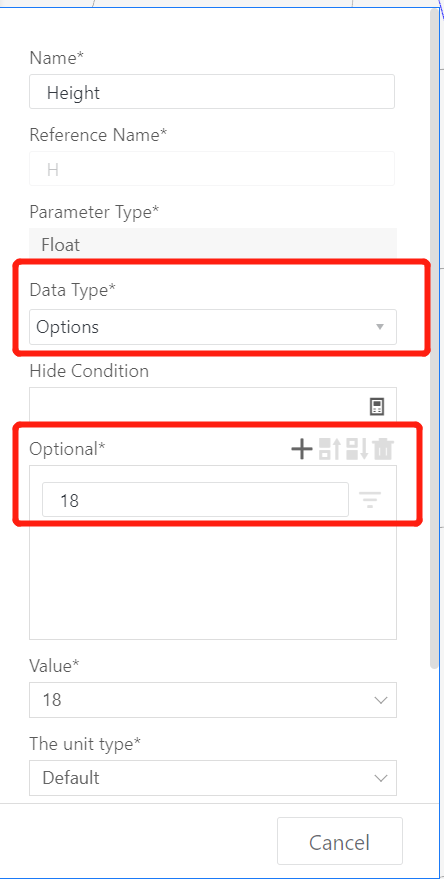
2-3. Height (H): Represents the dimension along the Z-axis, with optional value types. Can be a single value or multiple values (e.g., single optional value: 18, current value: 18).
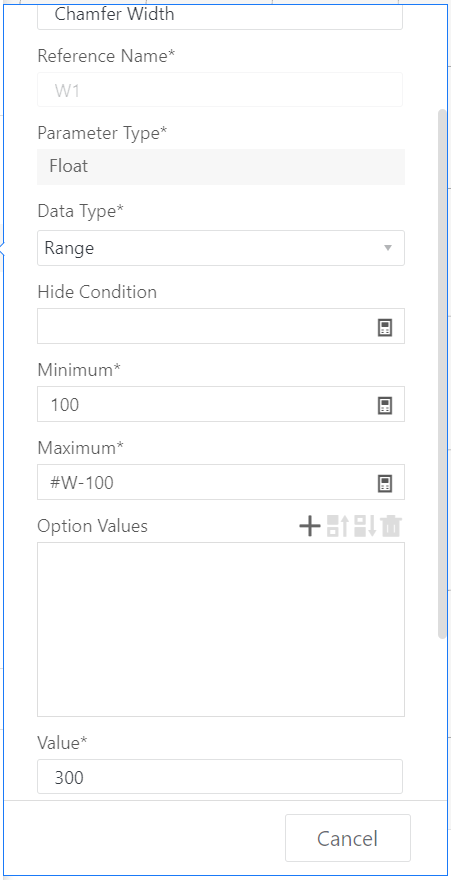
2-4. Add advanced parameter: Name: Left Width, Reference Name: W1, value type range (e.g., range, minimum value: 100, maximum value: #W-100, current value: 300), click [Create];
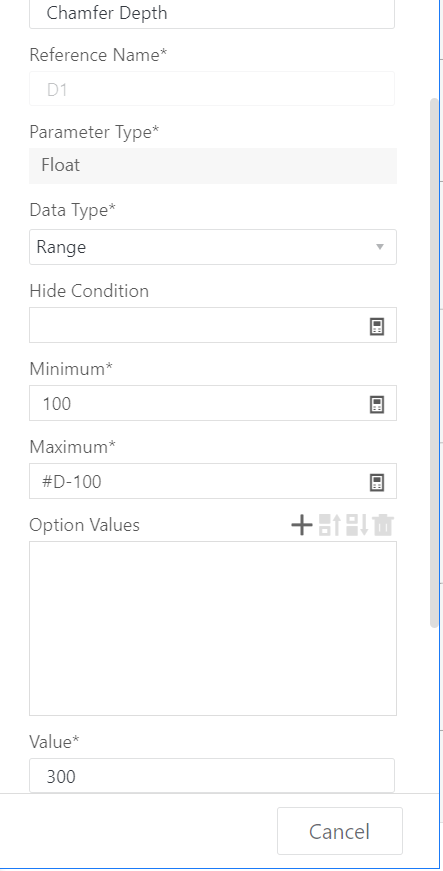
2-5. Add advanced parameter: Name: Right Depth, Reference Name: D1, value type range (e.g., range, minimum value: 100, maximum value: #D-100, current value: 300), click [Create];
2-6. Keep material default settings or modify them according to actual needs.
-
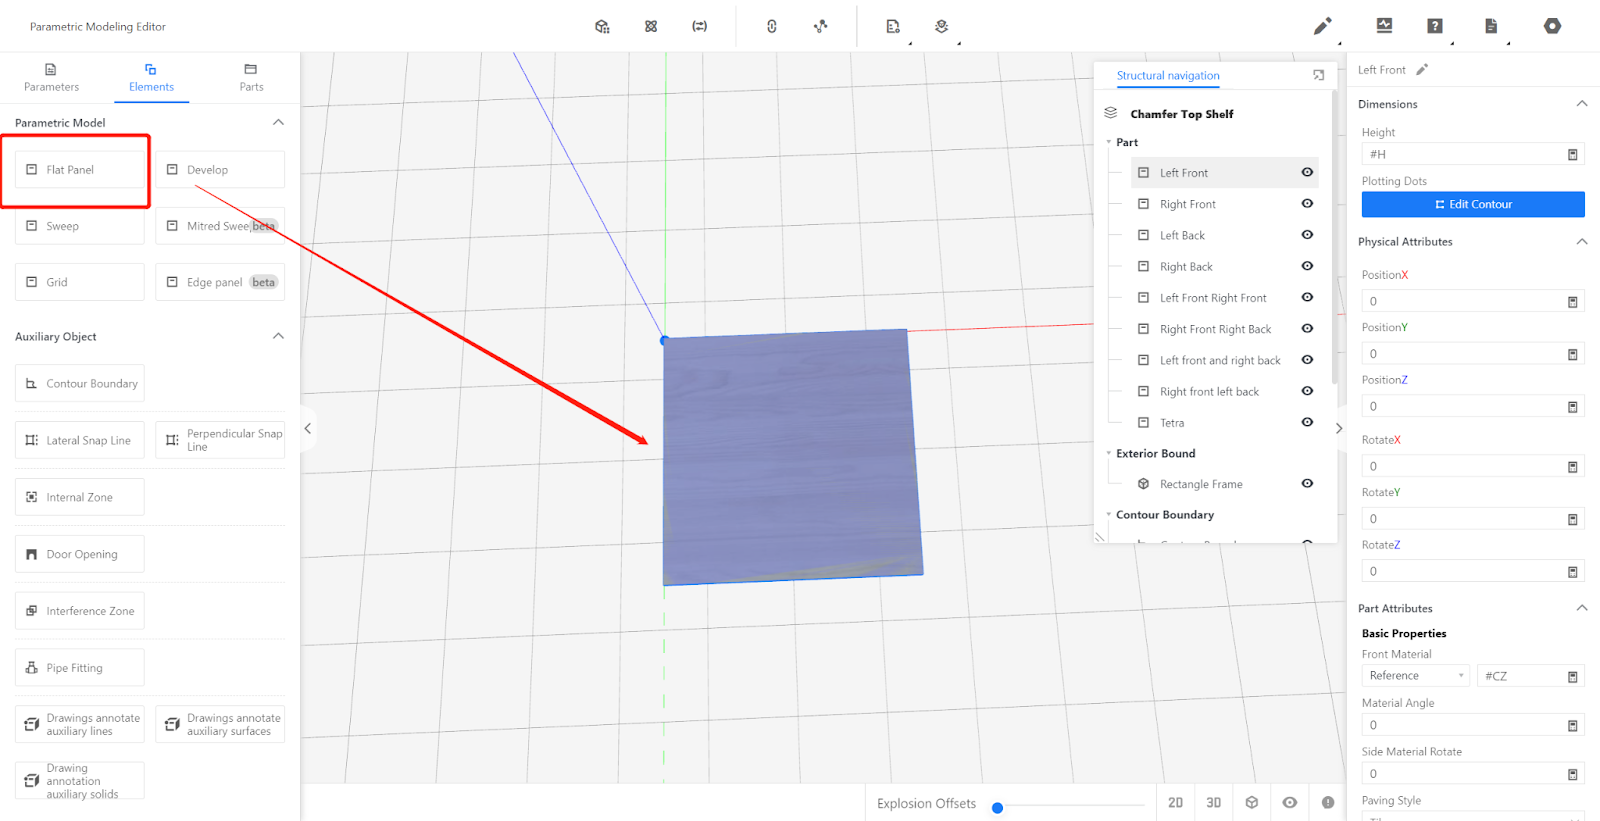
Inserting Flat Panel Modeling - Two methods are explained below. First Method: (Recommended)
Inserting Flat Panel Modeling - Two methods are explained below. First Method: (Recommended)
3-1. Insert flat panel component from the component library.
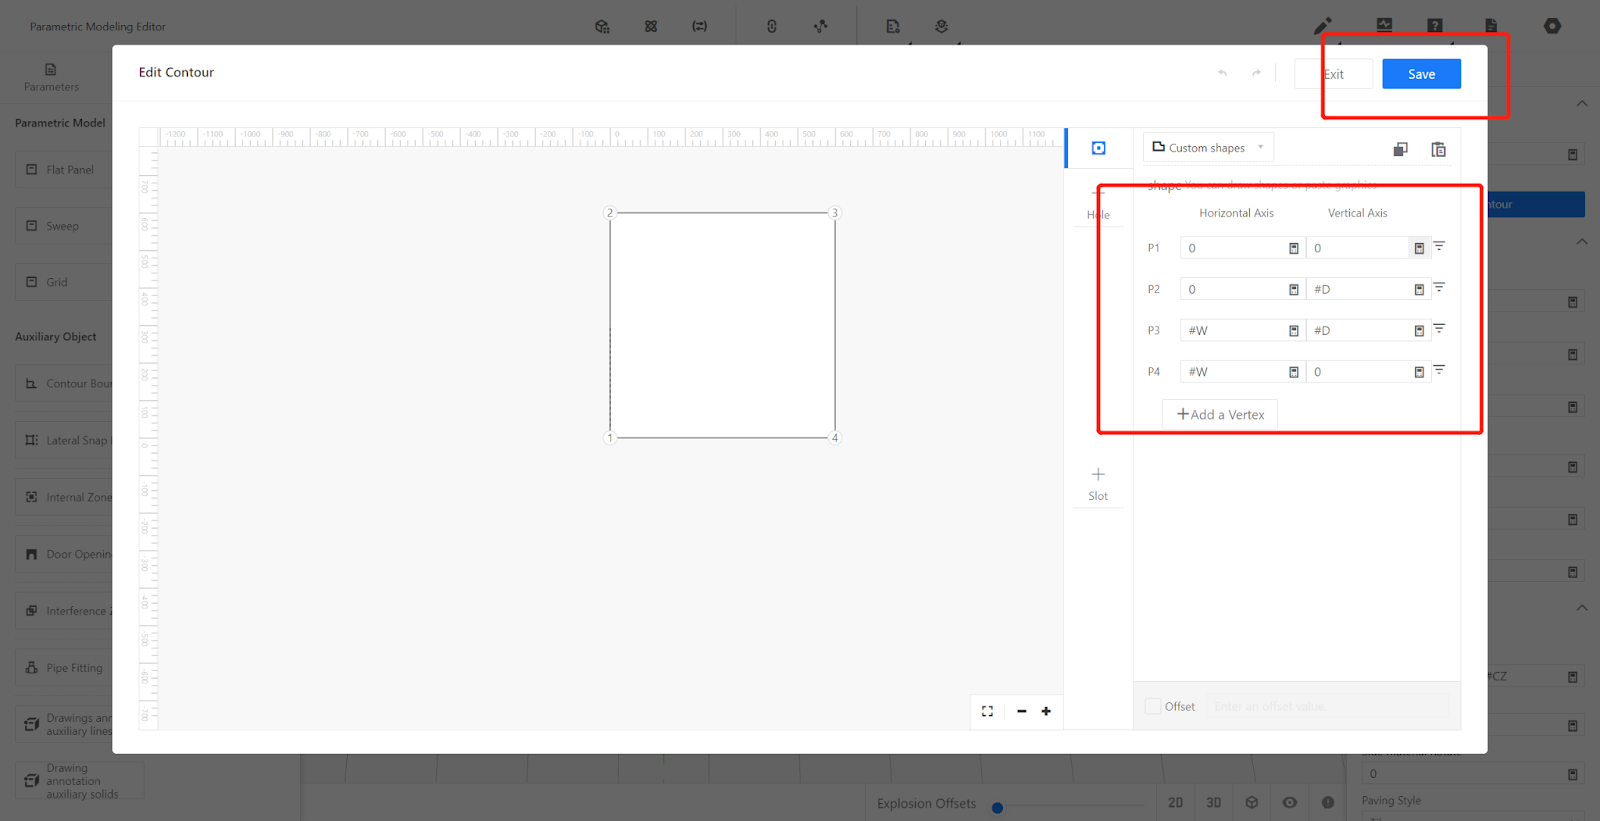
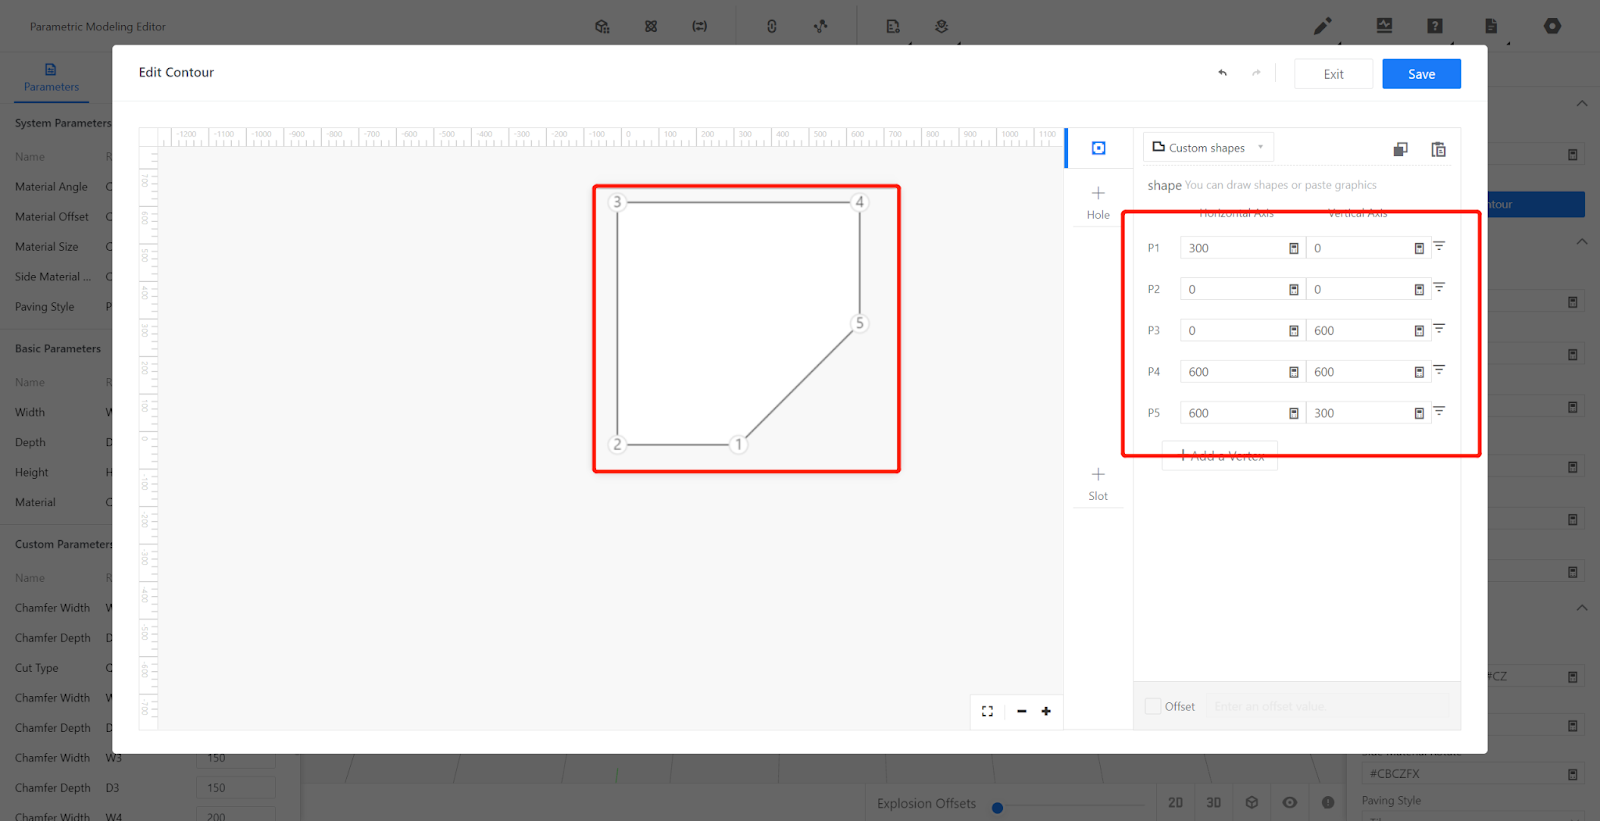
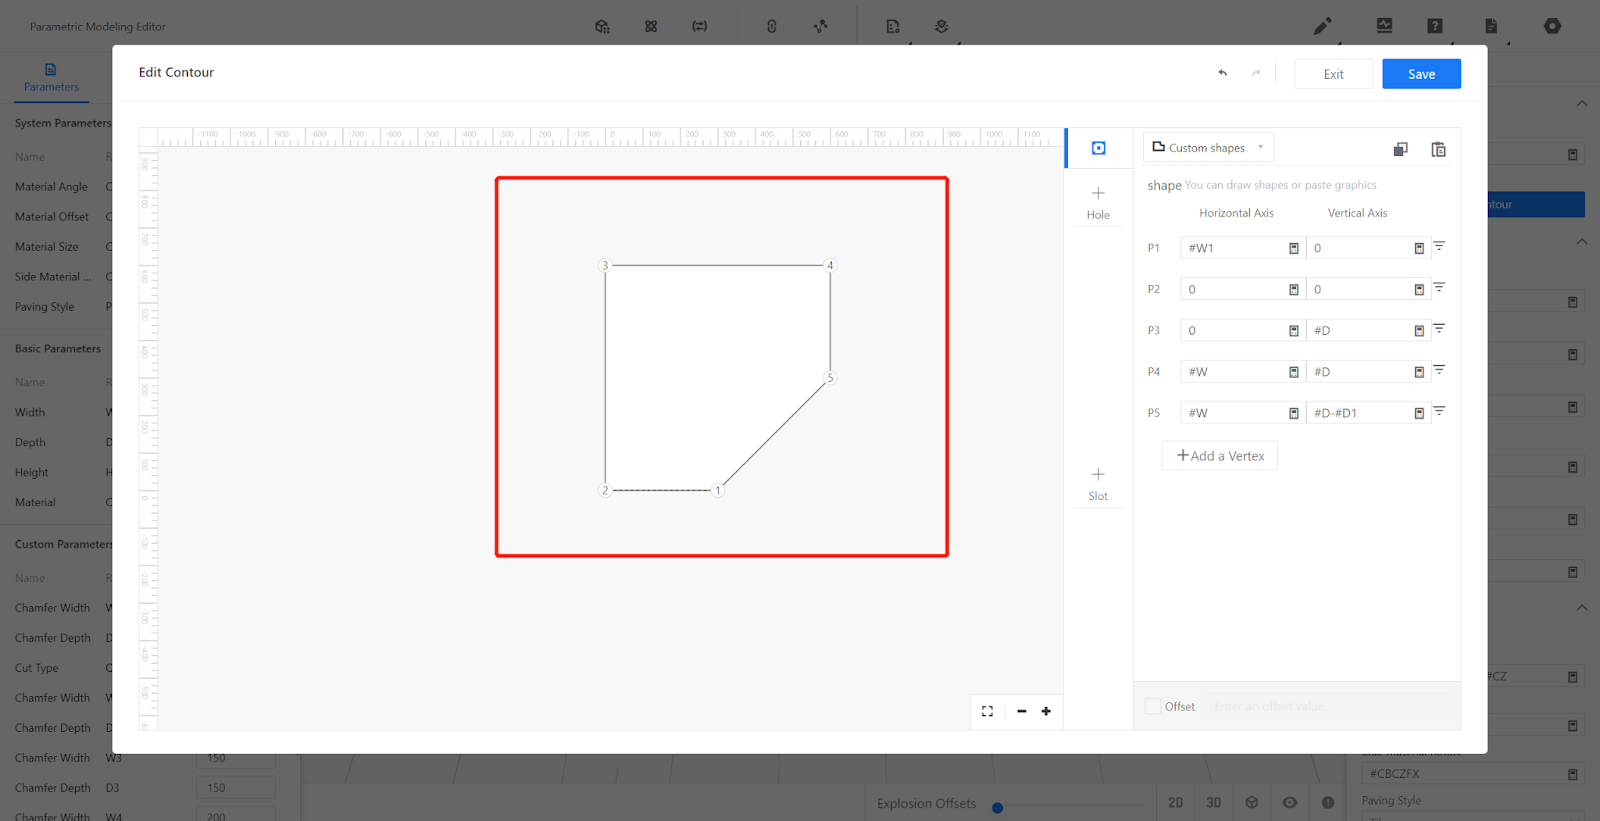
3-2. Click on "Edit Contour," delete the default four points, and redraw or modify them directly.
Point 1: 0,0; Point 2: 0,#D;
Point 3: #W,#D; Point 4: #W,0;
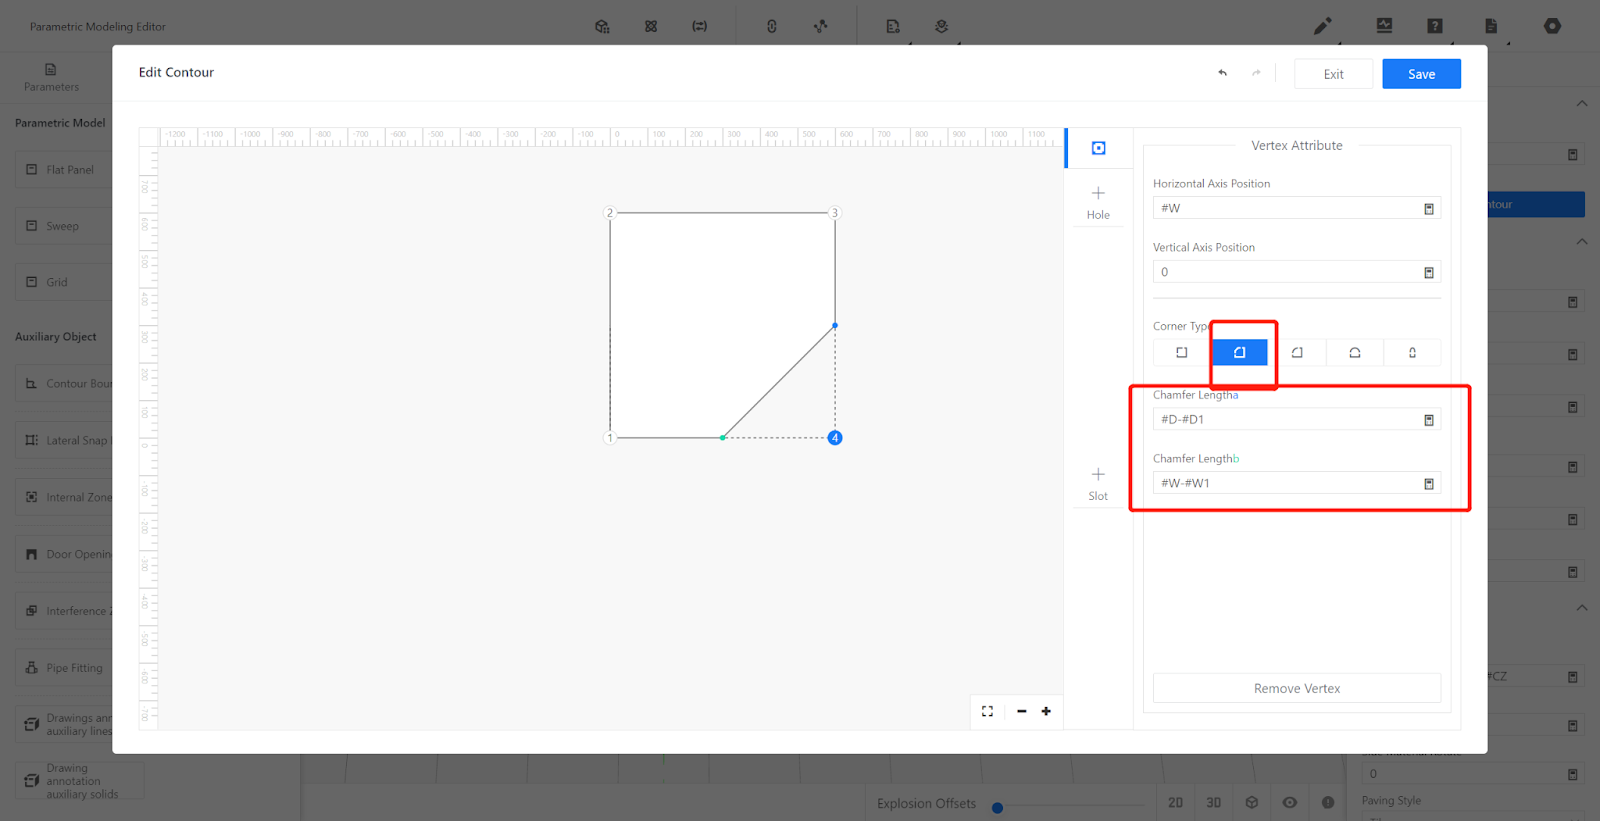
②After that, click on point 4, select "Chamfer" as the corner type, and set the chamfer length 'a' as #D-#D1 and chamfer length 'b' as #W-#W1. Then, save the changes.
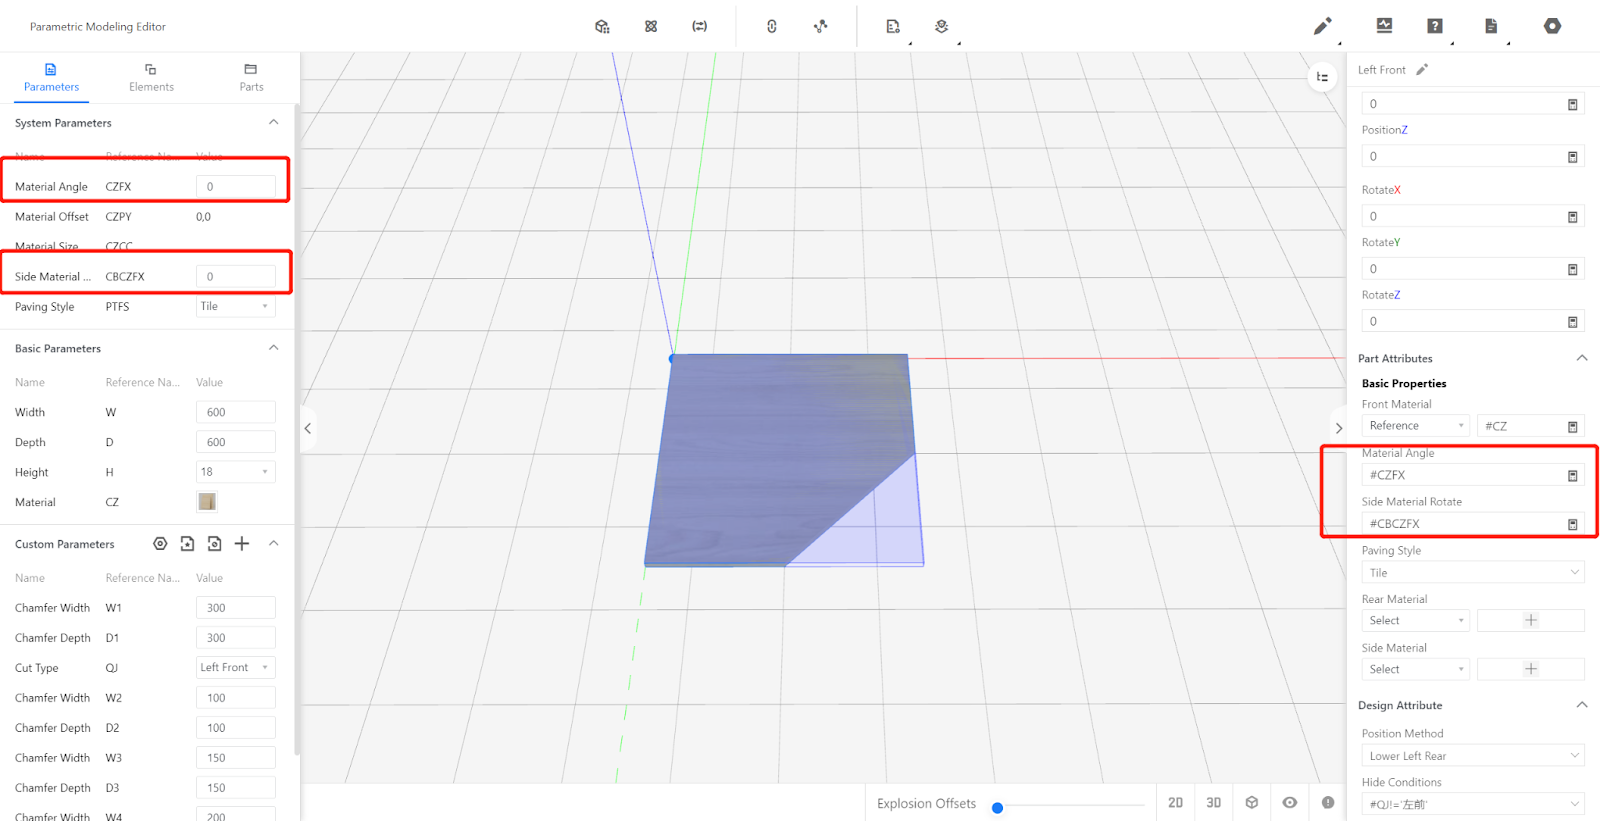
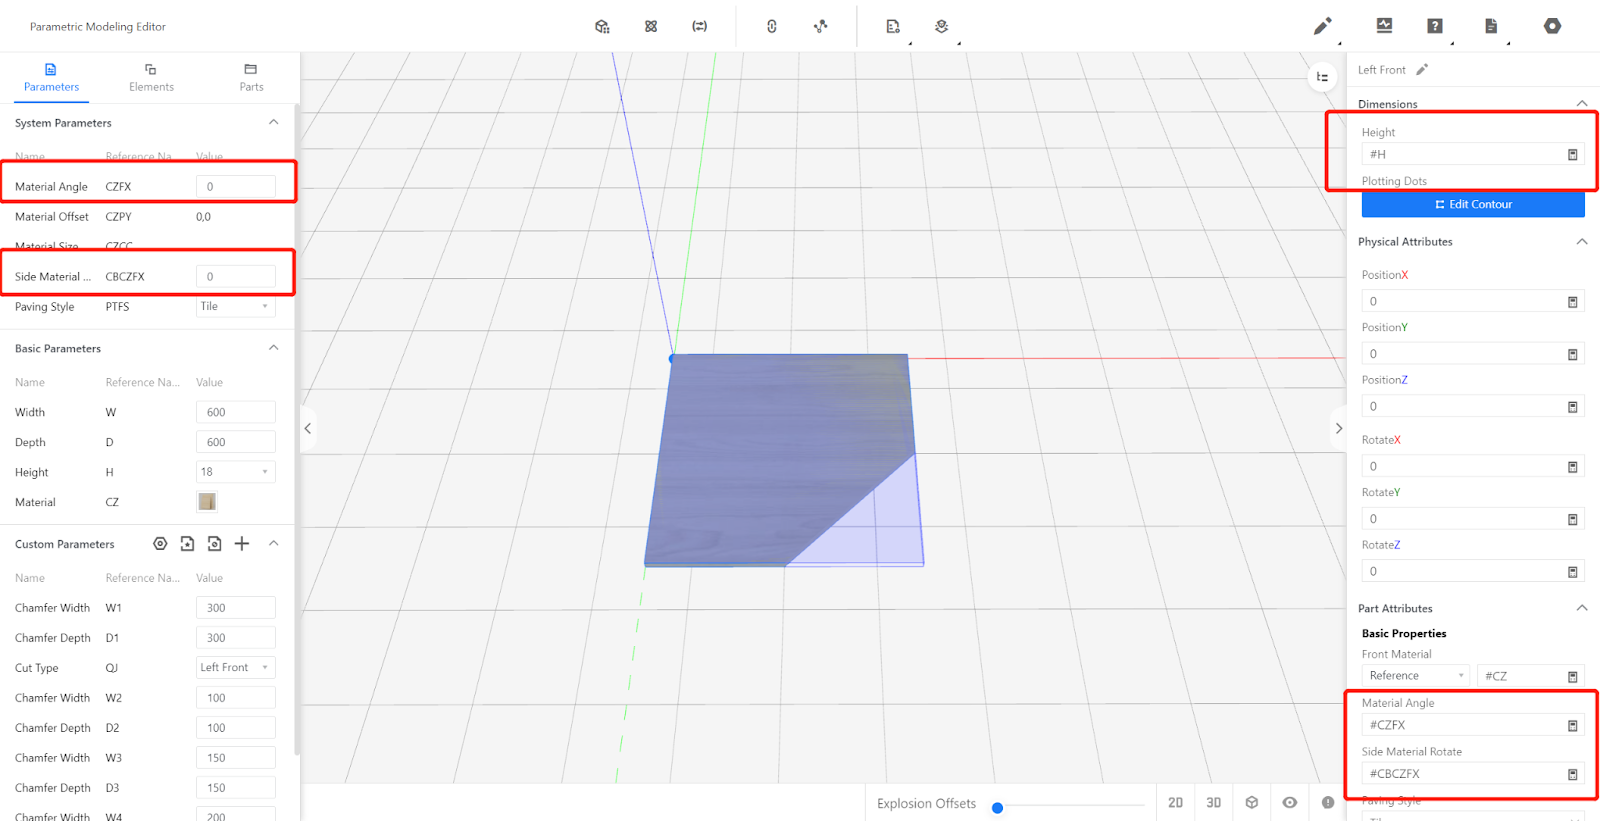
3-3. Set height: #H
3-4. Set other properties, material angle: #CZFX, side material angle: #CBCZFX (The texture direction of the panel can be modified when calling the panel, but the quotation output remains unchanged).

Second Method:
3-1. Insert flat panel component from the component library.
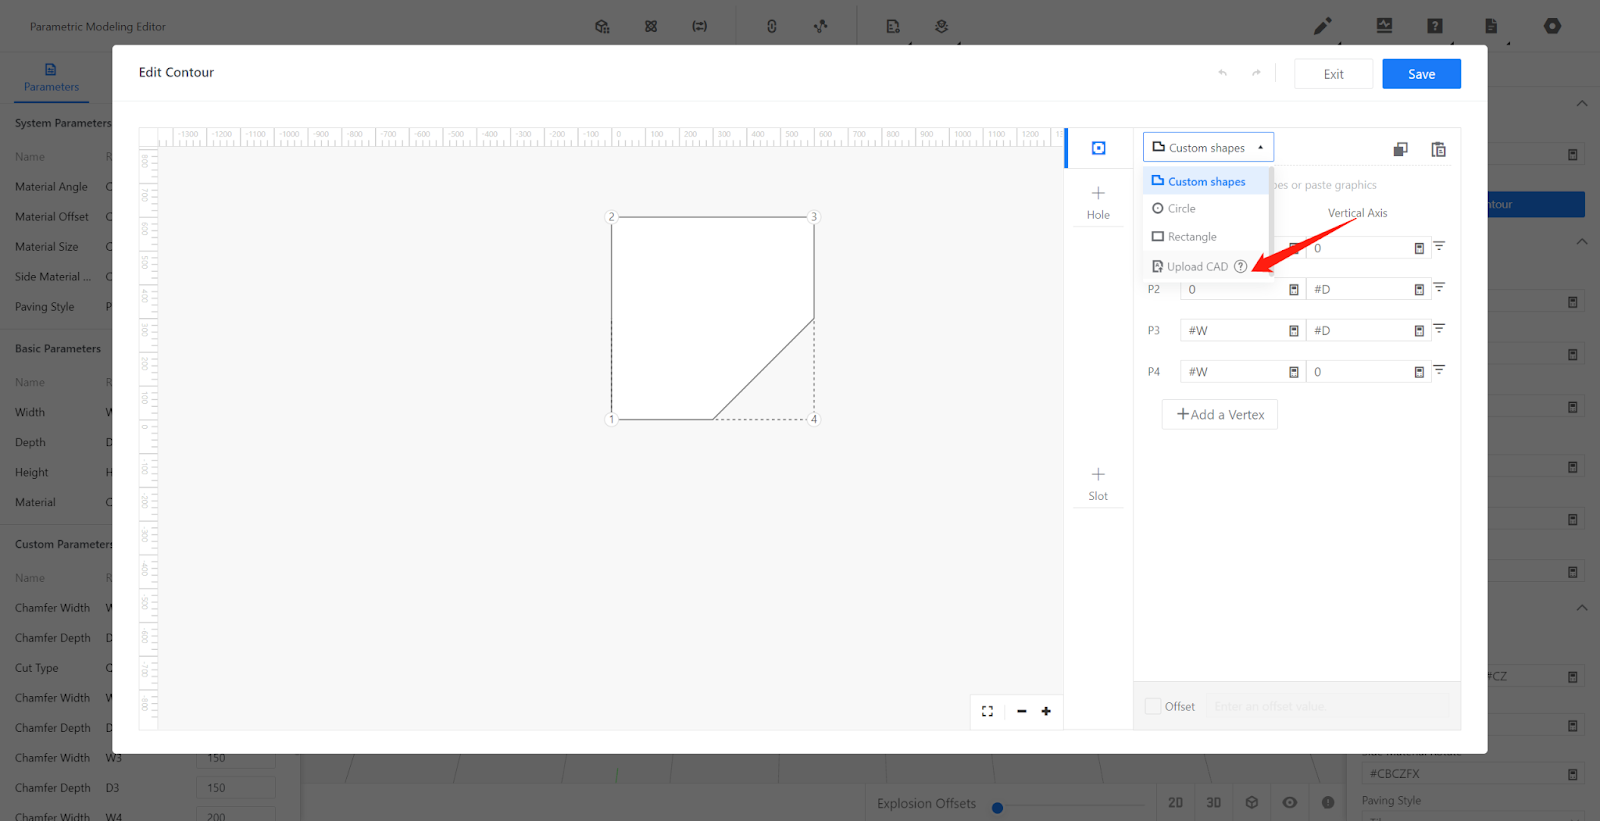
3-2. Click "Edit Contour" to draw points:
Select import pre-drawn CAD points (saved in DXF format).
Imported coordinates should be replaced with corresponding reference values.
Click "Save."
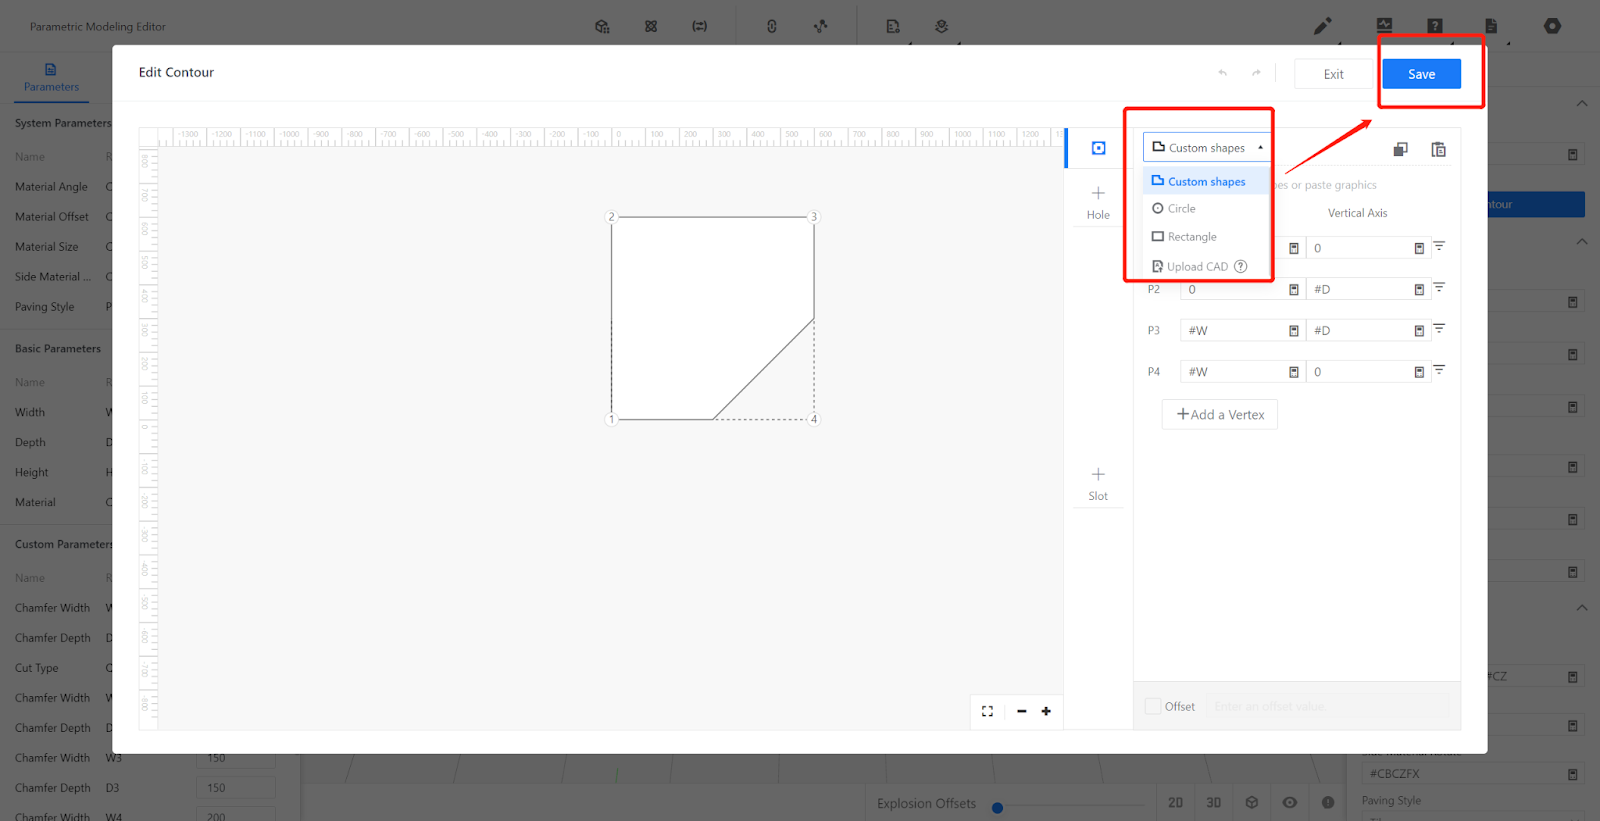
3-3. Set other properties, material angle: #CZFX, side material angle: #CBCZFX (The texture direction of the panel can be modified when calling the panel, but the quotation output remains unchanged).
4.Test the Model
1.Replace values for W, D, H, Left Width, and Right Width variables to different sizes on the left side. Check if the model has any issues.
2.After testing, restore these values to default.
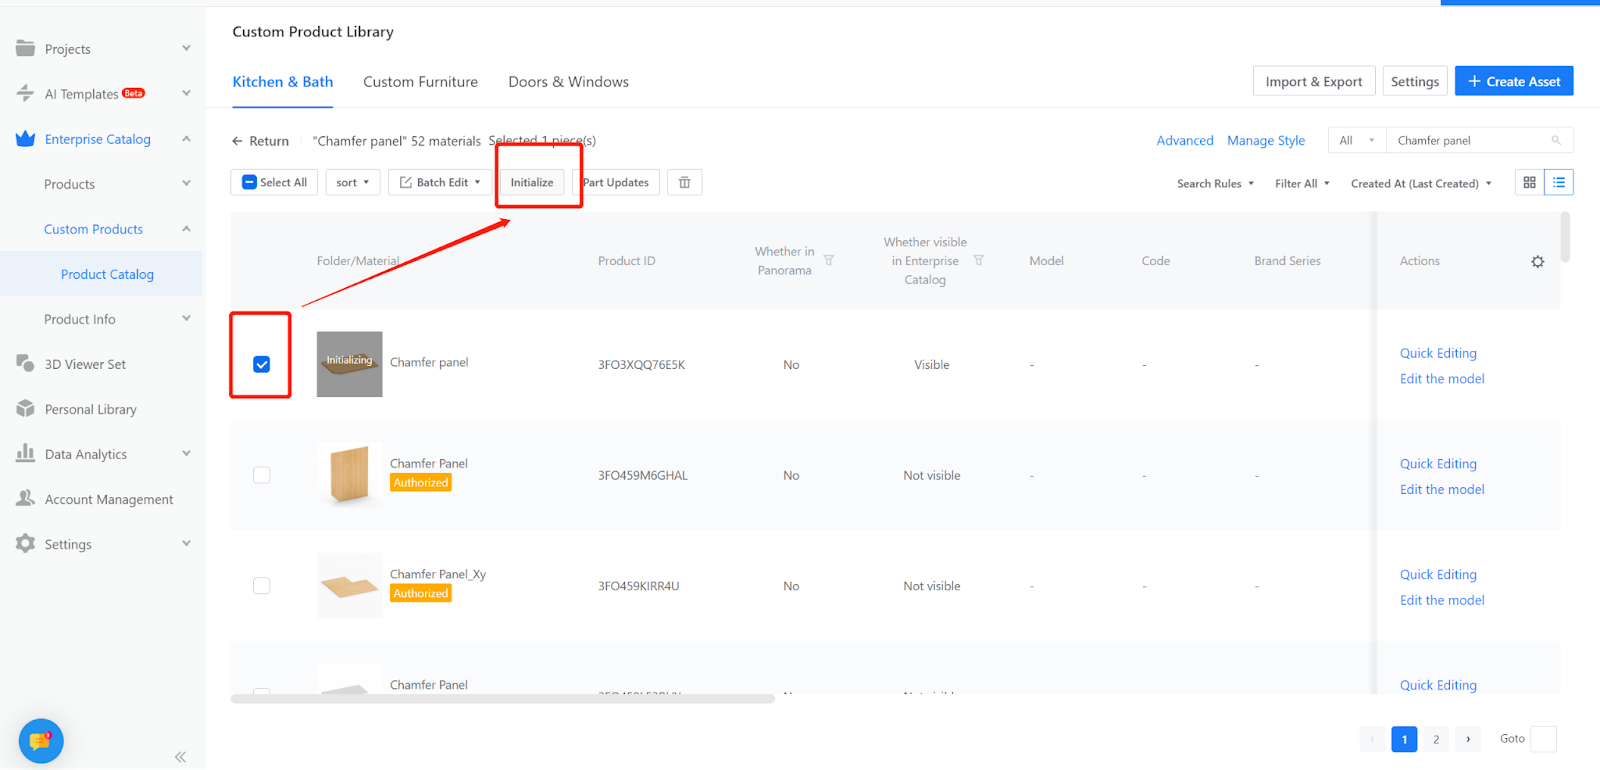
5.Save to Library
5-1. Click on the top right corner "File," select "Save," choose a subdirectory, name it, and click "Save."

5-2. On the backend page, find the model, select it, and choose to save it to the library.