Contents
I. Definition
II. Function Entry
III. Configuration Steps
I. Definition
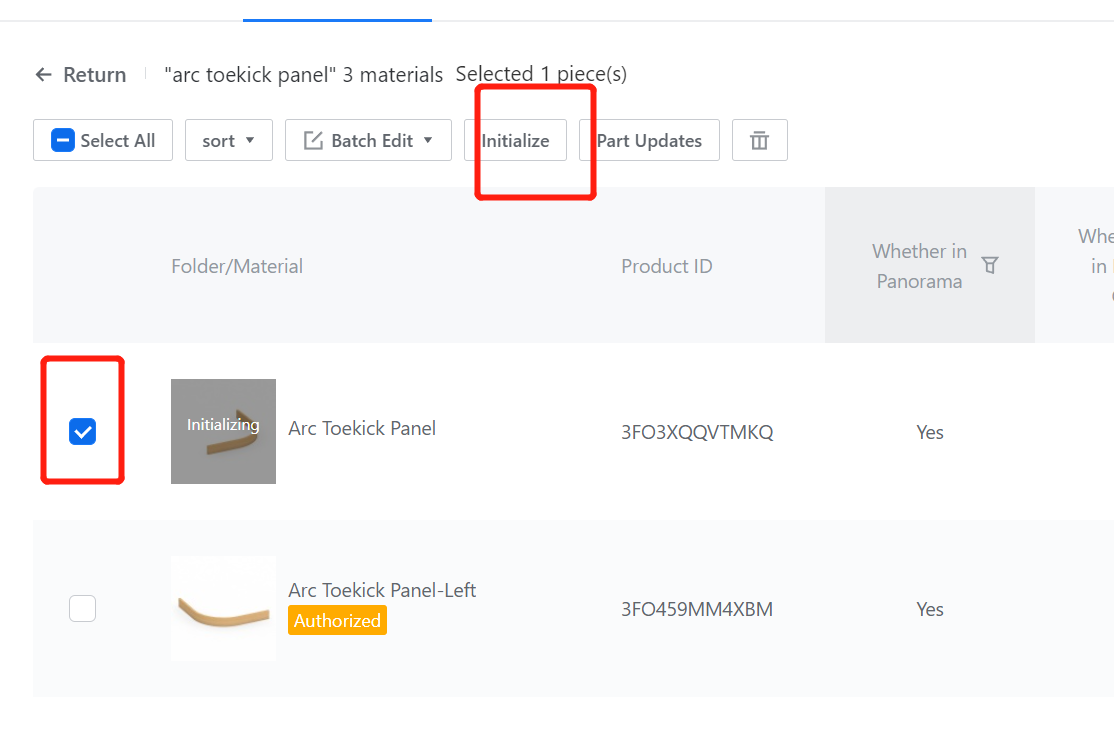
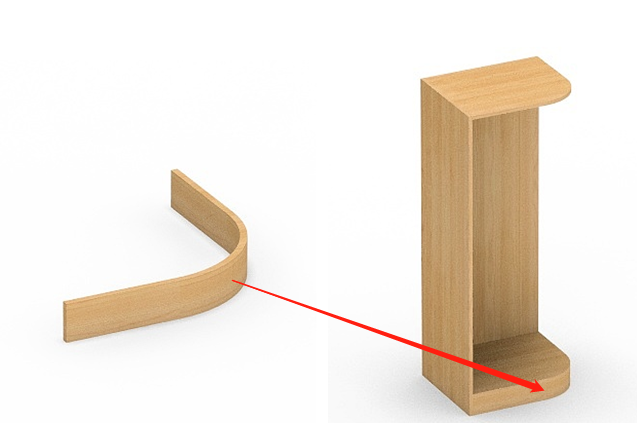
The arc kickboard is one of the components used in modeling arc cabinets.
II. Function Entry
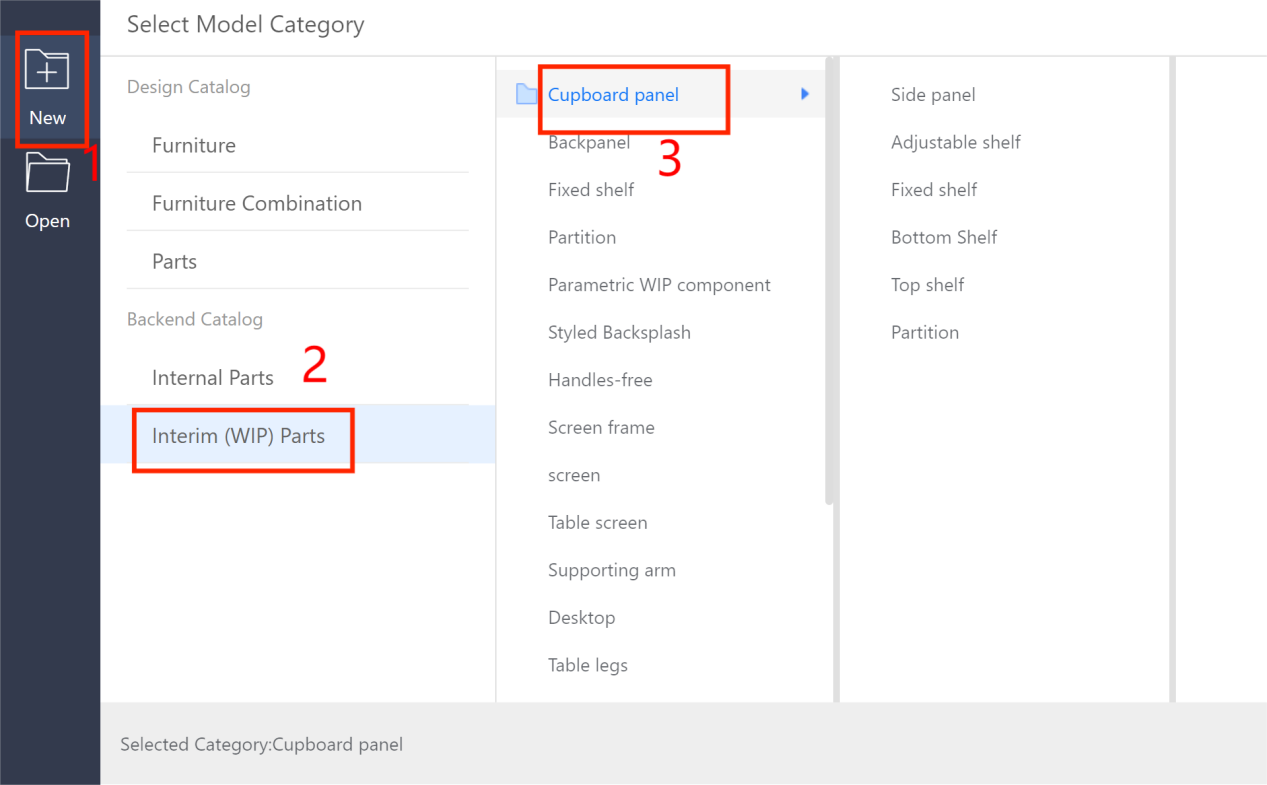
Enterprise Catalog-Custom Products-Product Catalog- Kitchen&Bath, Custom Furniture-Create Asset- Click “Parametric Model Library”- New- Interim Parts- Cupboard panel

III. Configuration Steps
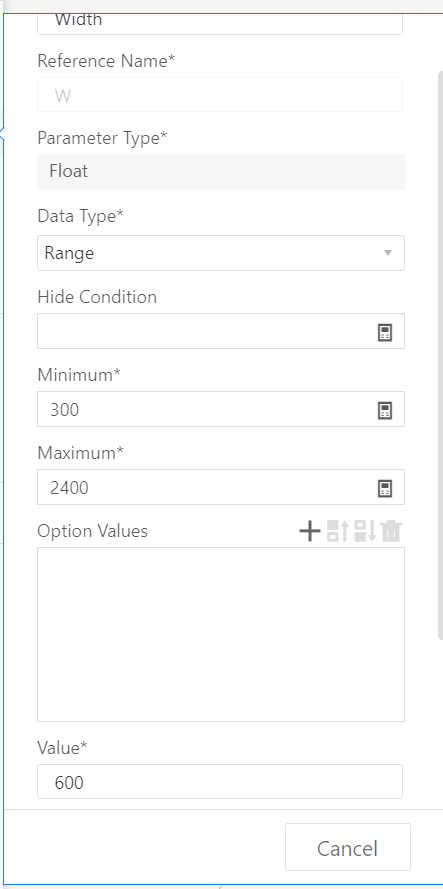
1.Width (W) - Represents the size in the X-axis direction. The value type can be set as optional (e.g., optional values 300, 400, 500,..., 2400, current value 600) or a range (e.g., range 300 to 2400, current value 600).
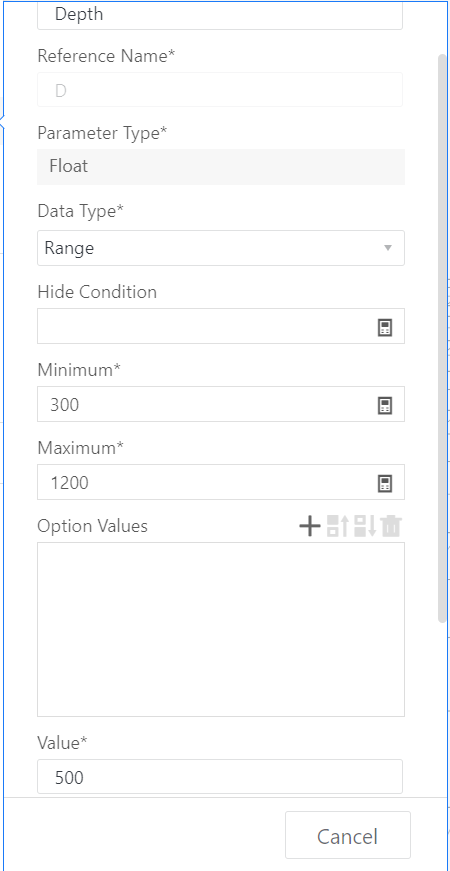
2.Depth (D) - Represents the size in the Y-axis direction. The value type can be set as optional (e.g., optional values 300, 400, 500,..., 1200, current value 500) or a range (e.g., range 300 to 1200, current value 500).
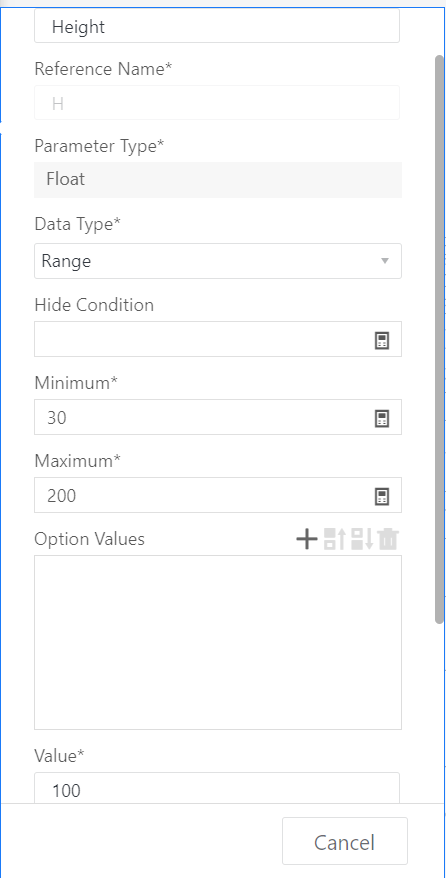
3.Height (H) - Represents the size in the Z-axis direction. The value type can be set as optional (e.g., optional values 30, 40, 50,..., 200, current value 100) or a range (e.g., range 30 to 200, current value 100).
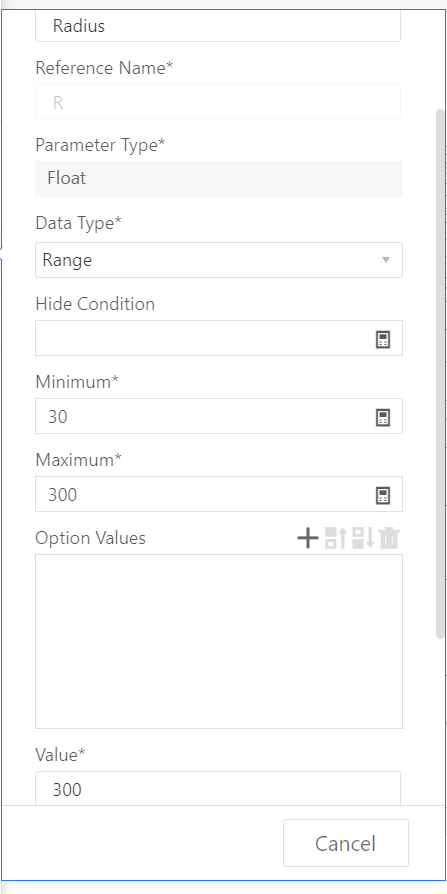
4.Add an advanced parameter named "Arc Radius" with reference name R. The value type can be set as optional (e.g., optional values 10, 20, 30,..., 300, current value 300) or a range (e.g., range 30 to 300, current value 300). Click "Create."
5.Material can be kept as default or modified according to specific requirements.
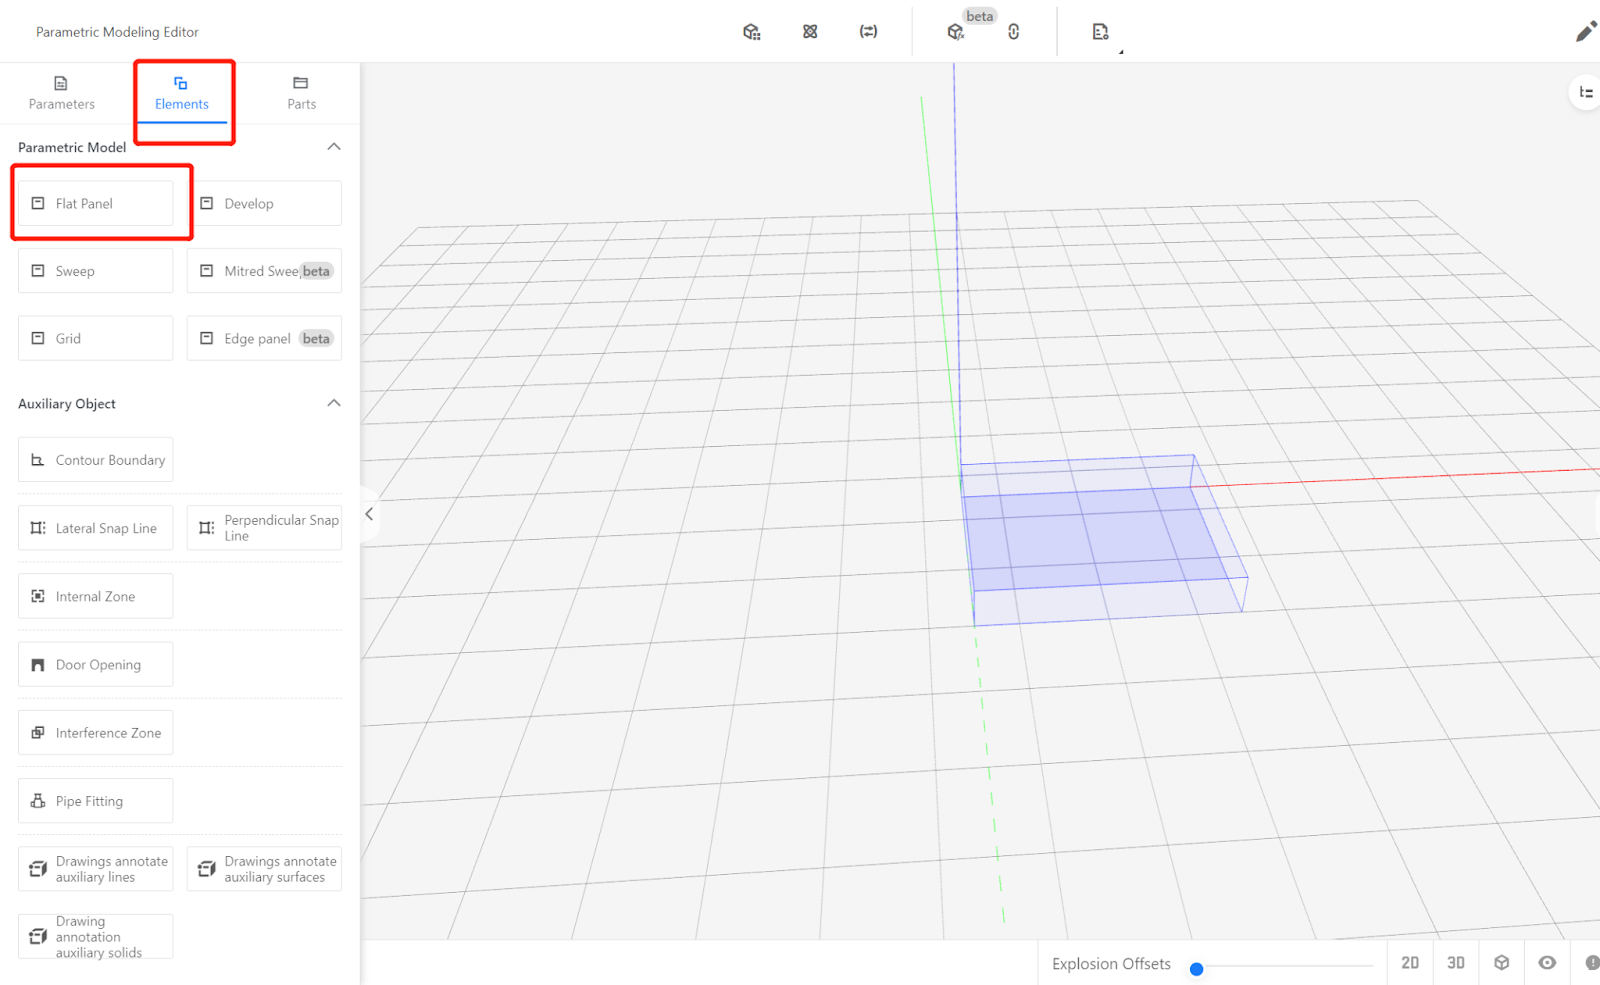
3.Insert Flat Panel
1.Insert the flat panel from the element library.
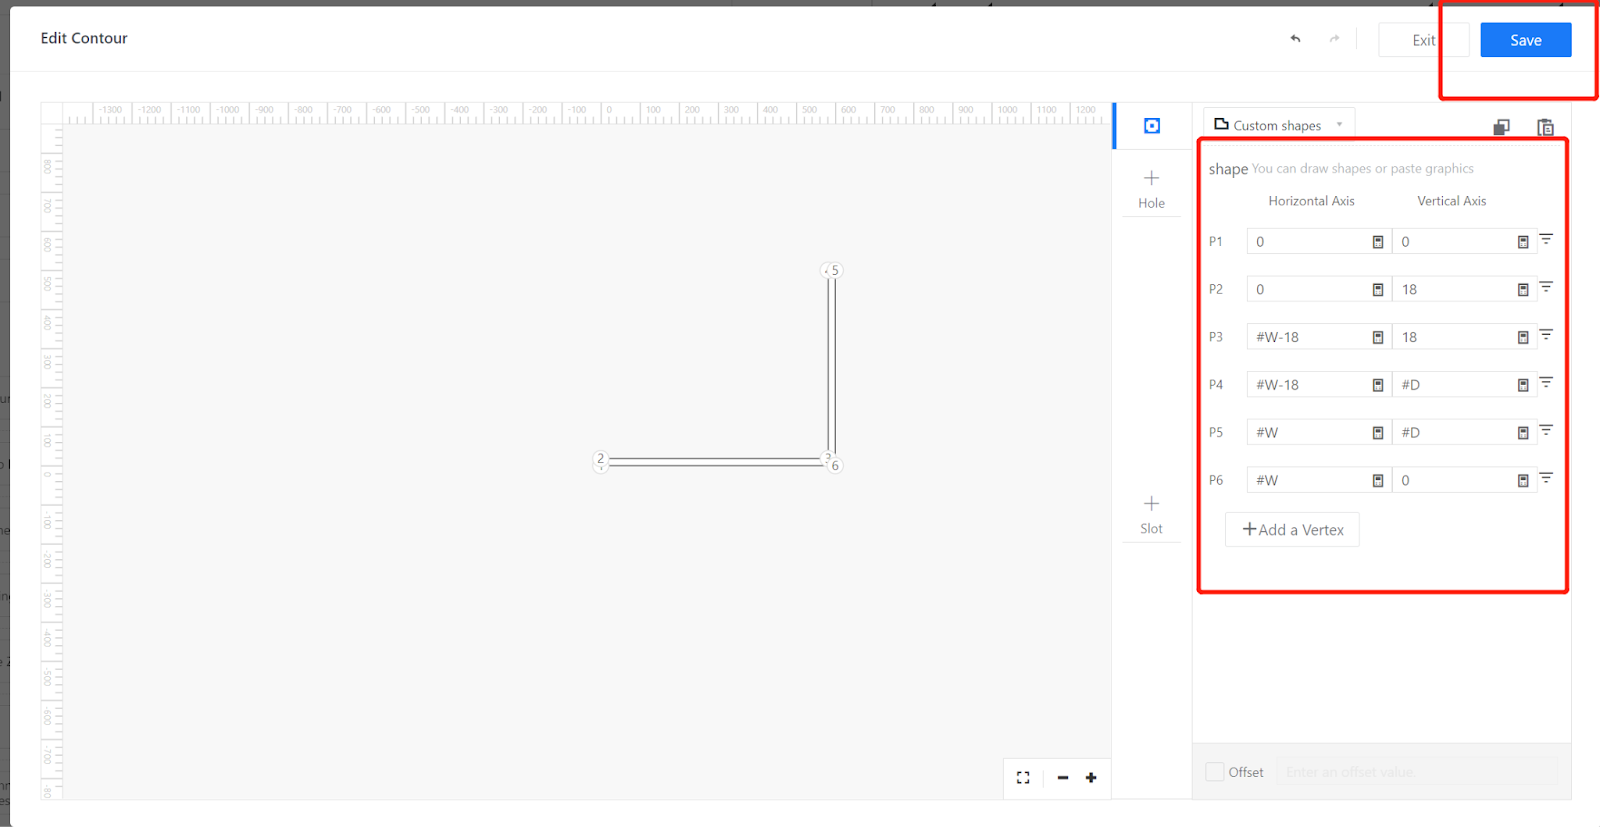
2.Click "Edit Contour" to create points.
Point 1: 0,0
Point 2: 0,18
Point 3: #W-18,18
Point 4: #W-18,#D
Point 5: #W,#D
Point 6: #W,0
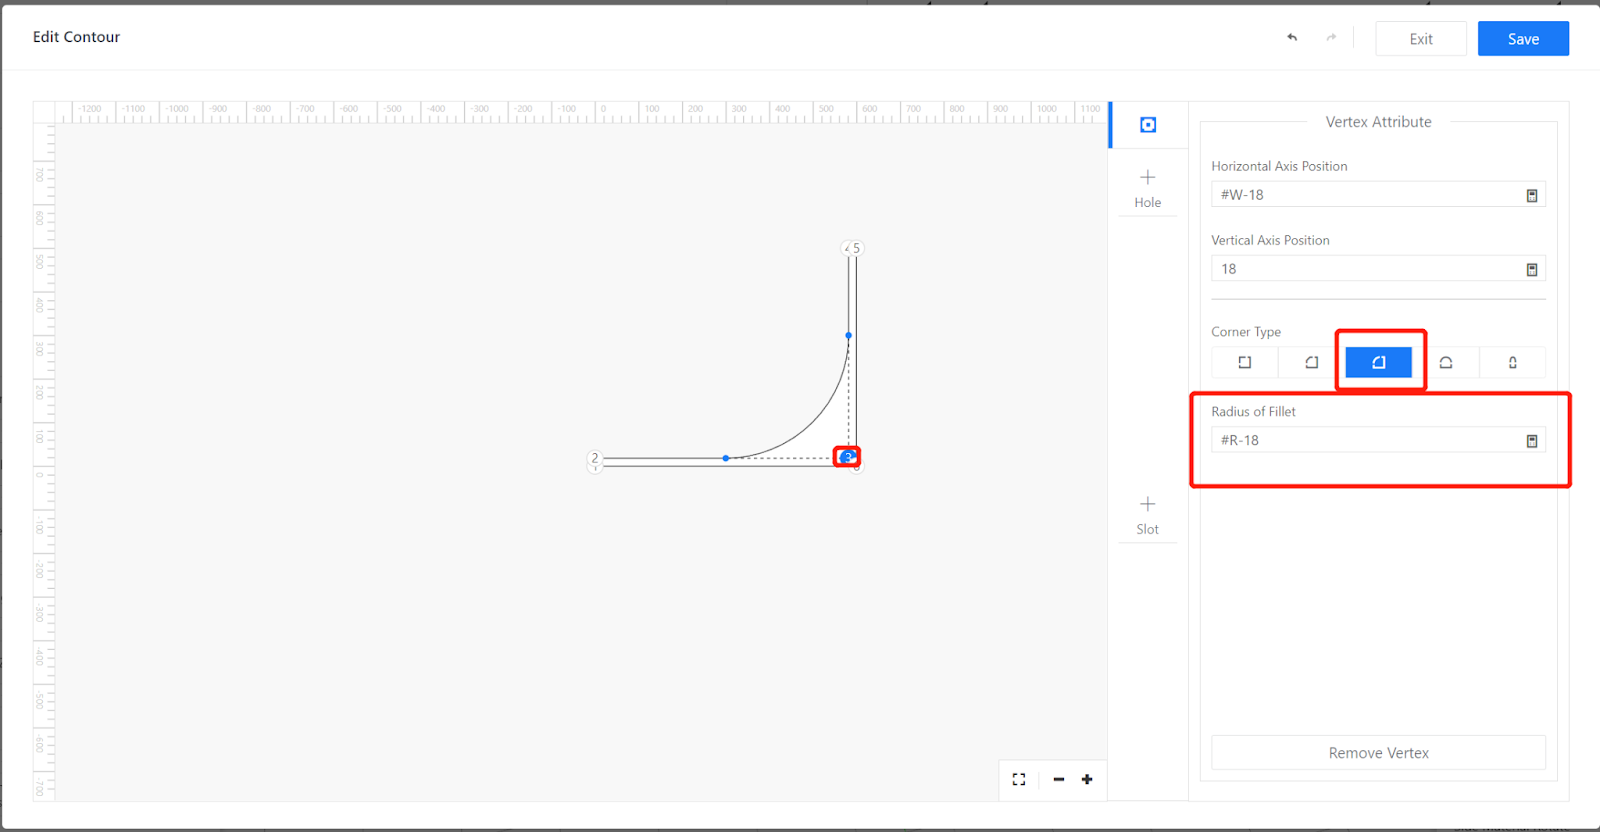
For Point 3, change the corner type to "Round" with a radius of #R-18.
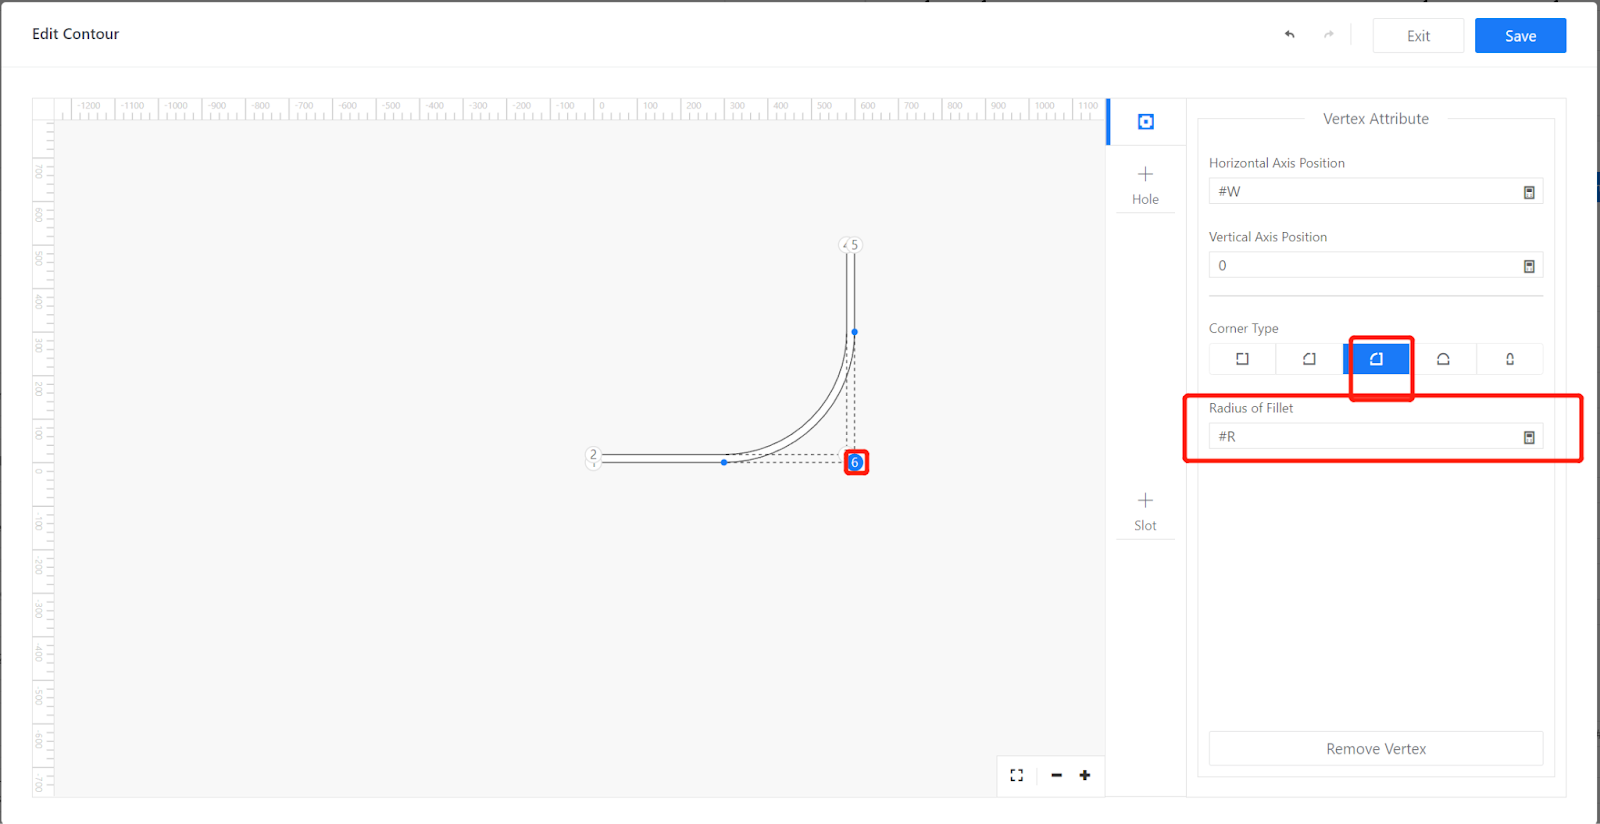
For Point 6, change the corner type to "Round" with a radius of #R. Save the changes.
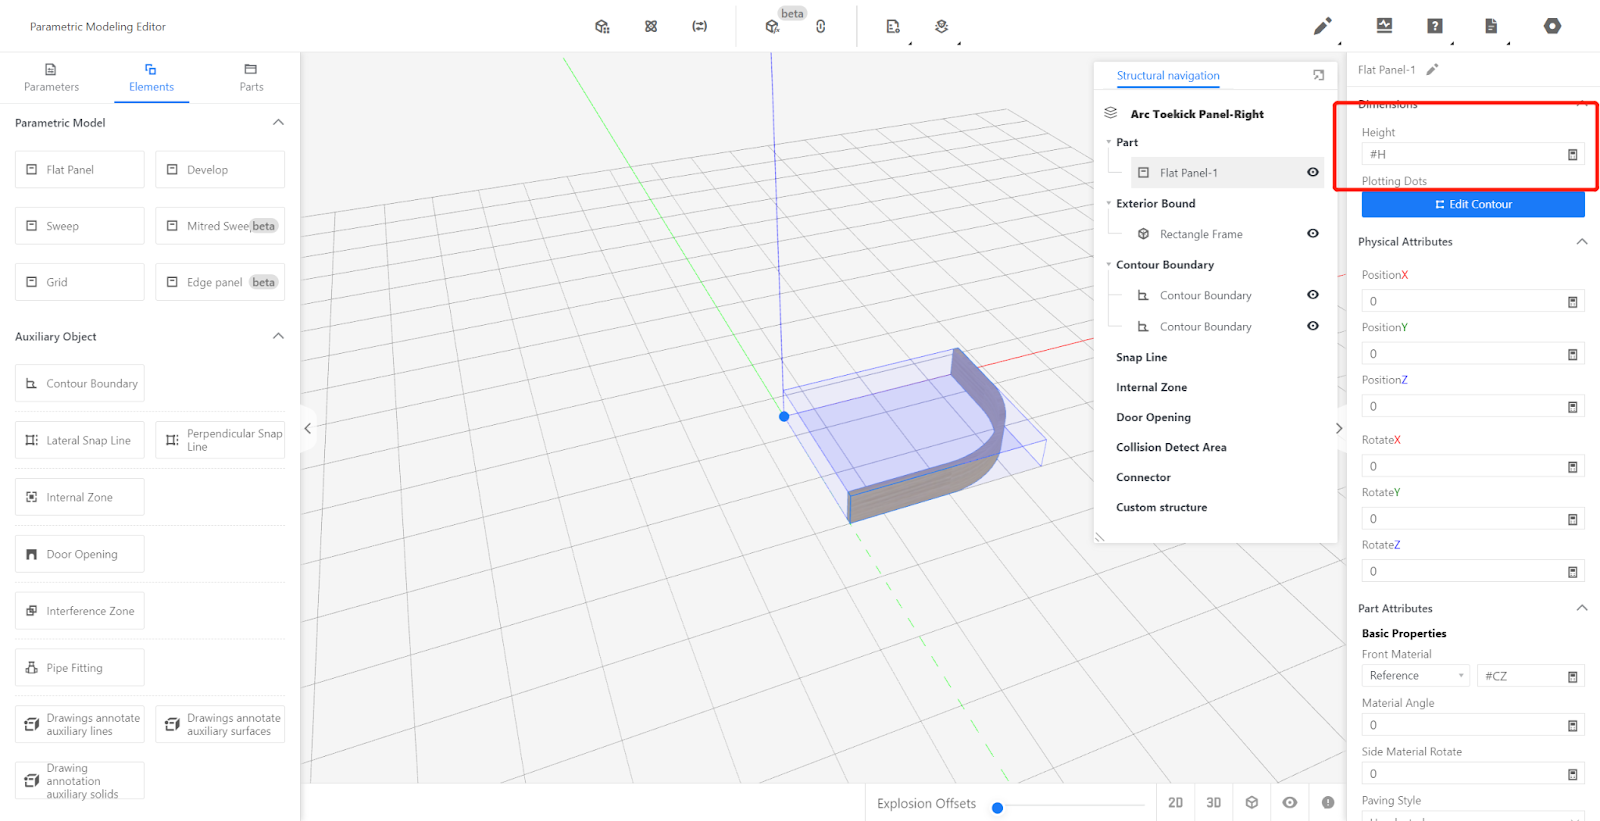
Set the height as: #H.
-
Set Other Attributes
Set Other Attributes
Material Angle: #CZFX (refers to the material angle direction on the top surface of the kickboard, allowing for texture modifications on the front-end).
Side Material Angle: #CBCZFX (refers to the material angle direction on the side surface of the kickboard, allowing for texture modifications on the front-end).
4.Testing
Modify the current values of custom variables to test if the model dimensions are correct. Confirm at least three values: maximum value, minimum value, and a random value within the specified range. After testing, revert back to the desired current value and perform material replacement tests using different materials. Once testing is completed, revert back to the default material.
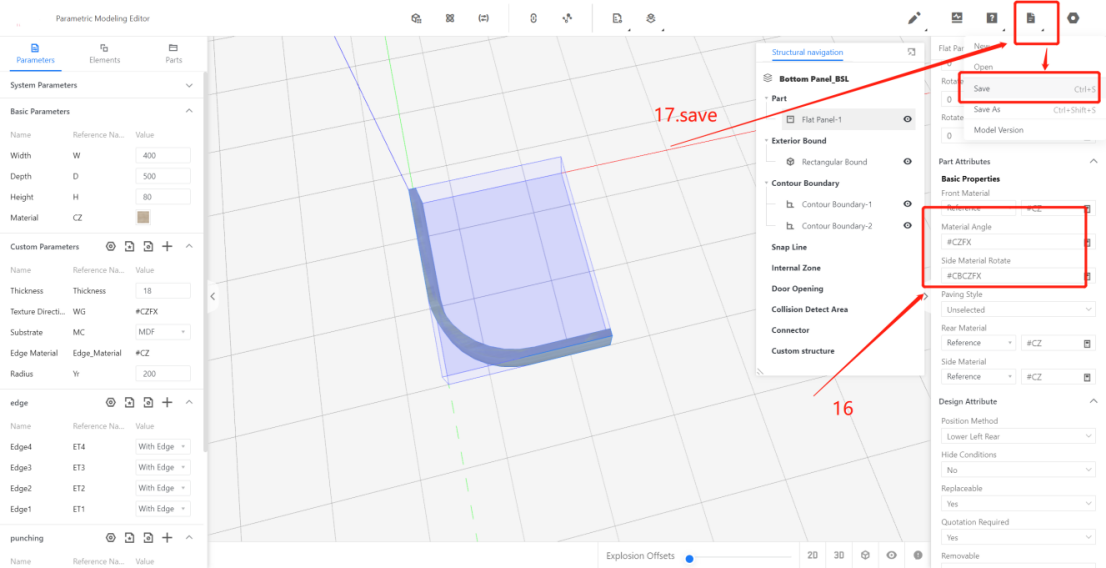
5.Save to Library
Click the file in the top-right corner, select "Save," choose the subdirectory for saving, provide a name, and click "Save."
In the backend page, locate the model and select it for storage.