Contents
I.Function Entry
II.Parameter Configuration
III.Insertion of Flat Panel Modeling
IV.Model Testing, Saving, and Initializing
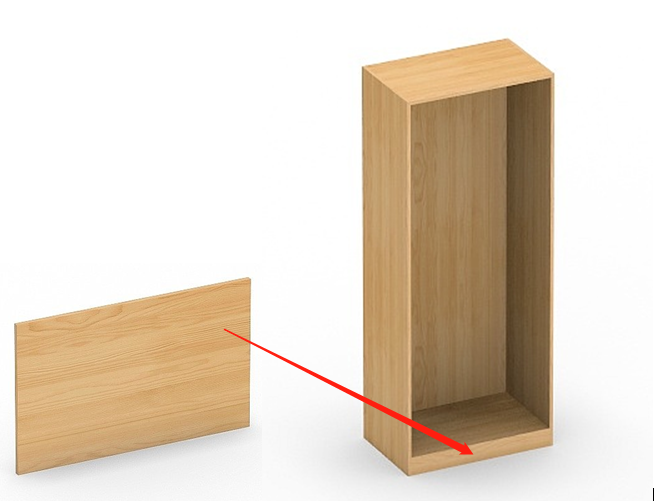
Definition: Face Panel is one of the basic panels that make up the cabinet model.
-
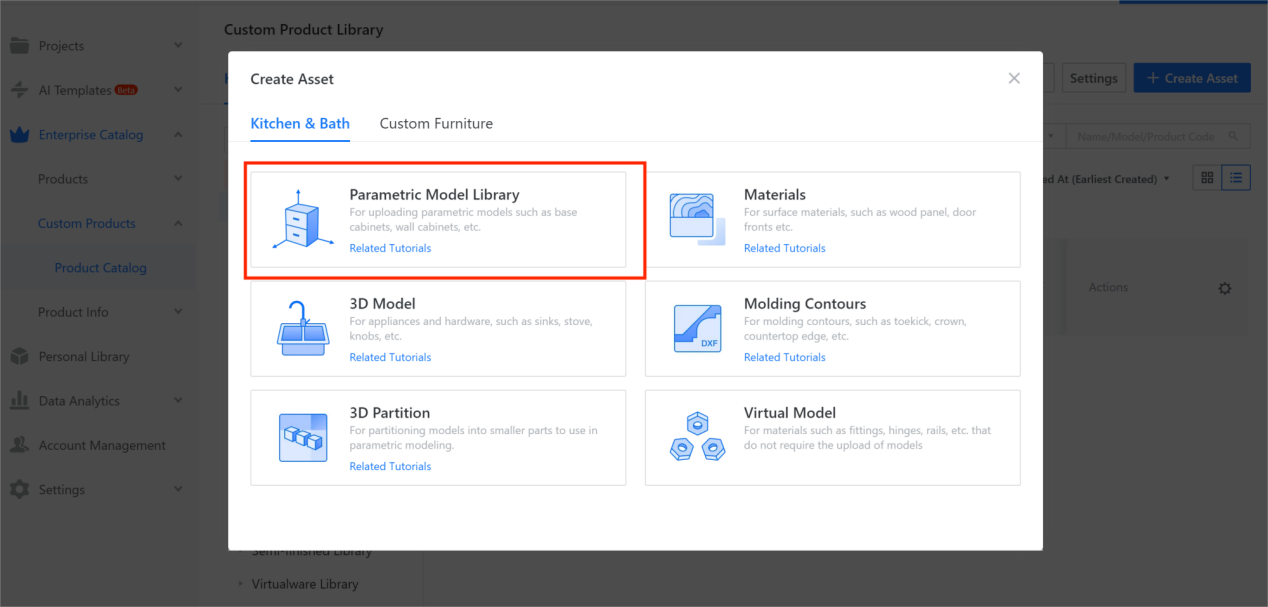
Function Entry
Function Entry
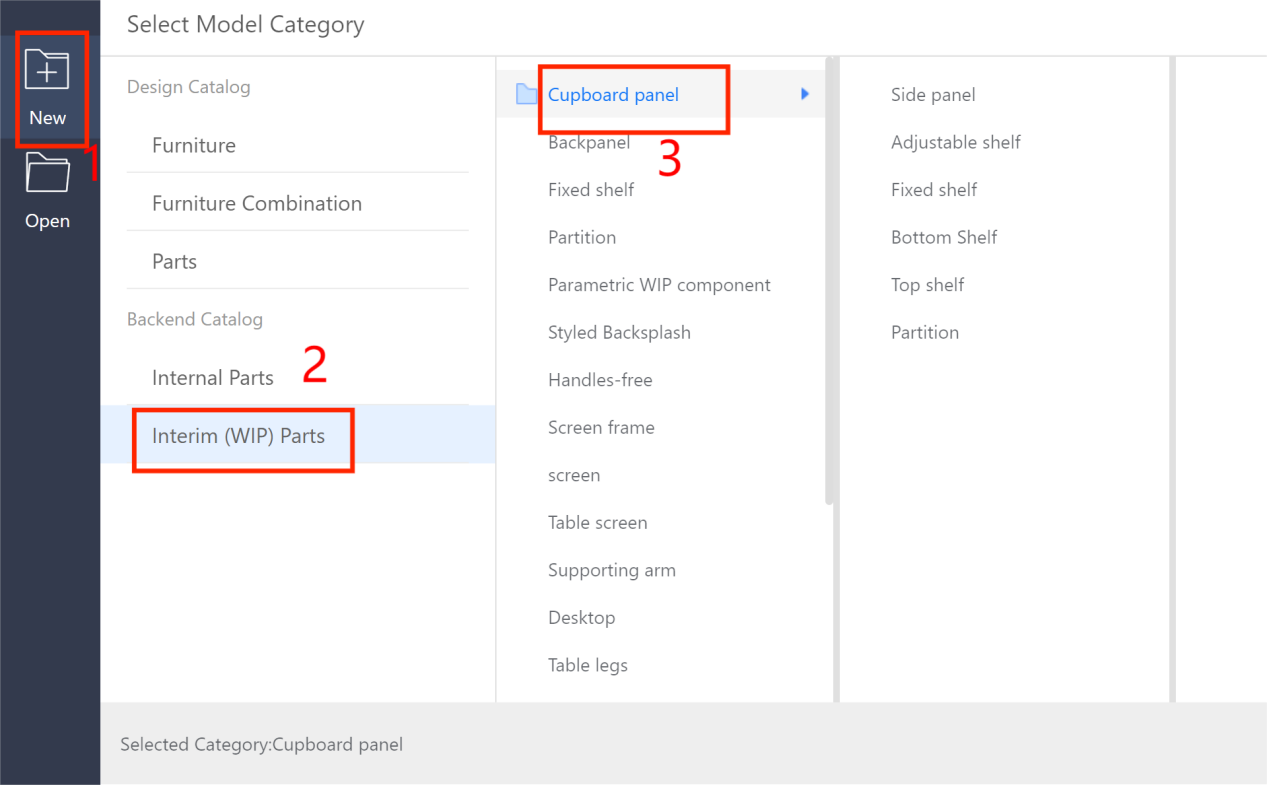
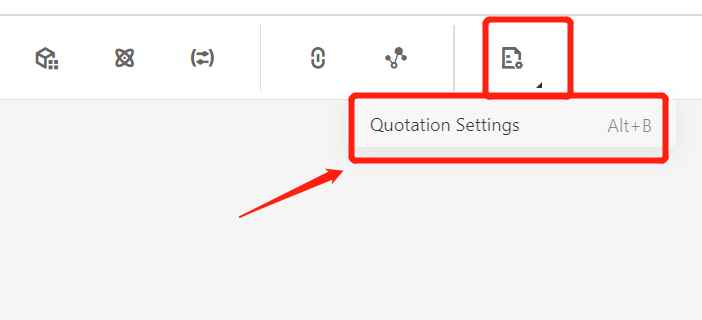
Enterprise Catalog-Custom Products-Product Catalog- Kitchen&Bath, Custom Furniture-Create Asset- Click “Parametric Model Library”- New- Interim Parts- Cupboard panel
II.Parameter Configuration
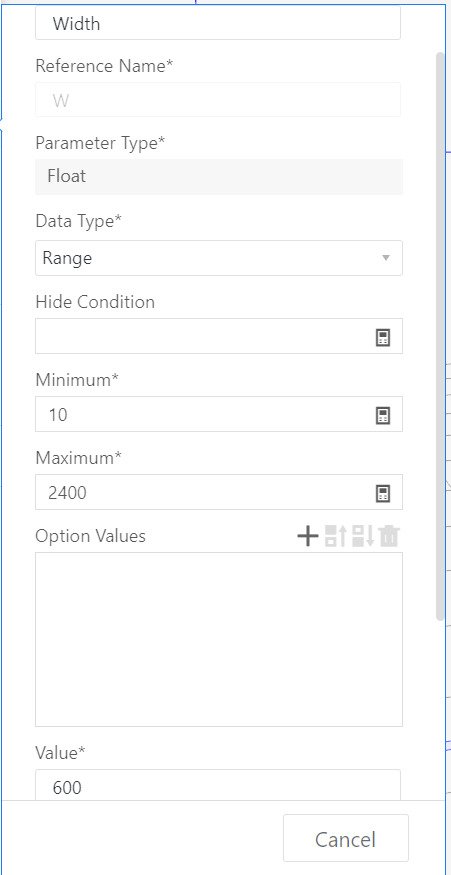
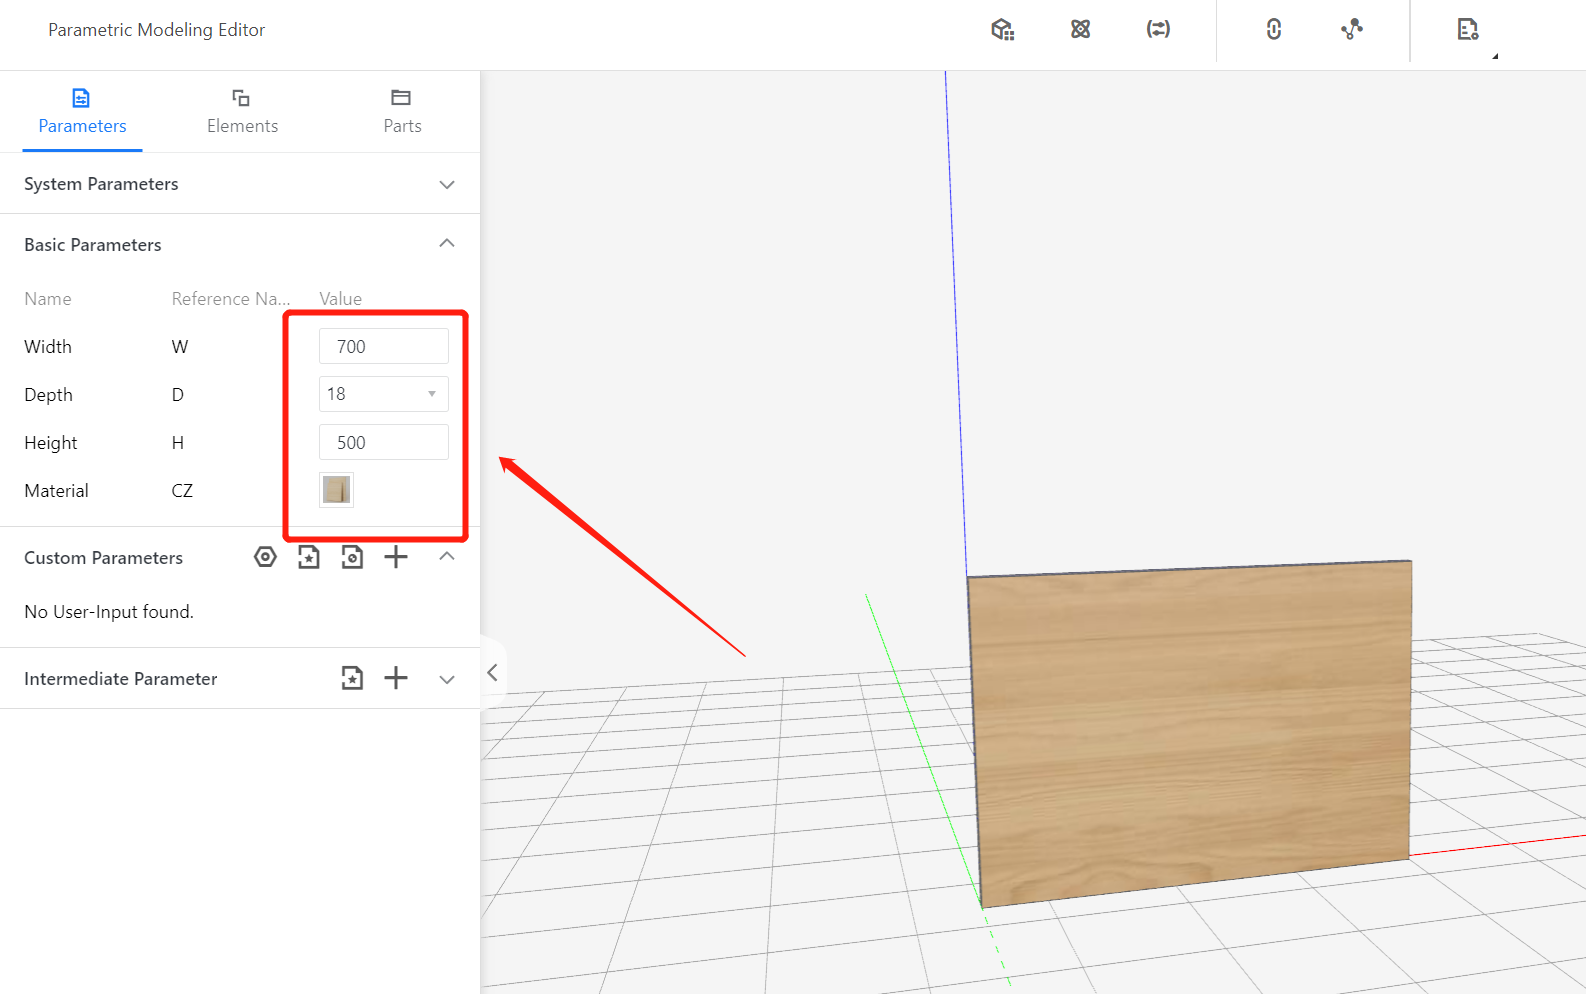
Width W - represents the dimension in the X-axis direction, and the value type is usually set as a range (example: range of 10-2400, current value: 600).
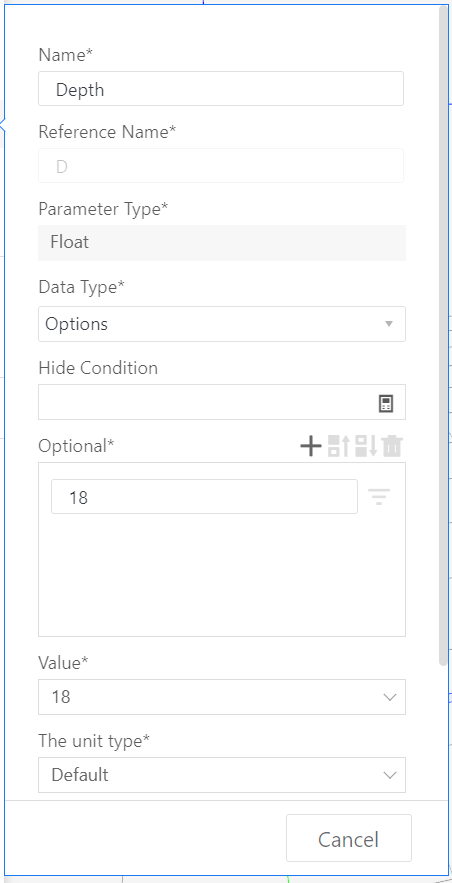
Depth D - represents the dimension in the Y-axis direction, and the value type can be set as a range or optional. The optional values can be single or multiple (example: single optional value of 18, current value: 18).
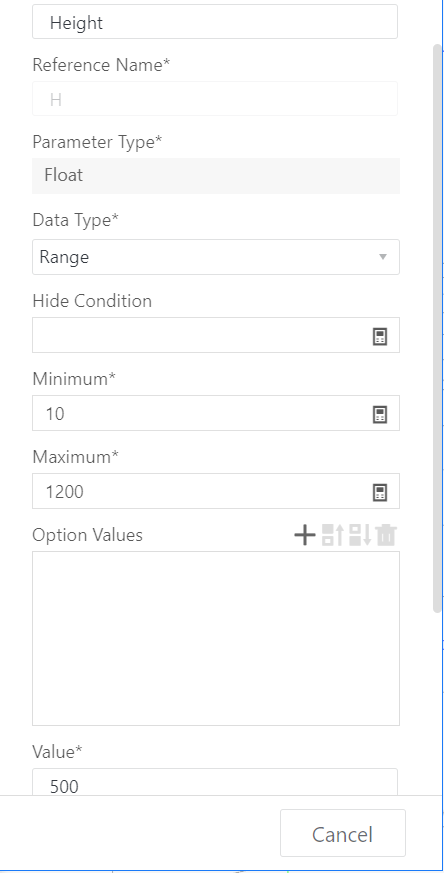
Height H - represents the dimension in the Z-axis direction, and the value type is usually a range (example: range of 10-1200, current value: 500).
Keep the material default, or modify it according to actual needs.
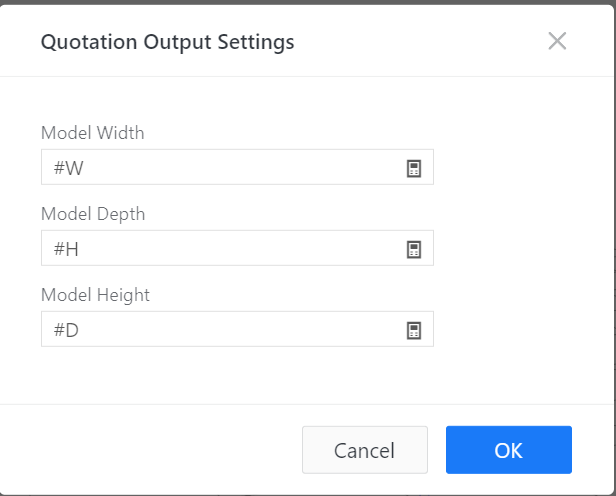
Set output dimensions:
In the bill of materials, the dimensions required for the vertical panel are #W*#H*#D (e.g., 70050018). Therefore, the output dimensions should be set as follows: Output width: #W, Output depth: #H, Output height: #D.
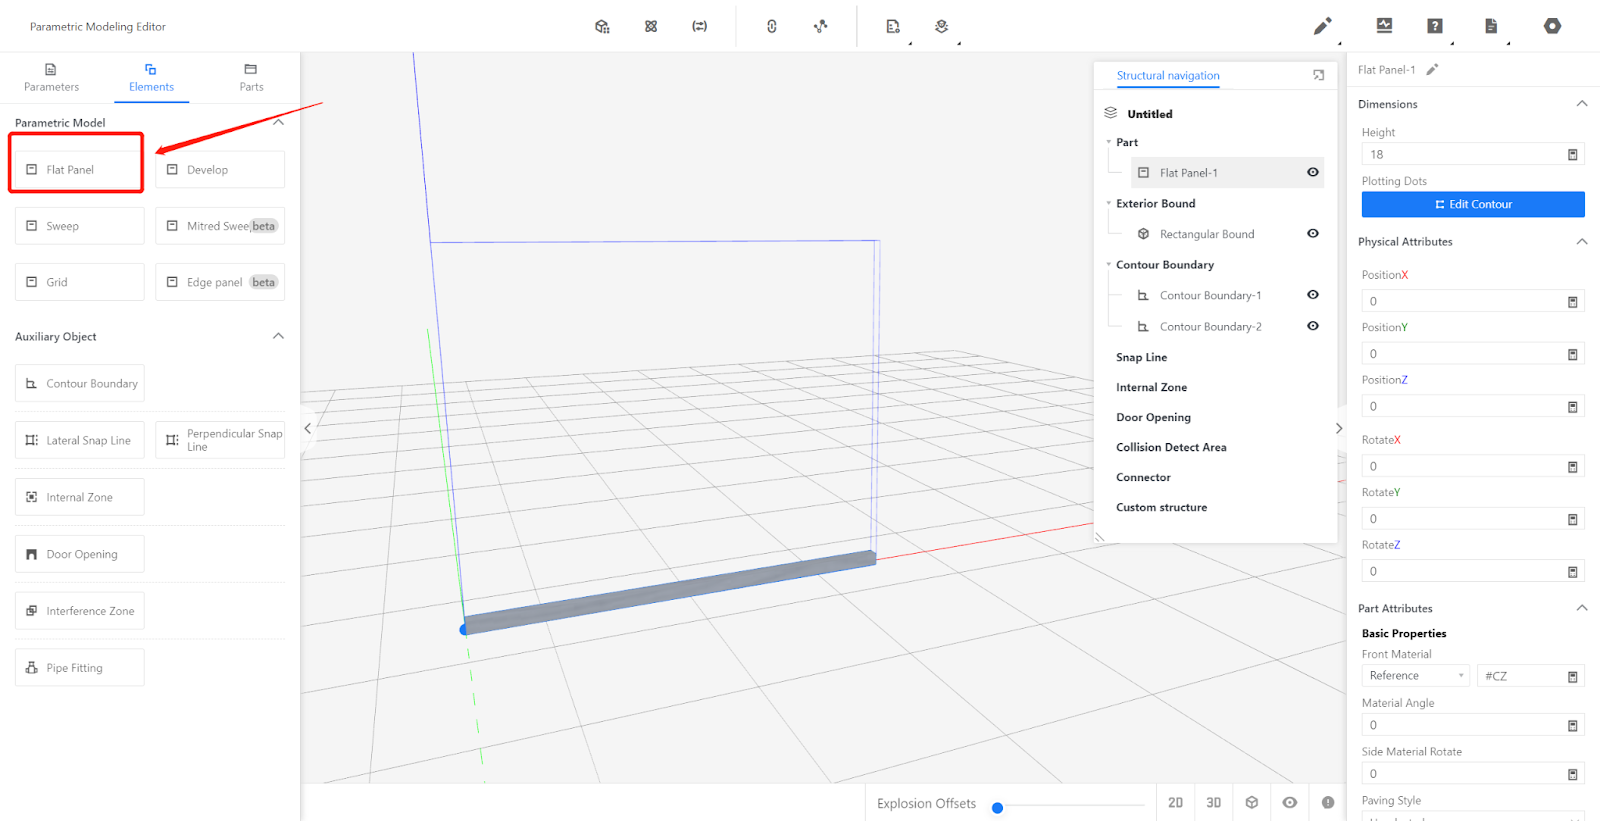
III.Insertion of Flat Panel Modeling
Insert the flat panel from the Elements.
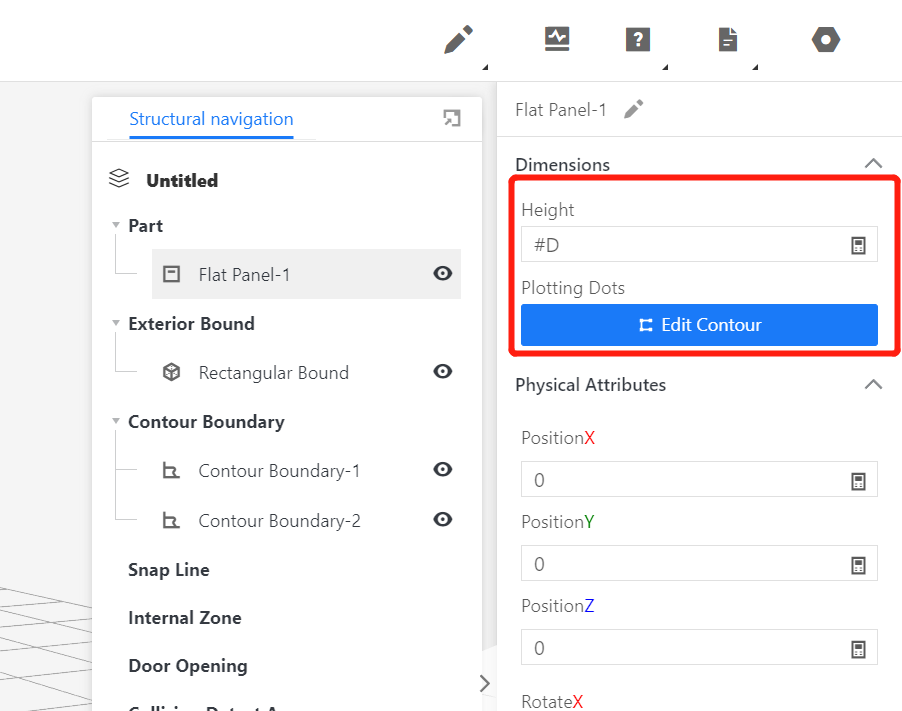
In the right-side size attributes column, set the height as: #D, and click [Edit Contour].
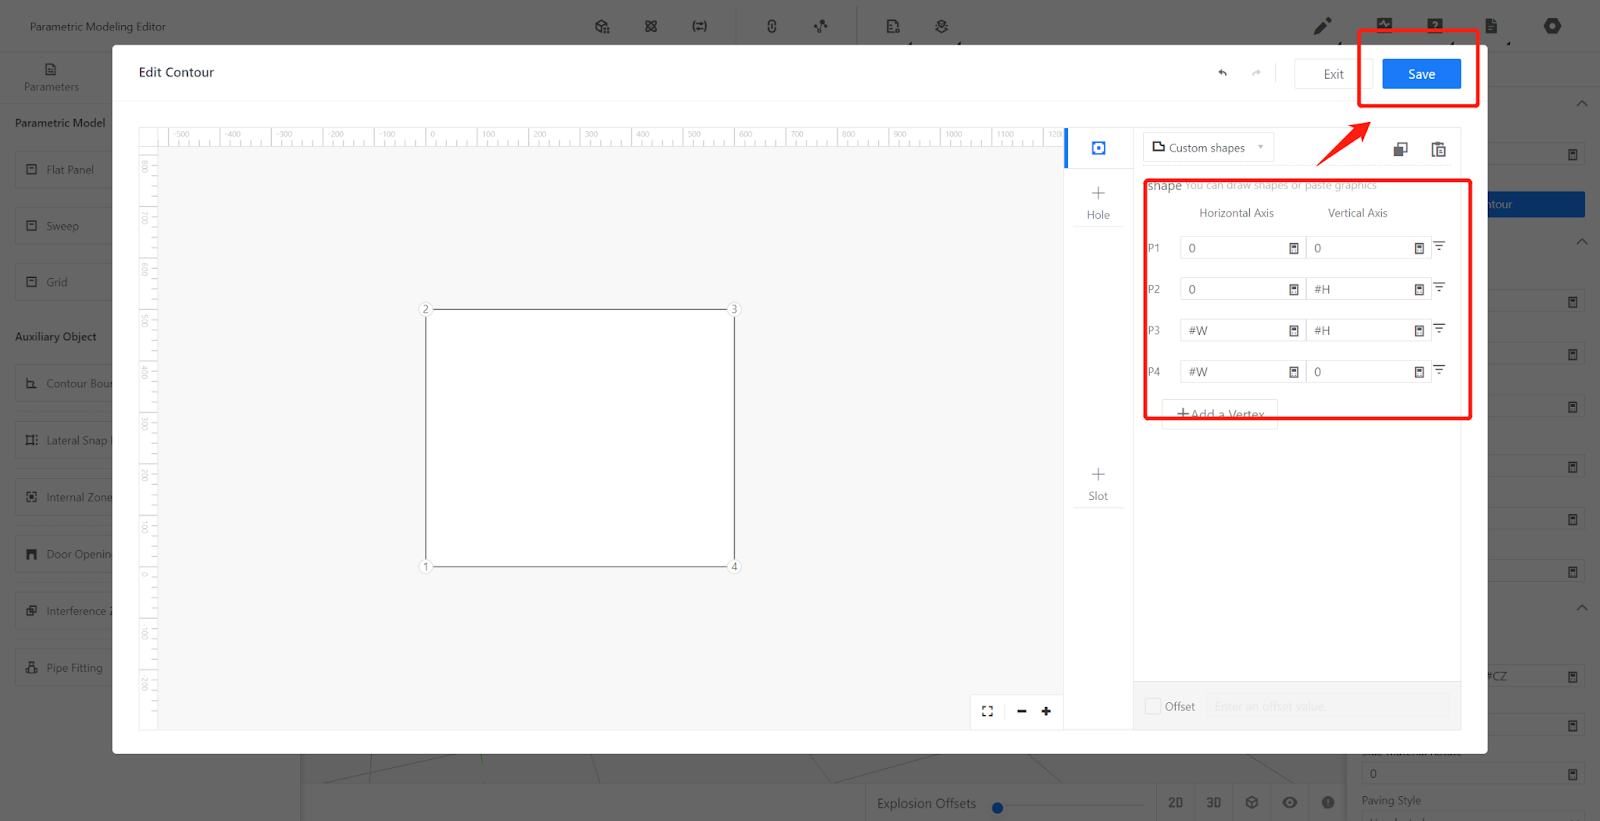
Delete the default four points, redraw the points, and then [Save].
Point 1: 0,0; Point 2: 0,#H; Point 3: #W,#H; Point 4: #W,0.
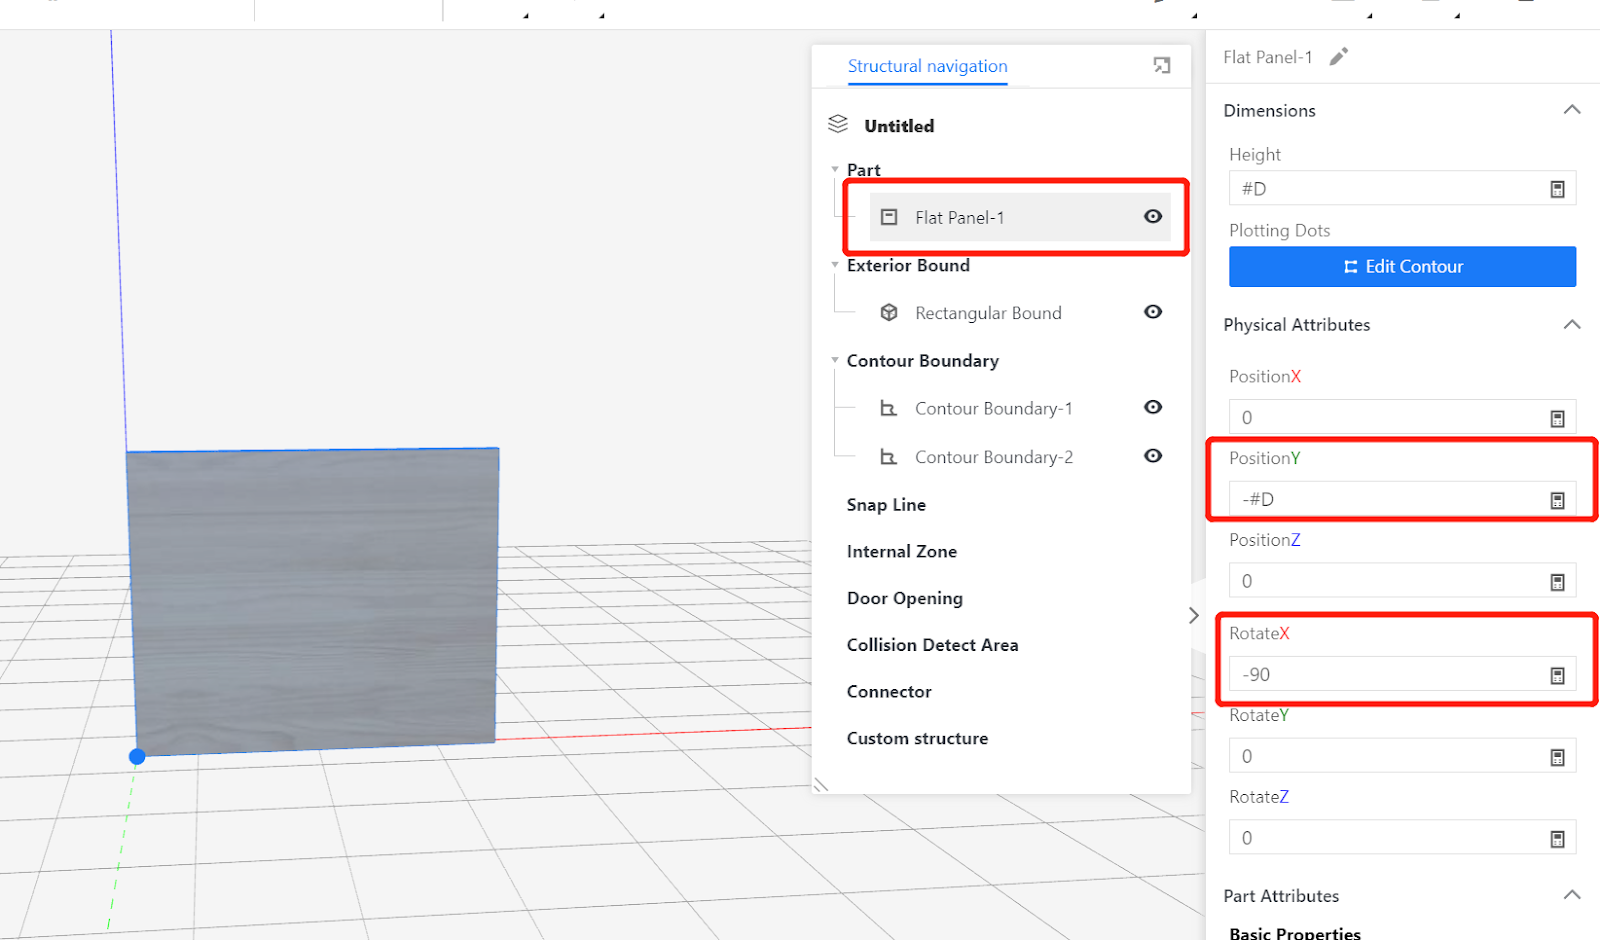
Modify physical attributes:
Rotate X: 90, Position Y: -#D.
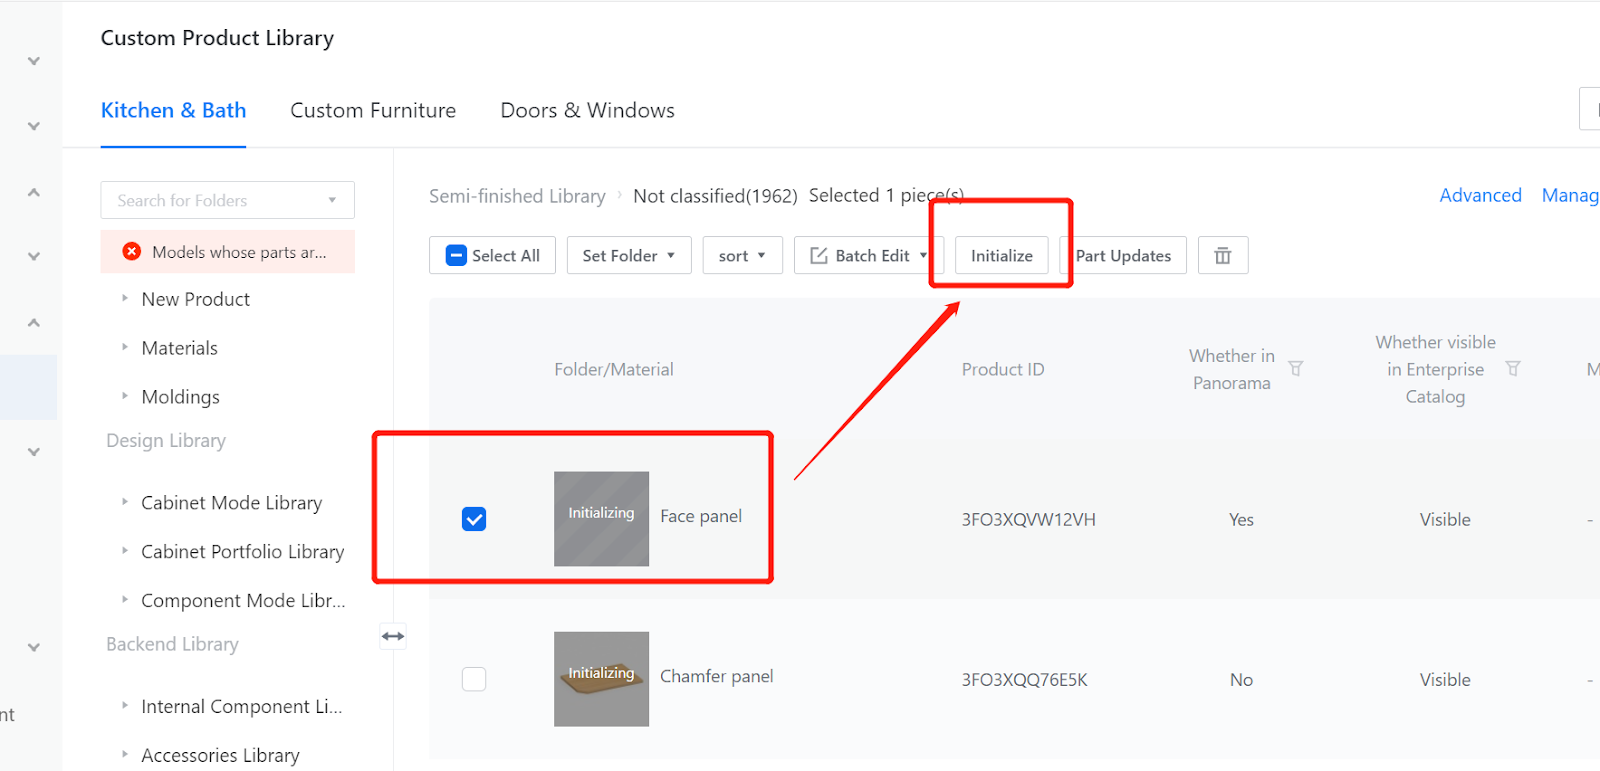
IV.Model Testing, Saving, and Initializing
Testing: Change the current values of model parameters #W, #D, #H, #CZ, and observe if the model changes correctly. Once confirmed, proceed to save.
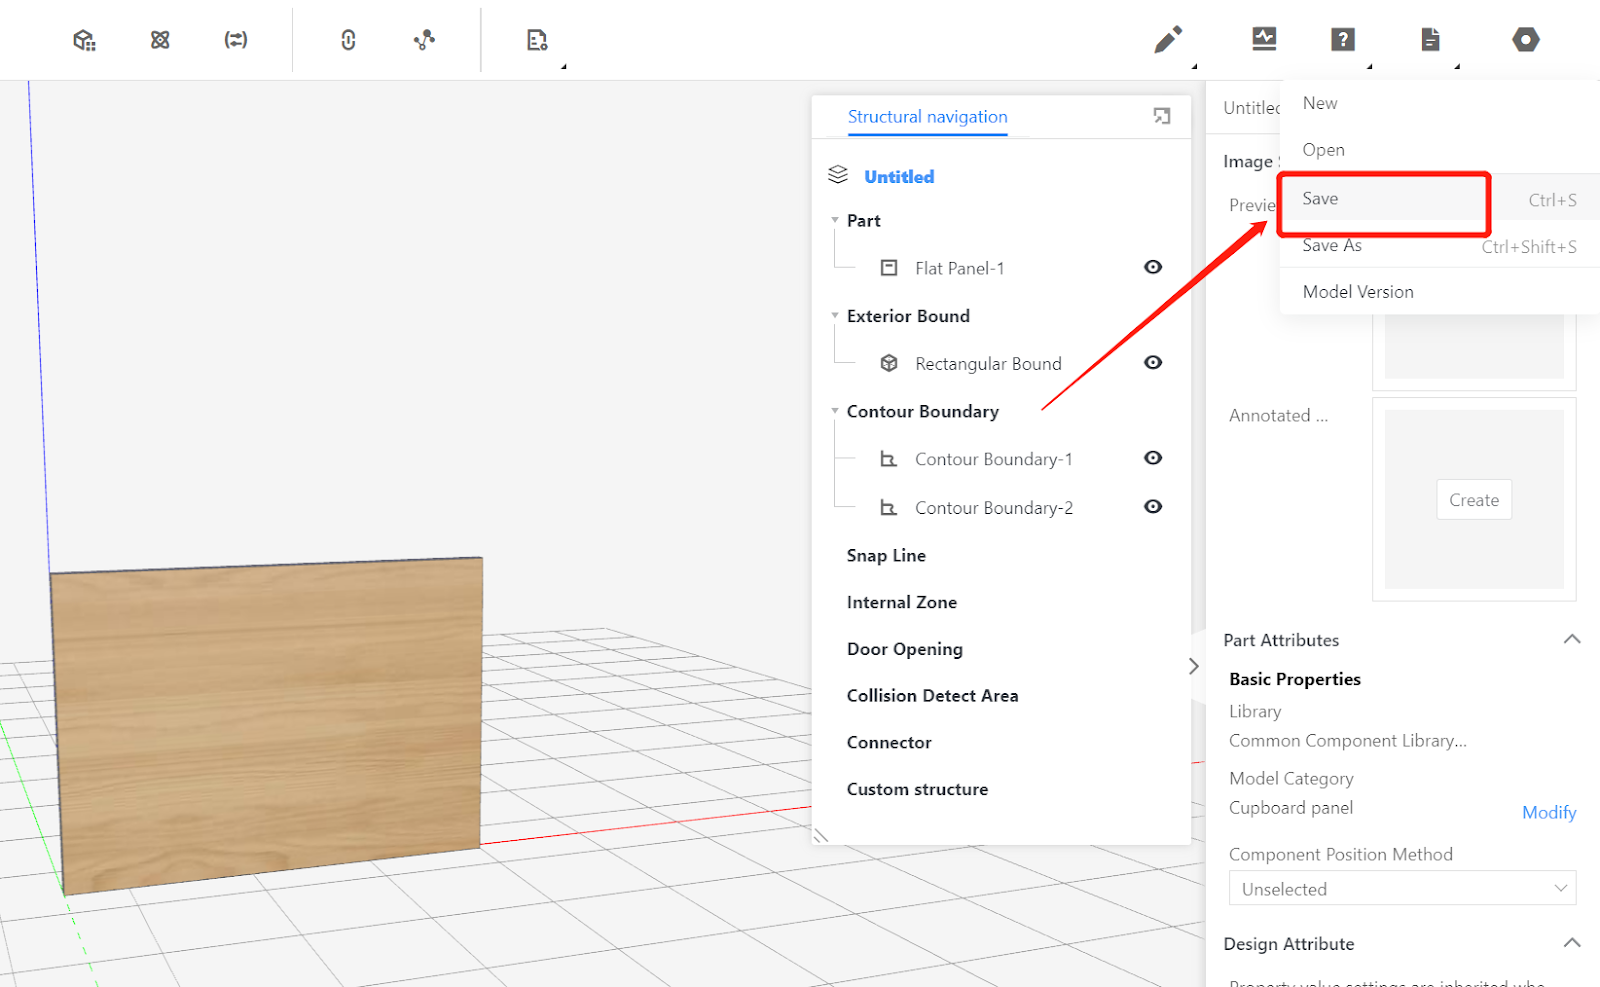
Saving: Move the mouse to the corresponding position in the upper right corner of the page, select Save, choose the subdirectory for saving, give it a name, and click Save.
In the backend page, find the model, select the model, and choose to initialize it.