I.Definition
The 3D model supports plugin-free uploading, which means that after processing the model, it can be directly archived and packaged for uploading as a 3D MAX model.
II.Requirements for Sink 3D Model
1.The max file should only contain the necessary model without any extra models (having extra models will cause upload failure).
2.The model should be centered in 3D MAX.
3.The max file size should be less than 100MB.
4.The model's polygon count (polys) should not exceed 800,000 polygons (after converting to an editable mesh, press '7' to check).
5.The model's dimensions should be in millimeters (mm) (set in Custom Menu -> Unit Setup).
6.The size of the model within the scene should not exceed 10 meters.
7.The faucet on the sink can be included or excluded; there is no standard requirement.
8.It is recommended to compress the sink model into an archive before uploading.
III. Upload Steps
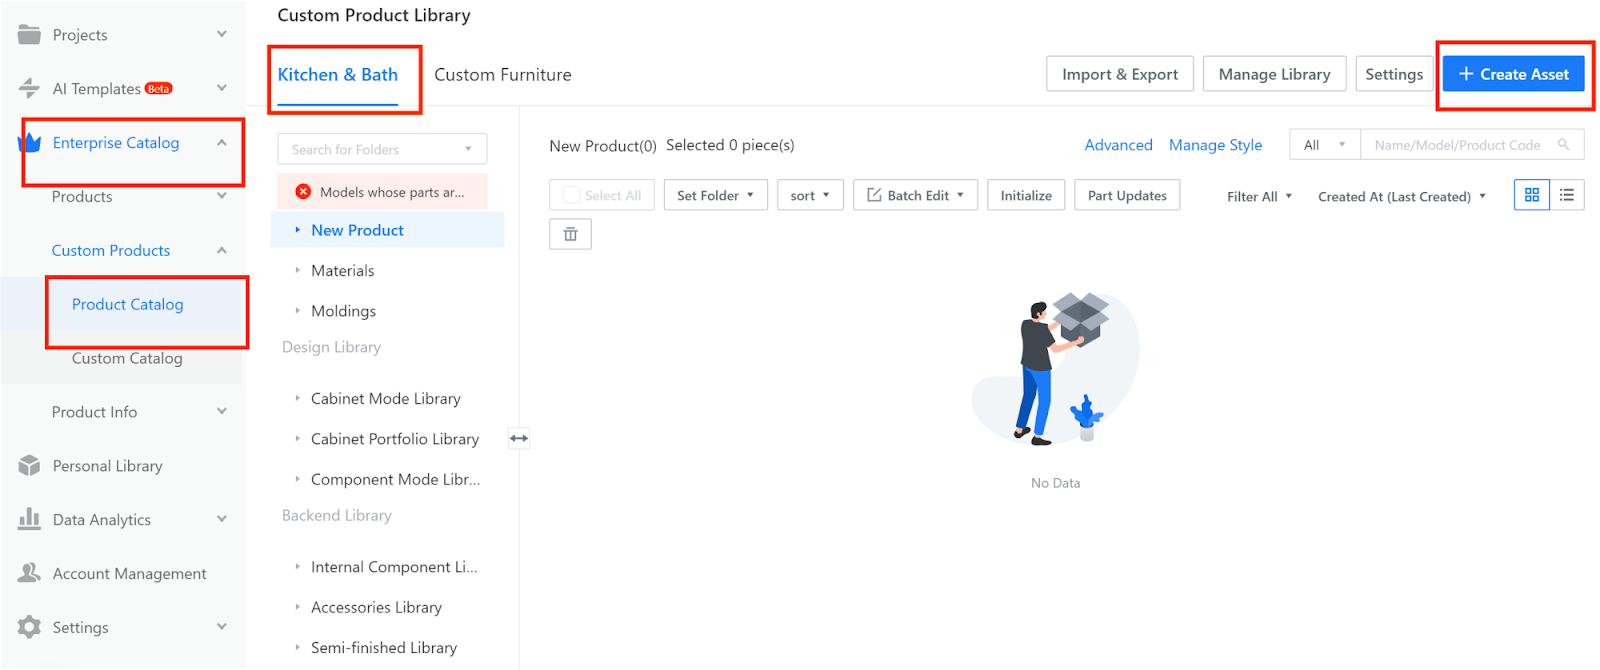
Enterprise Catalog-Custom Products-Product Catalog- Kitchen&Bath-Create Asset-3D Model
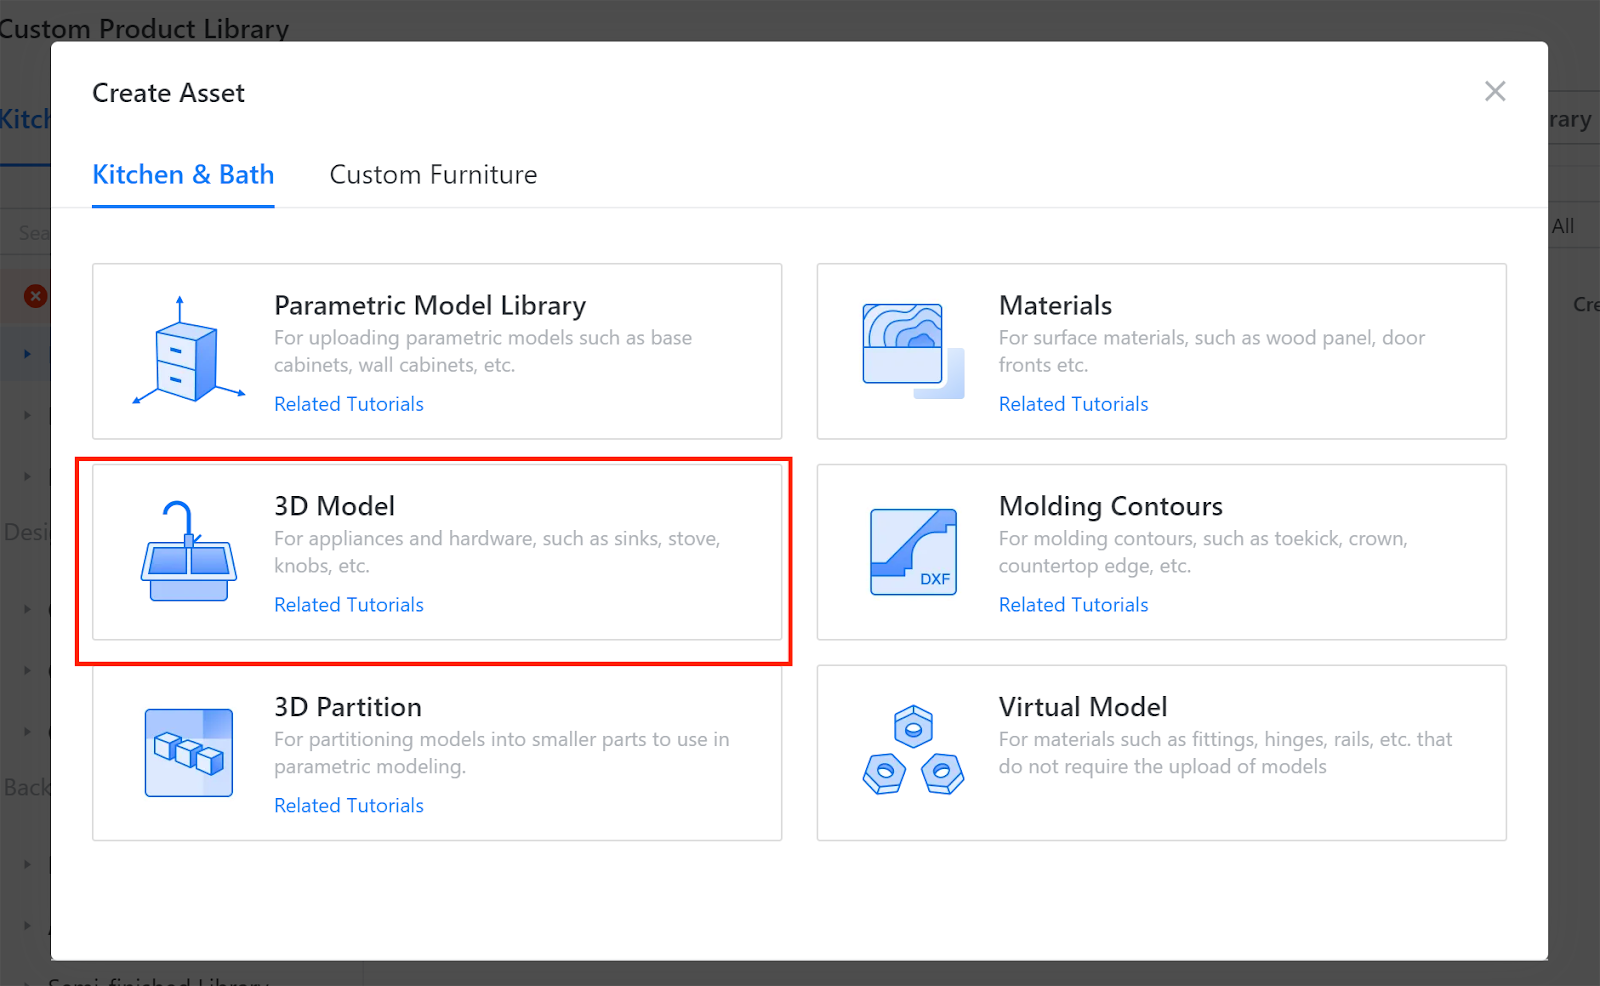
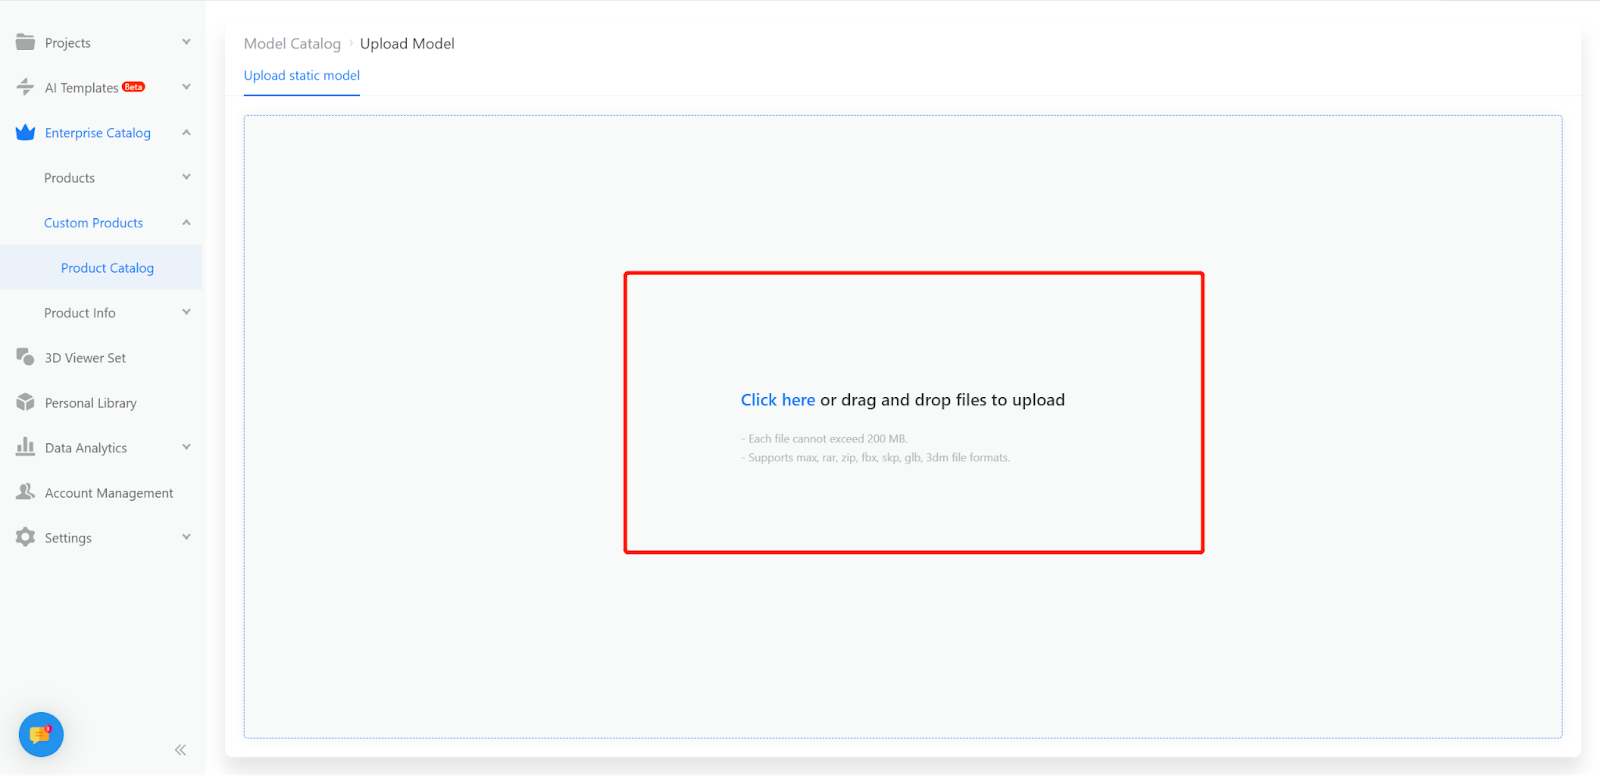
Redirect to the 3D model upload page and click "+ Add File". Locate the 3D model file to be uploaded, enter the asset name (automatically selects the 3D file name or you can modify it manually), and choose the rendering category. Rendering the 3D model requires some time, so wait until the blank box below displays "processing successful" before proceeding with the upload.
Select the rendering category as "Sink."
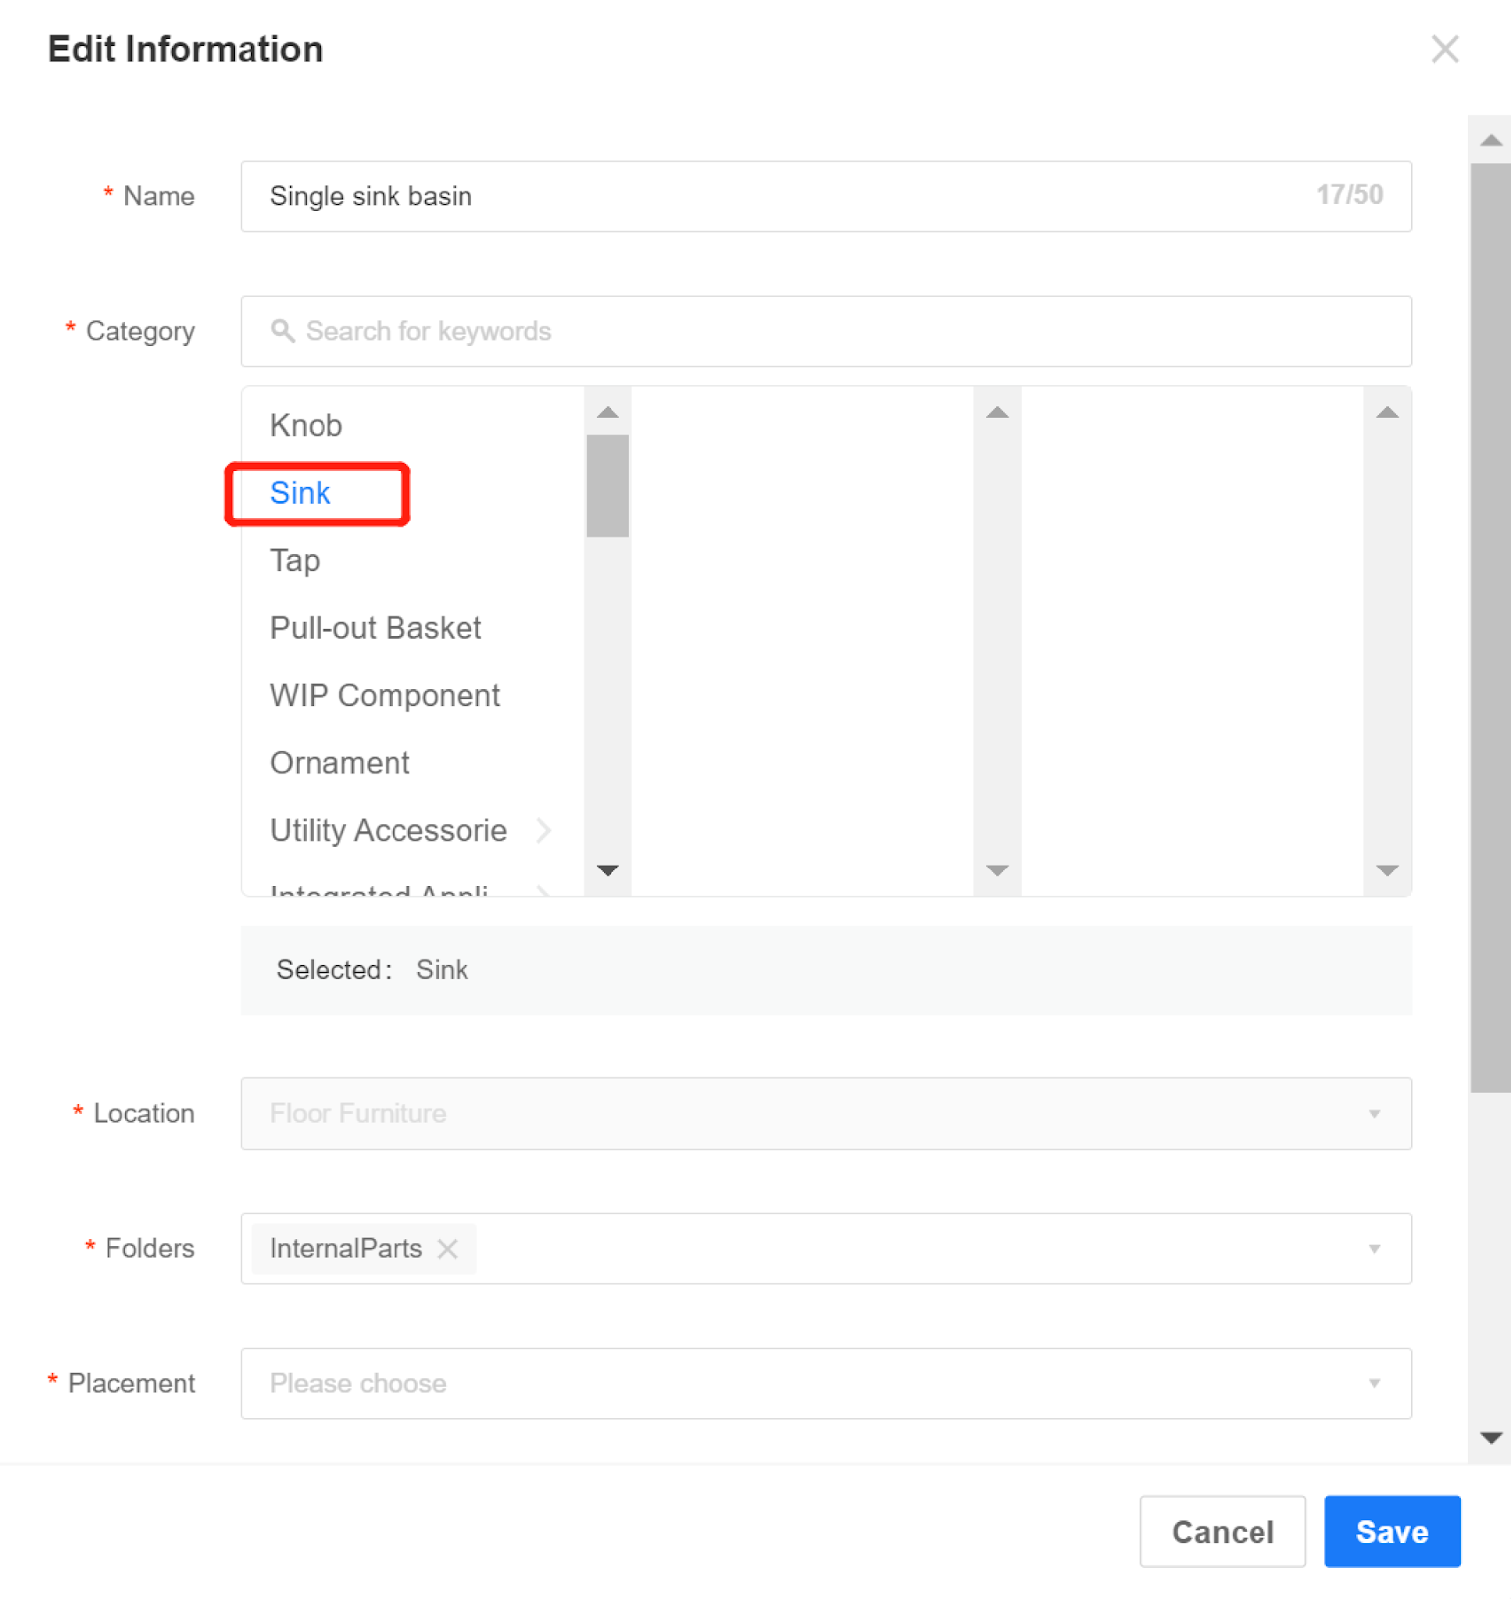
Enter the required parameter information for the sink model.
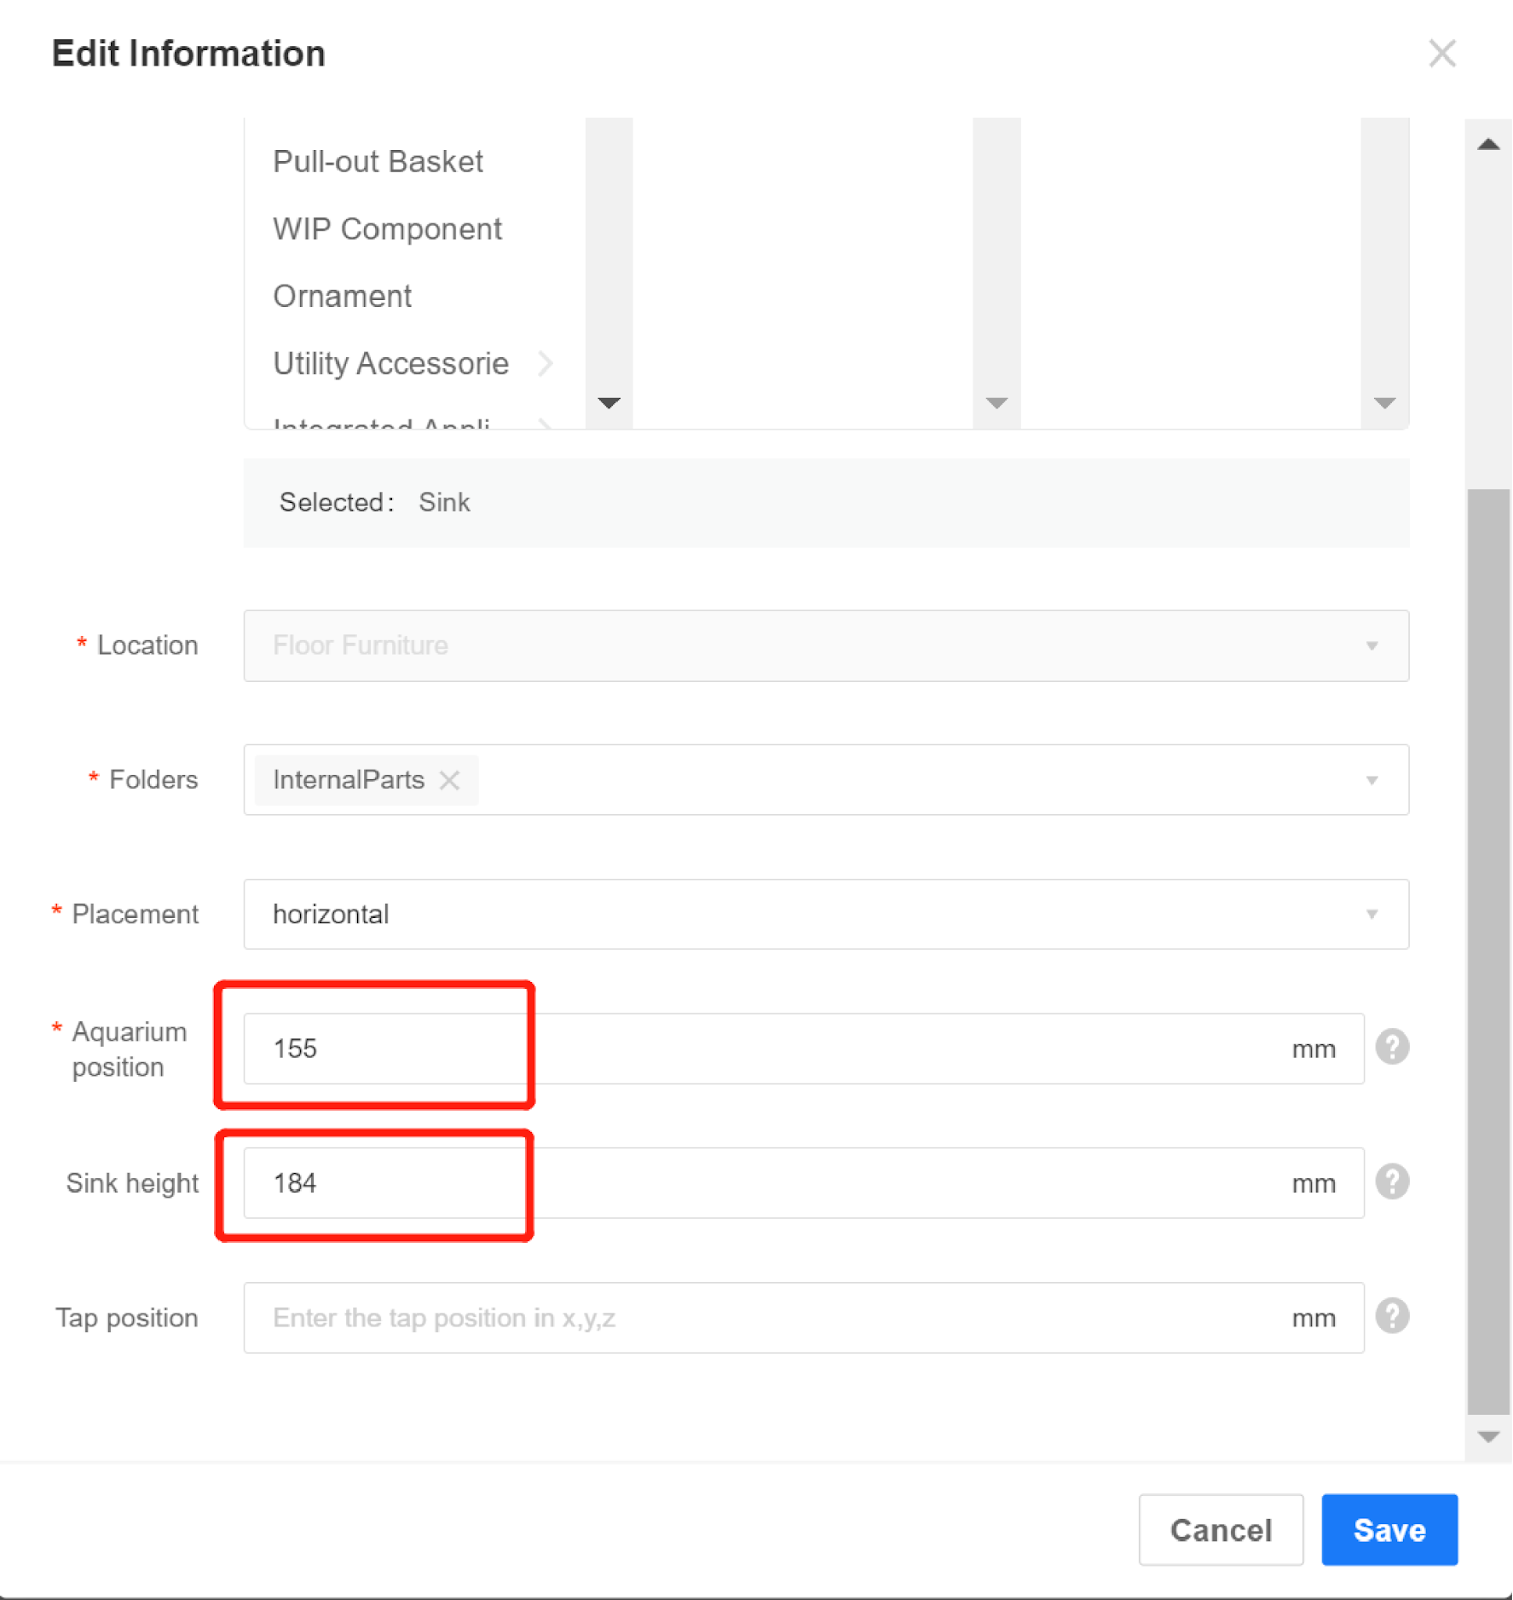
Example sink positions from the tutorial: Sink position: 155 Sink height: 184 Faucet position: 373.4, 417, 180
Enter the faucet position in the X, Y, Z format.
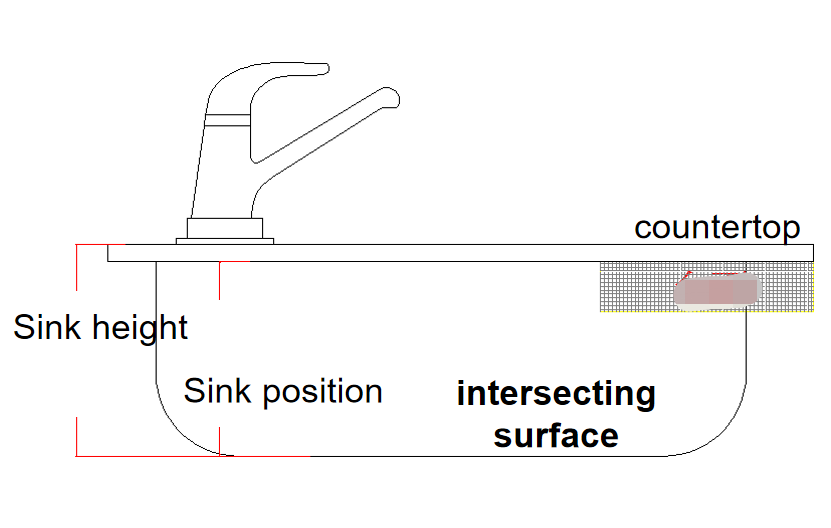
Sink height: The distance from the bottom of the sink model (including any pipes, if present) to the plane of the sink's top surface. It represents the remaining height of the model after excluding the faucet.
Sink position: The distance from the bottom of the sink model (including any pipes, if present) to the point where the sink contacts the countertop.
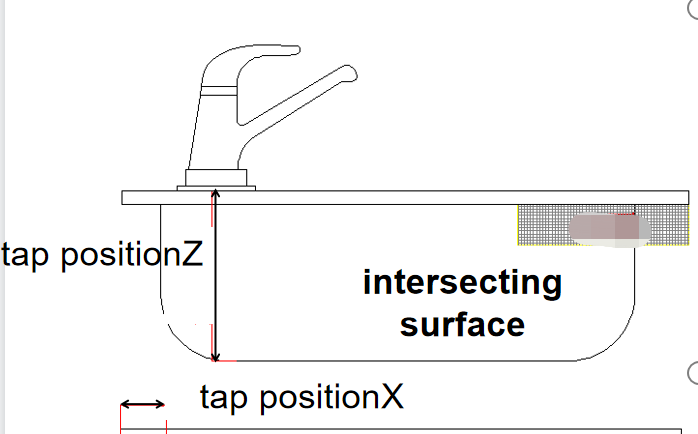
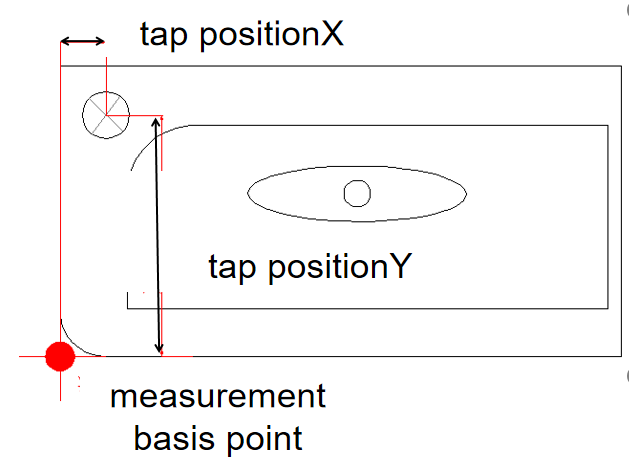
Faucet position X: The distance in the X direction from the center point of the circle representing the faucet installation location to the bottom-left-front corner of the sink model.
Faucet position Y: The distance in the Y direction from the center point of the circle representing the faucet installation location to the bottom-left-front corner of the sink model.
Faucet position Z: The distance from the center point of the circle representing the faucet installation location to the bottom-most part of the sink model (considering any unevenness on the sink surface, you can decrease the Z distance slightly to have the faucet sink a few millimeters below the surface).
Once you confirm the information, complete the upload.
Find the uploaded sink model in the backend and click to view it.
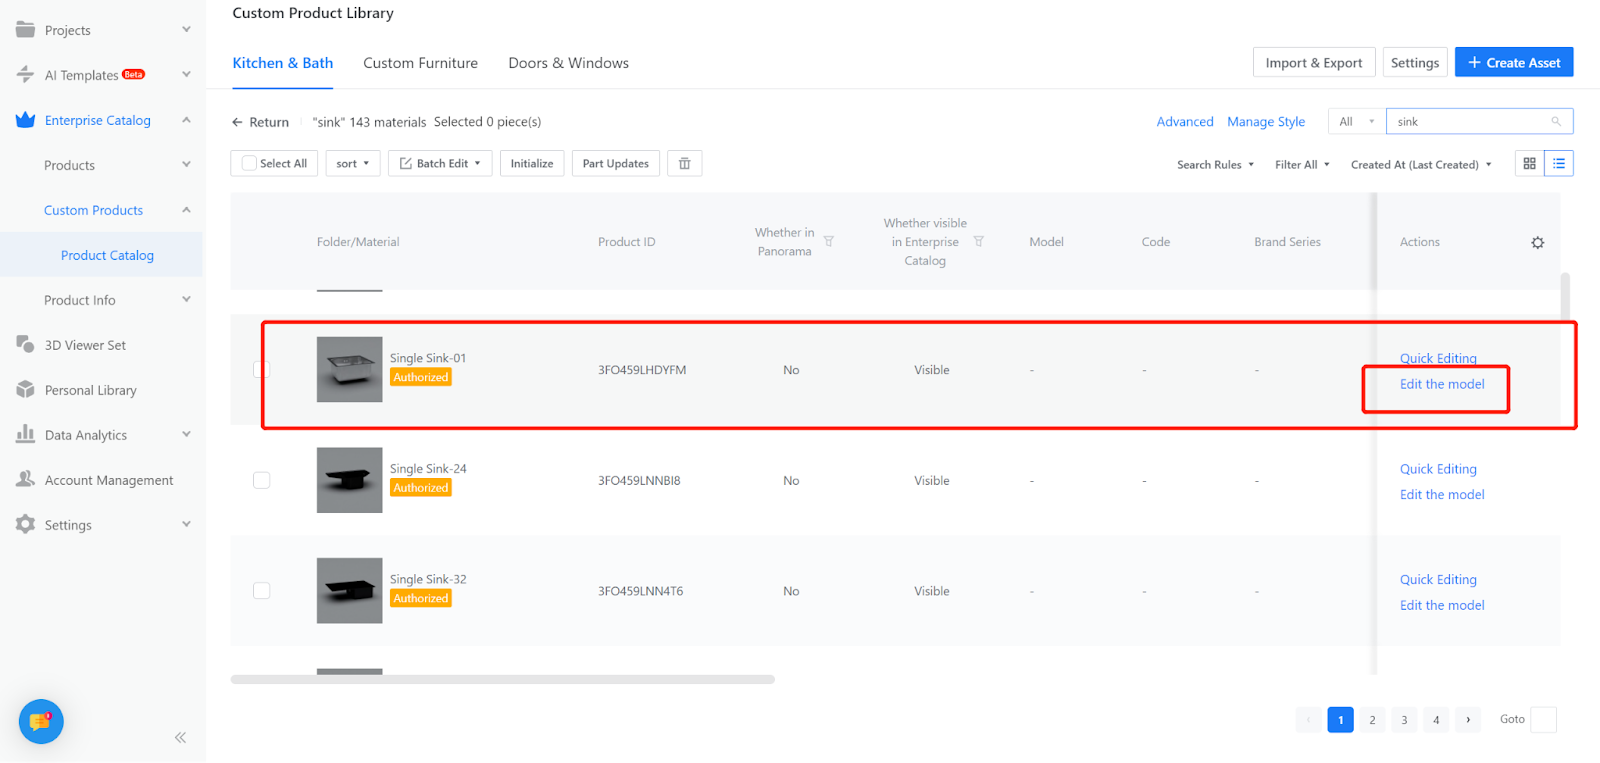
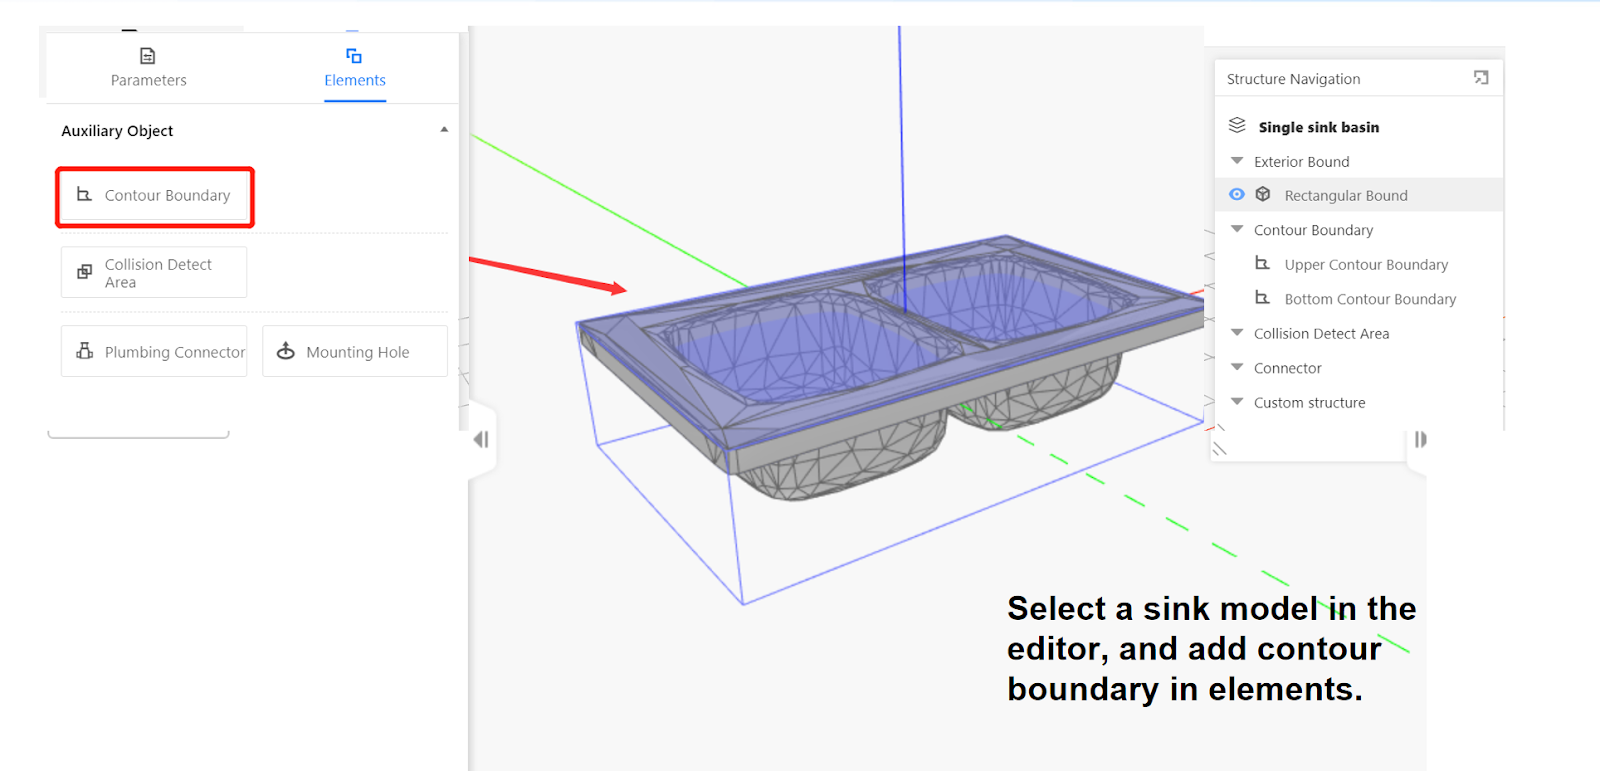
Go to the product details and enter the Edit Model section.
Modify the sink model's contour restriction, set it, and save.
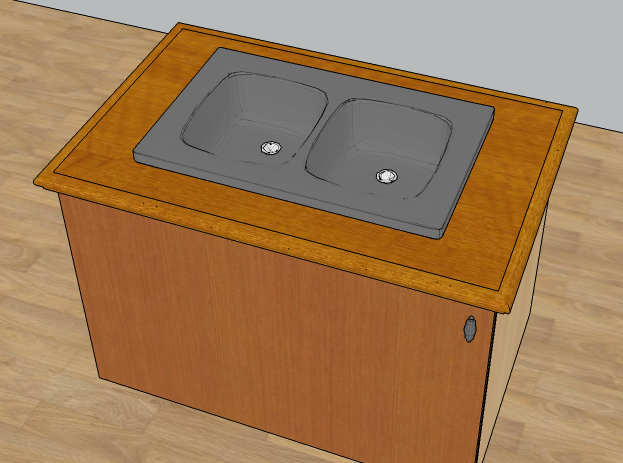
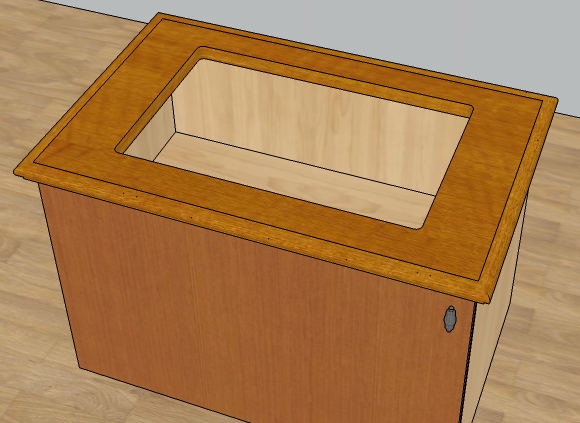
The contour boundary for the sink acts as a guideline for generating corresponding cutouts on the countertop using the provided tools.