Contents
I.Precautions
II.Creation Location
III.Modeling Steps
IV.Verification
V.Saving and Initializing
I.Precautions
1.1 Right-angled snap line
The right-angled snap line is used to adapt the size of the model to the space in the front-end tool. It needs to be called and edited in the Elements.
1.2 Submodel calling
For modeling under the furniture library, all panels must be called from the submodel library and editing using flat panels from the Elements is not allowed.
1.3 Dimension range at corner cuts
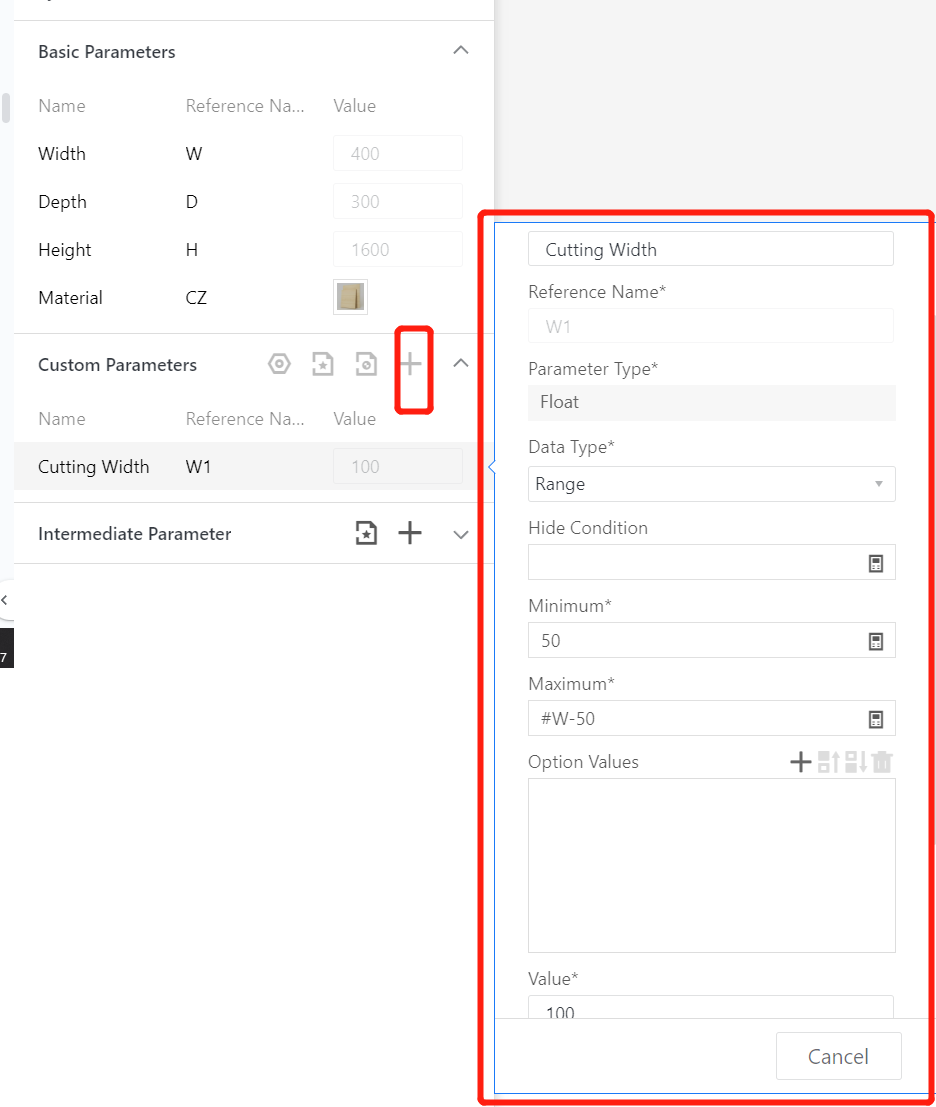
For parameter W1, its dimension range must be carefully considered. The maximum value of W1 must not exceed any possible value for W. Here are two ways to solve this issue. (D1 applies similarly)
a. Represent the maximum value of parameter W1 as a constant, which is smaller than the minimum value set for parameter W.
b. Represent the maximum value of parameter W1 with a formula, for example: #W-100
(Here, we will demonstrate using method b)
II.Creation Location
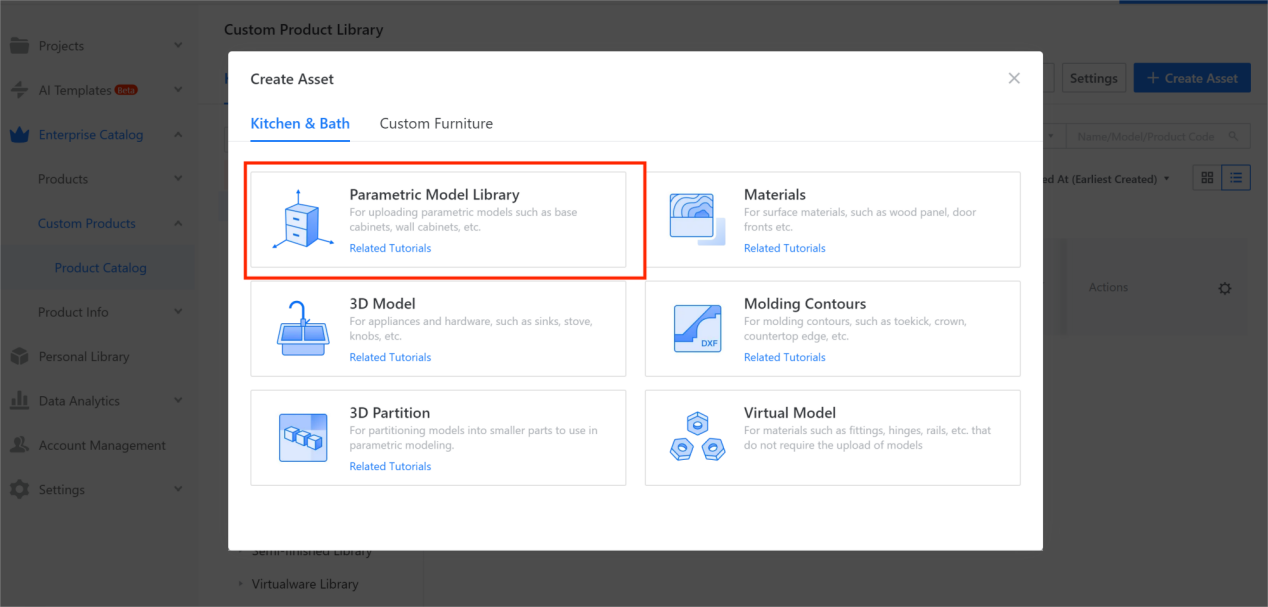
Enterprise Catalog-Custom Products-Product Catalog- Kitchen&Bath, Custom Furniture-Create Asset- Click “Parametric Model Library”- New- Interim Parts- Cupboard panel
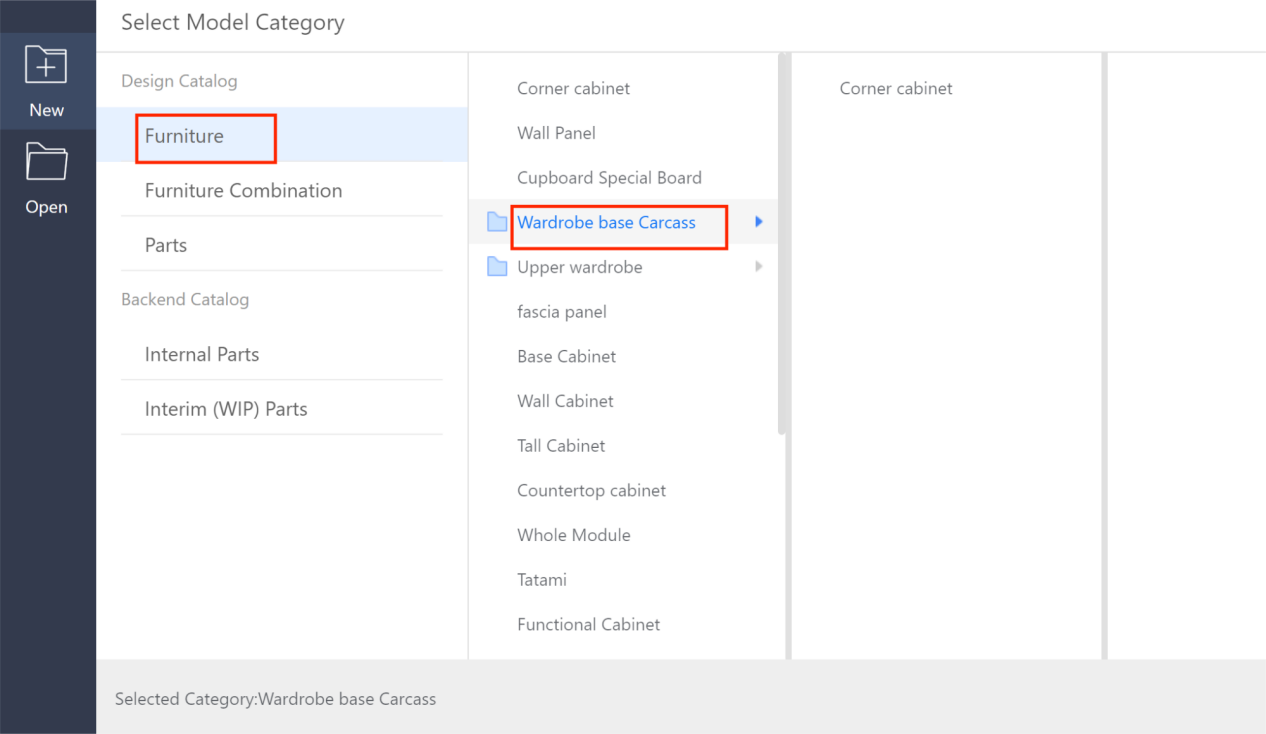
New-Furniture-Wardrobe Base Carcass
III.Modeling Steps
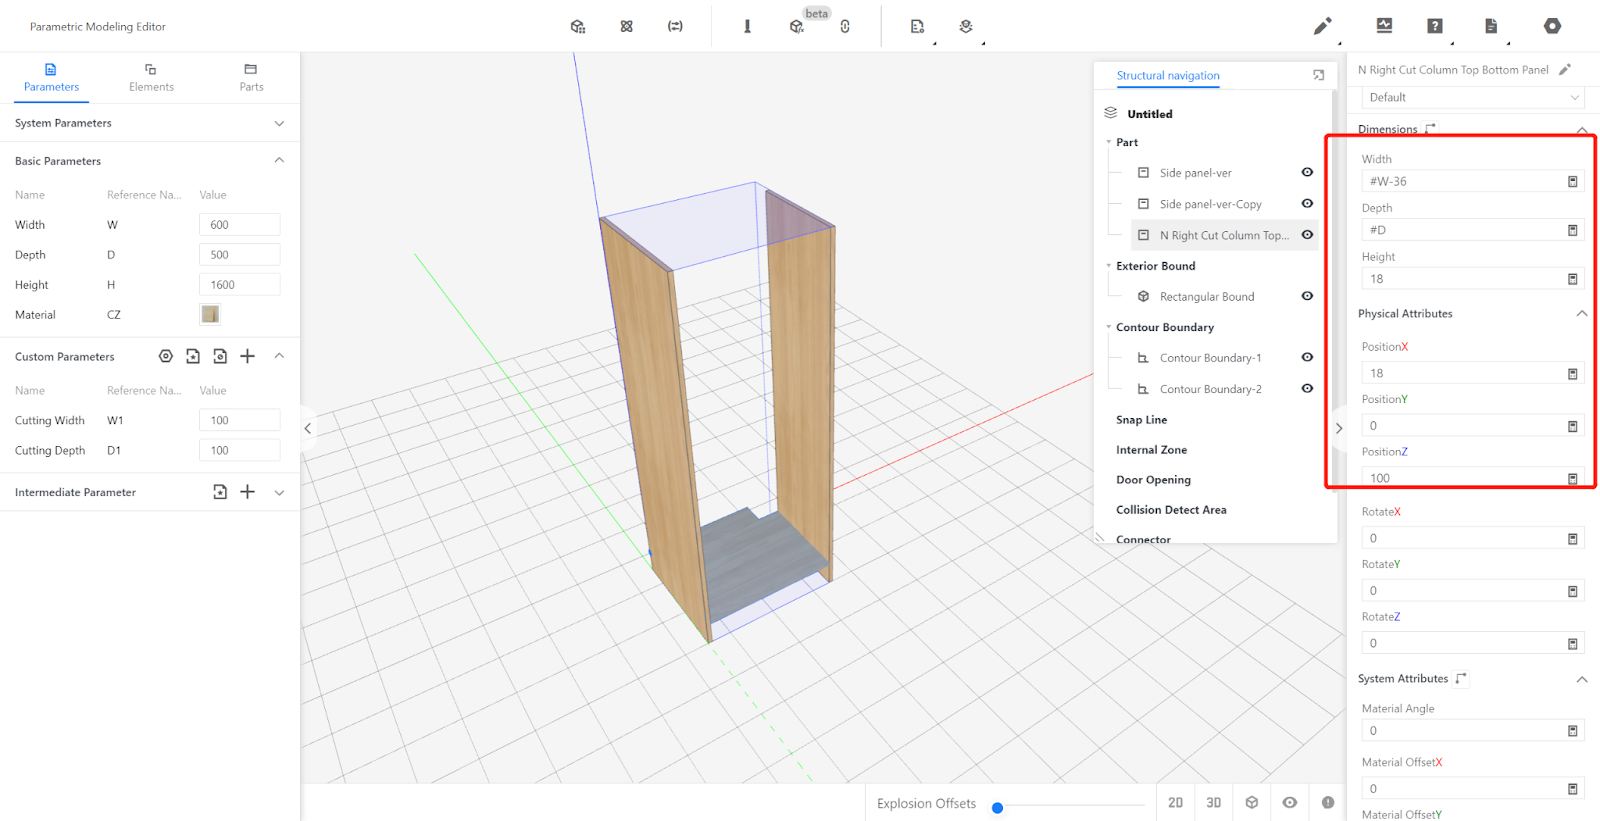
Set Custom Parameters:
-
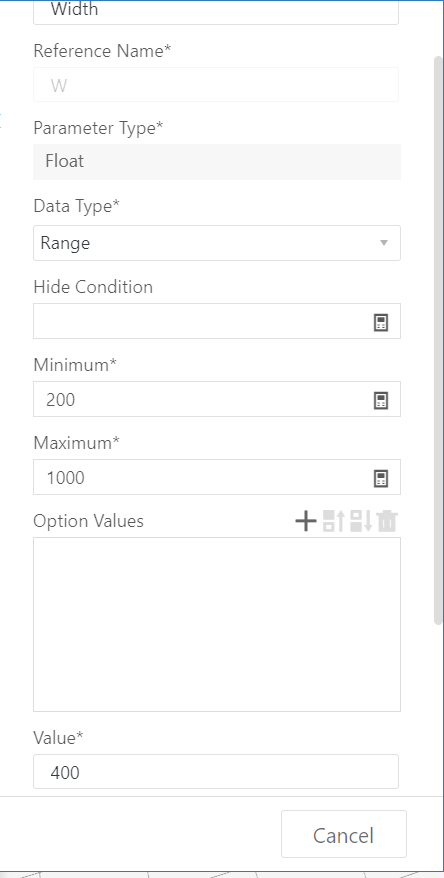
Width (W) - Represents the dimension of the model board in the X-axis direction, i.e., the width of the curved cabinet. The value type is set as optional (e.g., 300, 350, ..., 1000, current value 900) or as an interval (e.g., interval 200-1000, current value 400).
Width (W) - Represents the dimension of the model board in the X-axis direction, i.e., the width of the curved cabinet. The value type is set as optional (e.g., 300, 350, ..., 1000, current value 900) or as an interval (e.g., interval 200-1000, current value 400).
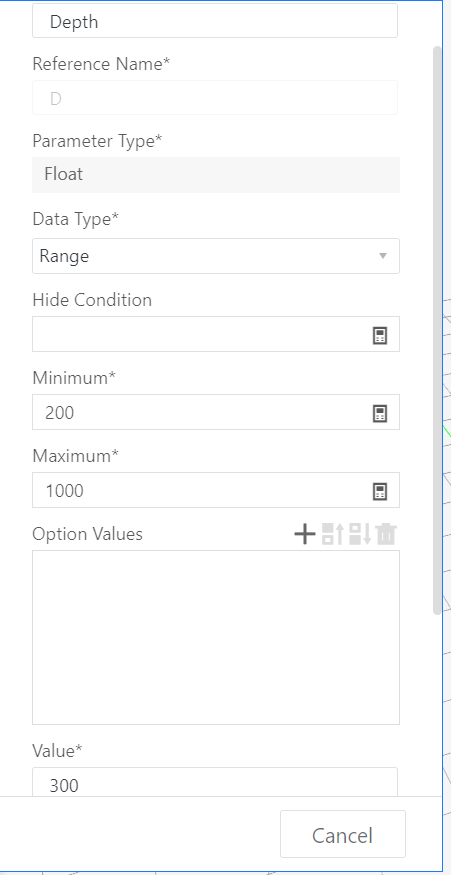
1.2 Depth (D) - Represents the dimension of the model in the Y-axis direction. The value type is set as optional (e.g., 300, 350, ..., 1000, current value 900) or as an interval (e.g., interval 200-1000, current value 300).
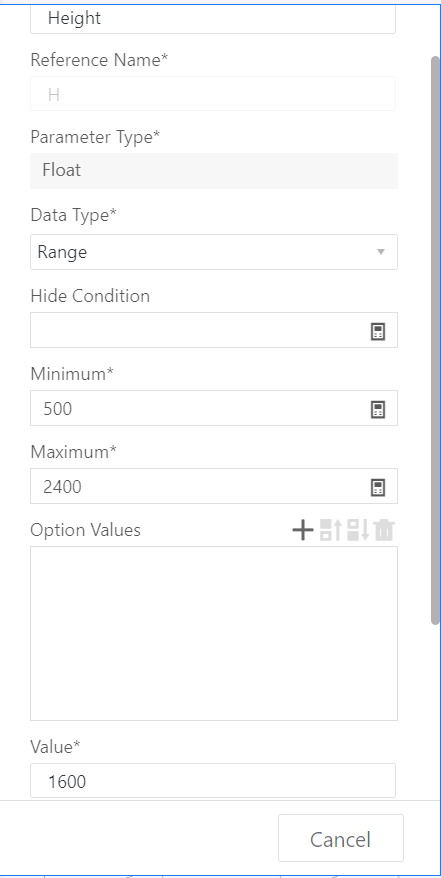
1.3 Height (H) - Represents the dimension of the model in the Z-axis direction. The value type can be set as a range (e.g., range 500-2400, current value 2000).
1.4 Add advanced parameter W1.
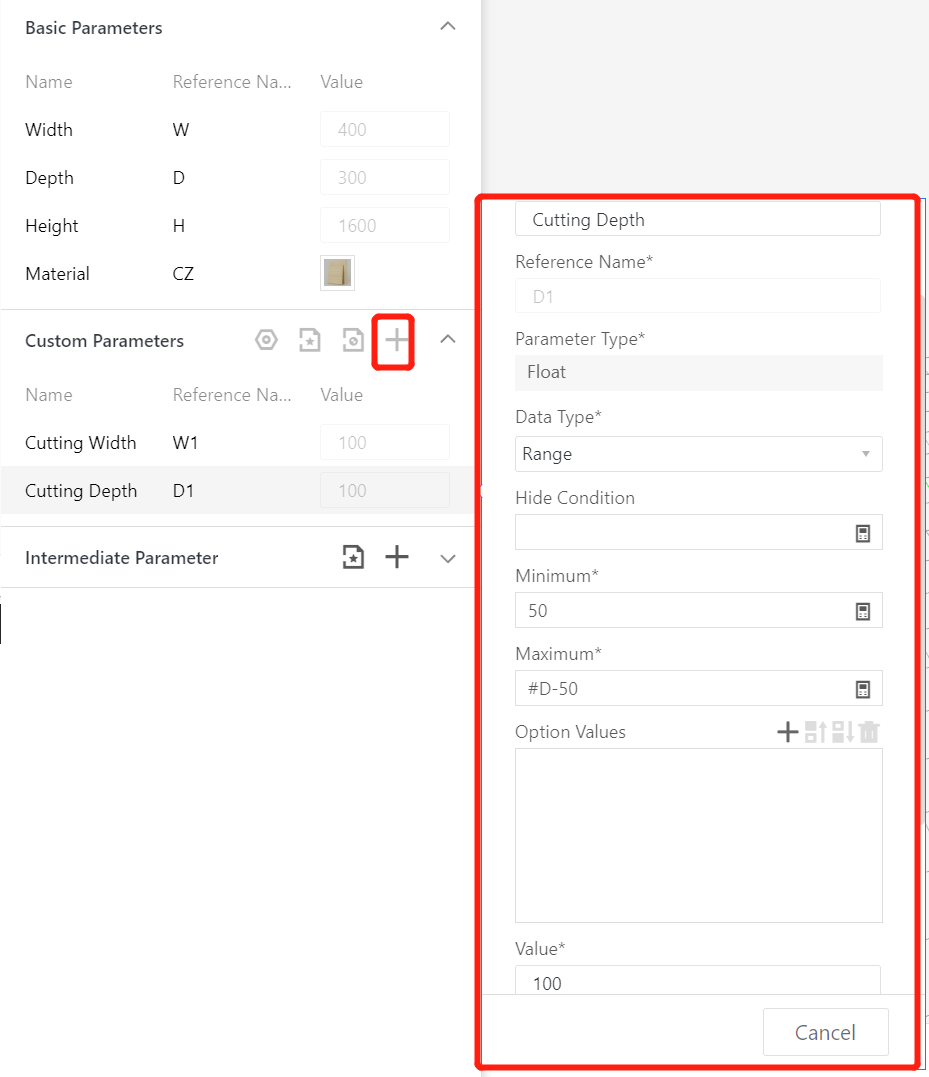
1.5 Add advanced parameter D1.
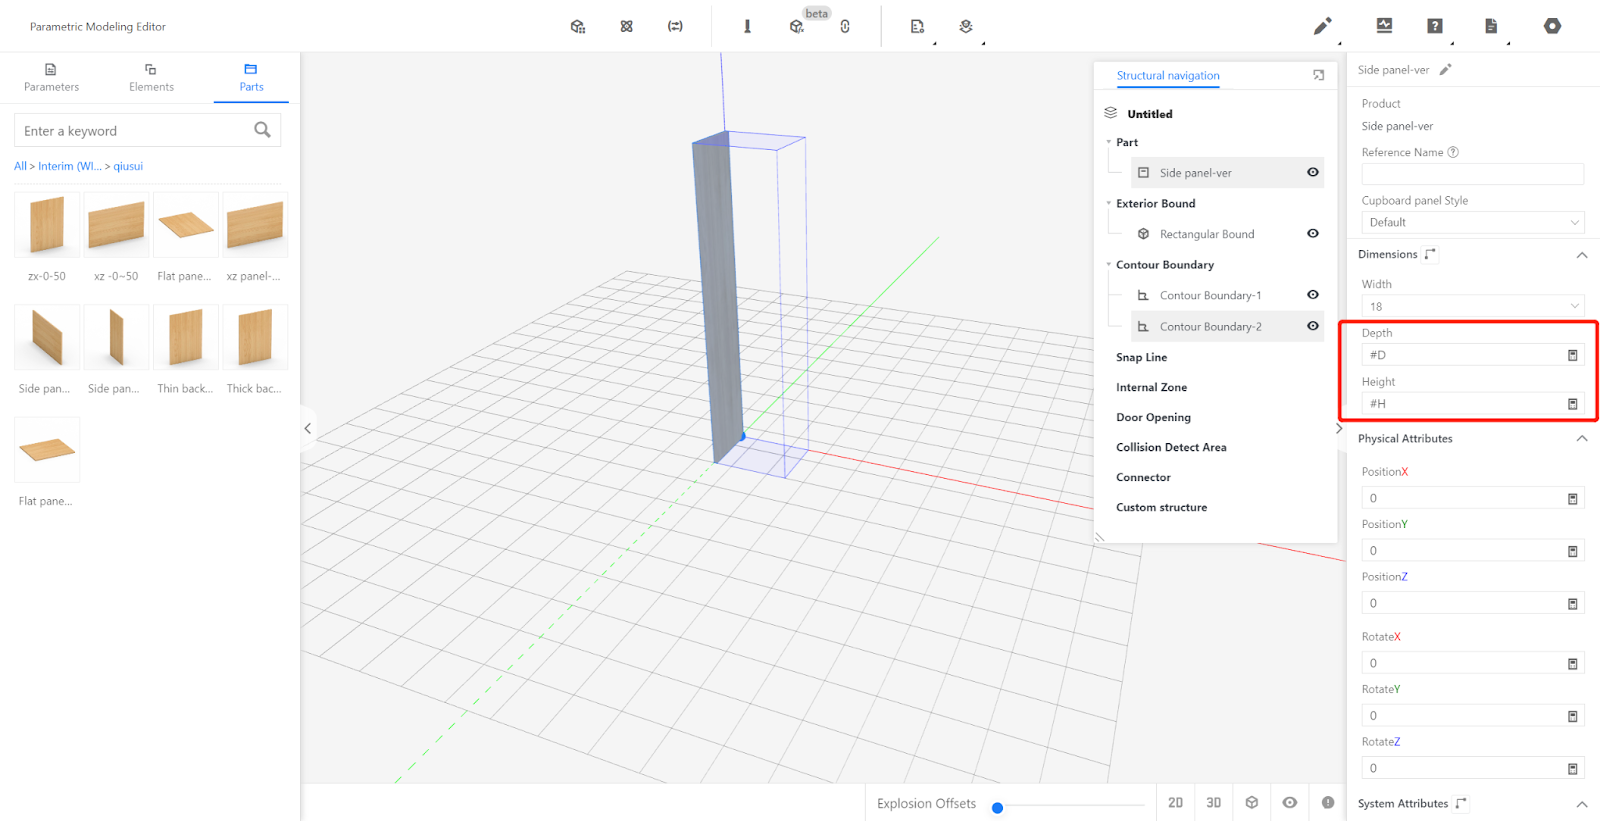
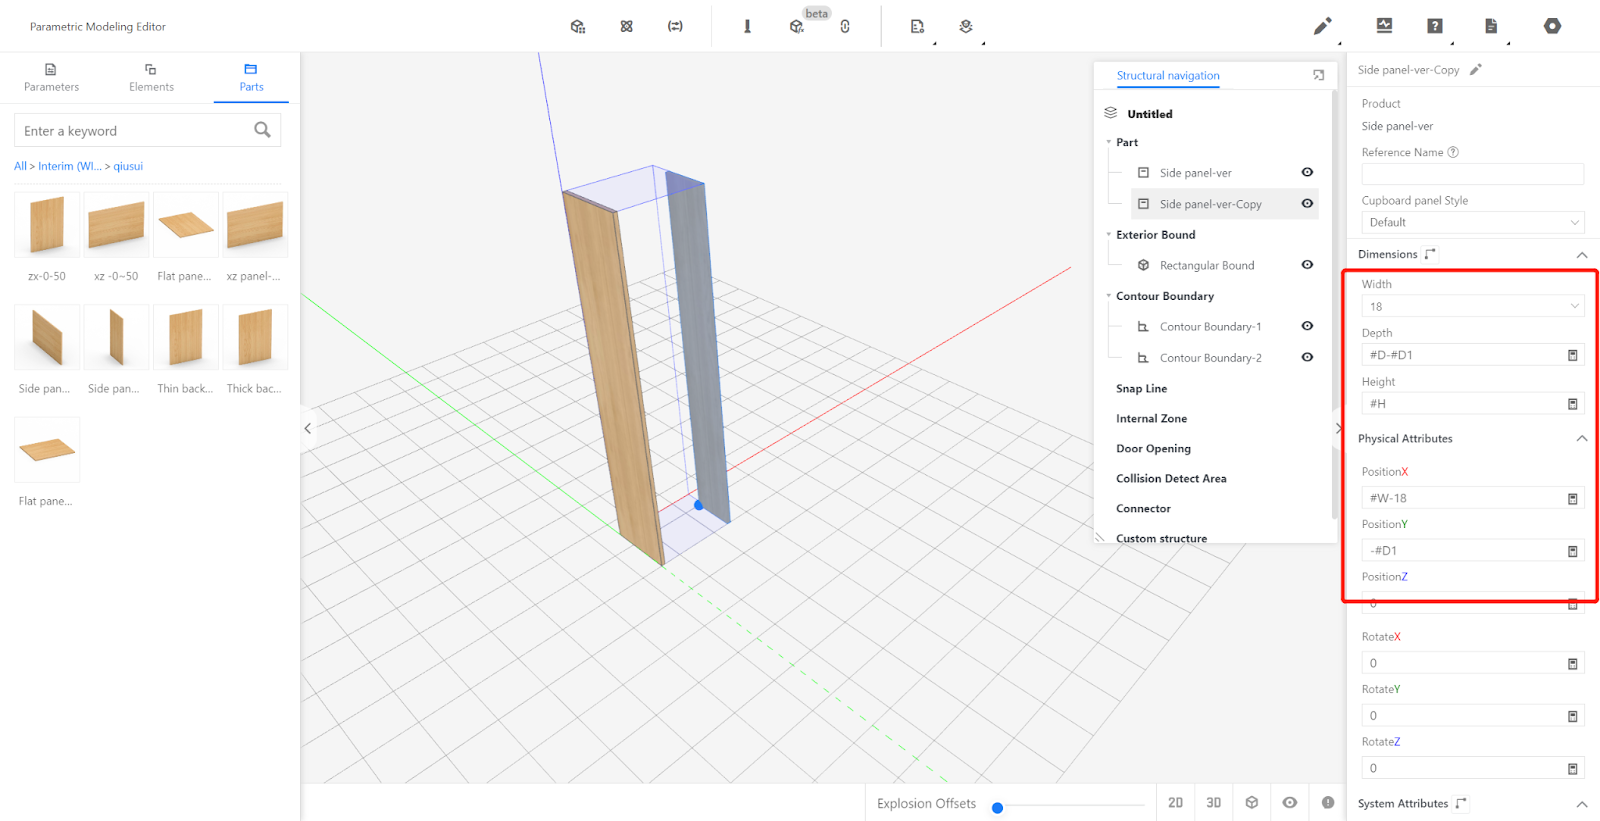
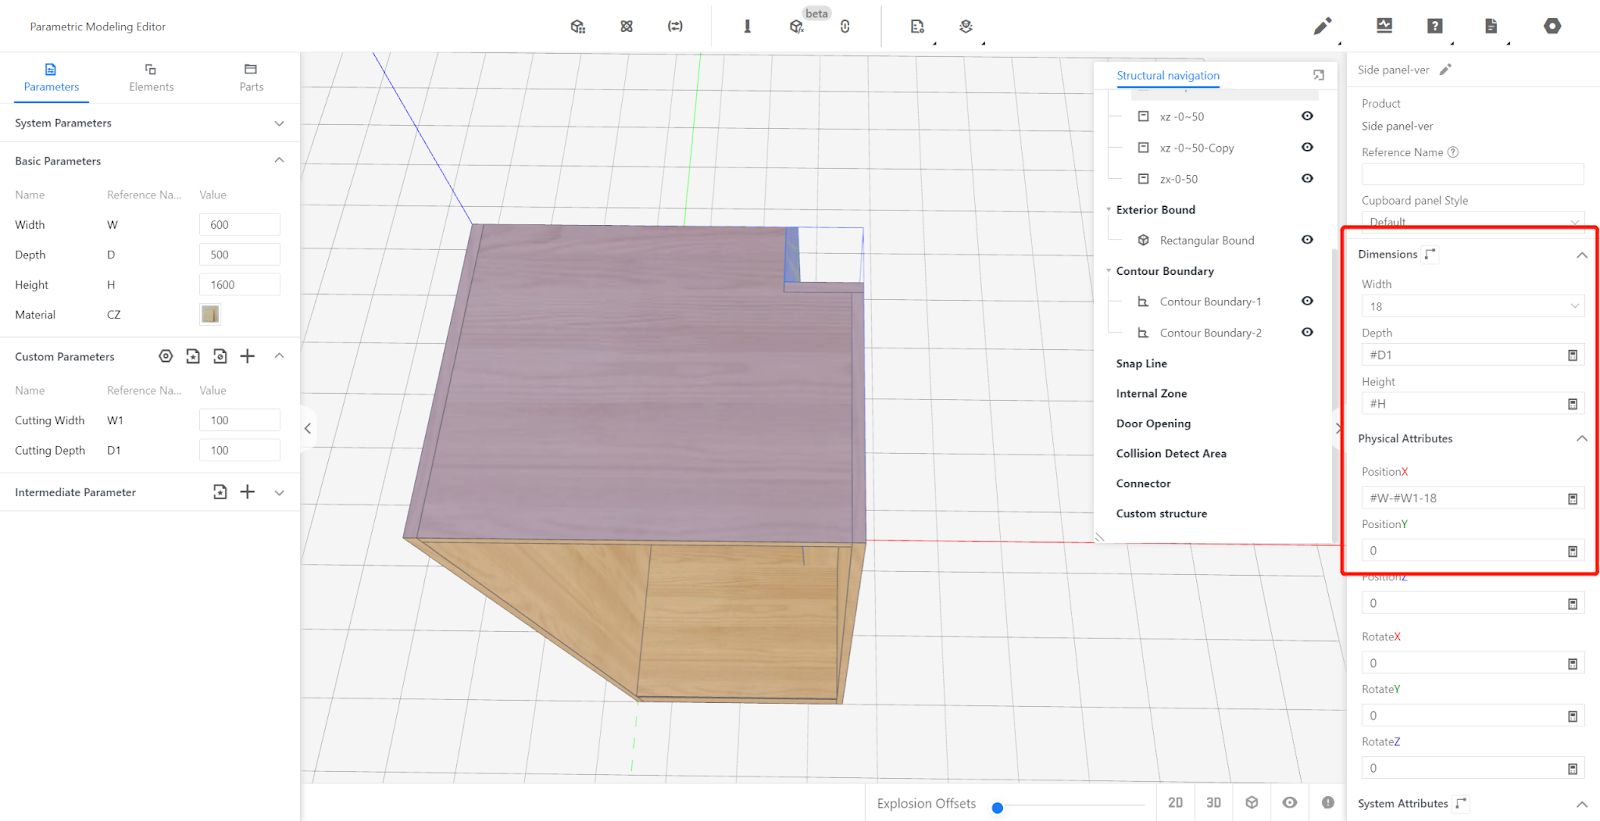
Click on the submodel library - Semi-finished Products Library, call the side panel, and set parameters.
Duplicate a side panel and modify the parameters.
Click on the submodel library - Semi-finished Products Library, call the cutting corner flat panel and set parameters.
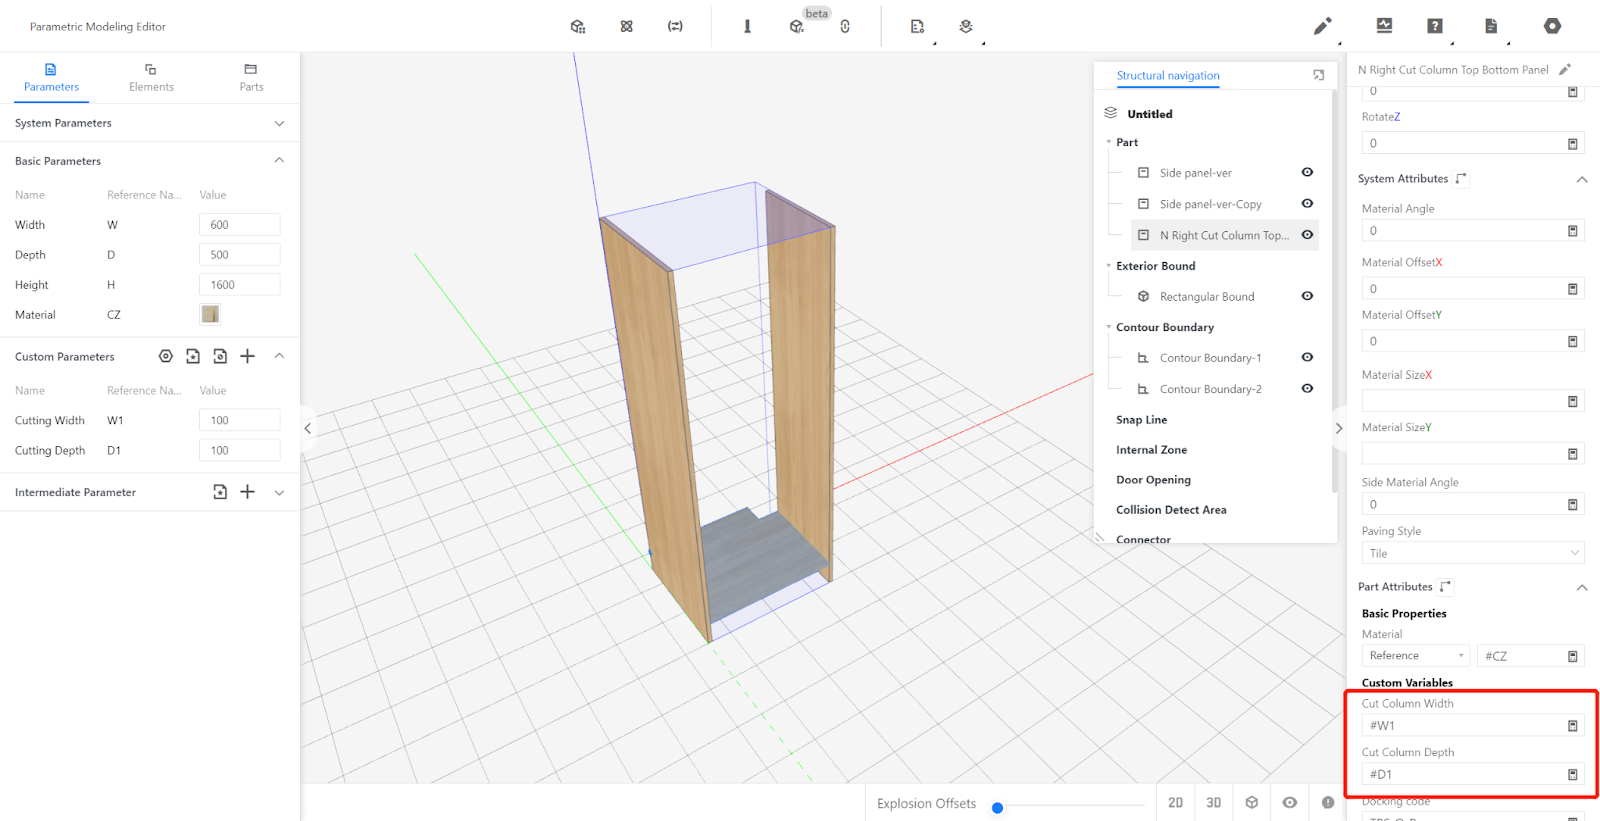
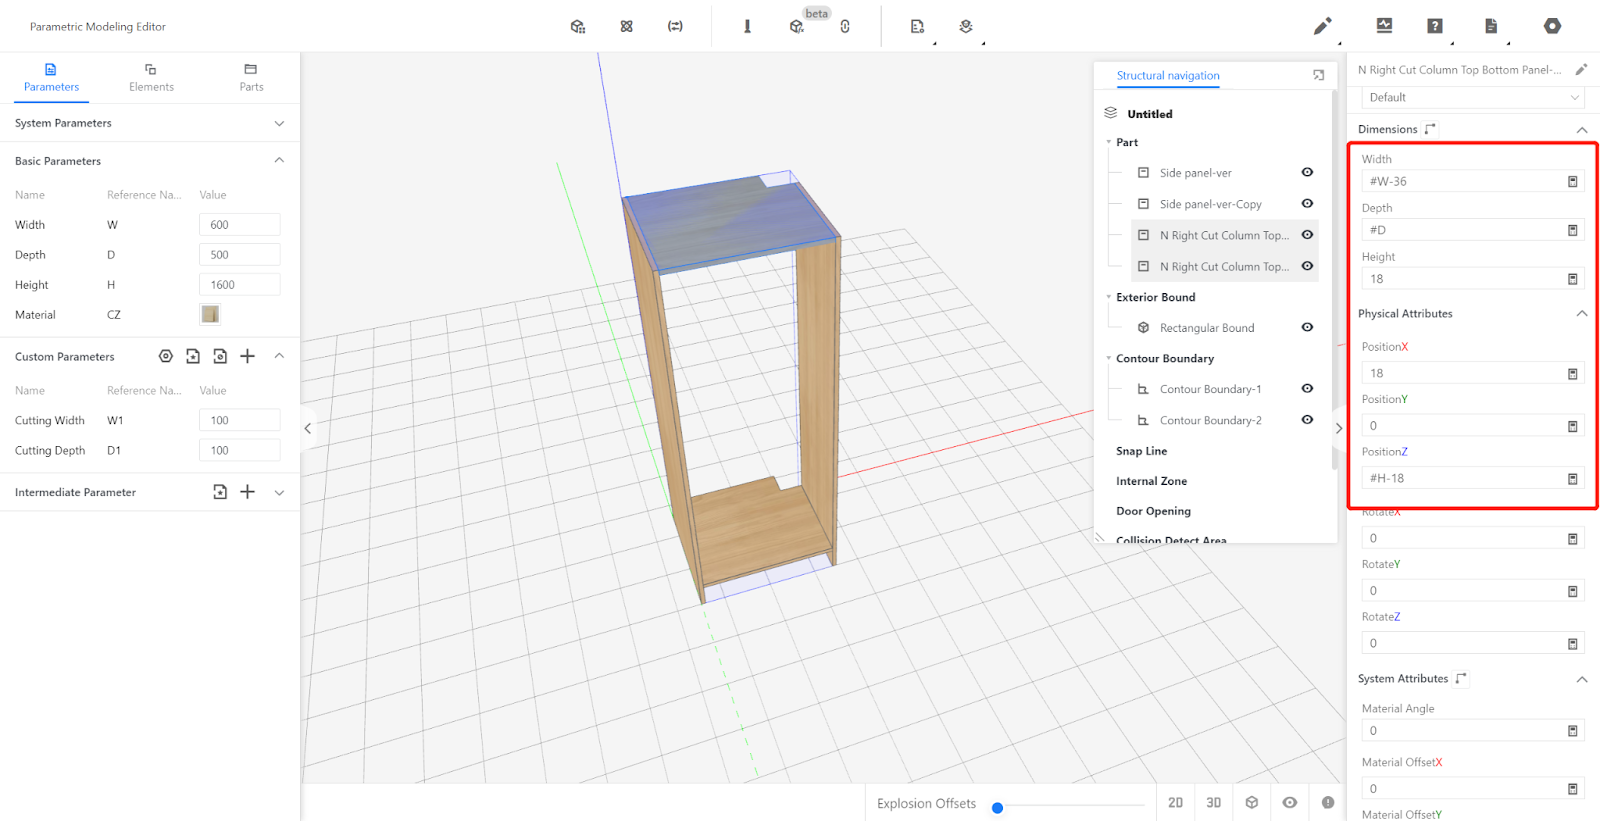
Duplicate the cutting corner flat panel and modify the parameters.
Click on the submodel library - Semi-finished Products Library, call the vertical panel and set parameters.
Duplicate the side panel and modify the parameters.
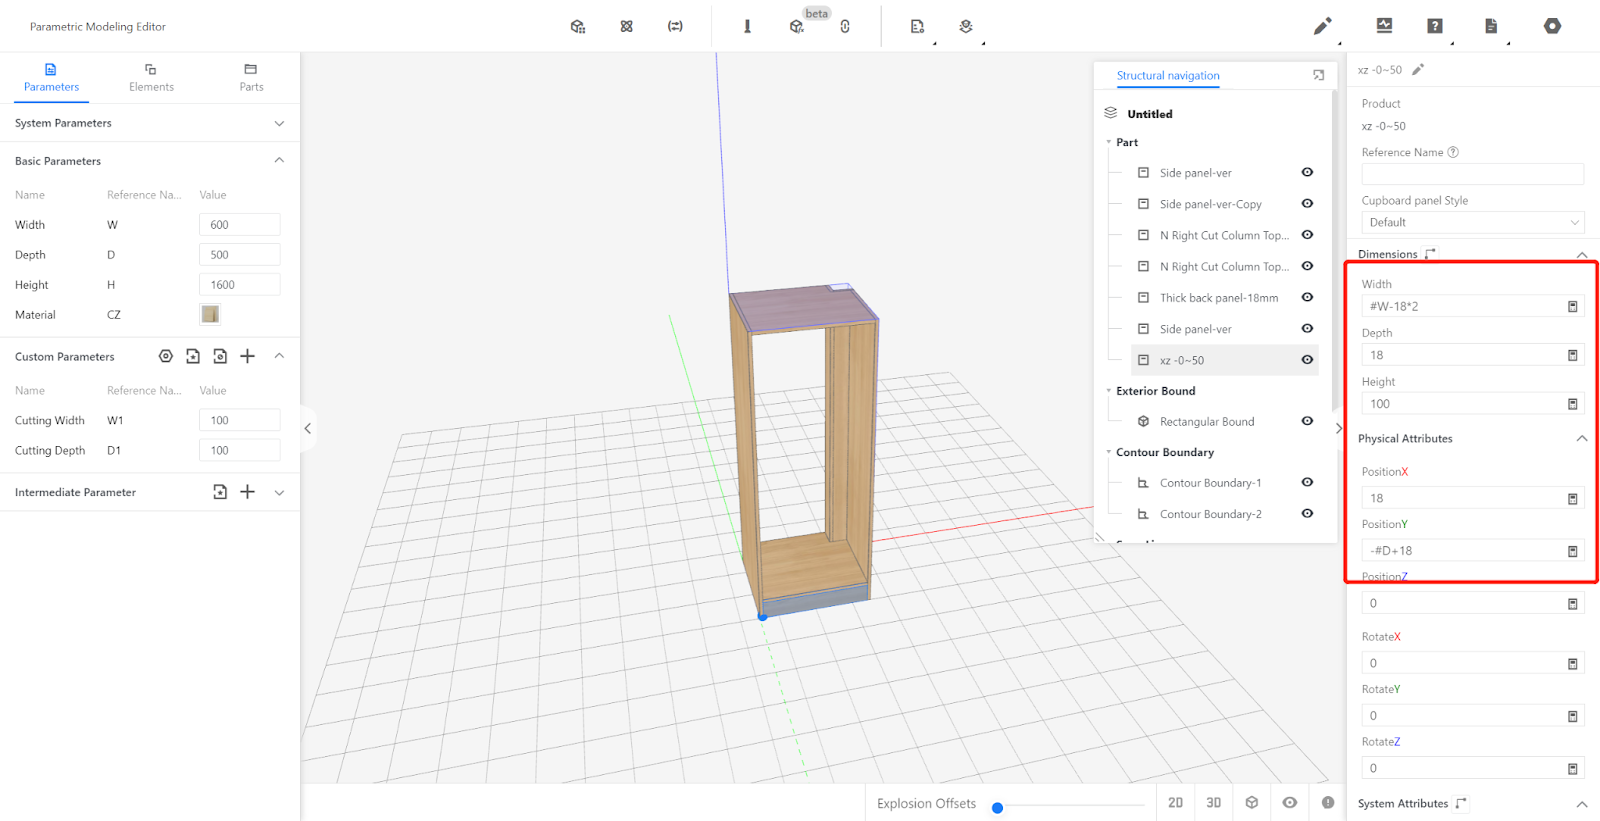
Click on the submodel library - Semi-finished Products Library, call the kickboard and set parameters.
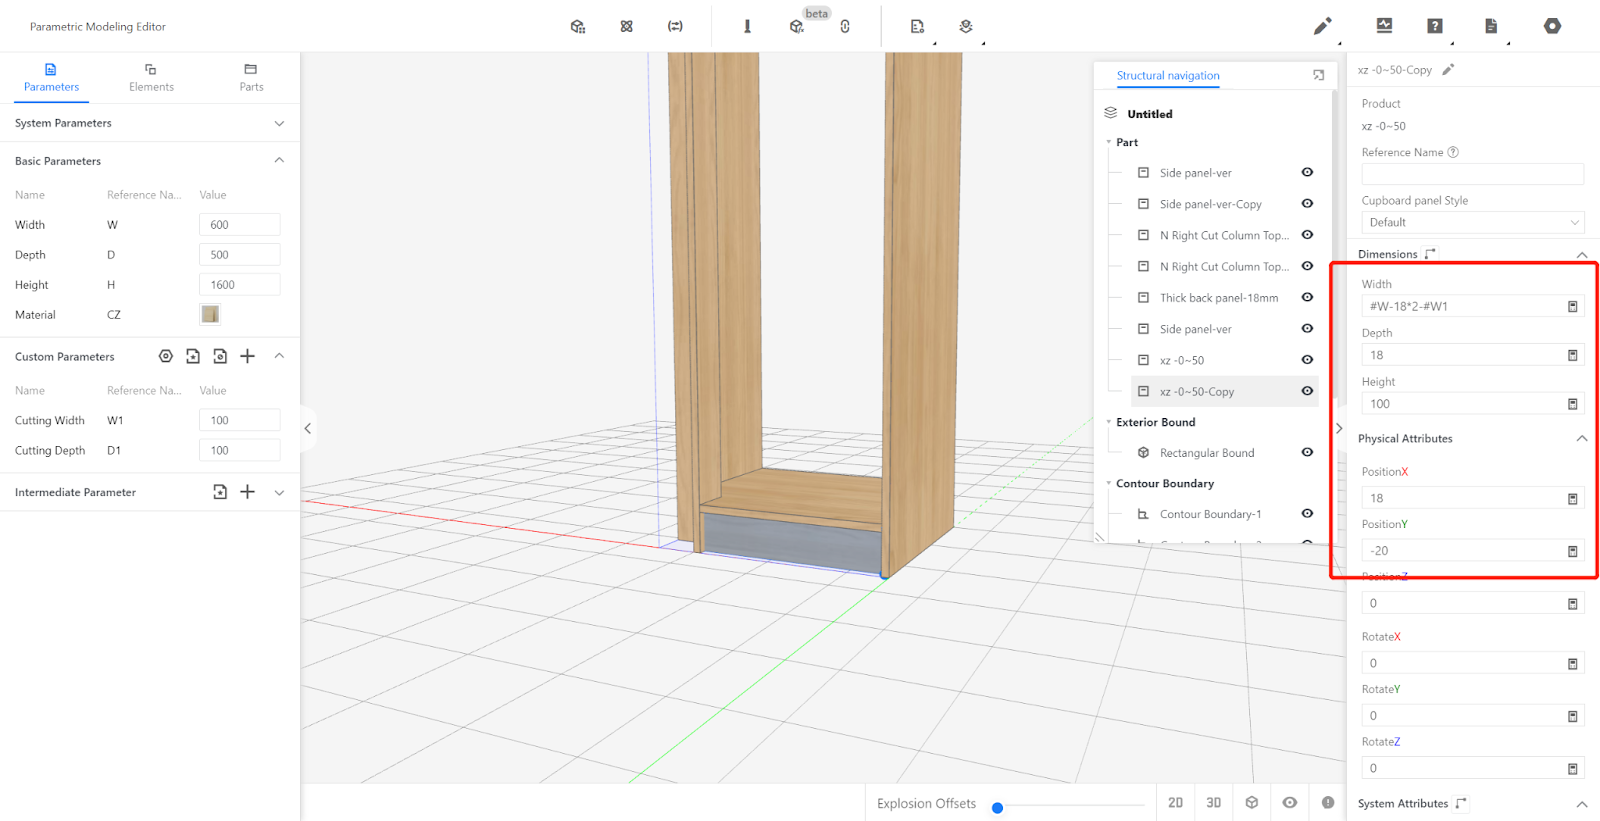
Duplicate a kickboard and modify the parameters.
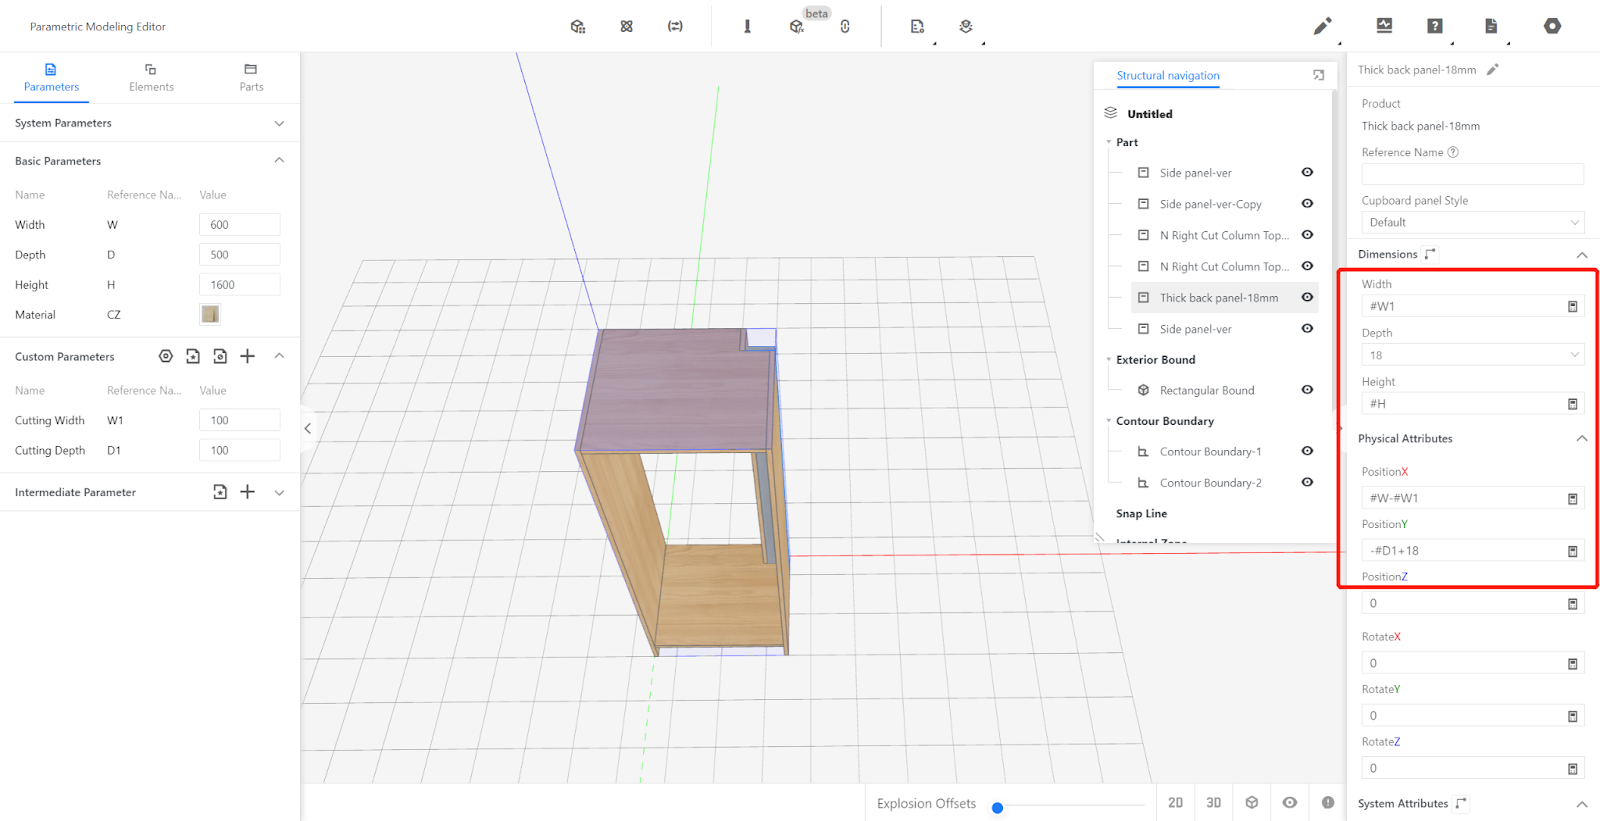
Click on the submodel library - Semi-finished Products Library, call the back panel and set parameters.
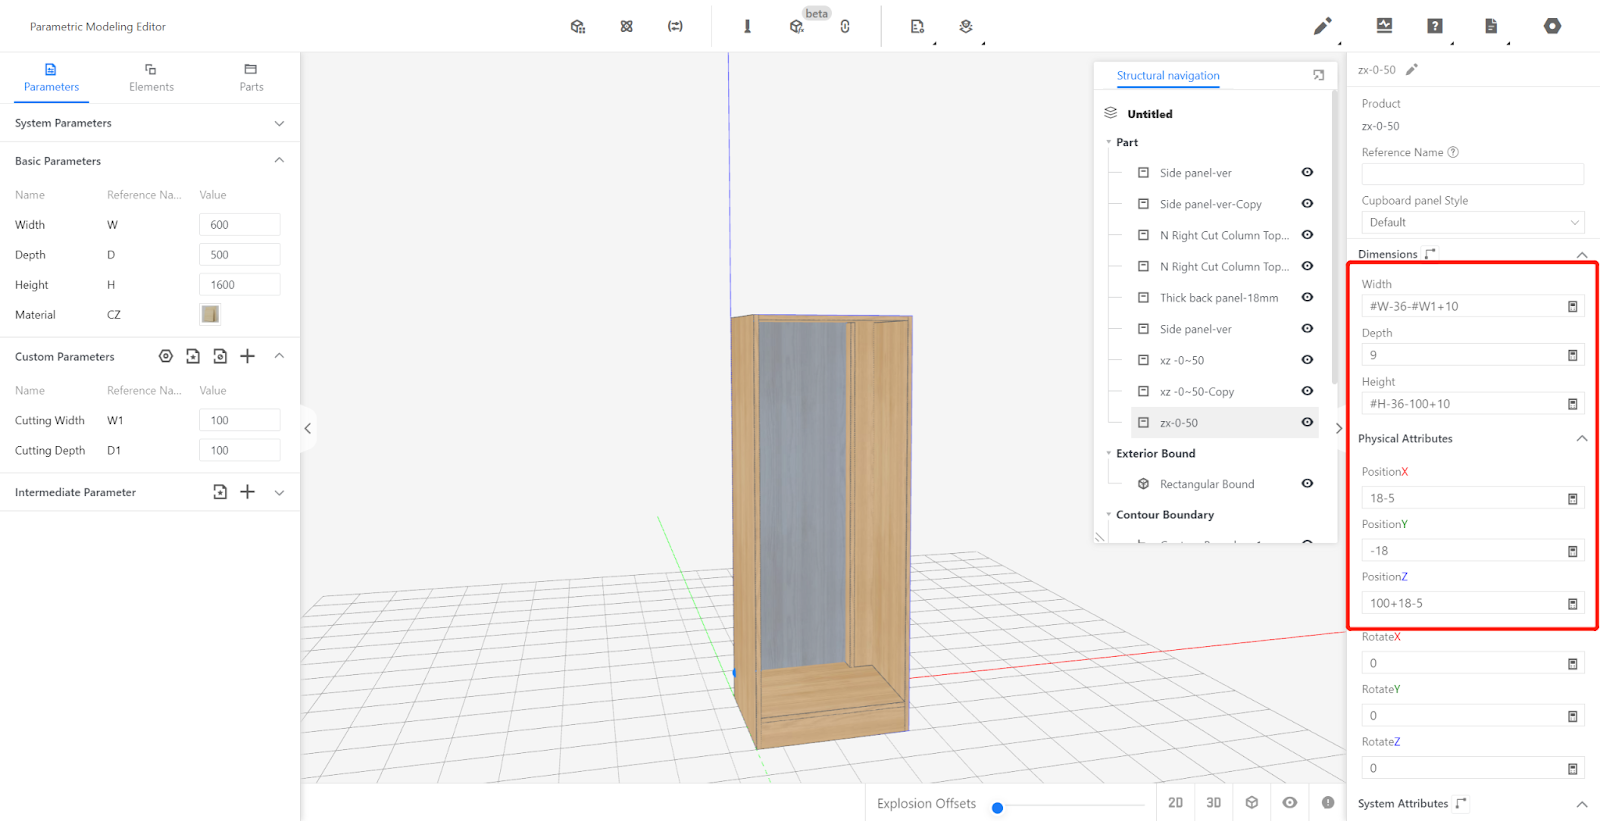
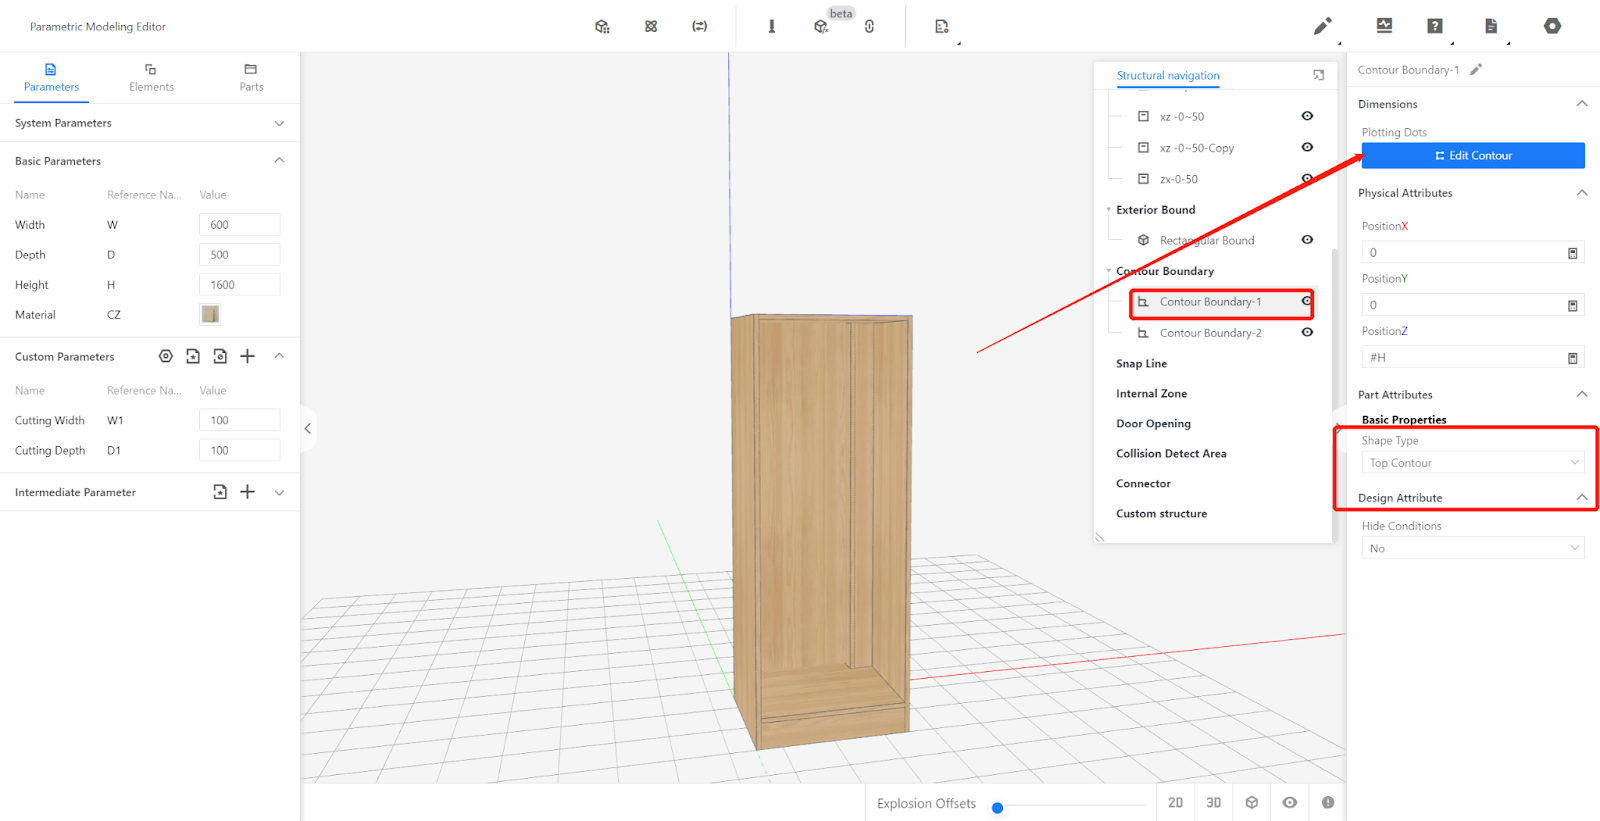
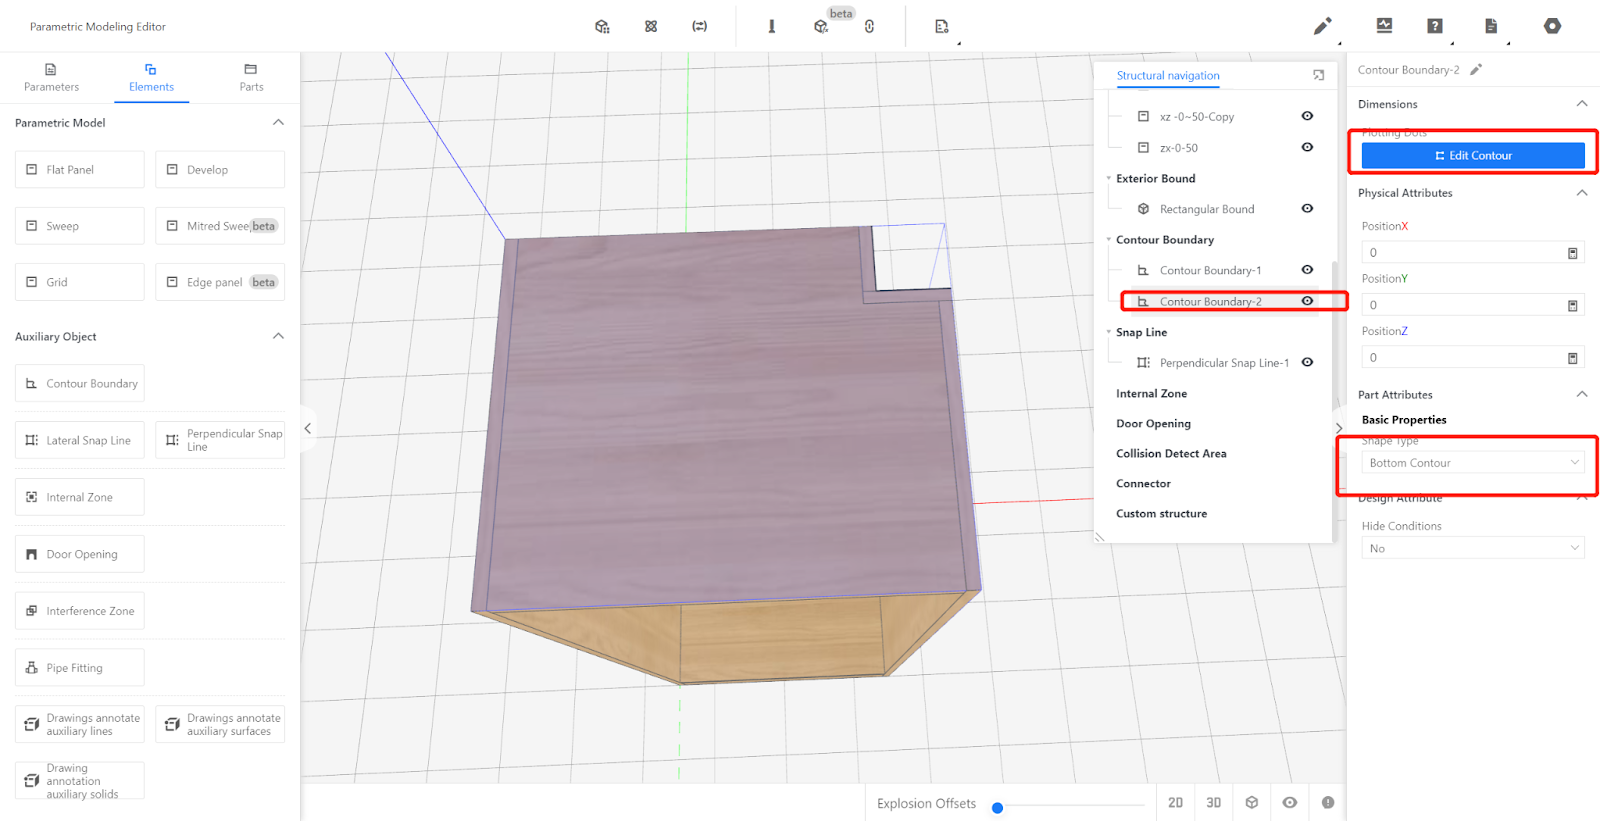
Contour Boundary Settings
Contour Boundary affects the generation of top and bottom moldings. Generally, the Contour Boundary for irregular cabinets need to be readjusted and set.
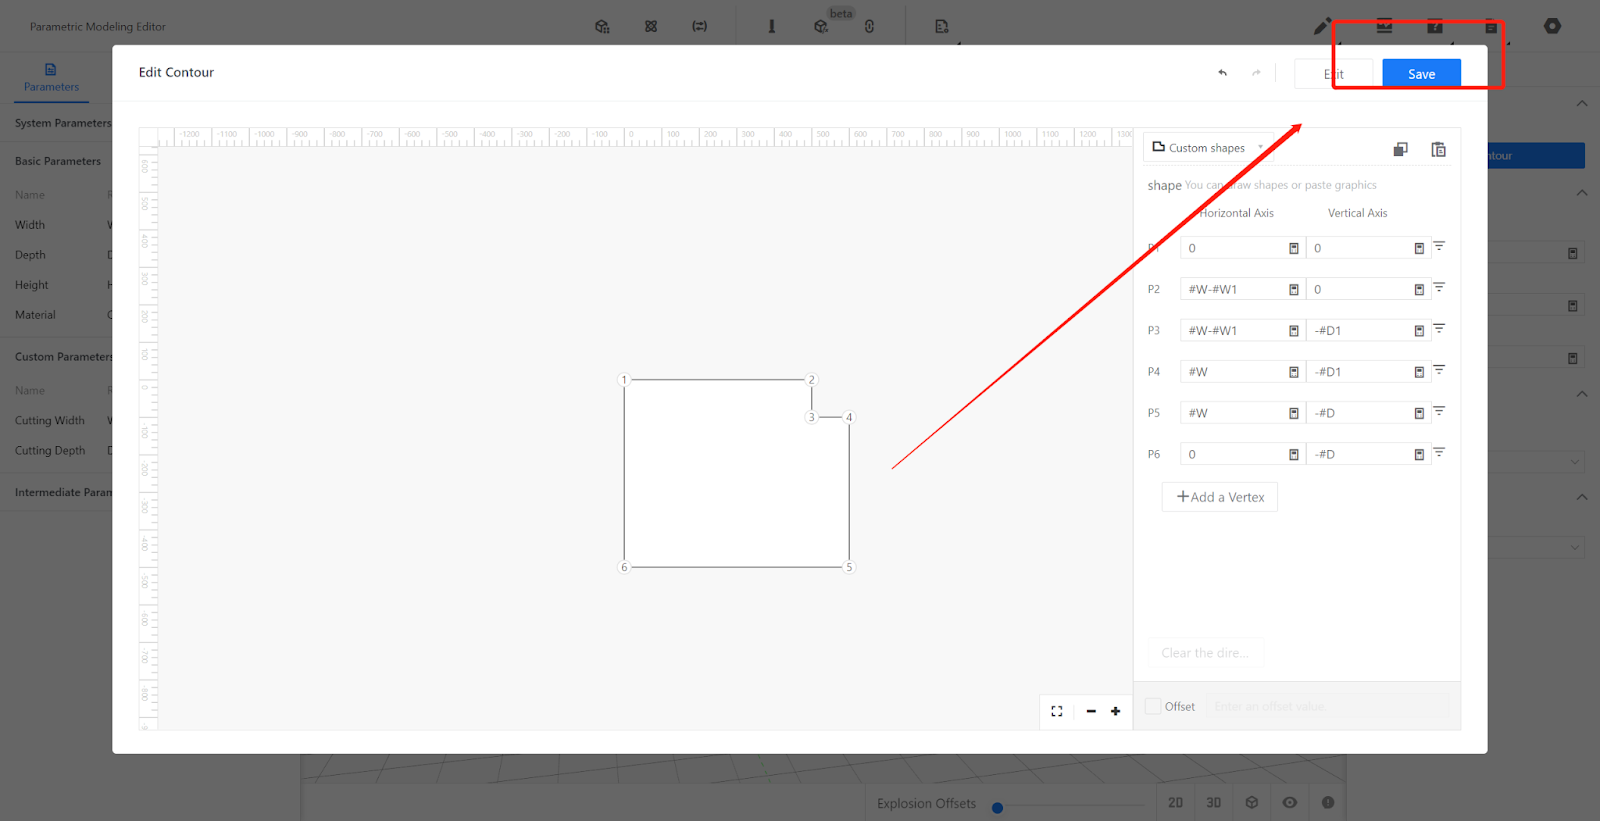
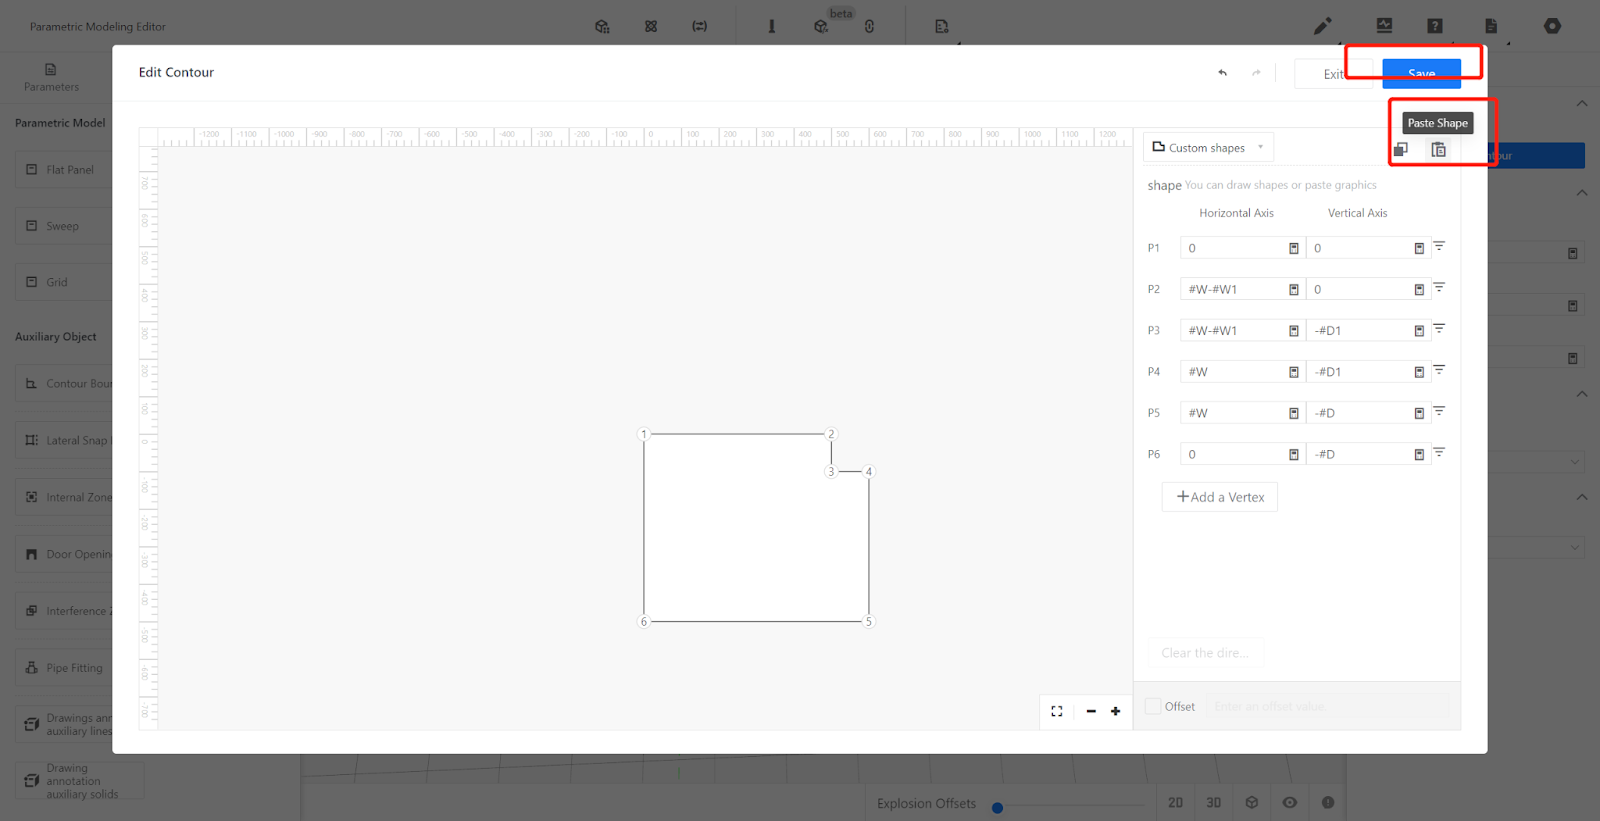
Upper Contour Boundary
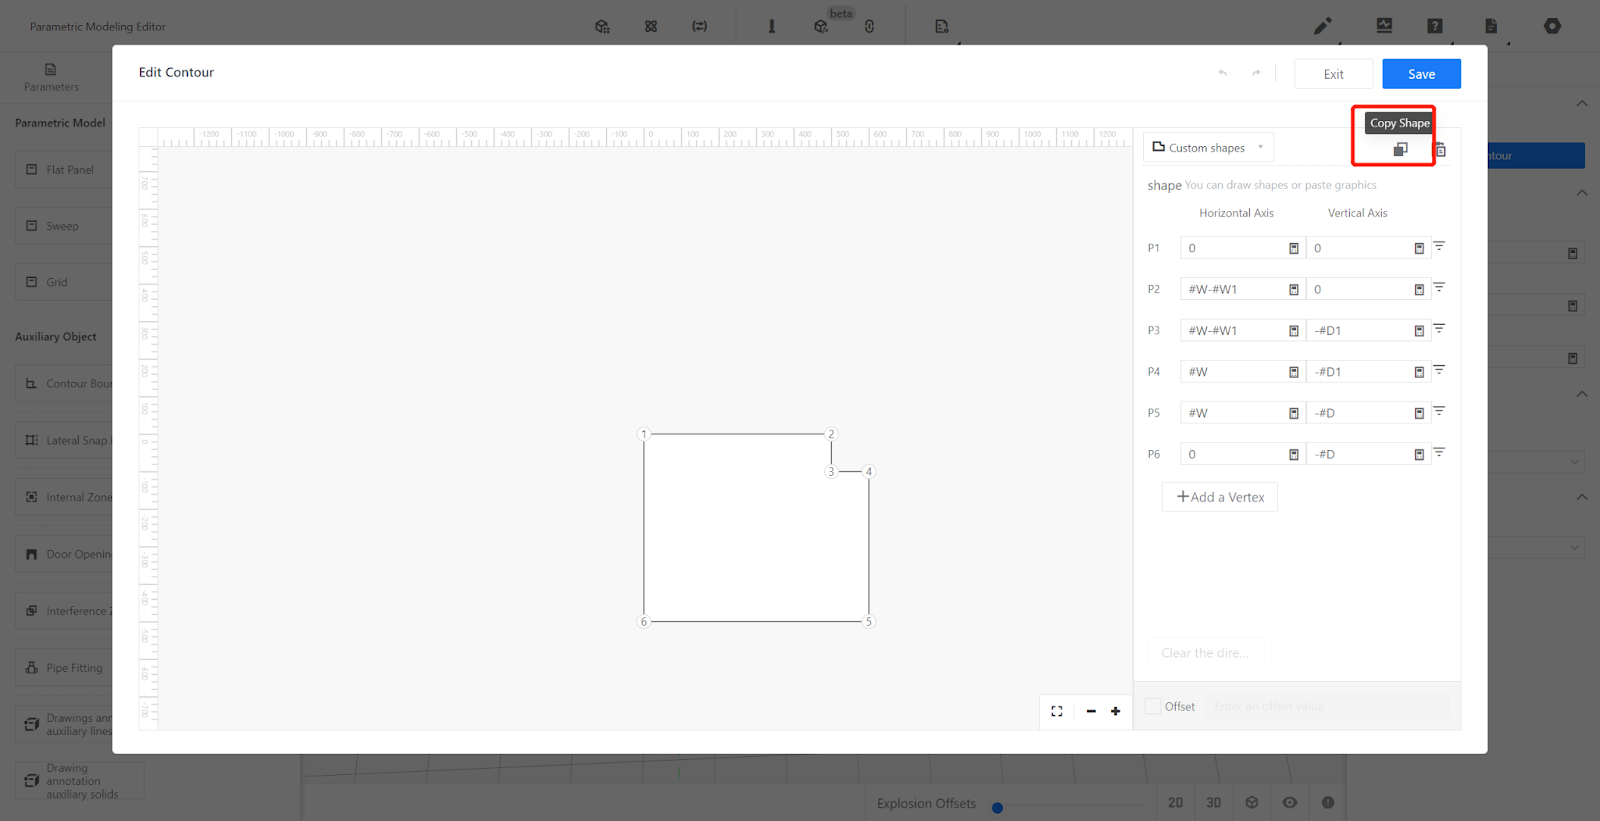
Edit the contour line: point 1 (0,0), point 2 (#W-#W1,0), point 3 (#W-#W1,-#D1), point 4 (#W,-#D1), point 5 (#W,-#D), point 6 (0,-#D) - Save.
Lower Contour Boundary
The contour editing is the same as the upper contour.
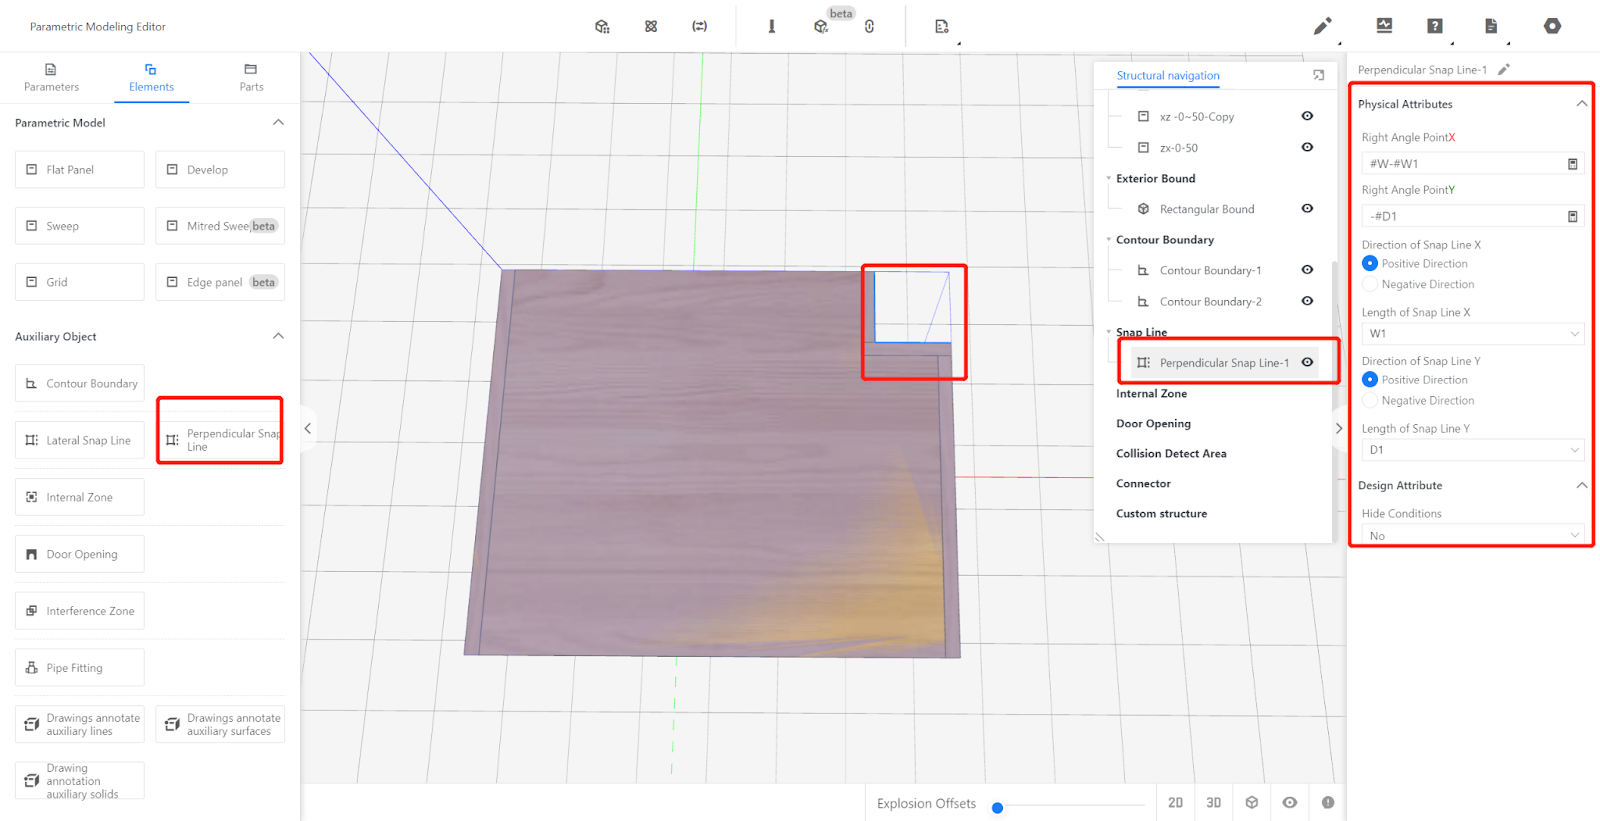
Set right-angled snap lines (used to snap and adapt to the dimensions of walls/columns)
Find the right-angled snap line in the Elements and click to modify its attributes.
IV.Verification
Modify the current values of custom Parameters to test if the model dimensions are correct. Test at least three values: maximum value, minimum value, and a random value within the interval range. After testing, modify the current values to the desired ones and test material replacement by selecting materials. Restore to the default material after testing.
V.Saving and Initializing
Click on the file in the top right corner, select "Save", choose the subdirectory to save it in, give it a name, and click "Save".
In the backend page, find the model, select the model, and choose to initialize it.