- Helpcenter
- Kitchen, Bathroom, Closet, Custom Modelling
- Parametric Model
-
Getting Started
-
Model Library & Asset Management
-
News & Product Update
-
Kitchen, Bathroom, Closet, Custom Modelling
-
[Enterprise] 3D Viewer & Virtual Showroom
-
Payment & Billing
-
Version 5.0
-
Upload & Export
-
Personal Account
-
Photo & Video Studio
-
Material&Component
-
Floor Plan Basic
-
Images/Videos & Light
-
Tips & Tricks
-
Privacy & Terms
-
Inspiration Spaces
-
Testimonials
-
Construction Drawings
-
AI Tools
-
Customer Service Team
-
Projects Management
-
FAQ
-
Coohom Online Training
-
Lighting Design
-
Coohom Architect
【Beginner Guide】Light Rail Molding Uploading
I. Definition
The Light Rail Molding is the basic molding that forms any lighting shape.
II. Operation Steps
Go to Custom Cabinet - Upload Material.
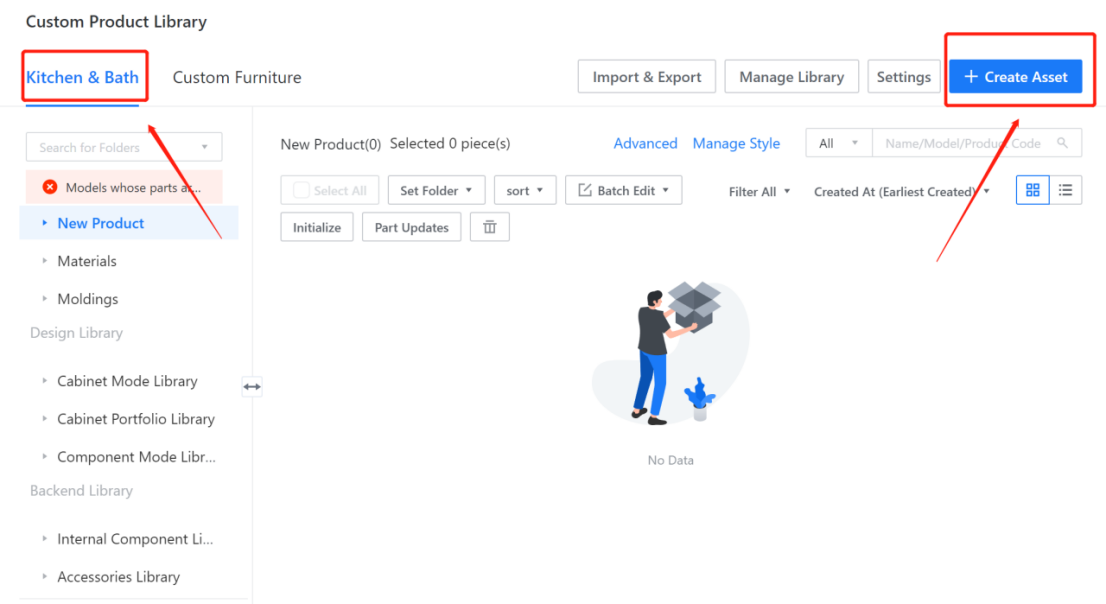
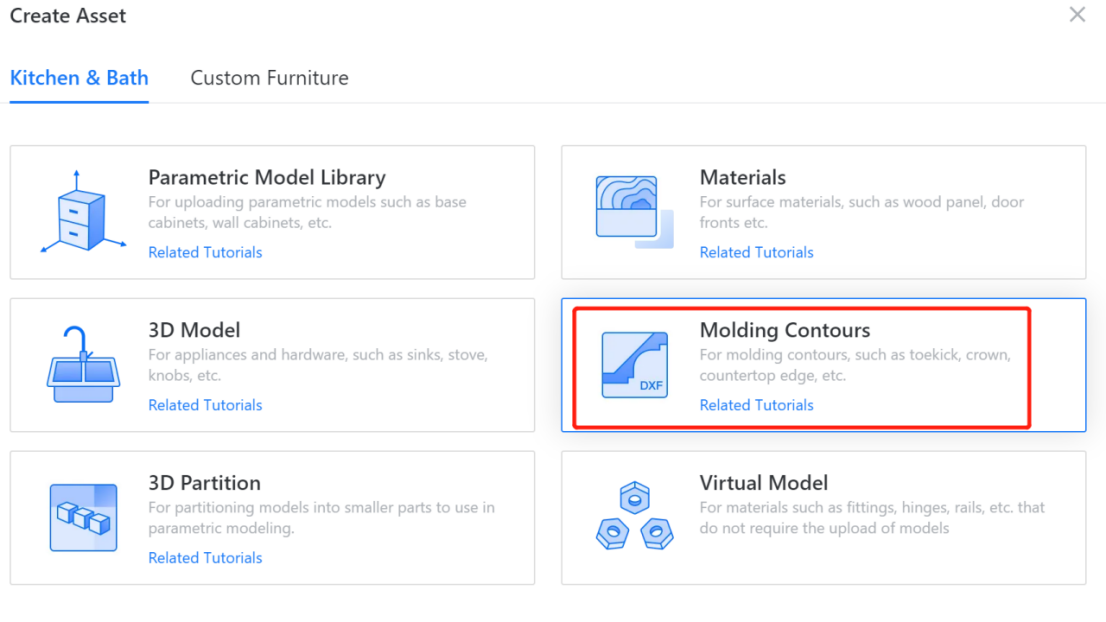
Select the option to upload the profile molding.
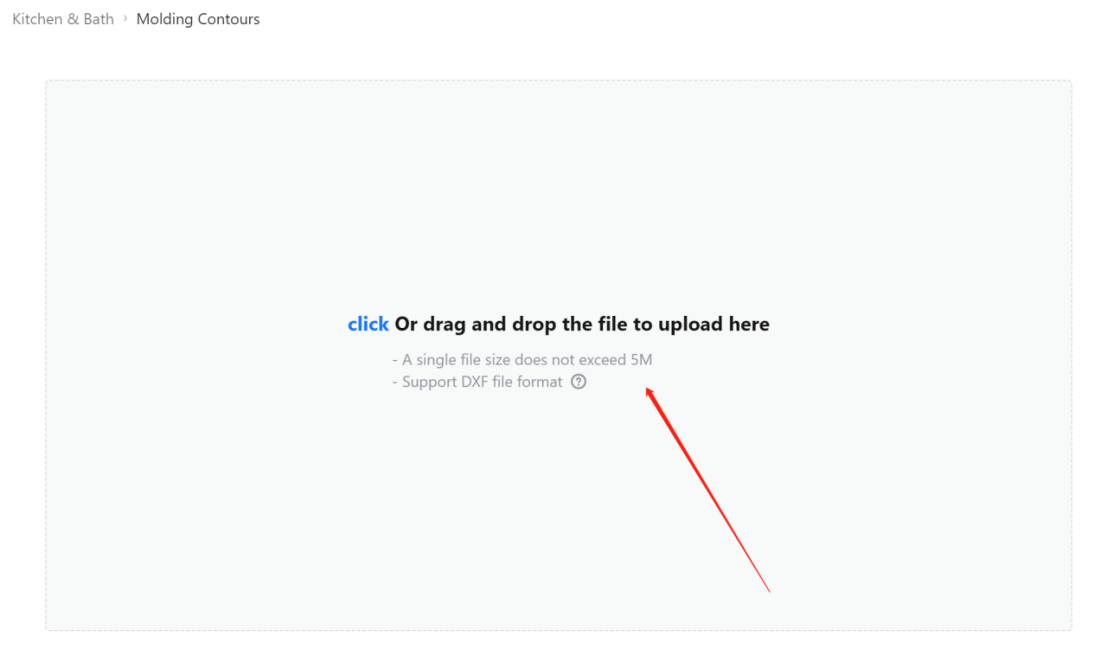
Click on "Add File" and choose the corresponding profile or drag and drop the profile directly.
Modify the name and select "Light Rail Molding" as the molding type.
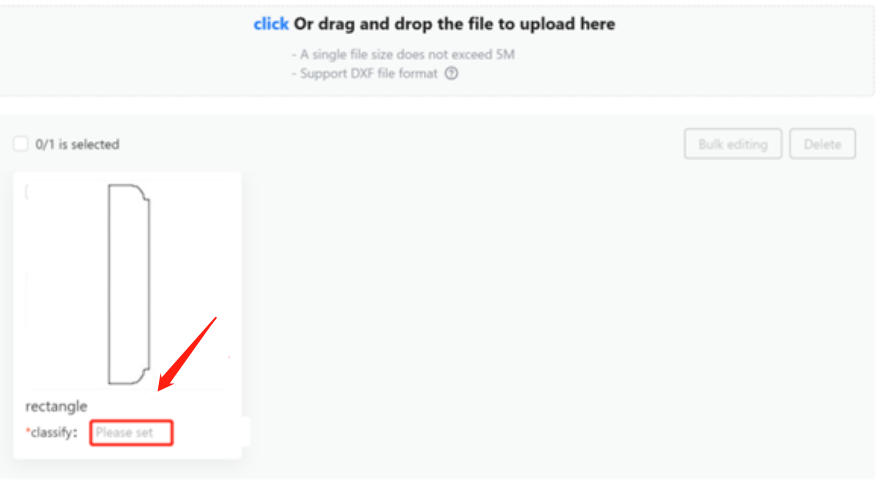
Adjust the profile height to a whole number, select the appropriate category for saving, leave the extended parameters blank, and click "Complete Upload."
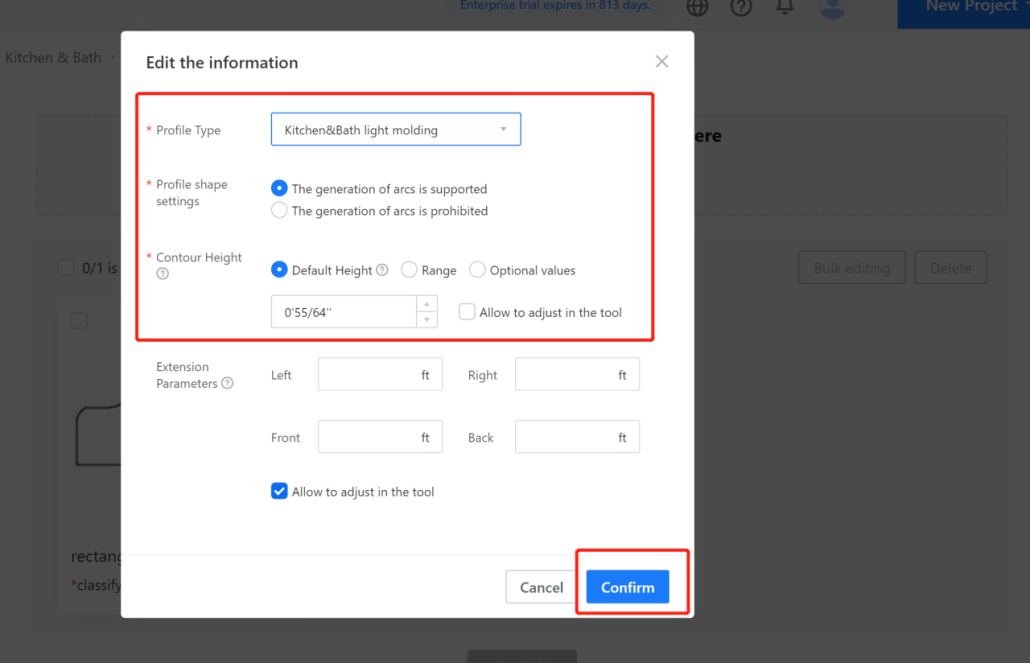
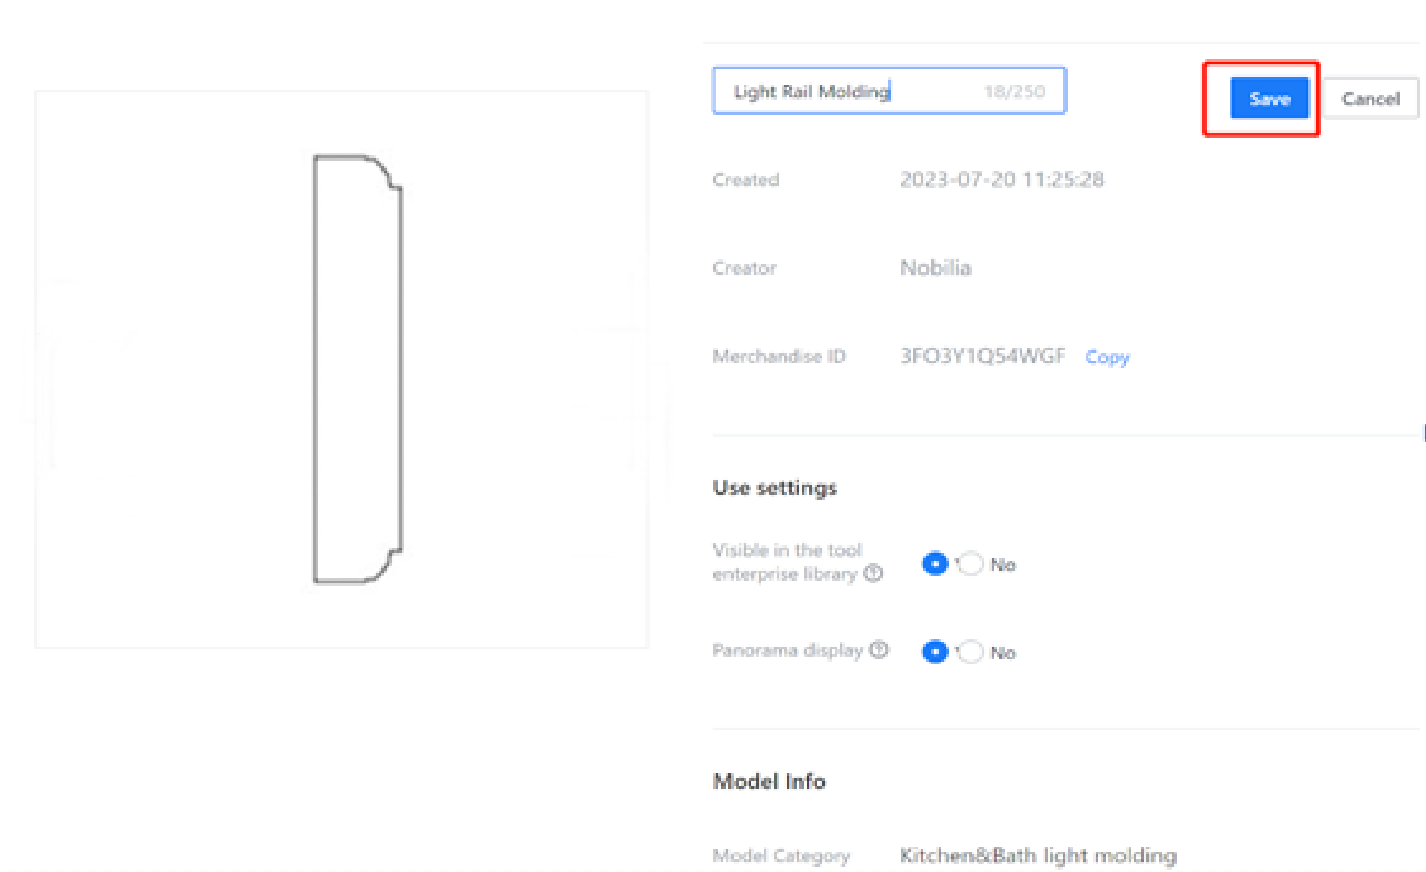
On the Edit Information page, you can modify the preview image of the profile molding and adjust the height and extended parameters of the profile molding.
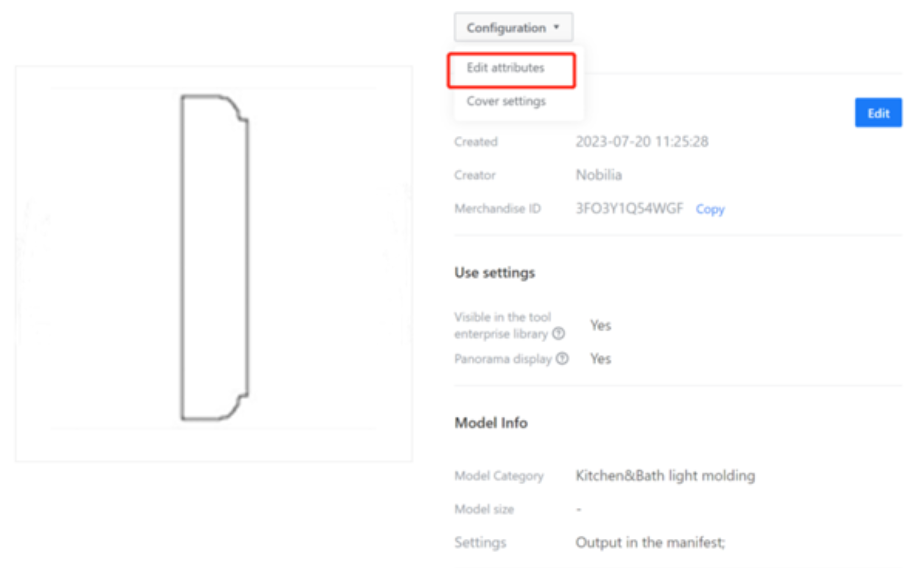
Click on "Modify Preview Image," choose the desired preview image, and click "Save". (Note: Modifying the preview image is for better identification of the profile information but it is optional.)
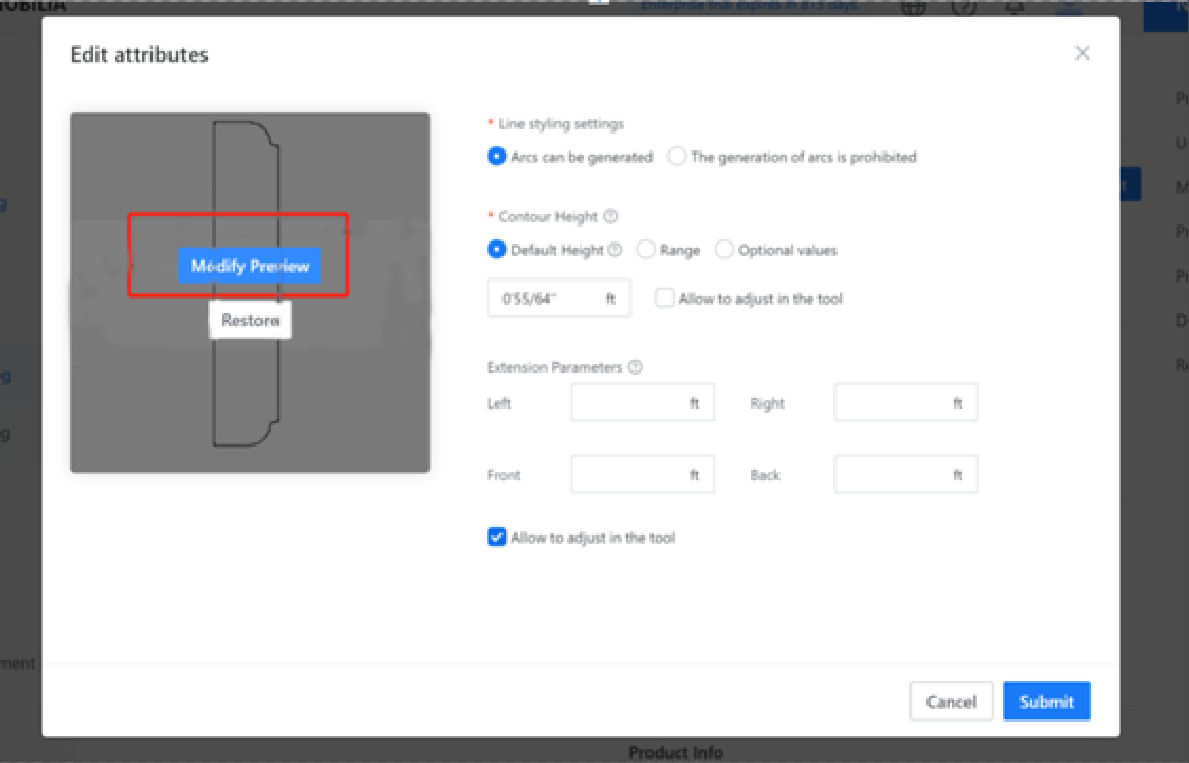
Click "Save" to complete the model upload.
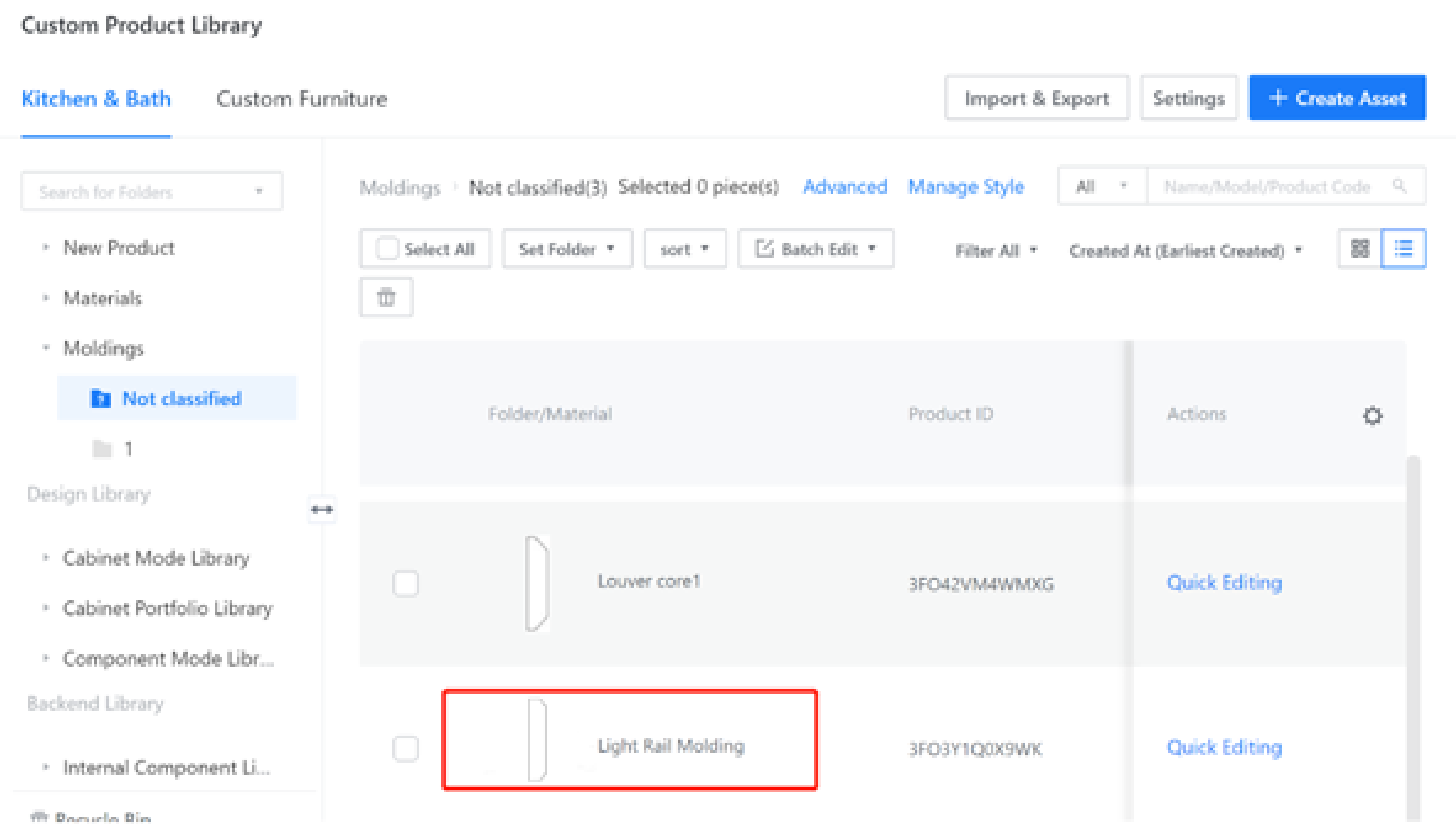
View the uploaded profiles in the corresponding category.
Application of the Light Rail Molding:
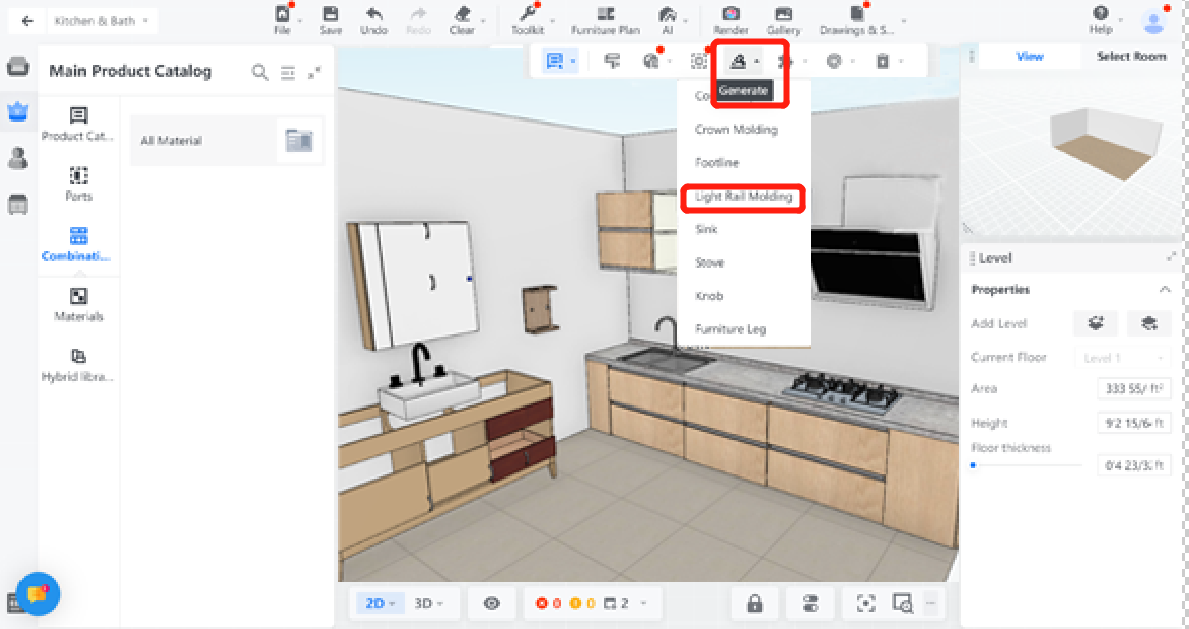
In the front-end tool, under Custom Cabinet / Cabinet Mode?, click on "Generate - Light Rail Molding," select the appropriate generation method, cabinet, lighting style, and parameter settings, then click "Confirm."
