-
Definition
Definition
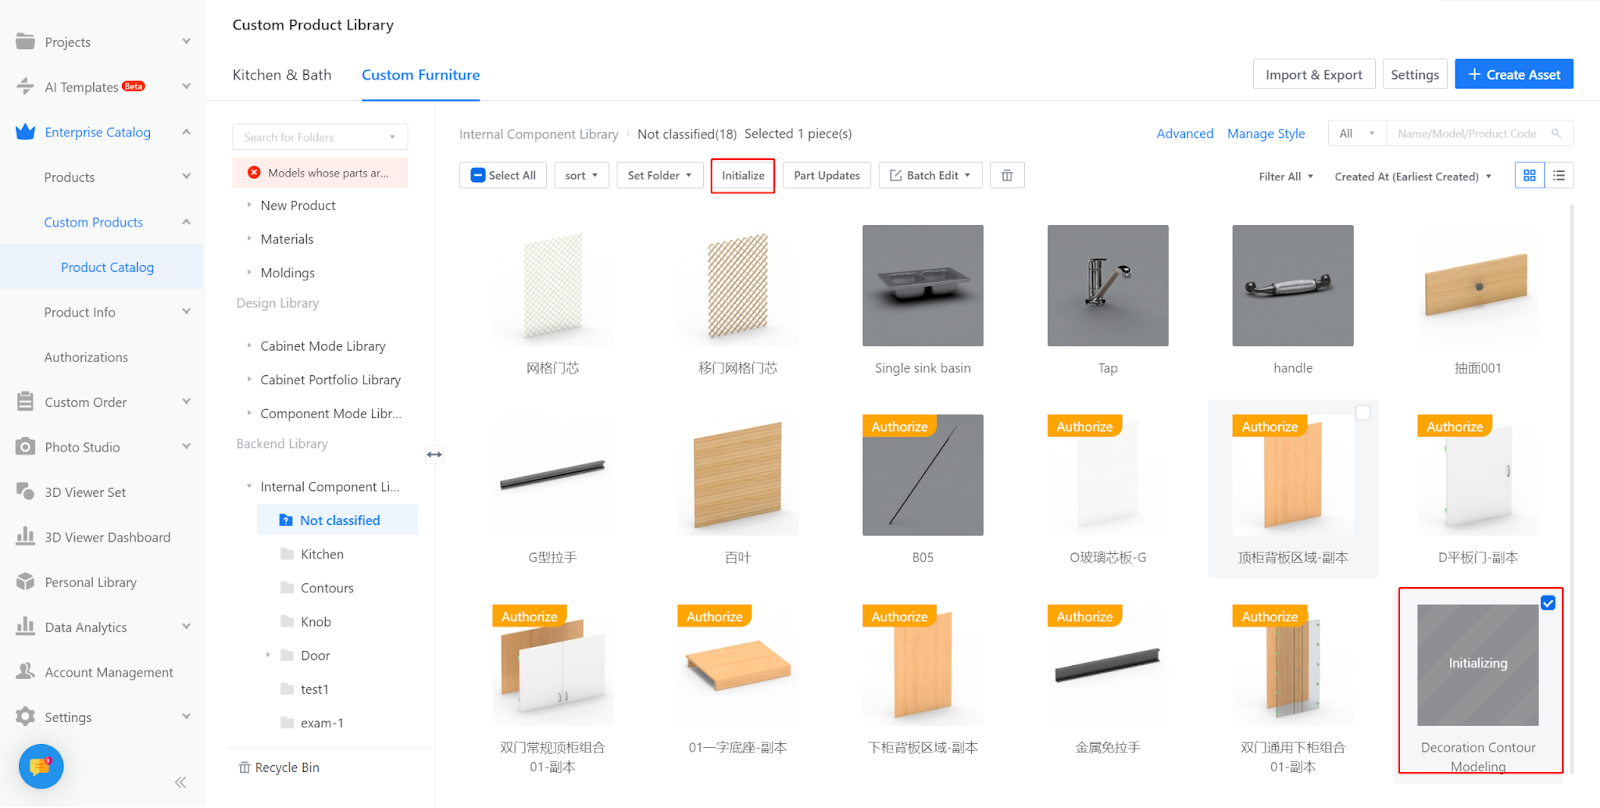
Create decorative lines that can have their materials and styles replaced independently, commonly used for gilded door panels.
-
Create Location
Create Location
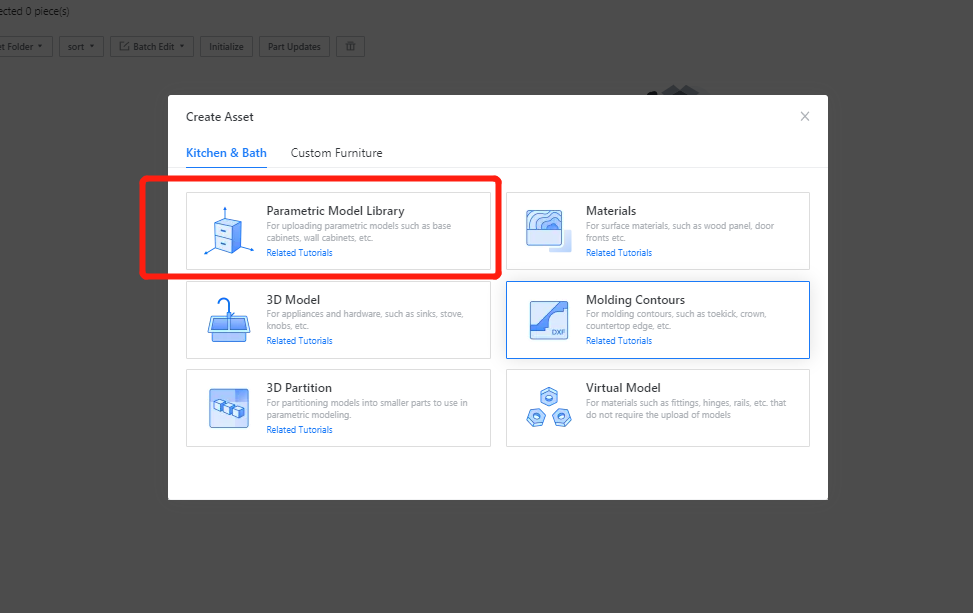
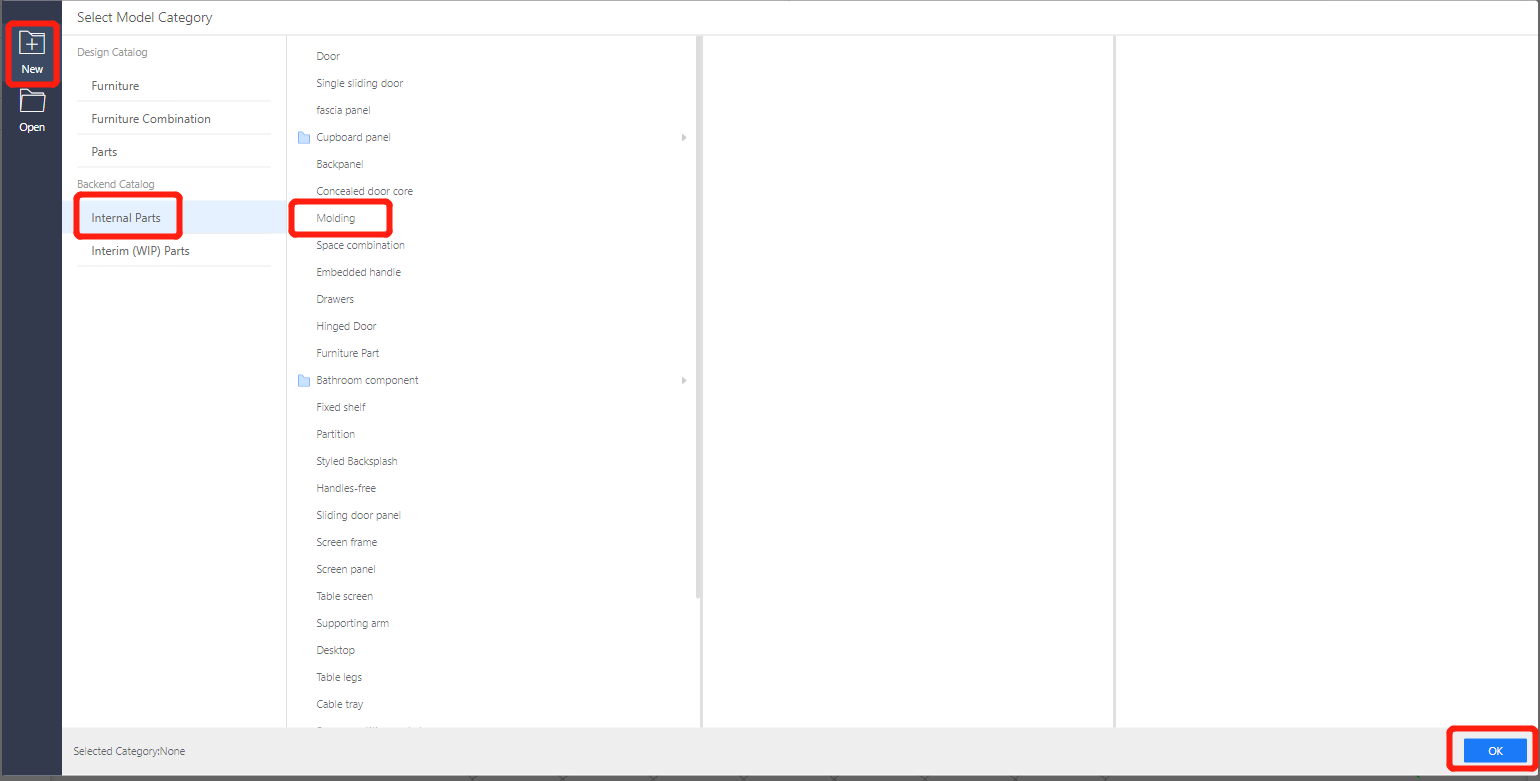
Enterprise Backend—Kitchen&Bath/ Custom Furniture —Create Asset—Parametric Model Library—New—Internal Parts—Molding—OK
-
Parameter Setting
Parameter Setting
Custom Variables (Using Gilded Decorative Line for Door Panels as an Example):
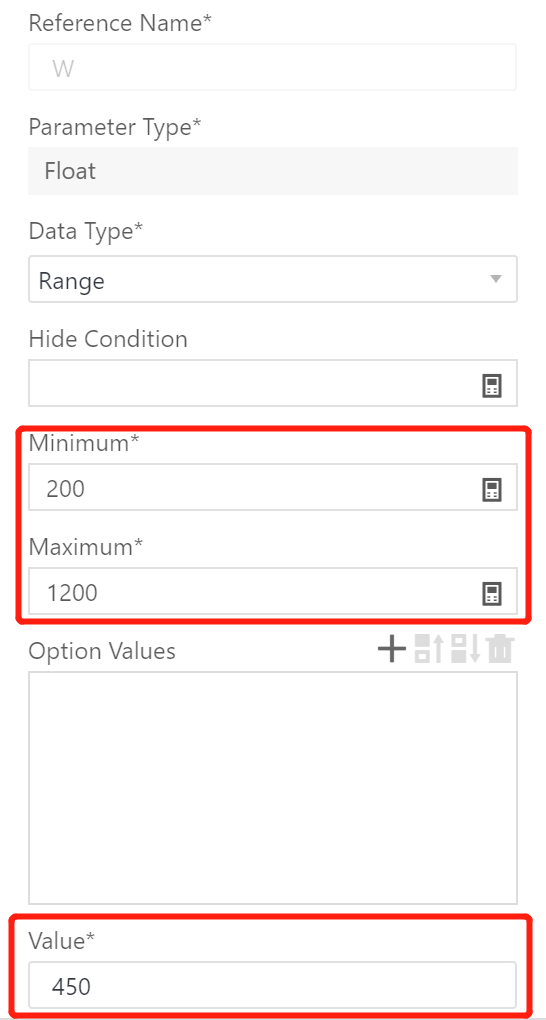
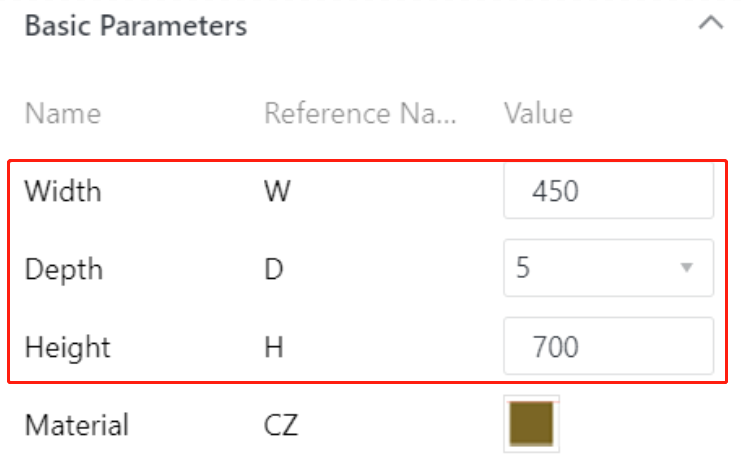
1. Width (W) - Represents the dimension of the model in the X-axis. The value type can be set as optional or within a range (e.g., range of 200-1200, current value is 450).
2. Depth (D) - Represents the dimension of the model in the Y-axis. The value type is set as optional (e.g., optional value of 5, current value is 5. Actual factory process dimensions should be used).
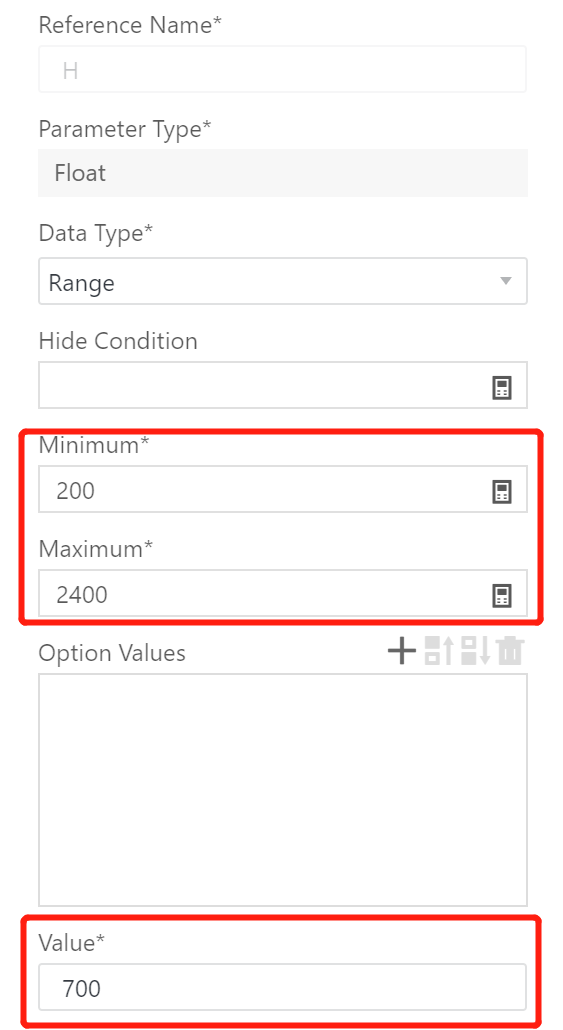
3. Height (H) - Represents the dimension of the model in the Z-axis. The value type can be set as optional or within a range (e.g., range of 200-2400, current value is 700).

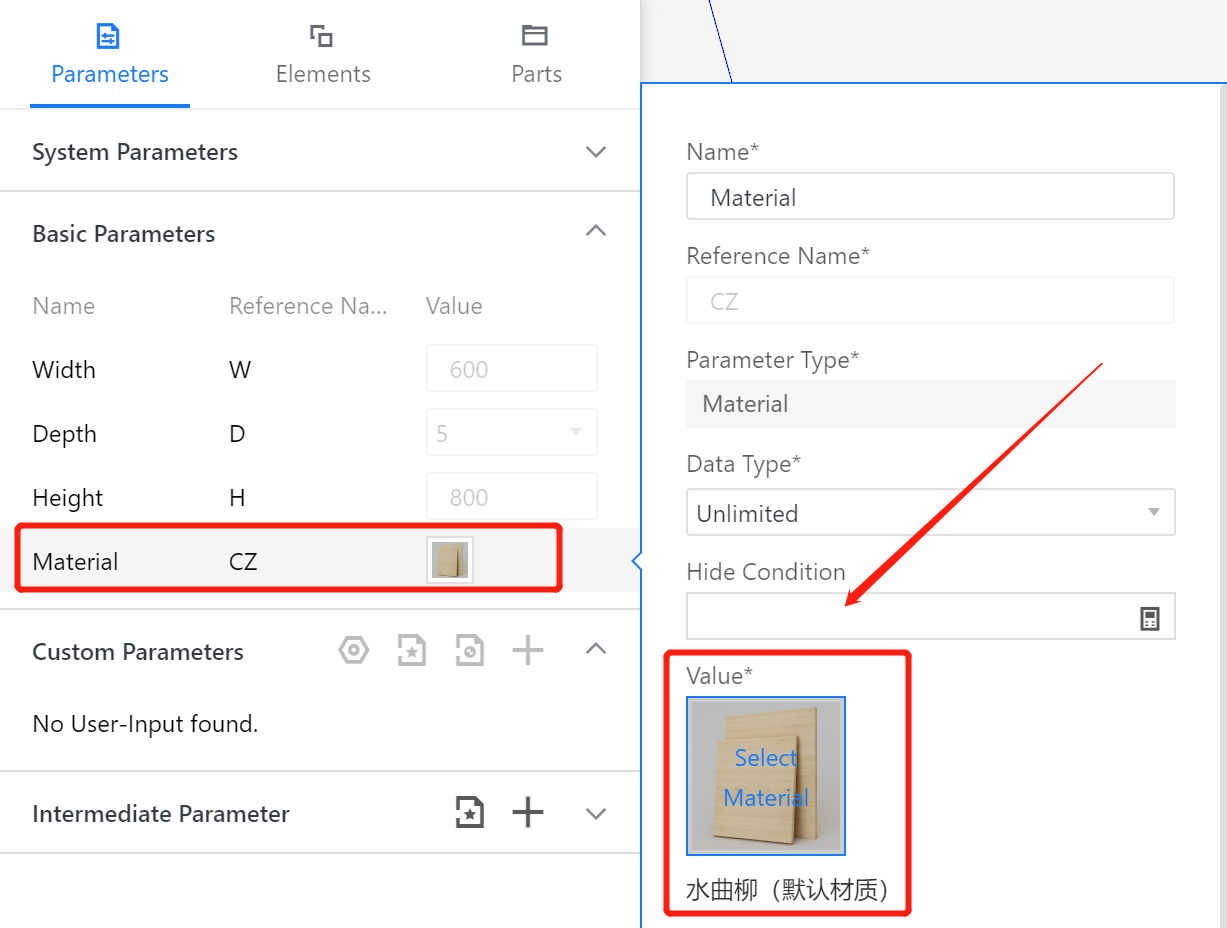
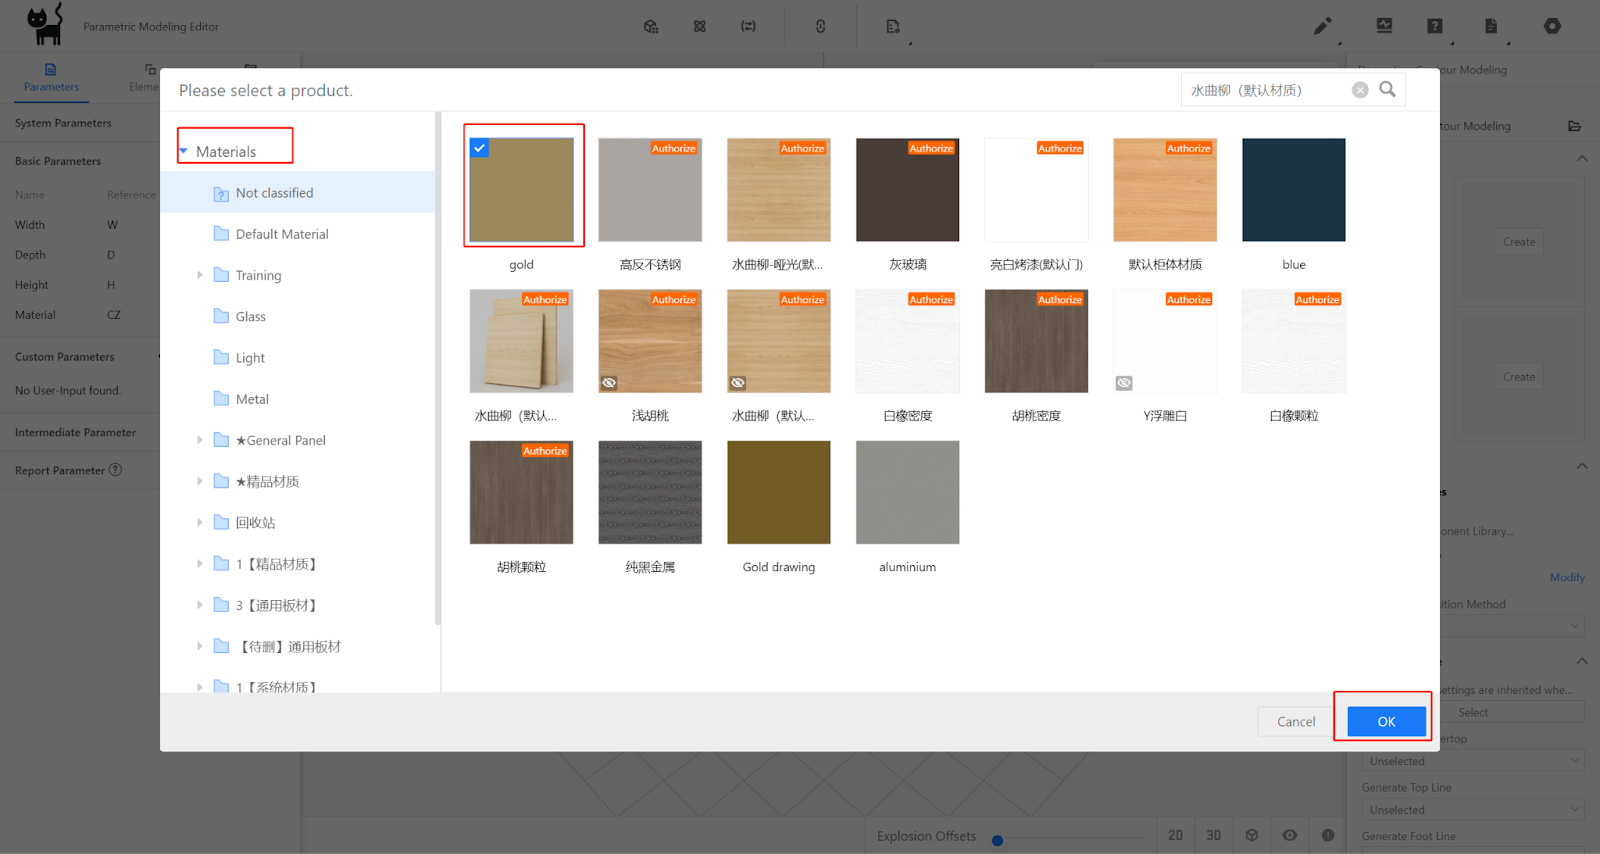
4. Material selection: Choose one default material that represents the color of the model.
-
Building Model
Building Model
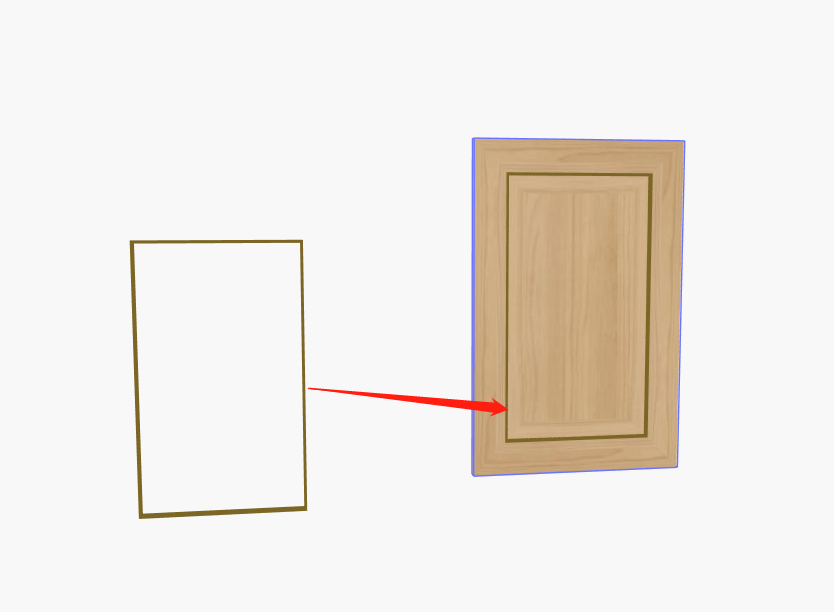
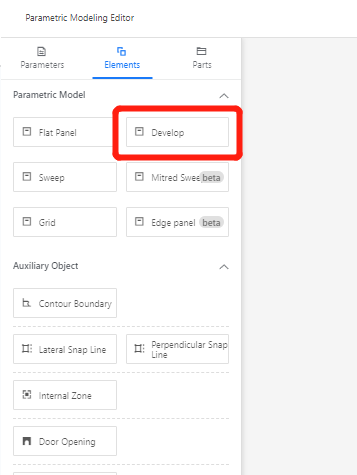
1. Insert the pattern from the component library.
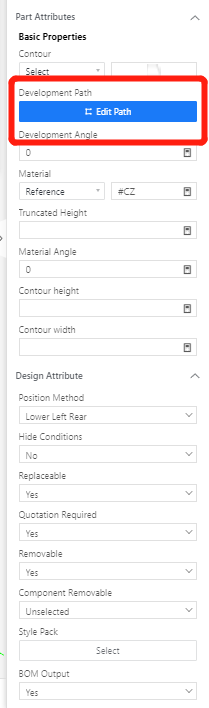
2. Select the contour line for the decorative line shape.
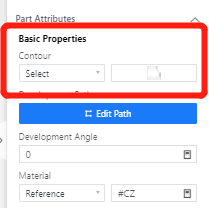
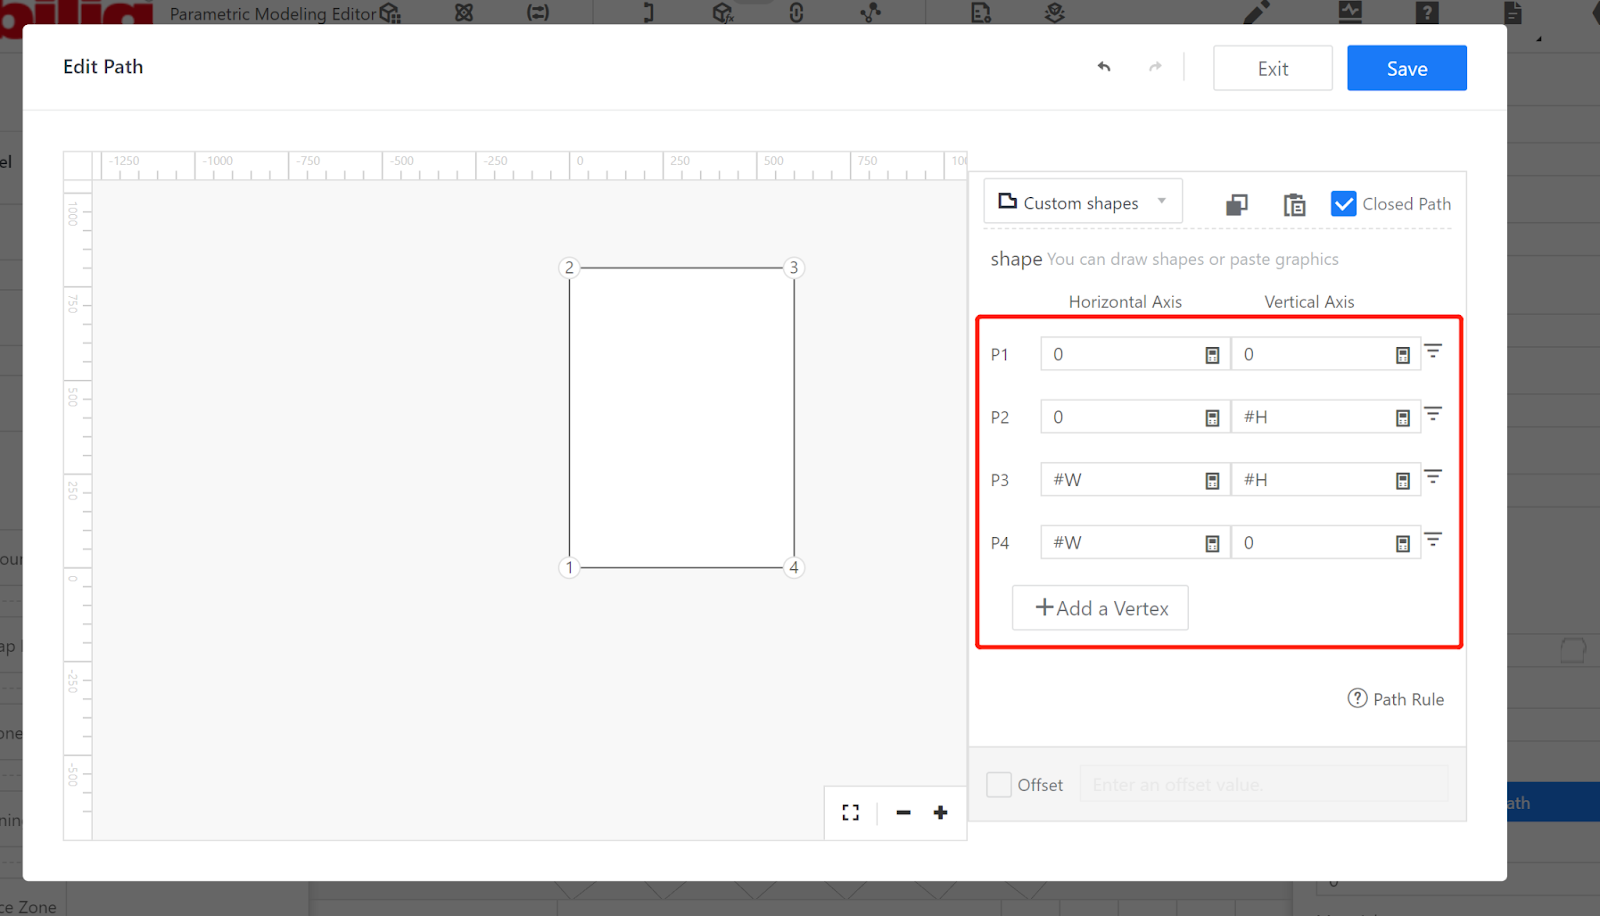
3. Edit the pattern path by using point-to-point sketching and save the changes.
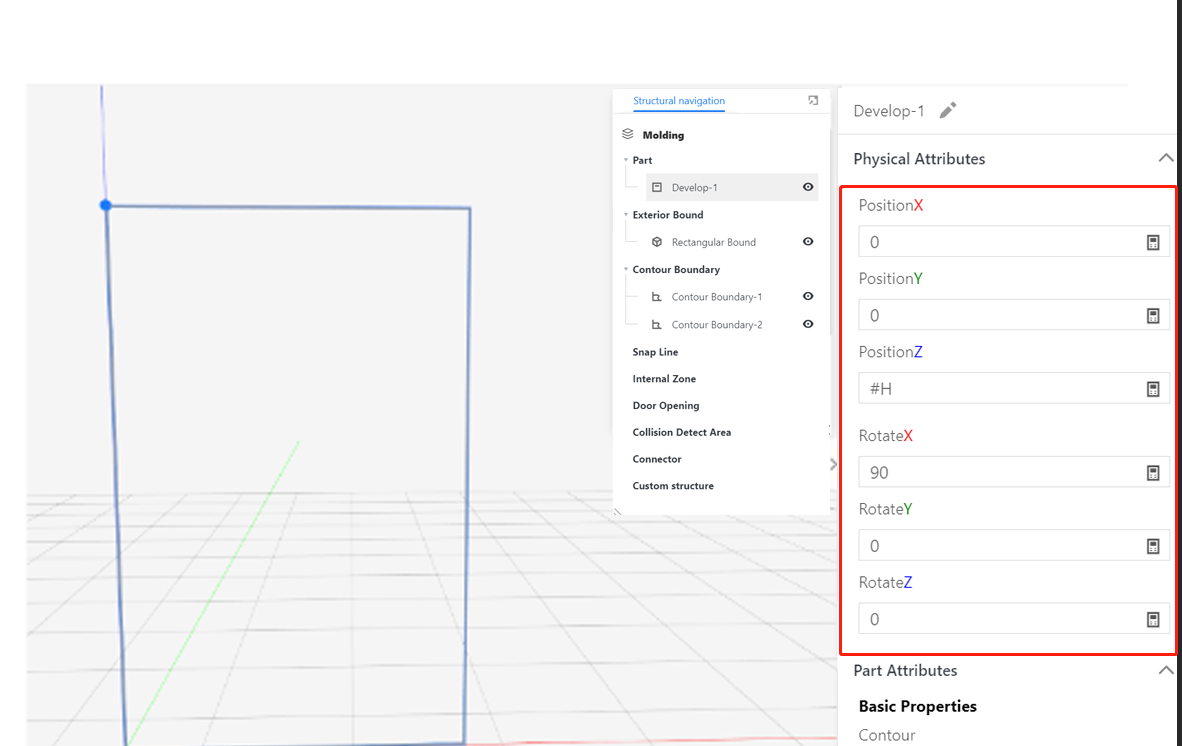
4. Set the physical properties:
Position X: 0; Position Y: 0; Position Z: #H.
Rotation X: 90; Rotation Y: 0; Rotation Z: 0.
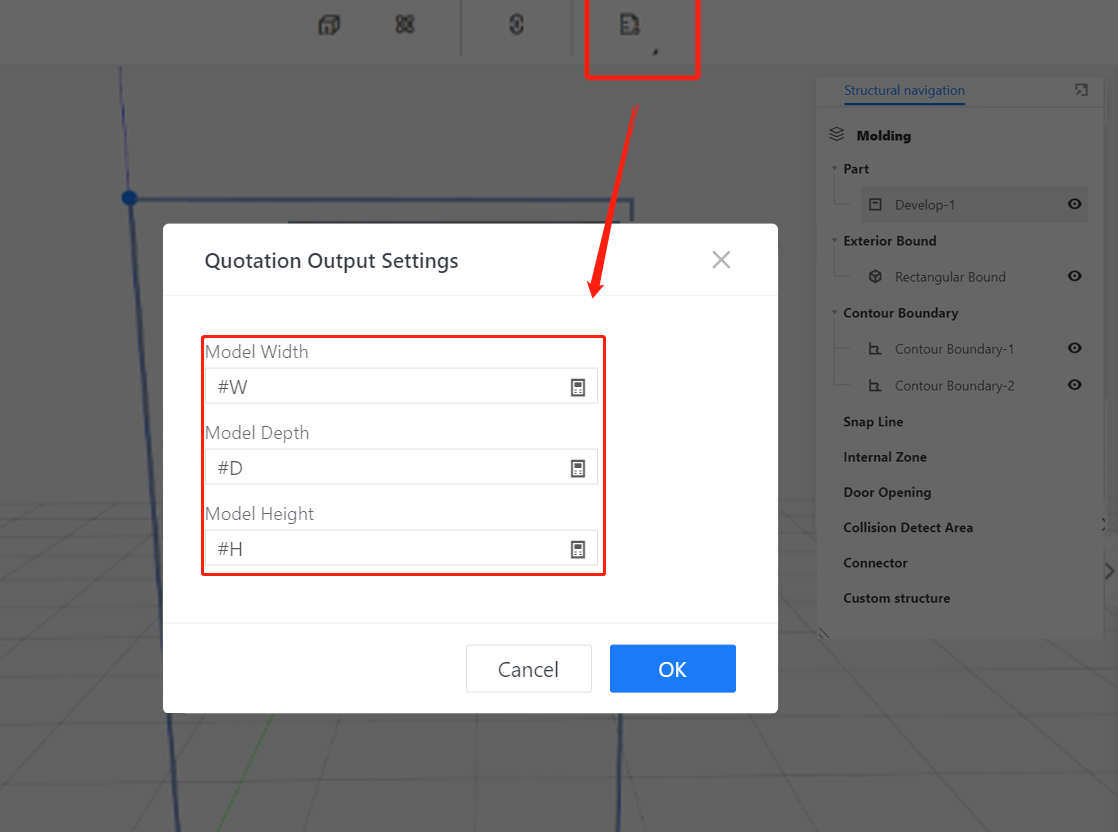
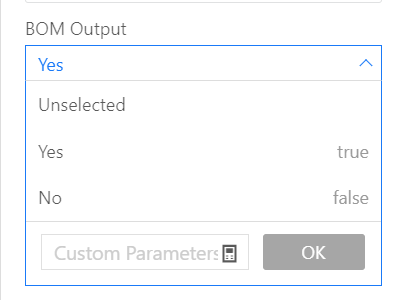
5. Set the output properties of the panel according to the manufacturing requirements (e.g., regular panel output dimensions, grain direction dimension * perpendicular to grain direction dimension * thickness). If you want to display the dimensions of the decorative line in the quotation list, select "Yes"; otherwise, select "No".
6. Click on the material and select the uploaded gold material texture.
-
Building Model
Building Model
4. Check And Save
1. Check the extreme dimensions of the gilded decorative line to see if the model changes correctly.
2. After confirming that everything is correct, click on the file in the top-right corner and select "Save". Choose the desired subdirectory for saving, provide a name for the file, and click on "Save".
3. Go to the backend page and locate the model. Select the model and choose "Store in Inventory" or "Complete".