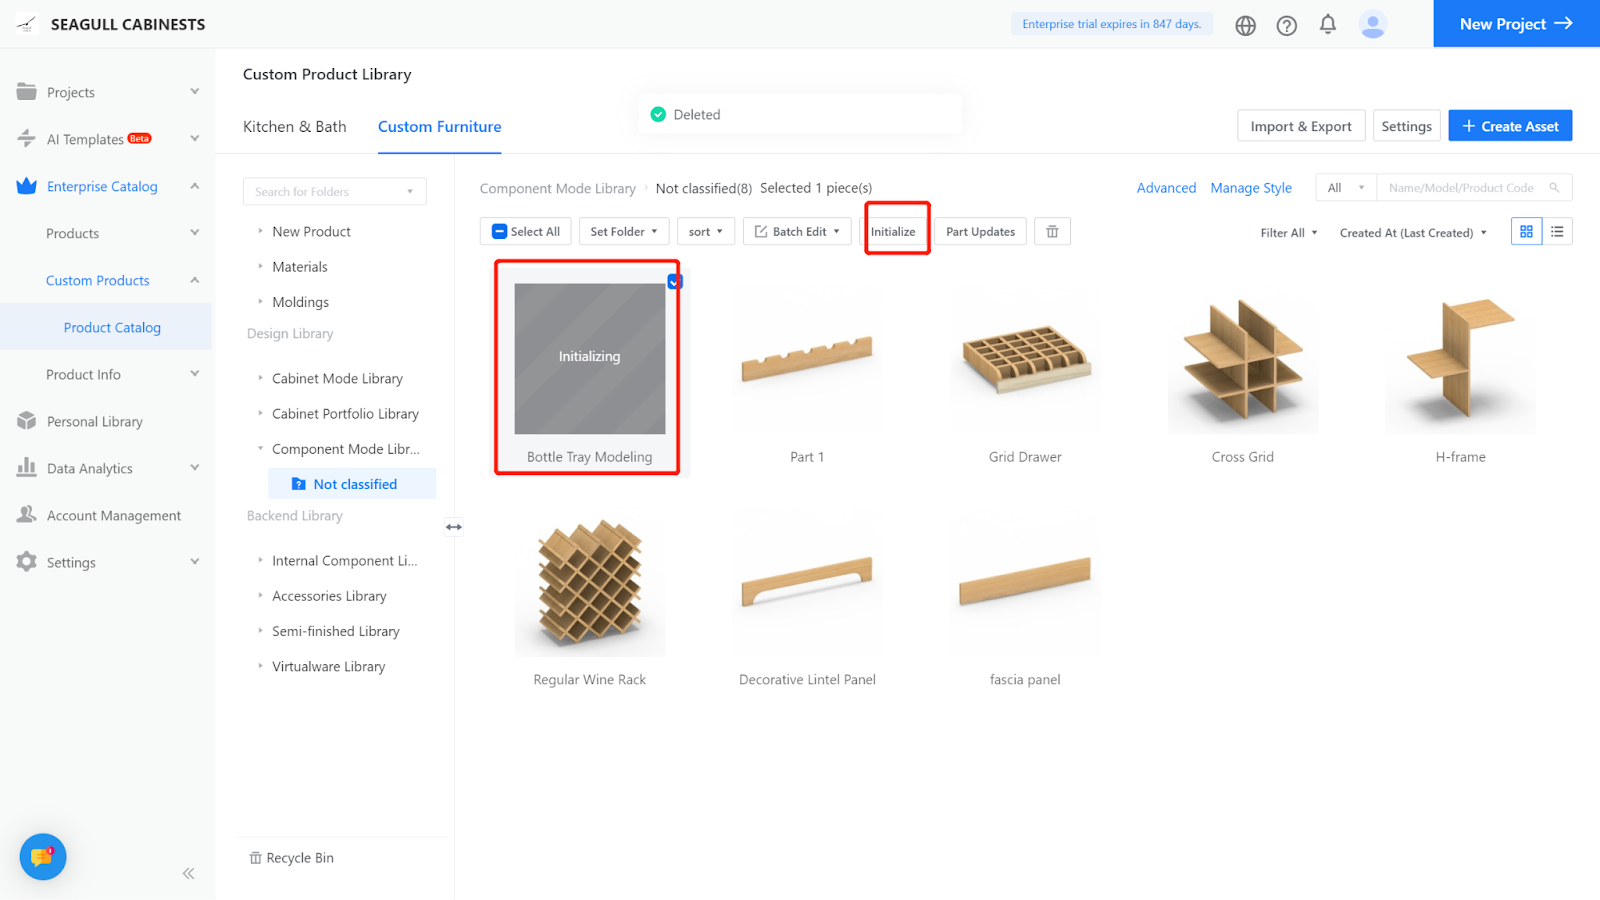
I.Case Presentation
We will model a standard bottle tray as an example (with a fixed height of 82, and specific arc sizes - a small arc in the front with a radius of 20 and a larger arc in the back with a radius of 40).
II.Operation Steps
Firstly, save the components of this model separately in the semi-finished products library.
The composition of the parts is as follows:
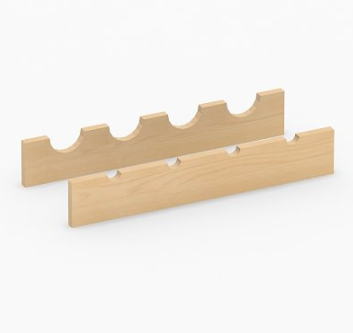
(Components 1 and 3: flat panels, Component 2: flat panel with defined points + array)
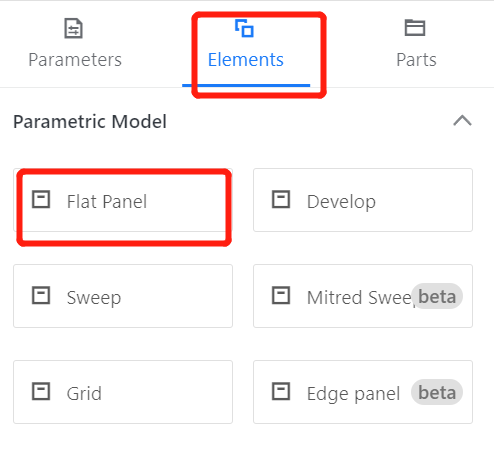
1.1. Create Location:
Custom Furniture —Create Asset—Parametric Model Library— New—
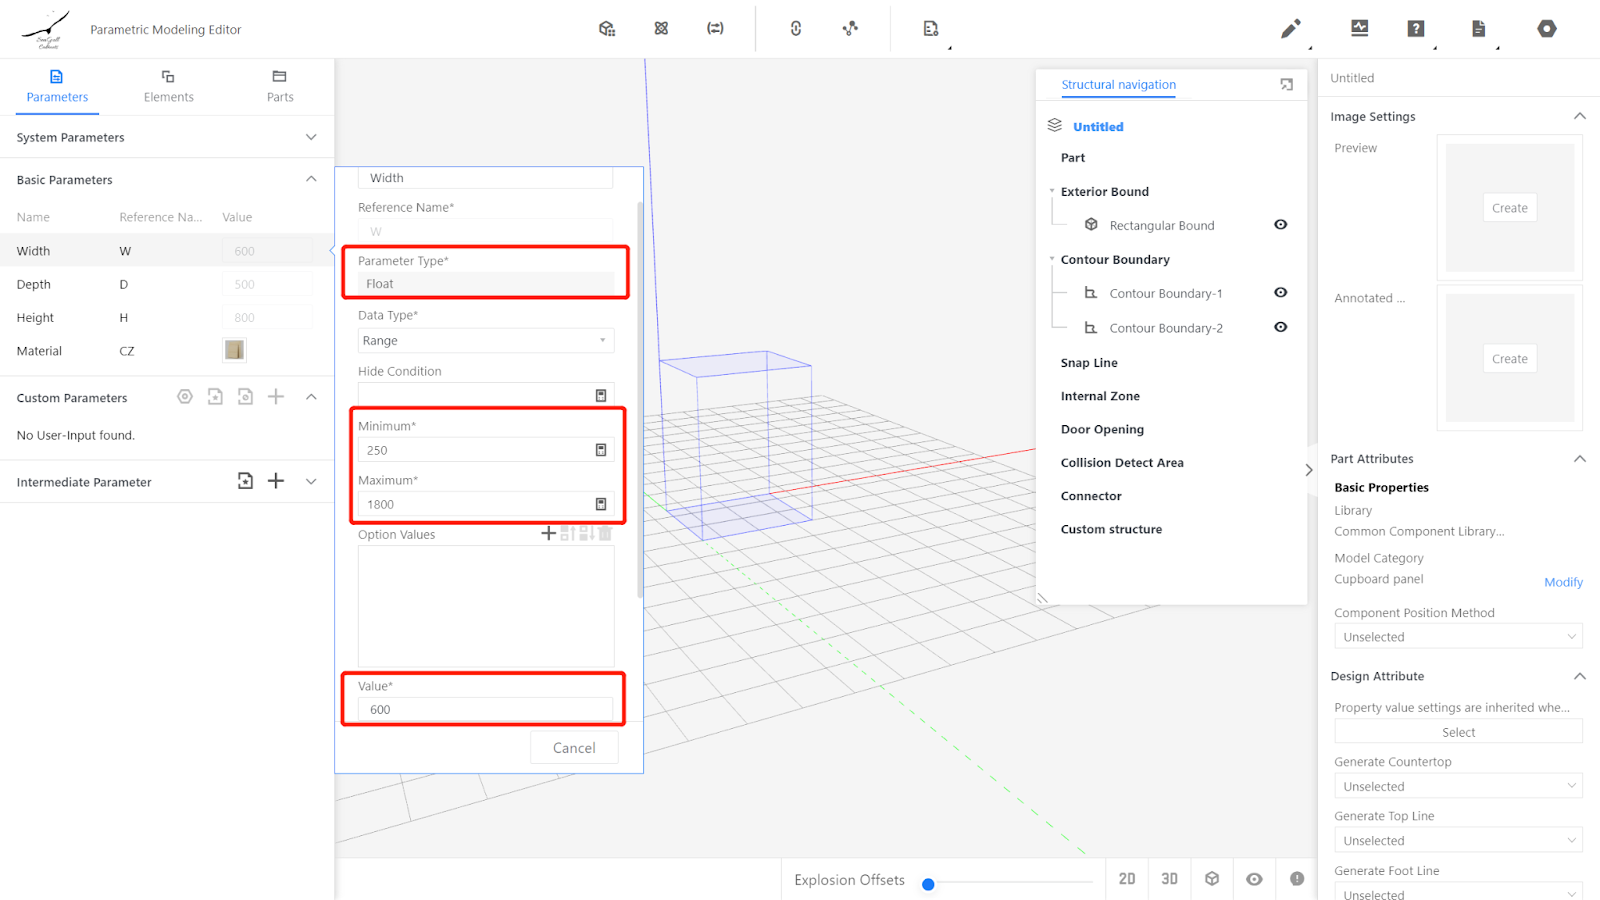
1.2. Set Parameters
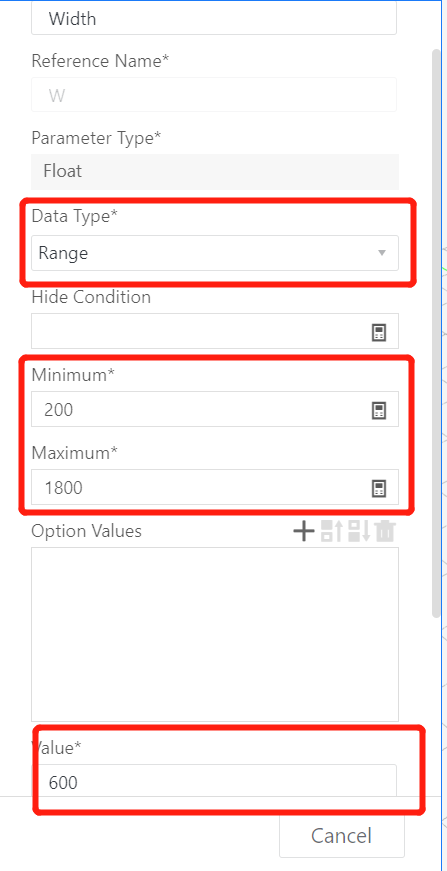
Width: Value Type: Range, Maximum Value: 250, Minimum Value: 1800, Current Value: 600
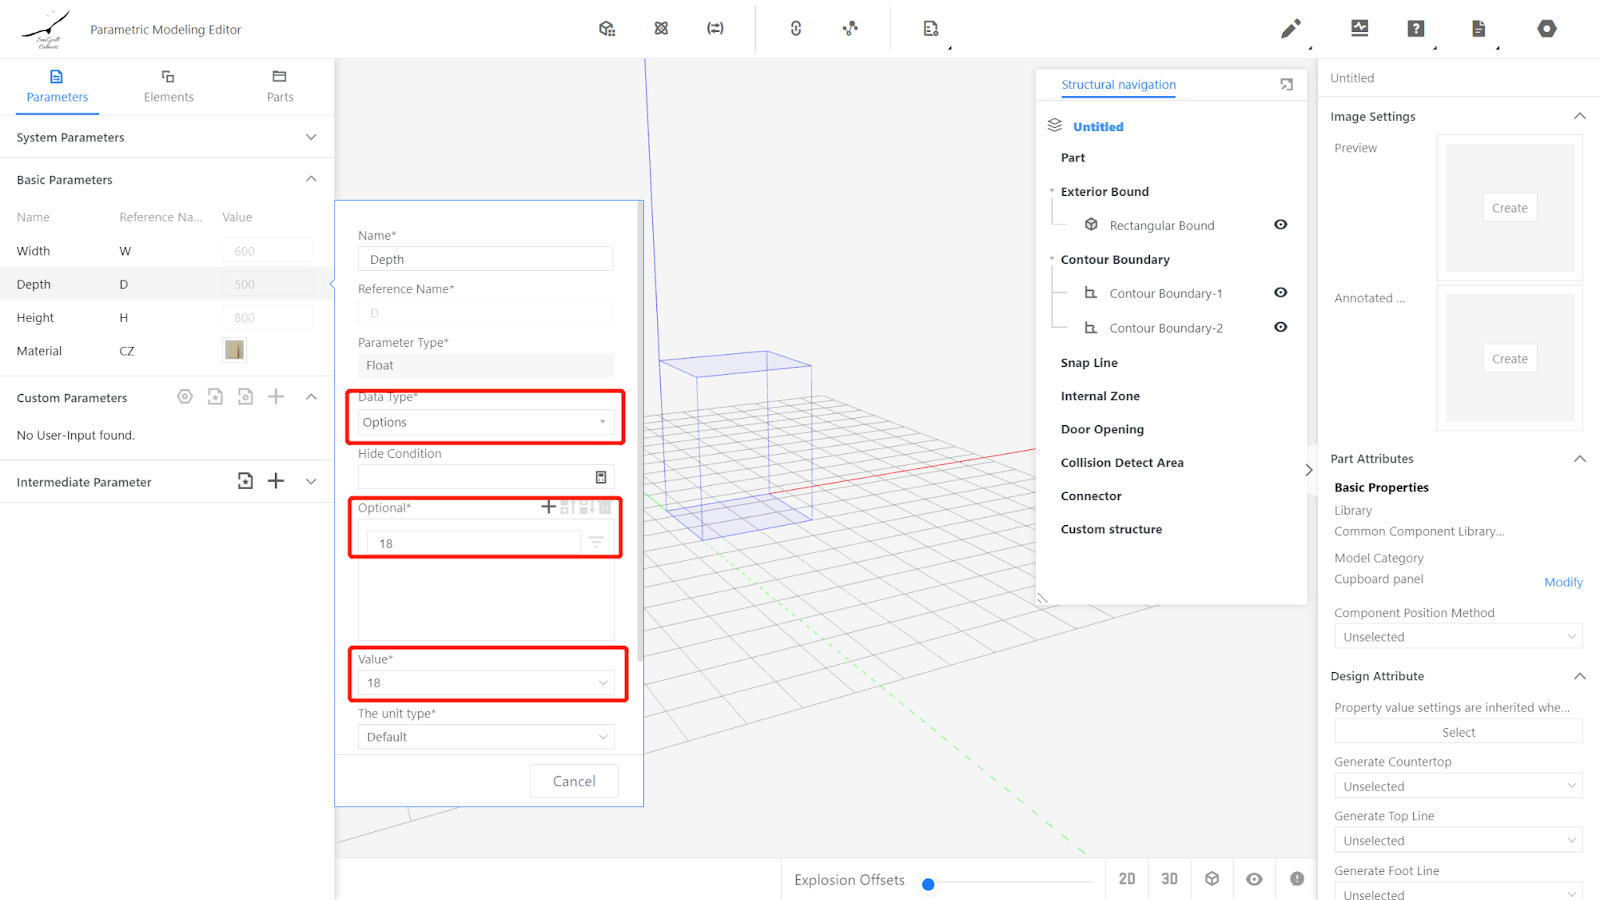
Depth: Value Type: Optional, Options: 18, Current Value: 18
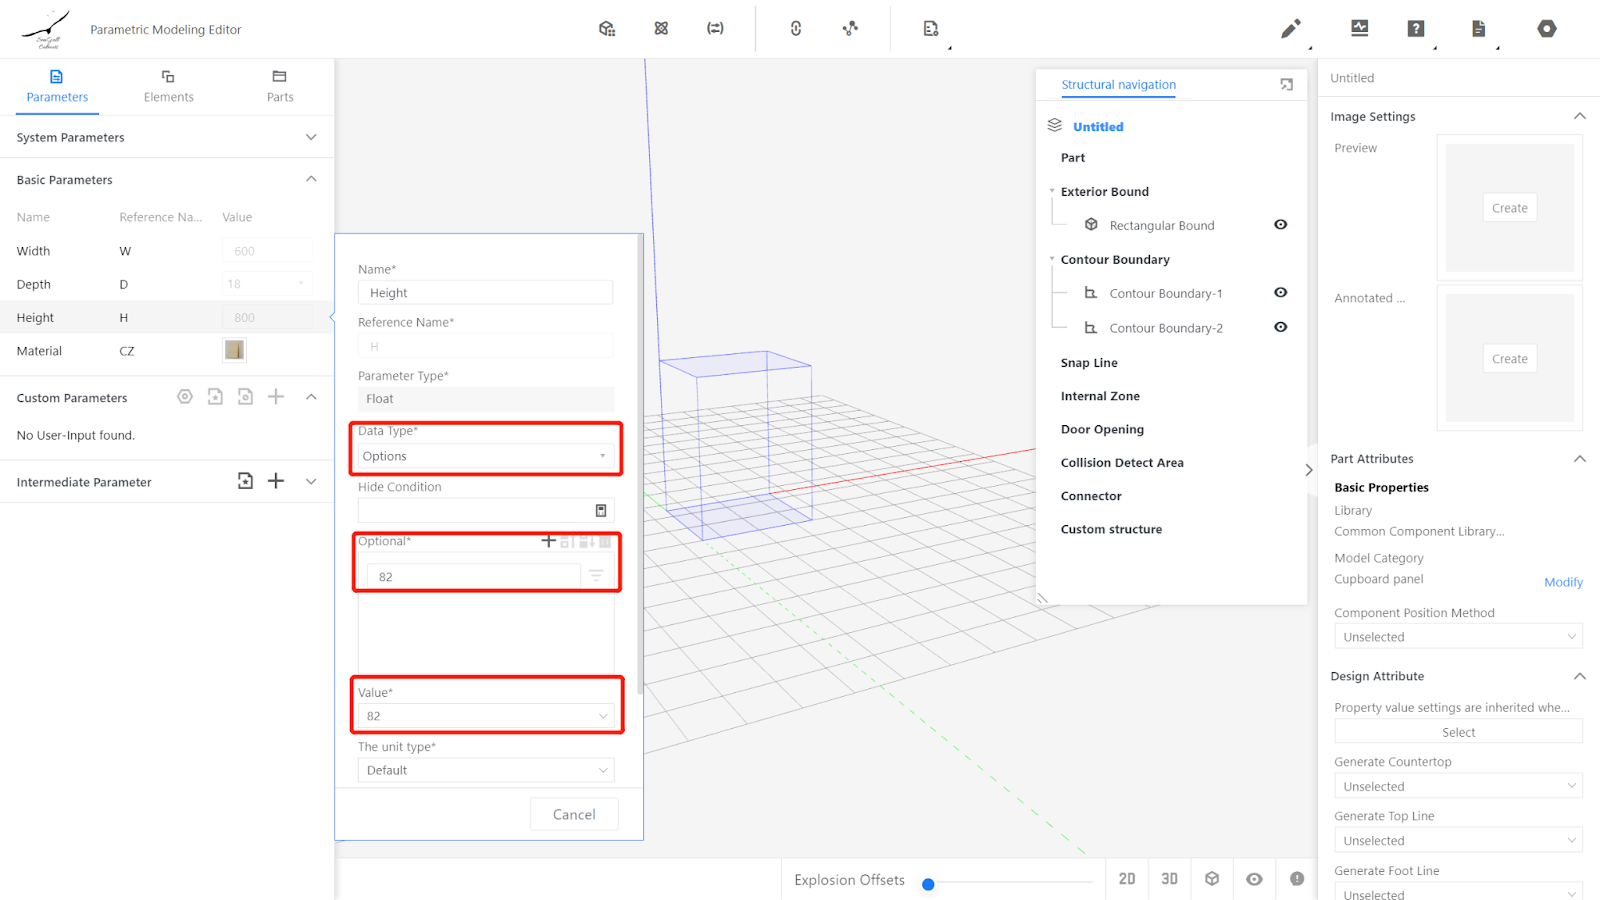
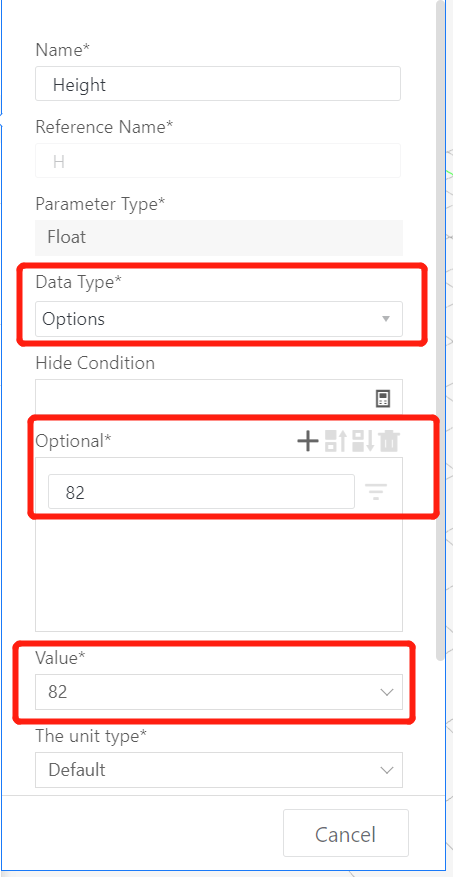
Height: Value Type: Optional, Options: 82, Current Value: 82
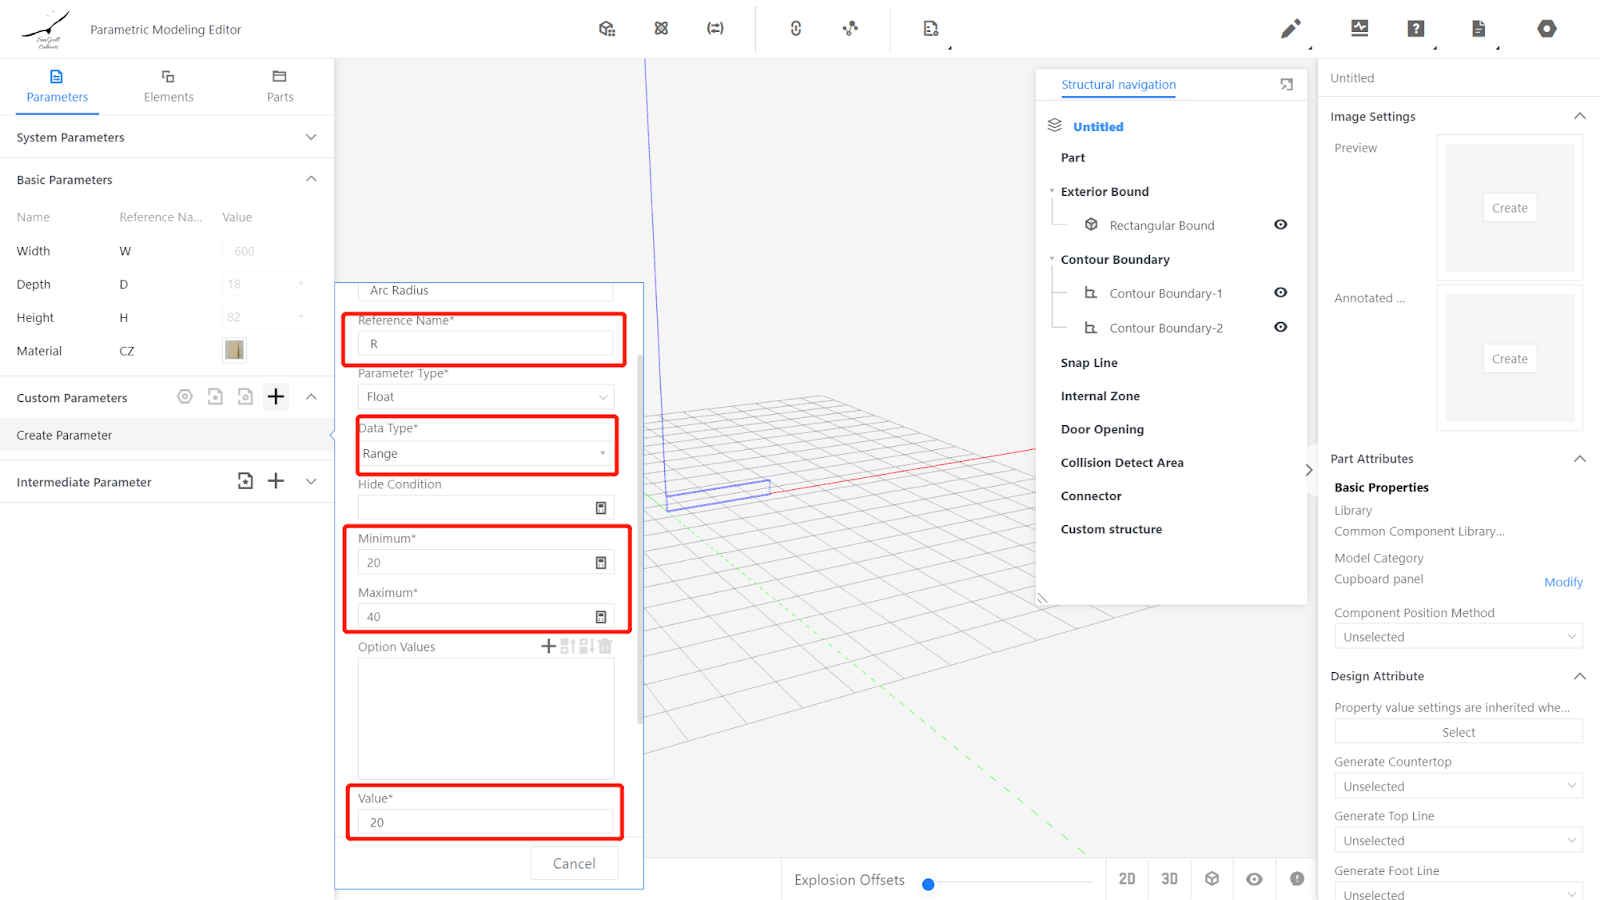
Add Advanced Parameter
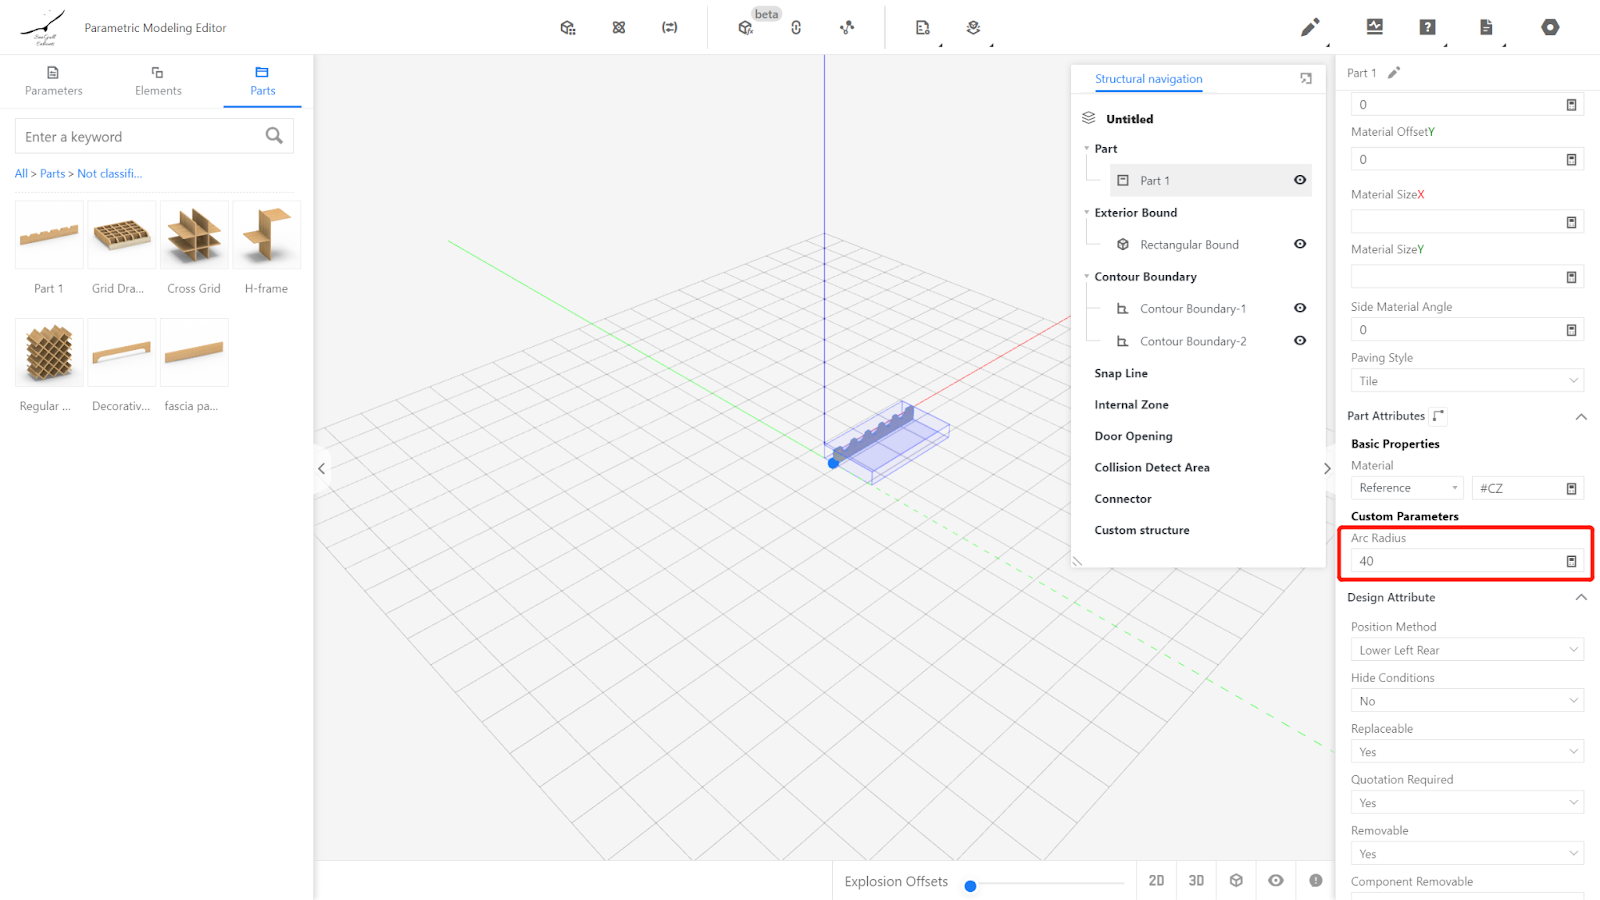
Name: Arc Radius, Reference Name: #R, Value Type: Range, Minimum Value: 20, Maximum Value: 40, Current Value: 20 - Create
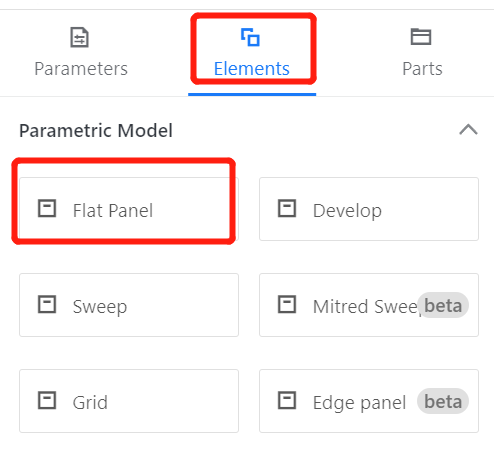
1.3. Create Flat Panel
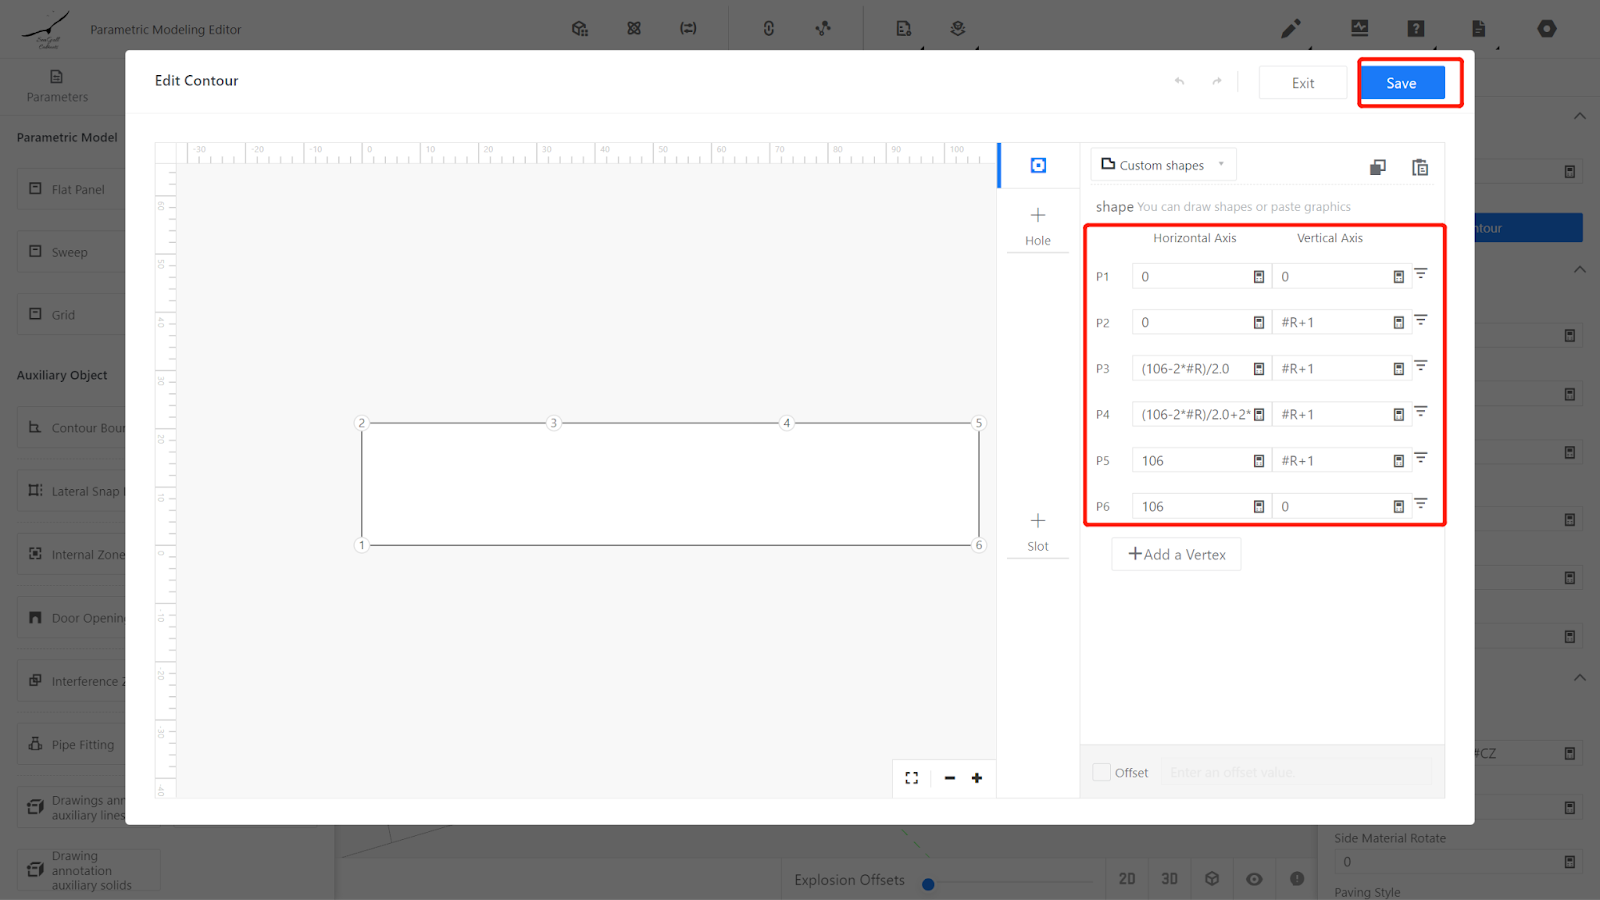
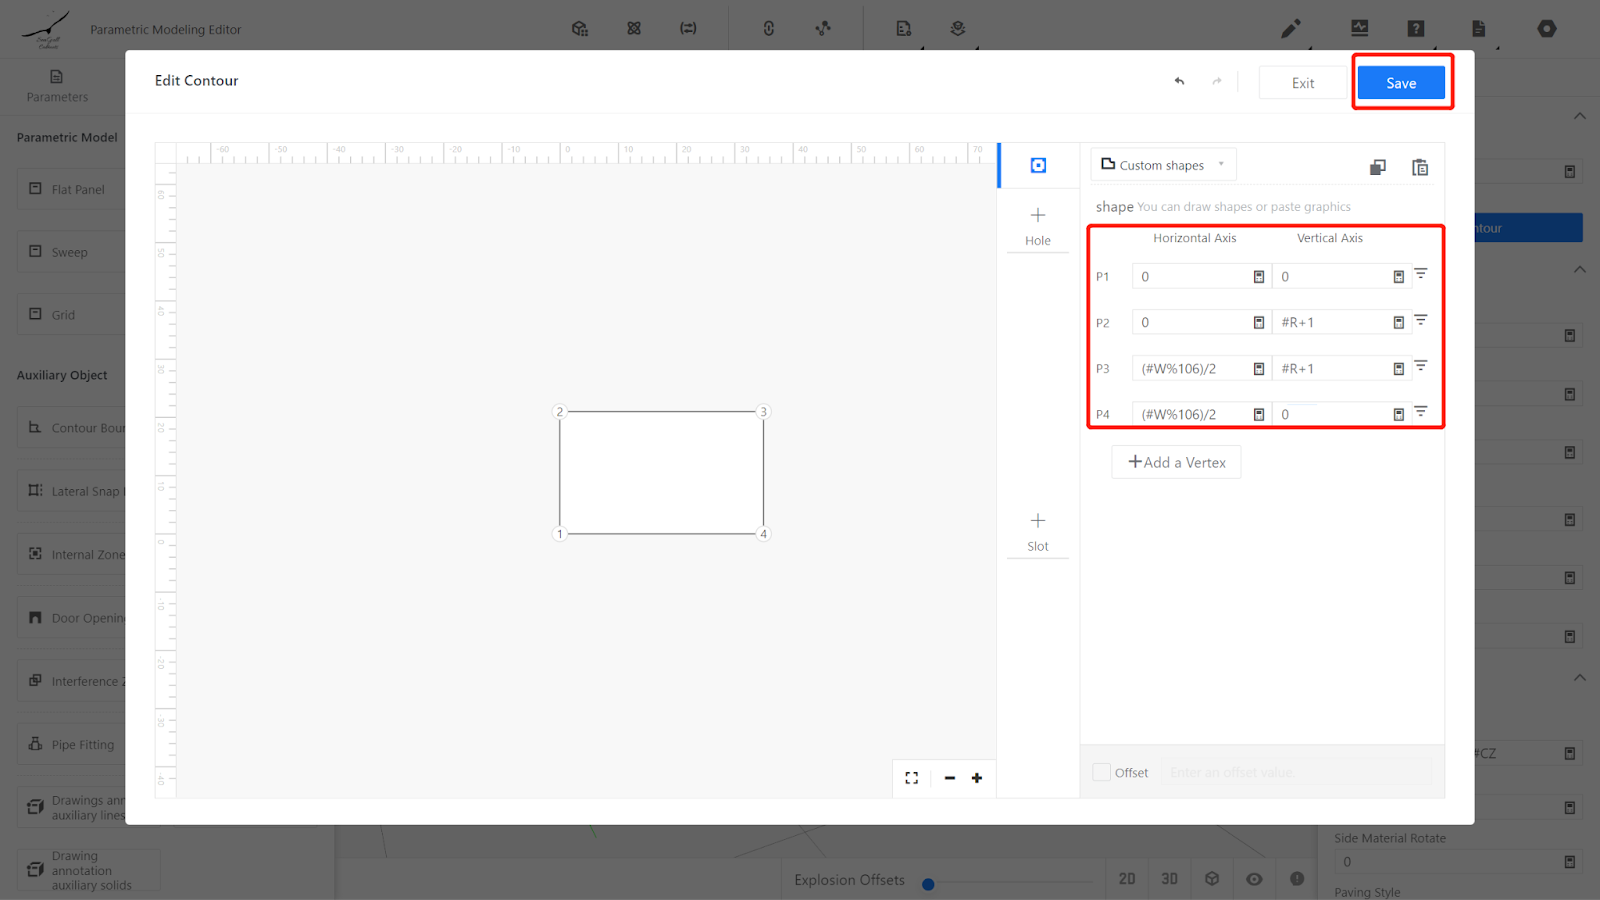
Edit Contour
Point 1 (0, 0), Point 2 (0, #R+1), Point 3 ((106-2*#R)/2.0, #R+1),
Point 4 ((106-2*#R)/2.0+2*#R, #R+1), Point 5 (106, #R+1), Point 6 (106, 0)
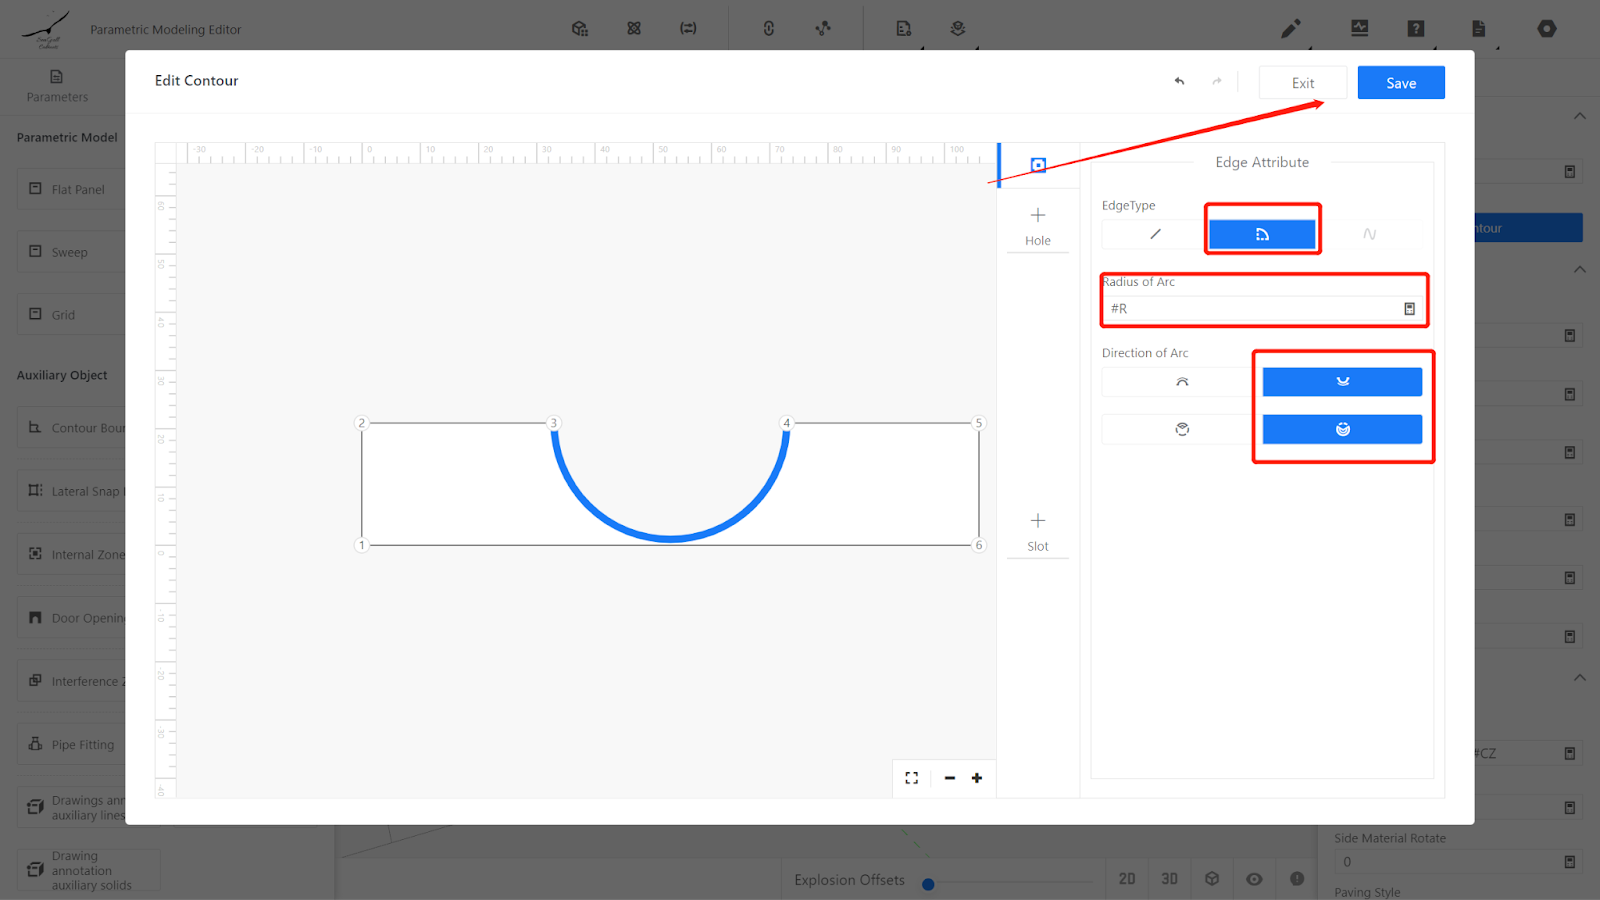
Select the line segment from Point 3 to Point 4, convert the straight line into an arc with a radius of #R
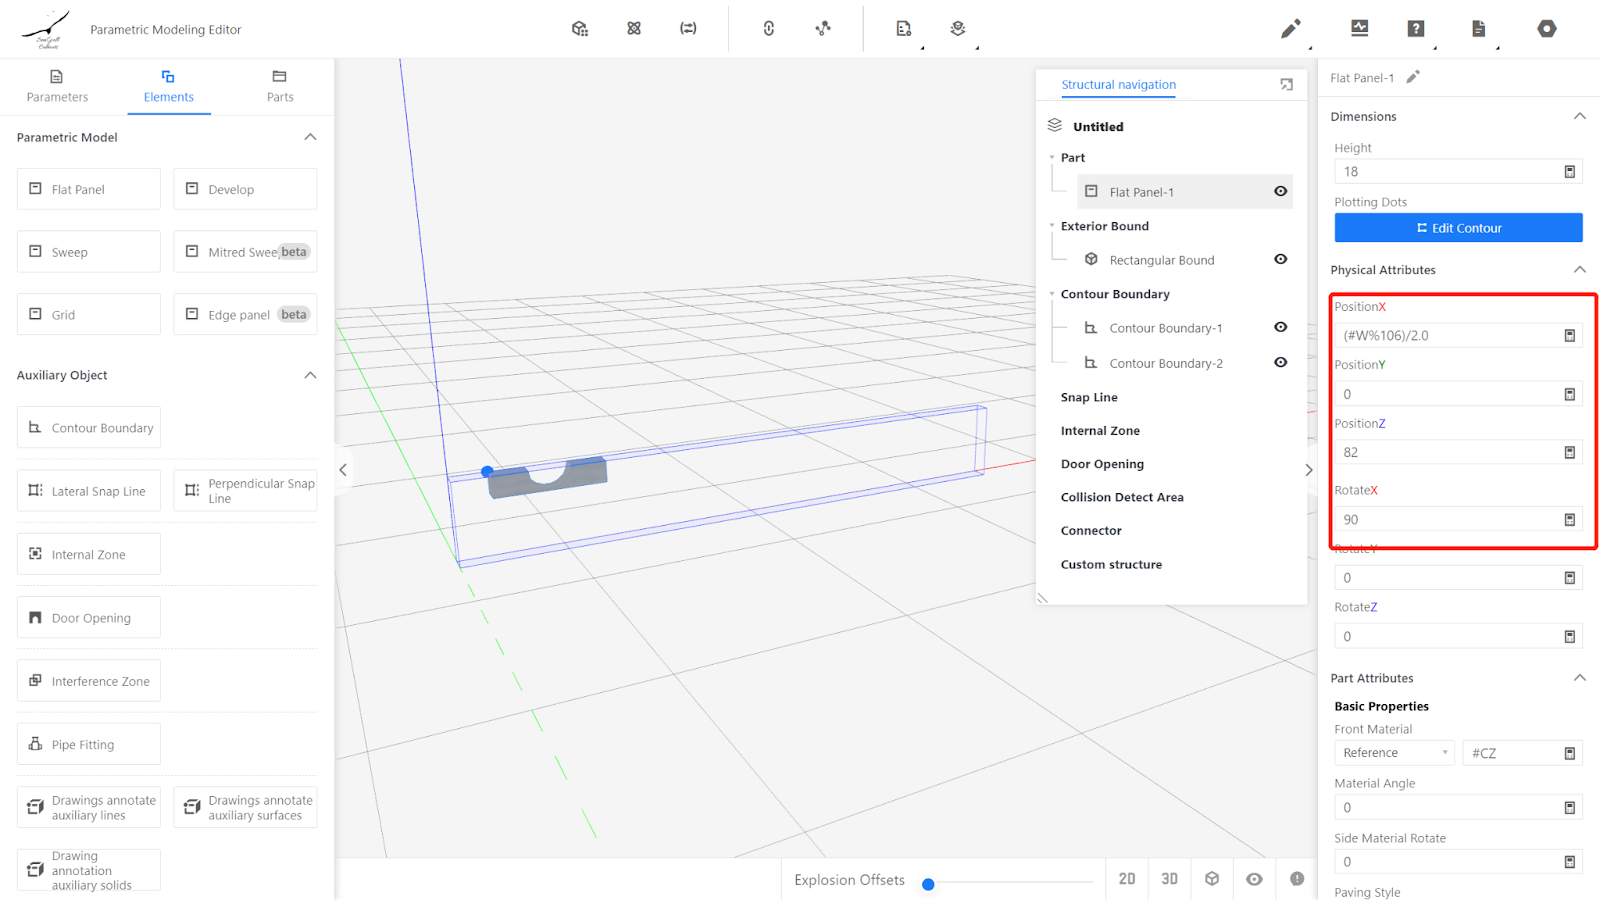
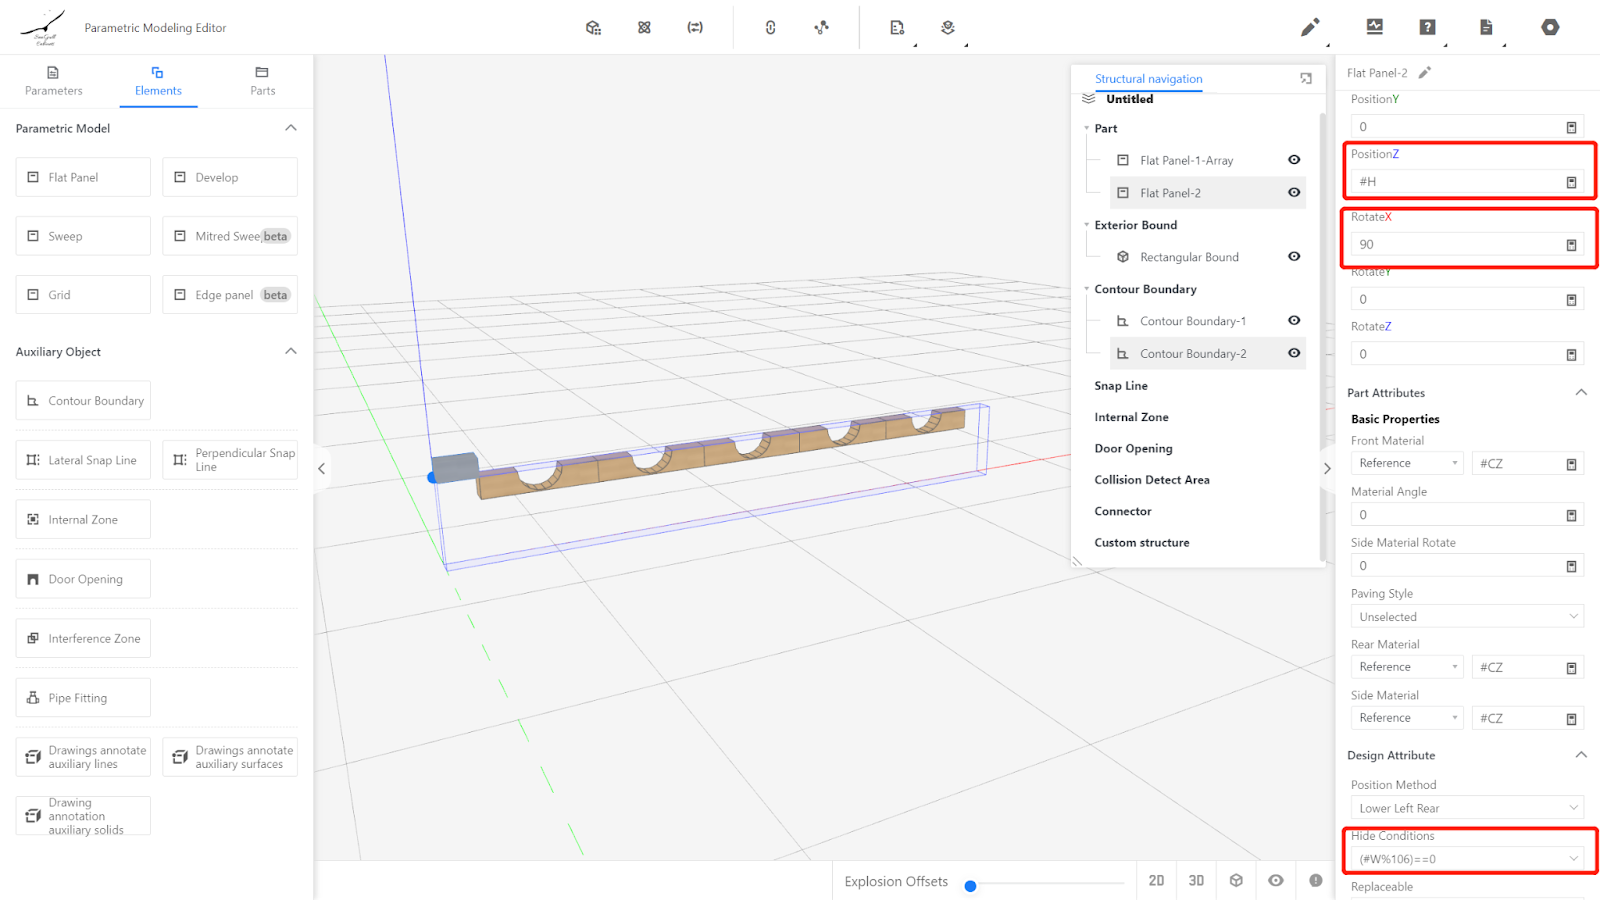
Set physical properties of the flat panel:
Position X: (#W%106)/2.0 , Position Z: 82 , Rotation X: 90
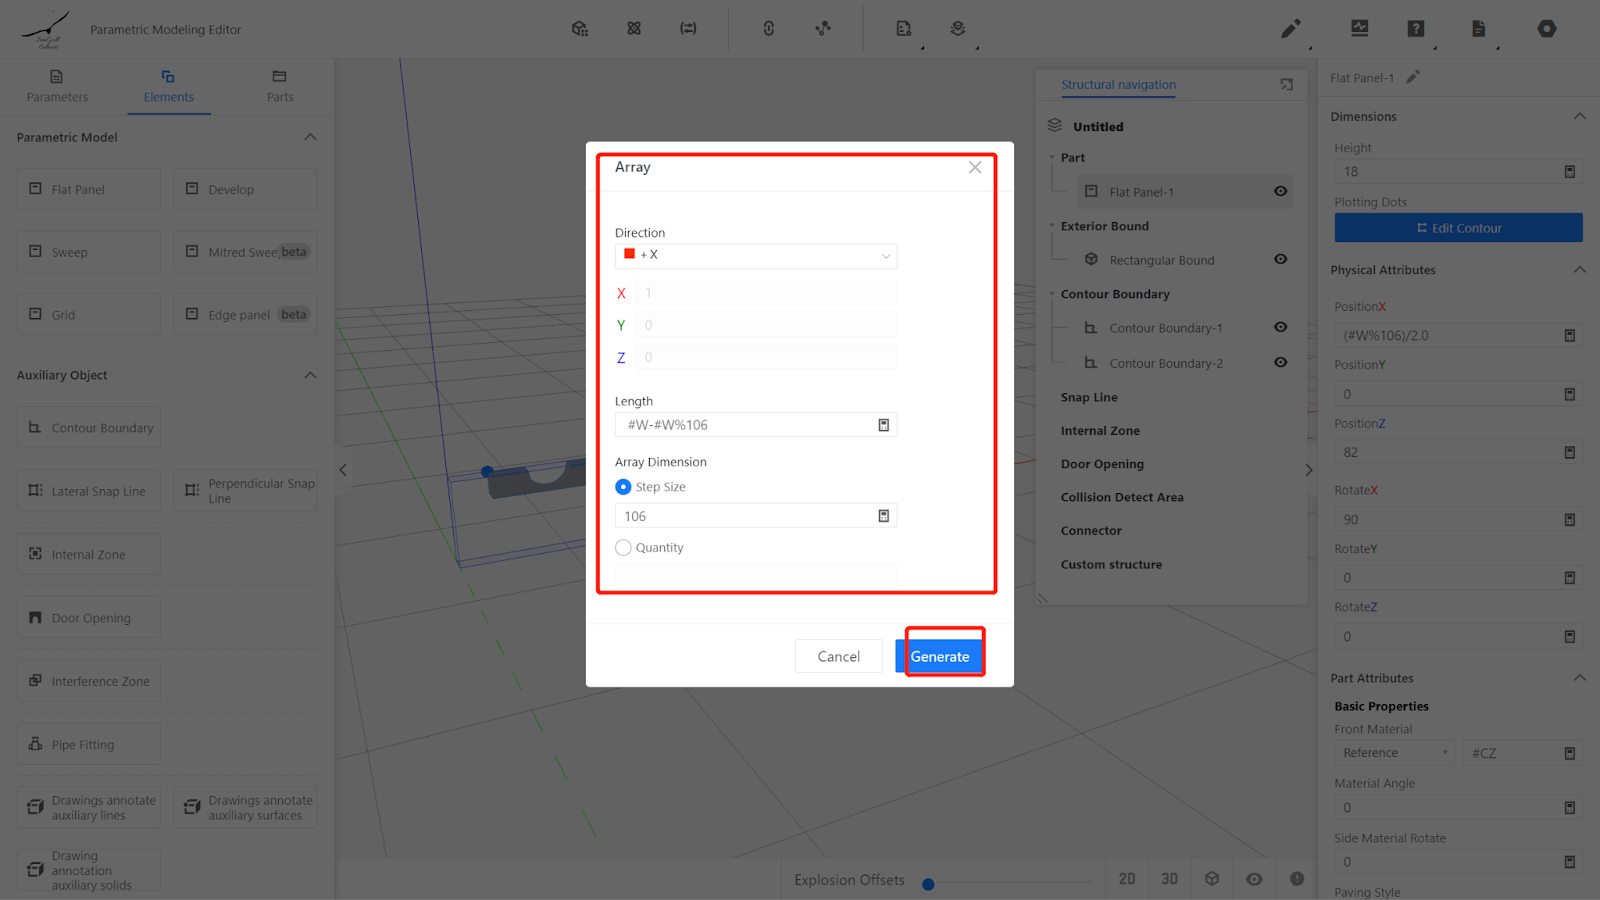
Array
Click on the flat panel, right-click and select Array.
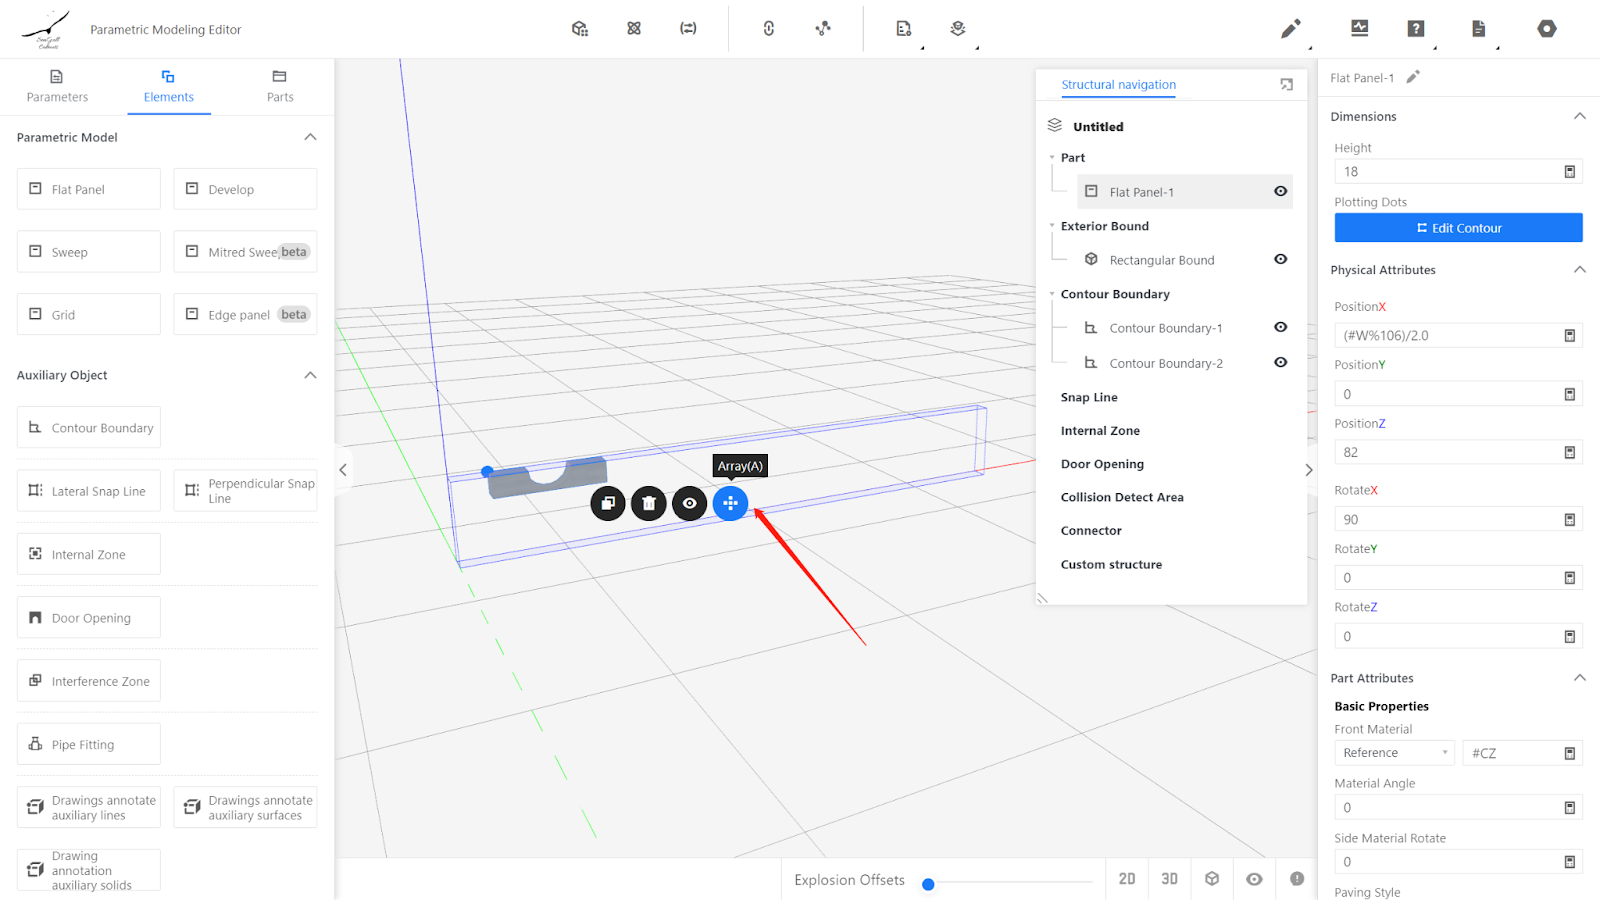
Set Array Rules:
Direction: +X, Array Length: #W-#W%106, Array Type: Step: 106, Select Generate
1.4. Create Flat Panels on Both Sides
1.4.1 Edit Contour
Point 1 (0, 0), Point 2 (0, #R+1), Point 3 ((#W%106)/2, #R+1),
Point 4 ((#W%106)/2, 0)
1.4.2 Set Physical Properties:
Position Z: #H, Rotation X: 90 Hidden Condition: (#W%106)==0
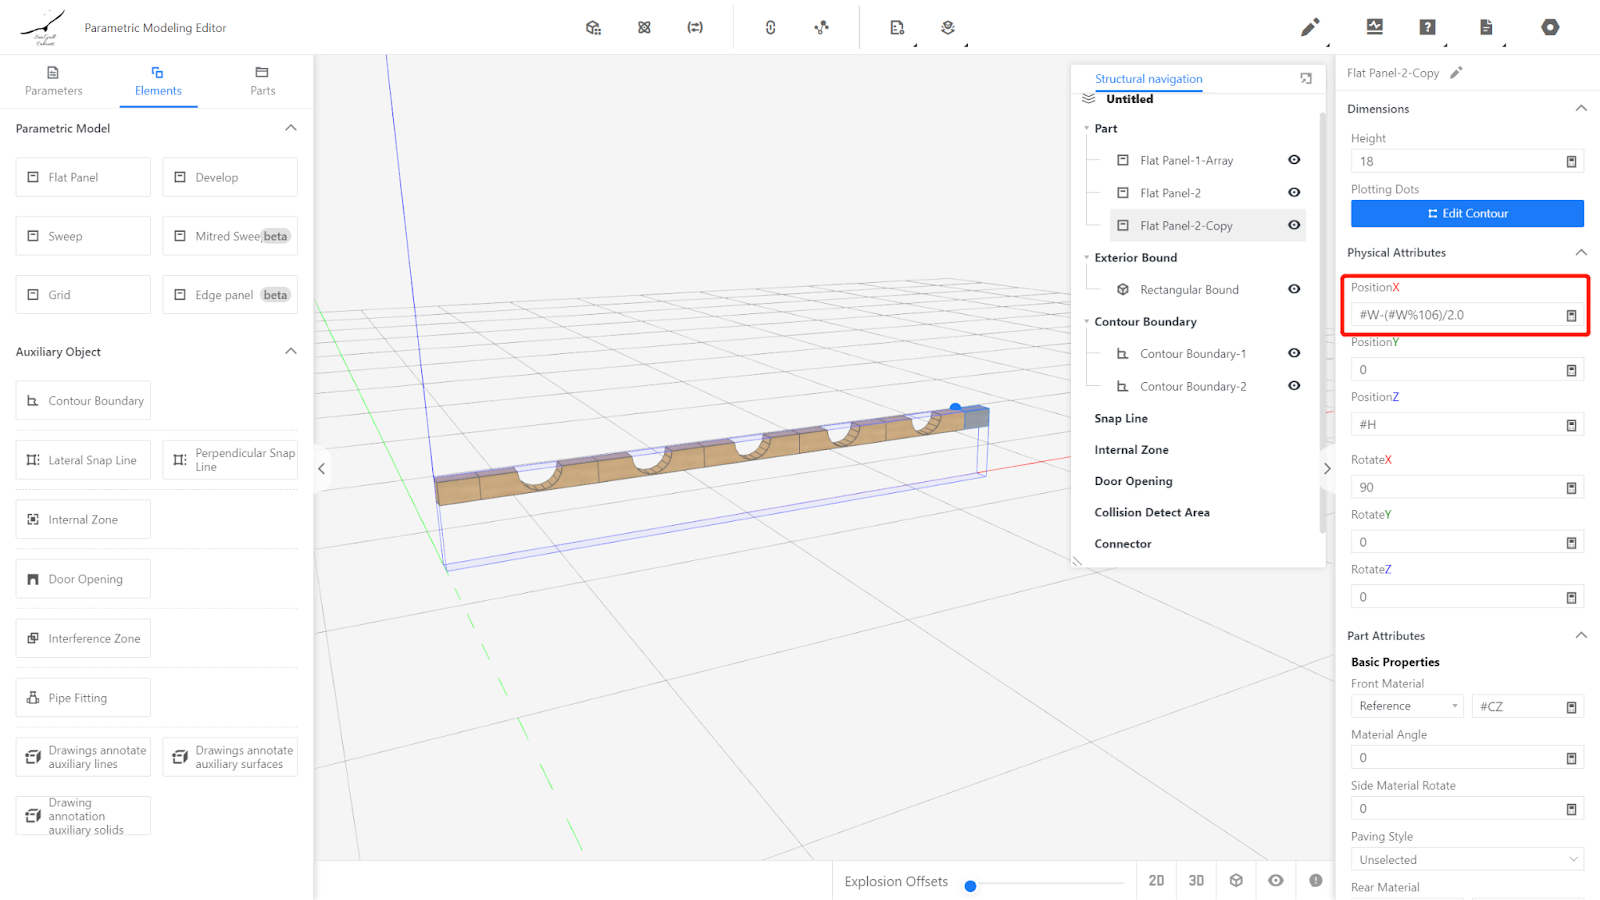
1.4.3 Click on Flat Panel 2, right-click and select Copy, set Position X as: #W-(#W%106)/2.0
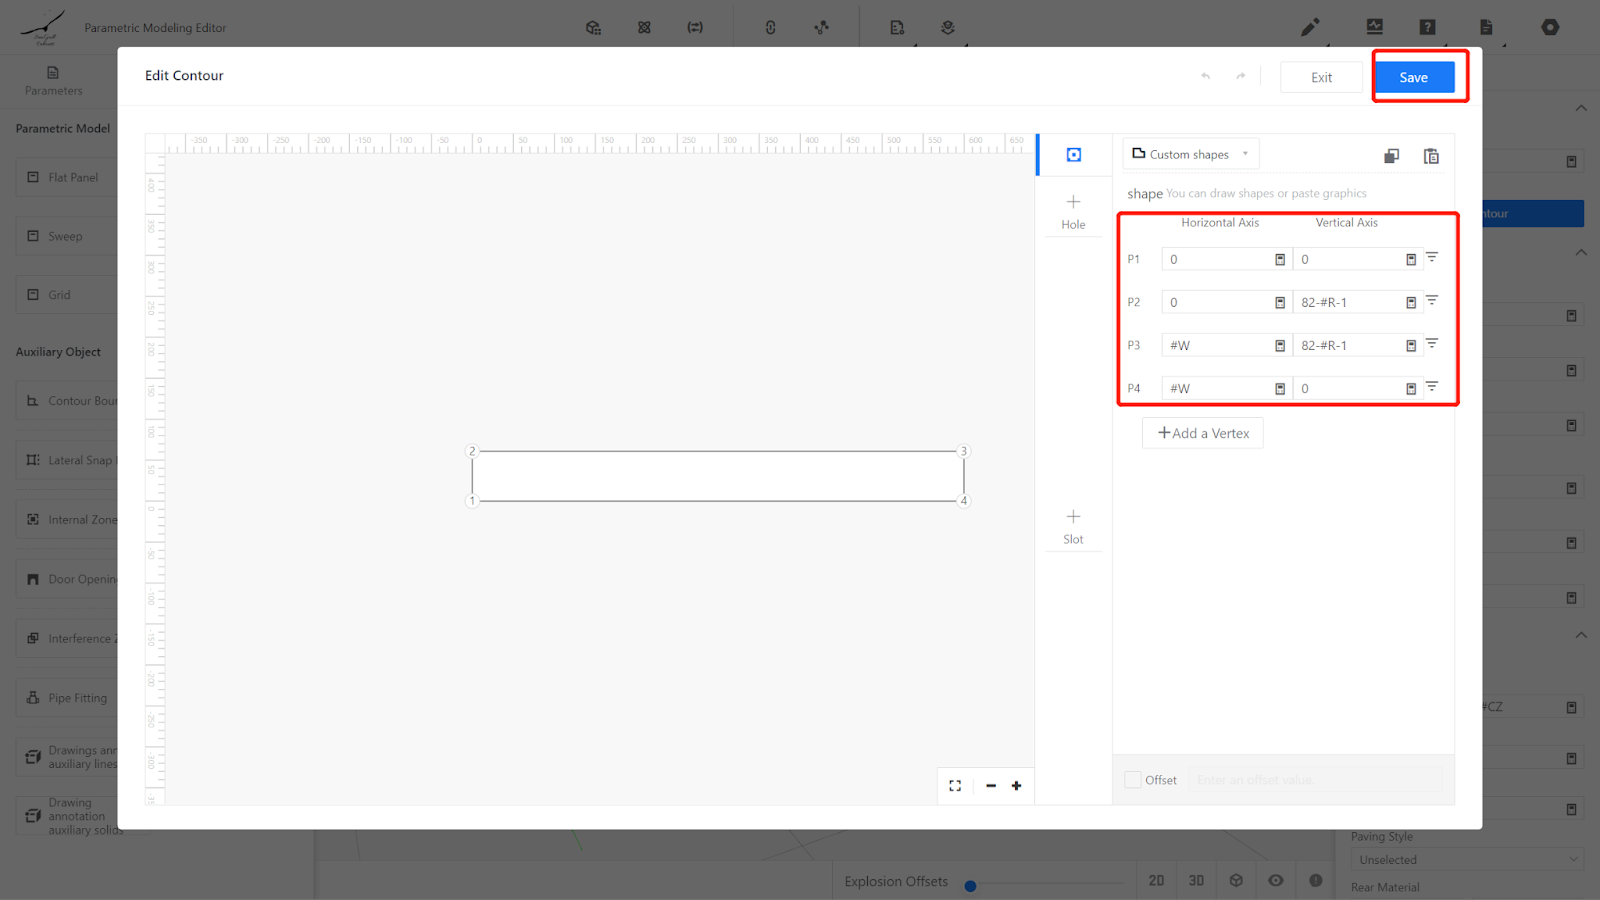
1.4.4 Create another flat panel, edit Contour
Point 1 (0, 0), Point 2 (0, 82-#R-1), Point 3 (#W, 82-#R-1), Point 4 (#W, 0)
1.4.5 Set Physical Properties:
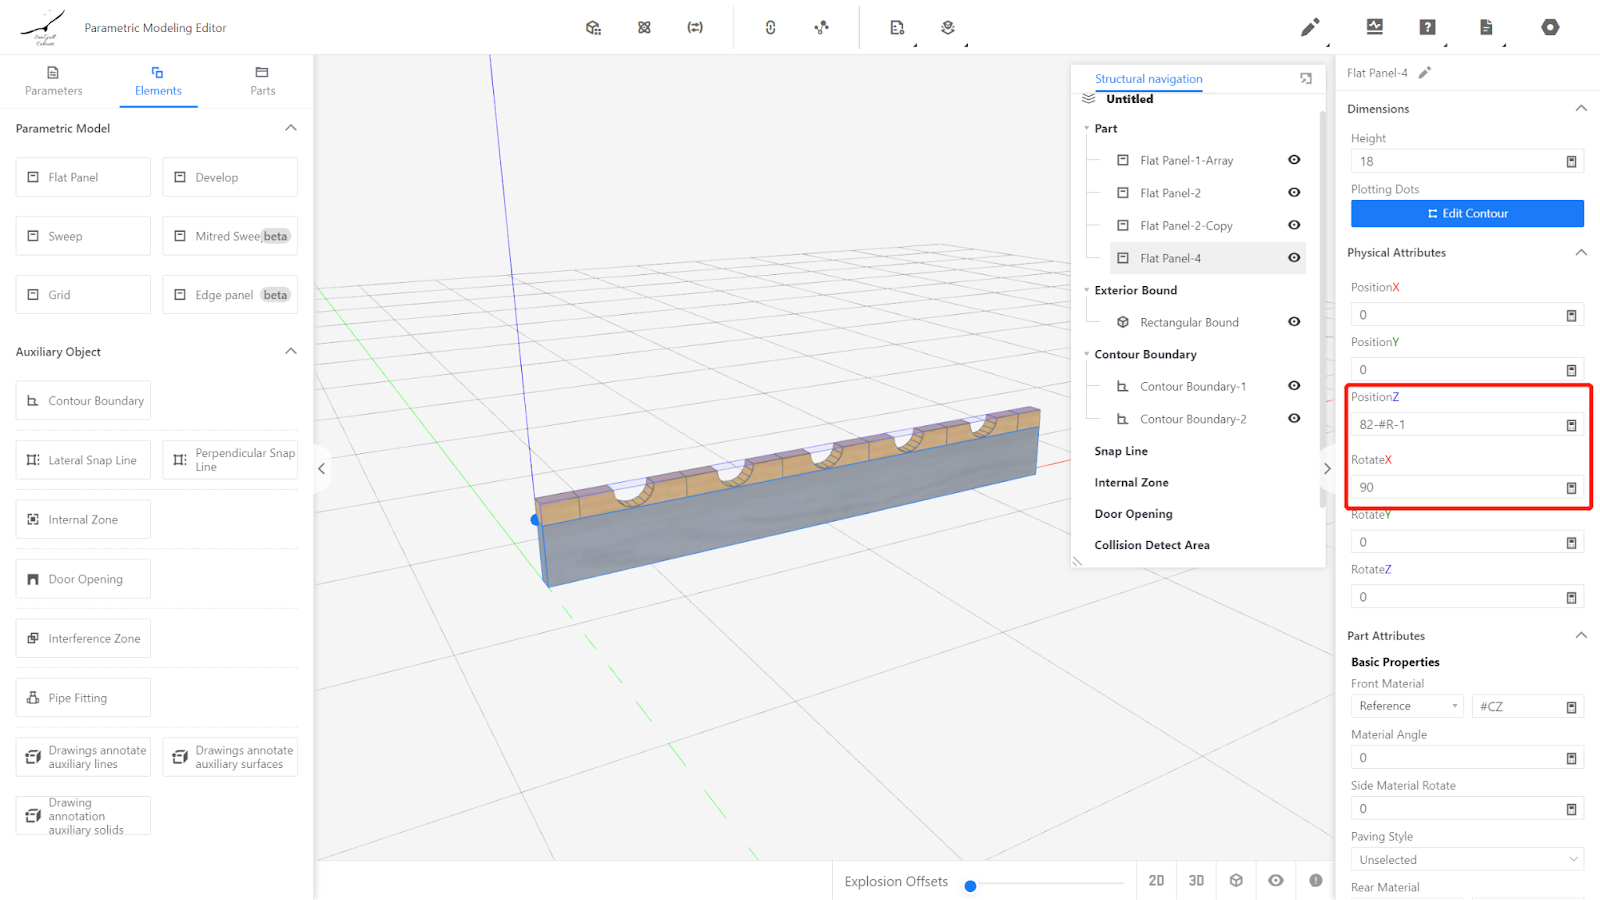
Position Z: 82-#R-1, Rotation X: 90
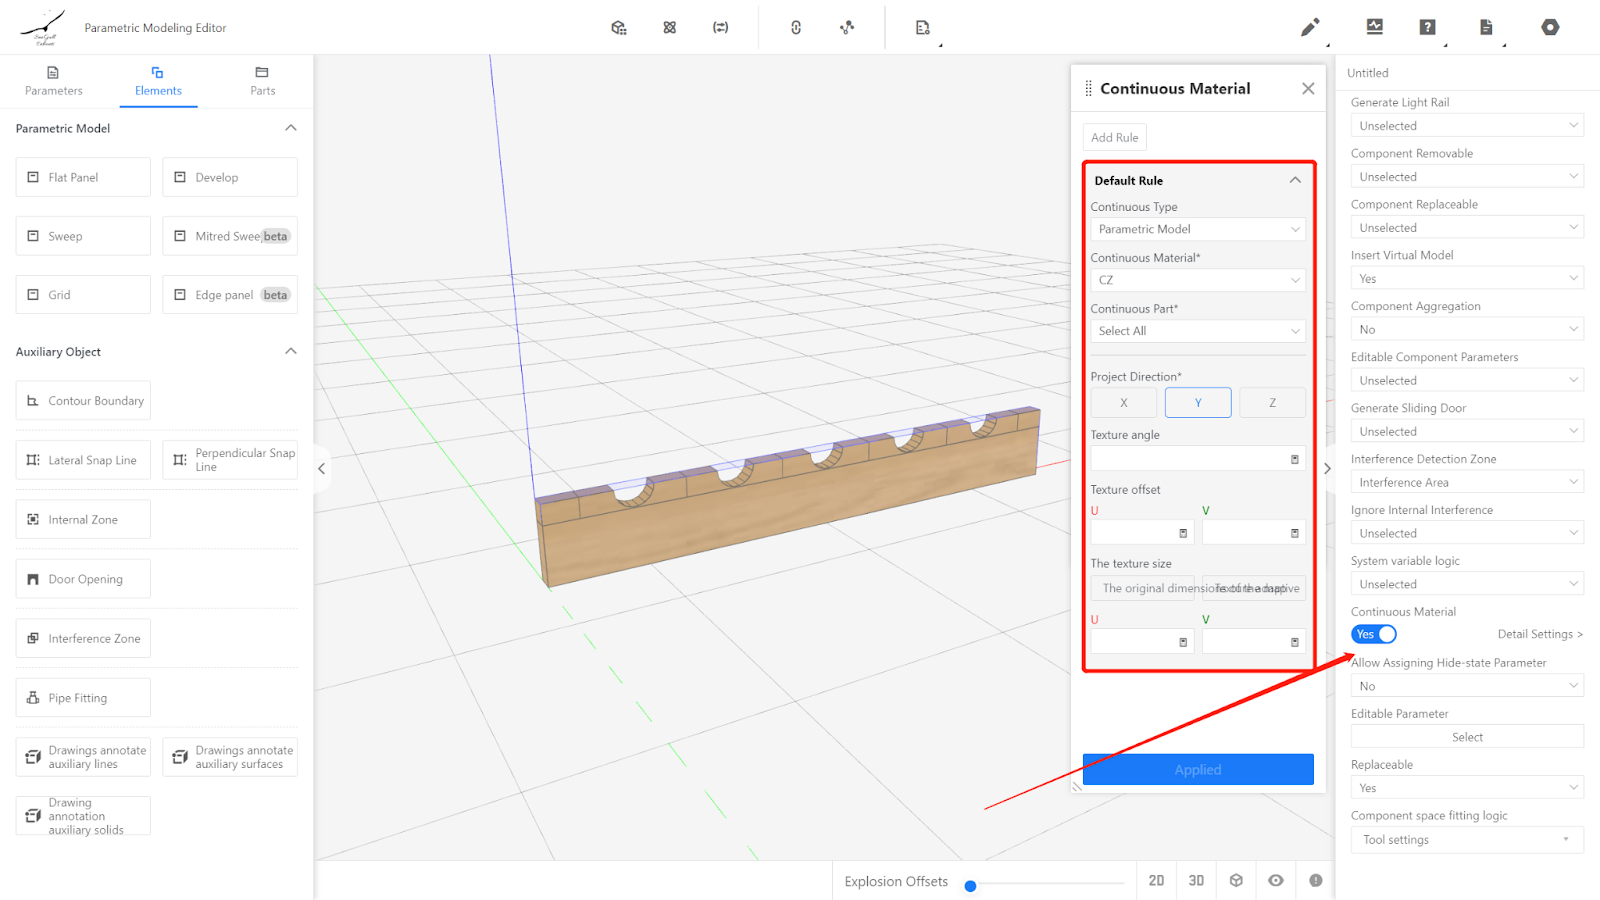
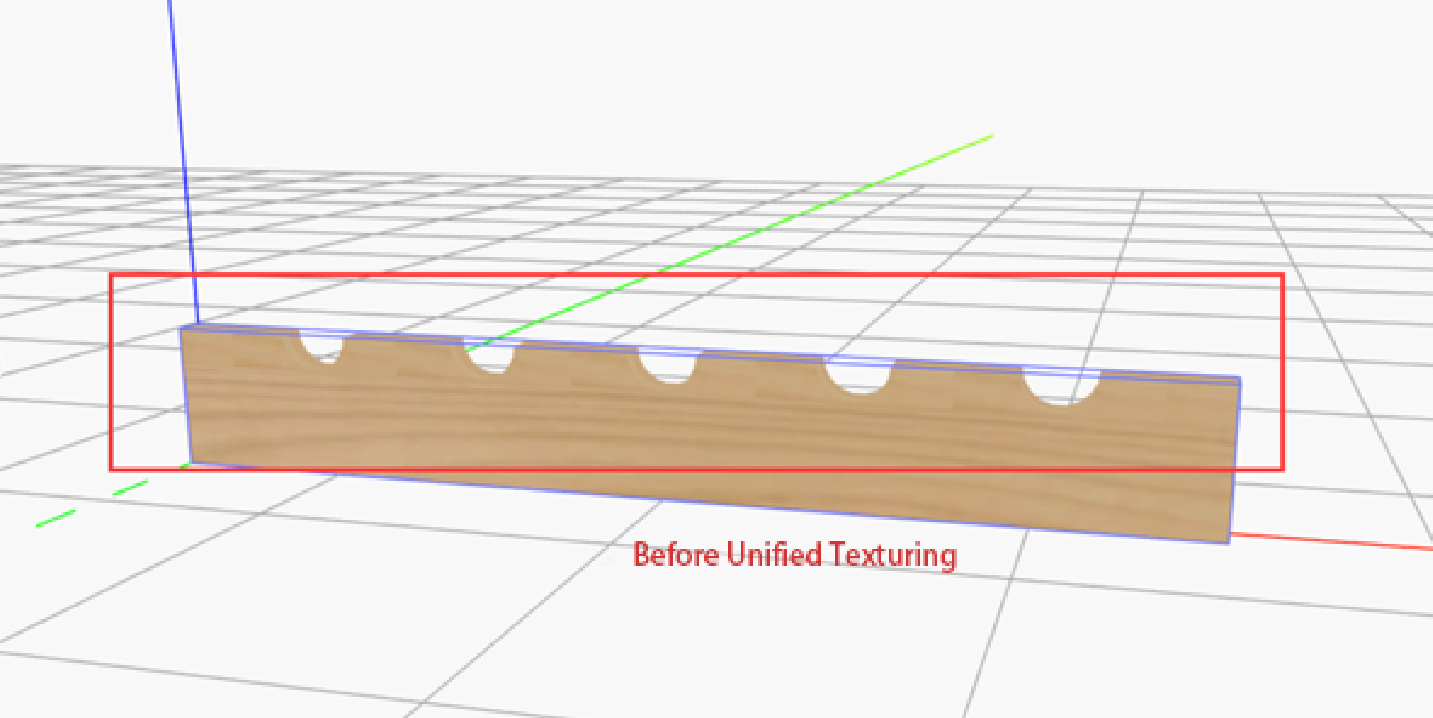
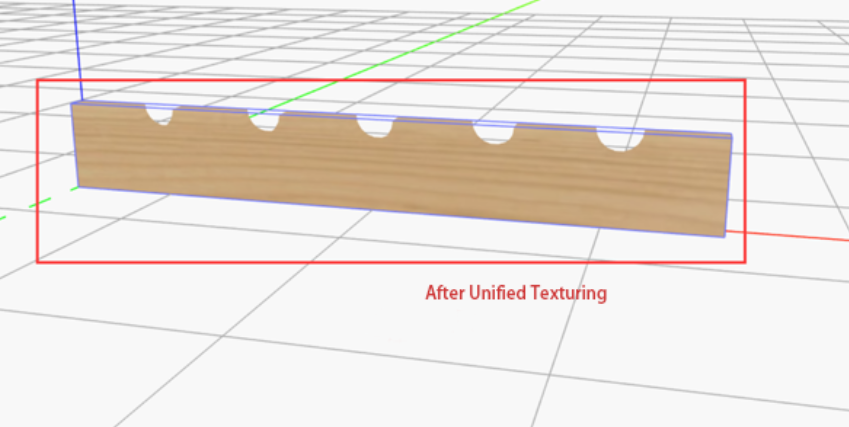
1.4.6 Unified Texturing
If there are obvious texture boundaries in the model, you can use the unified texturing function.
Unified Texturing: Recognize models in the scene as a whole and apply new textures.
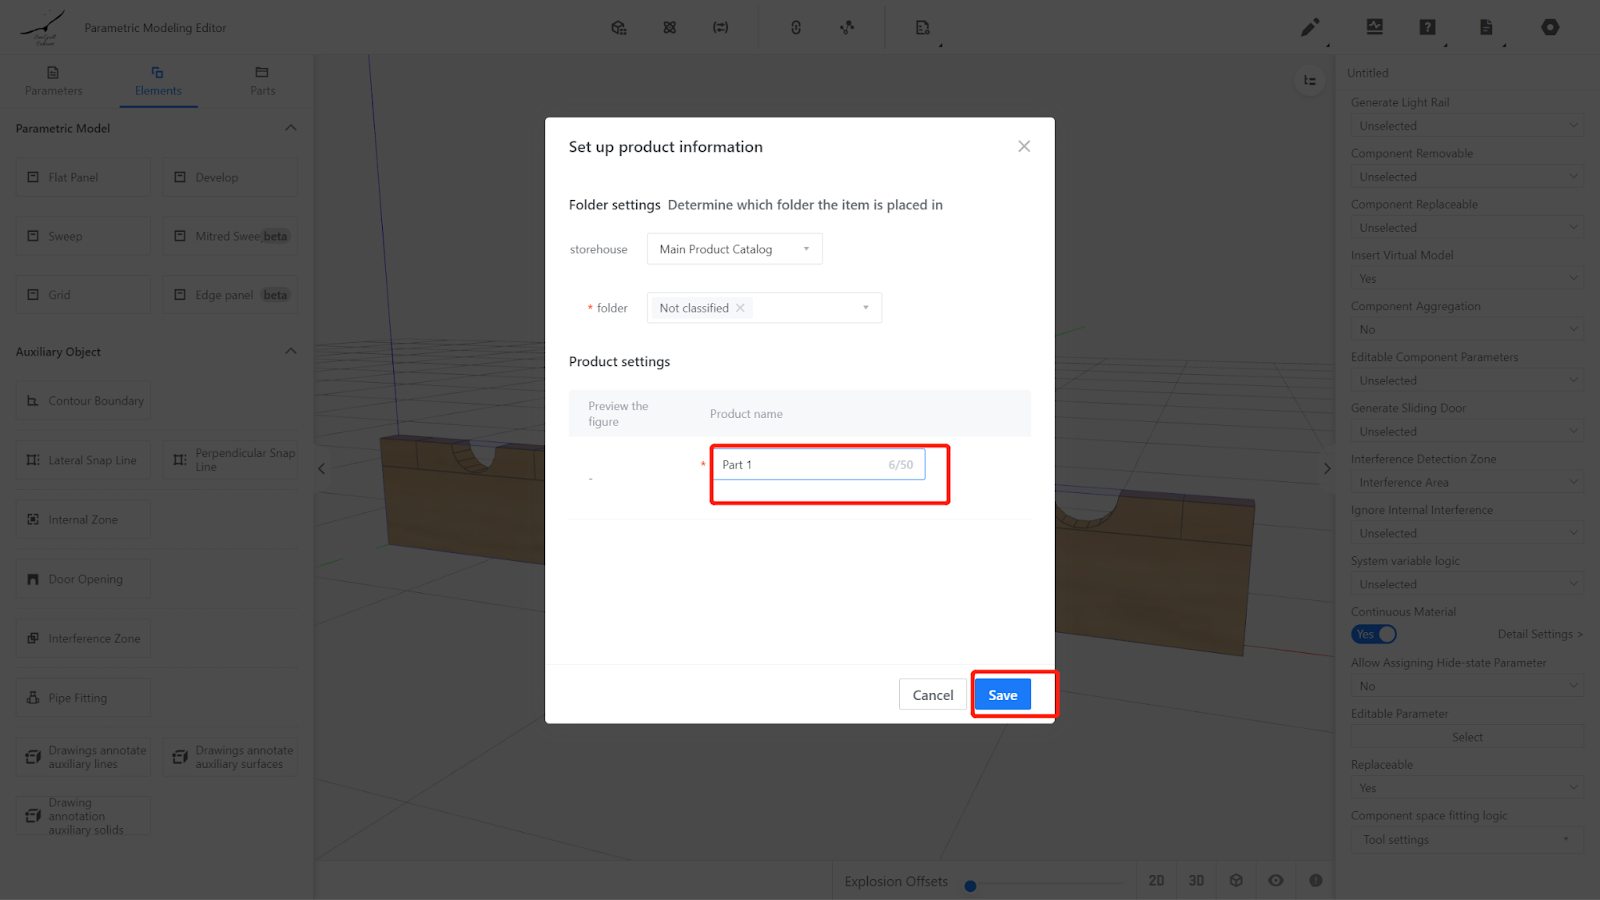
1.5. Save
Click on the file in the upper right corner and select Save.
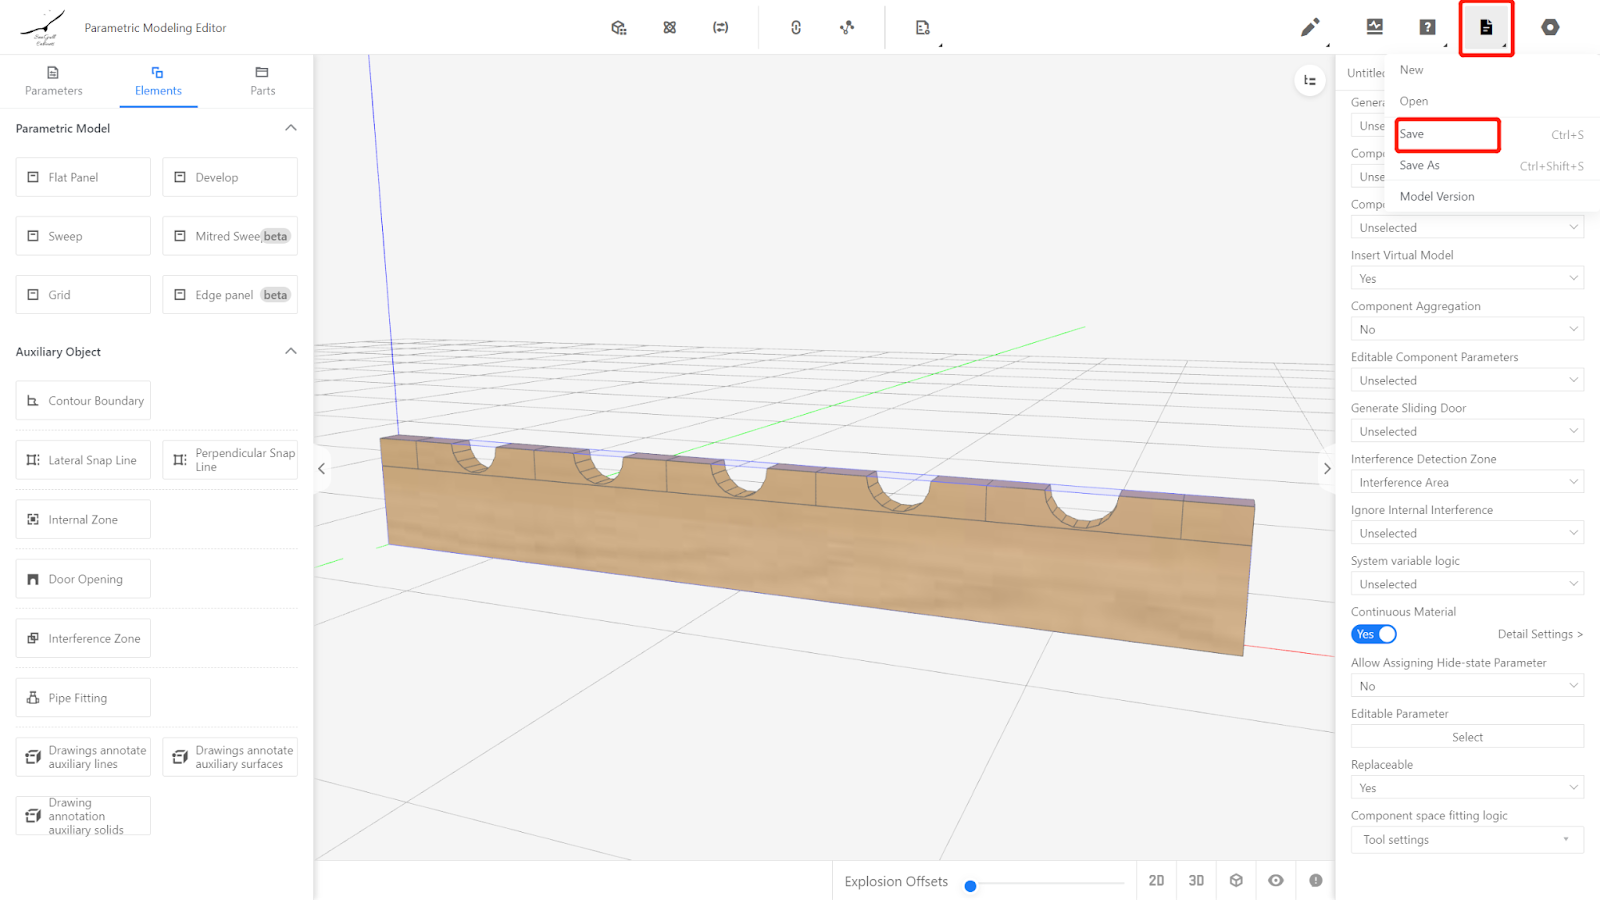
Select category, name it as "Part 1," click Save.
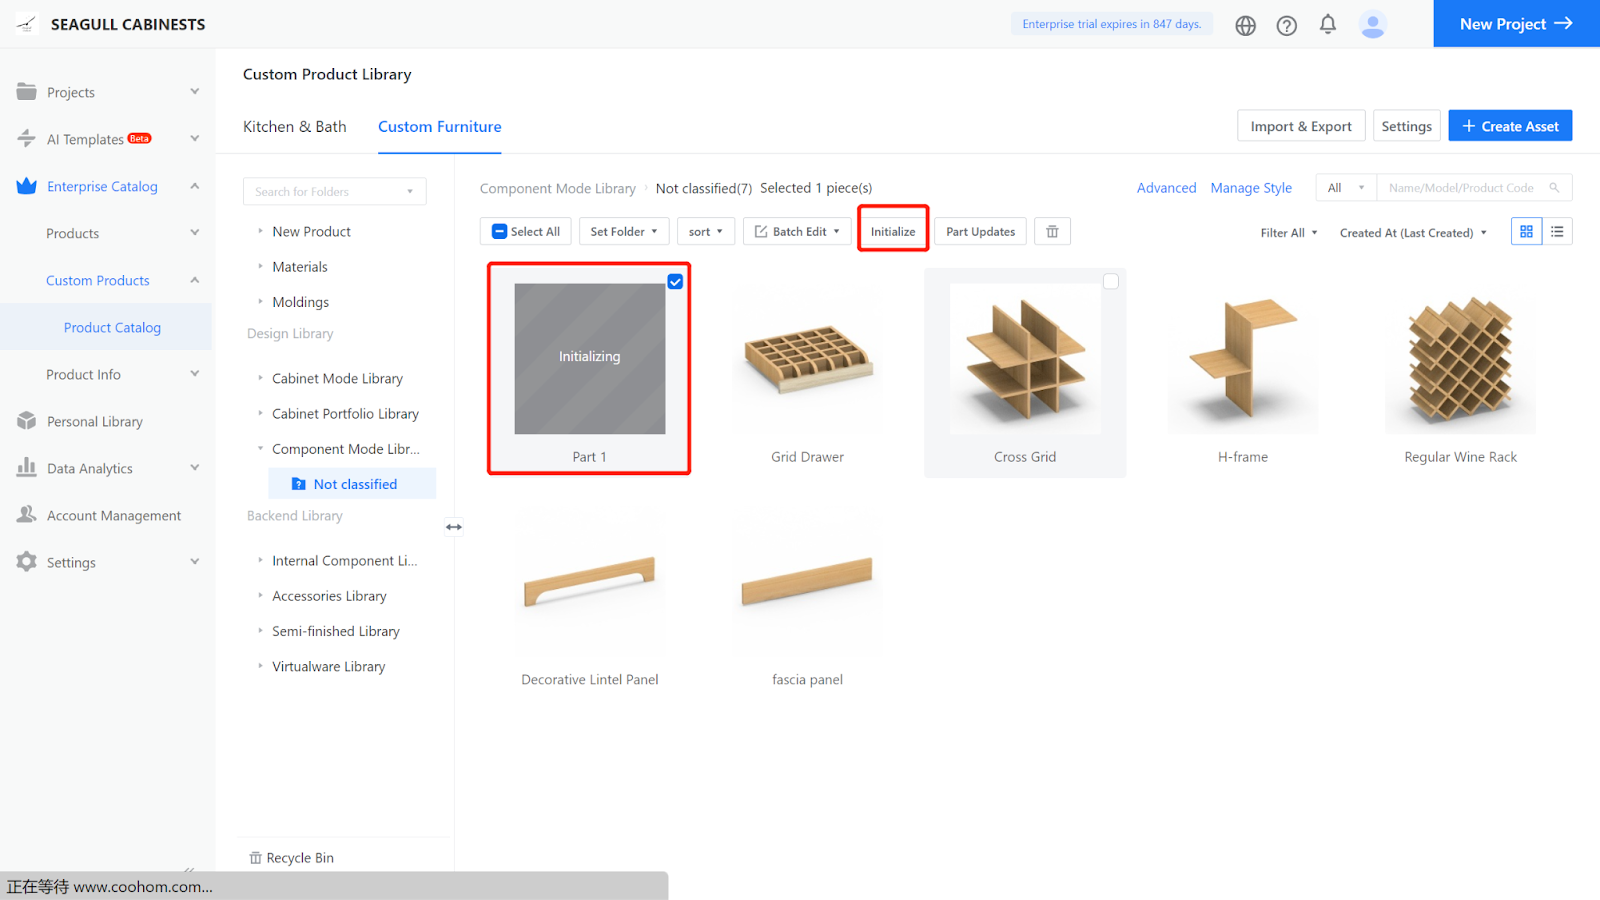
Initialize it: Find the corresponding model in the product management page, select it, click Store, and wait for the model to finish rendering.
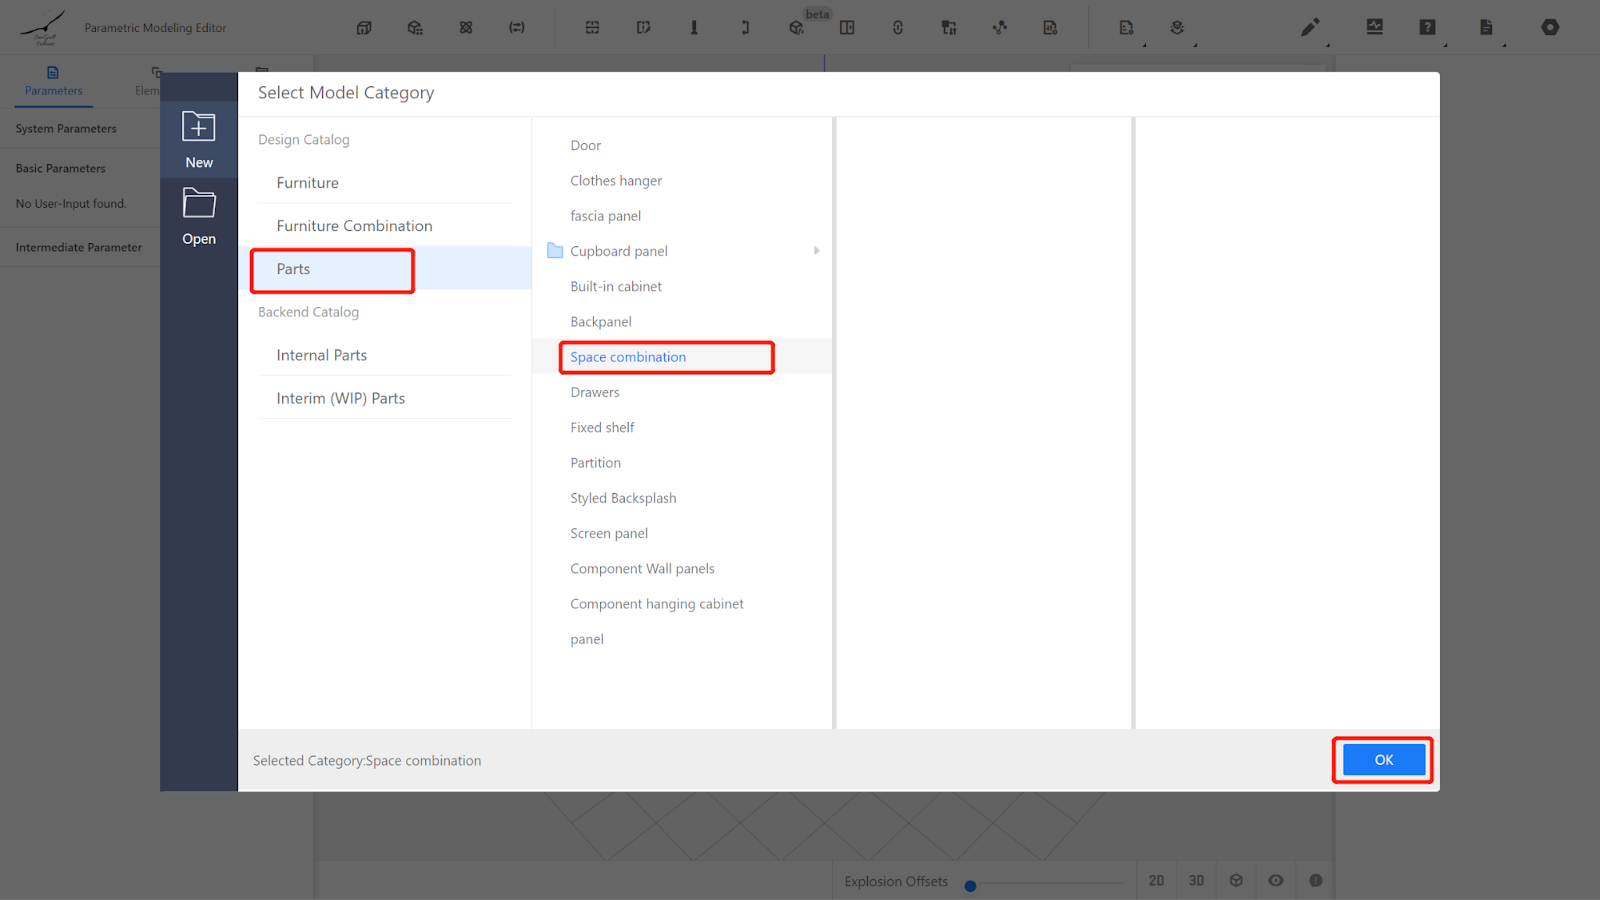
II.Bottle Tray Location Creation
Custom Furniture —Create Asset—Parametric Model Library— New—
2.1. Set Parameters
Custom Variable Settings
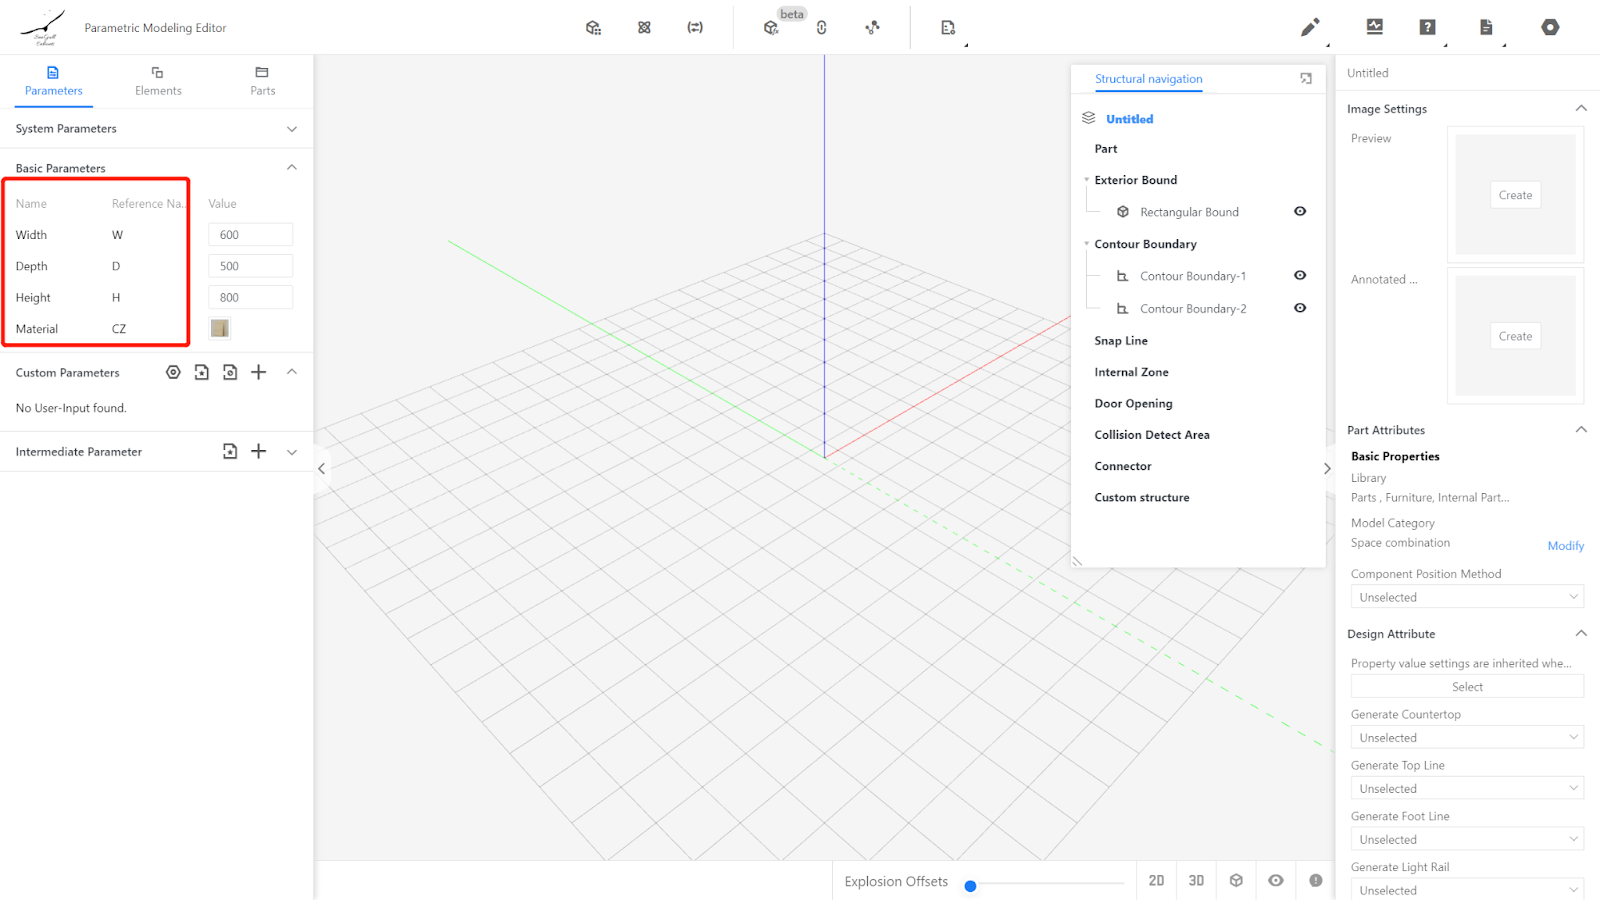
2.1.1 Width (W): Represents the size of the model panel in the X-axis direction. Value Type: Range (e.g., Range 250-1800, Current Value: 600).
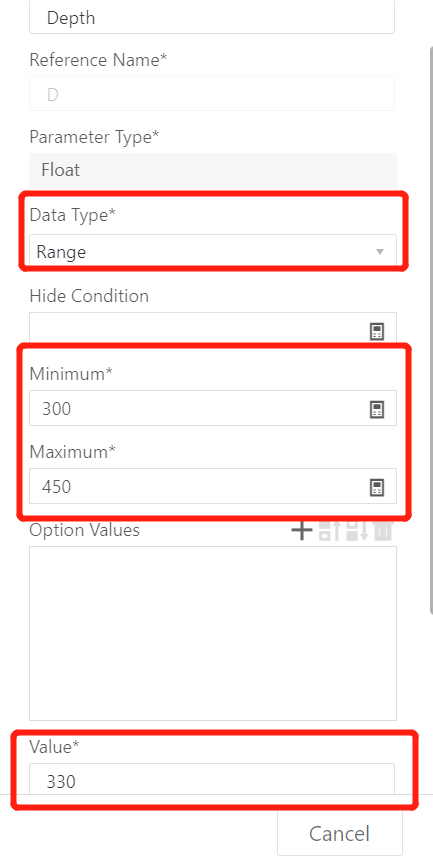
2.1.2 Depth (D): Represents the size of the model in the Y-axis direction. Value Type: Optional (e.g., Optional Range 300-450, Current Value: 330).
2.1.3 Height (H): Represents the size of the model in the Z-axis direction. Value Type: Optional (e.g., Optional 82, Current Value: 82).
2.1.4. The material does not need to be modified, indicating that the model uses the default material. When used, it will change according to the default material of the scene.
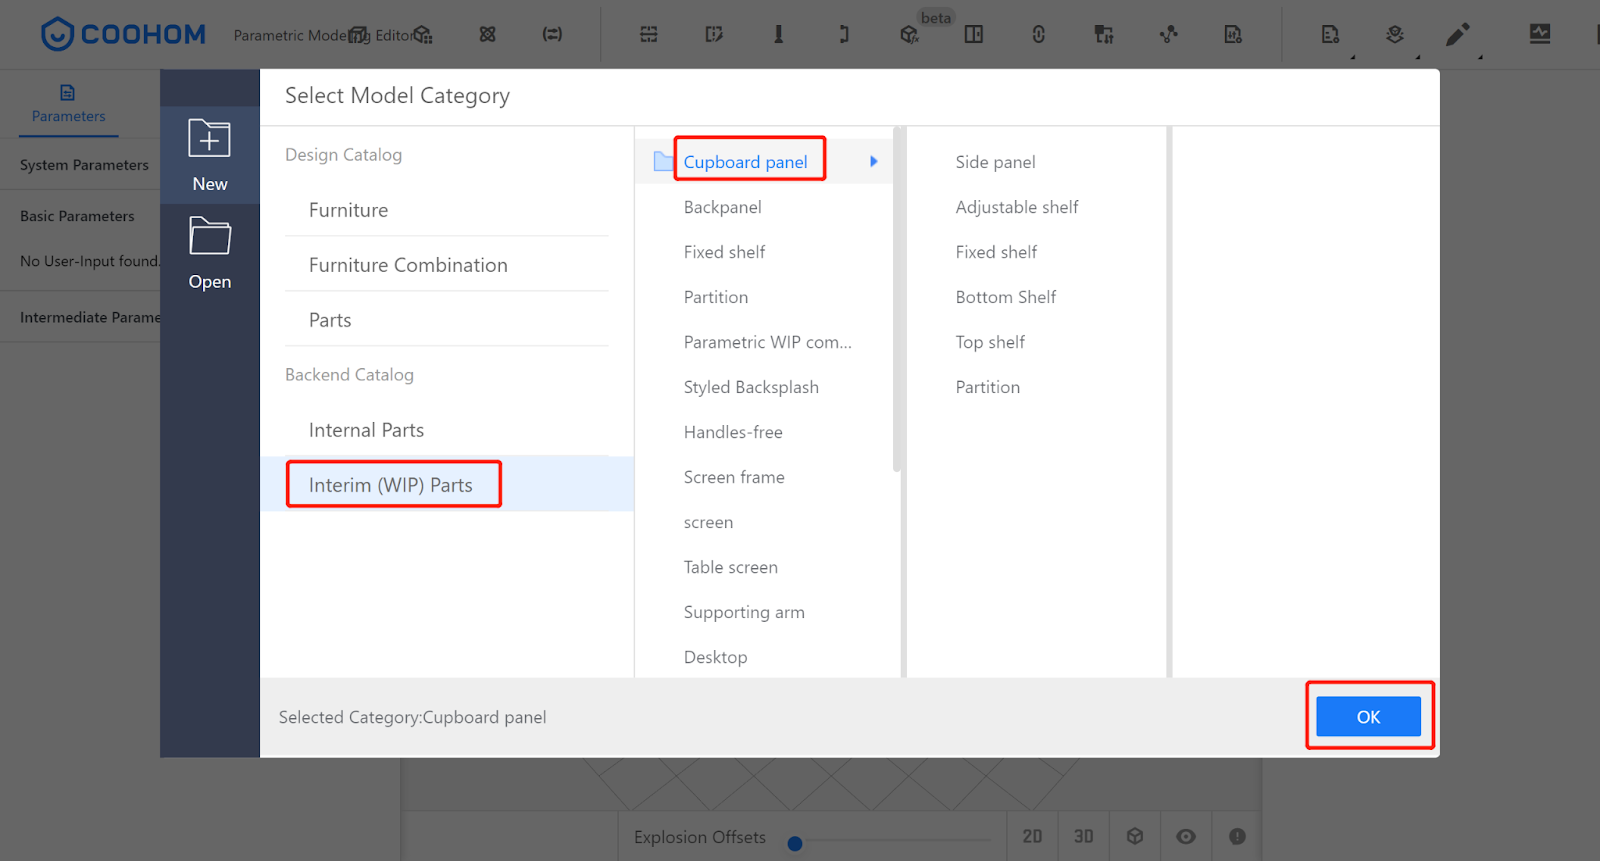
III.Importing Submodels
Call the just completed submodel - Part 1 from the semi-finished library and set the physical attributes: Width: #W, Position Y: -#D+30+18*2+200, Arc Radius: 40
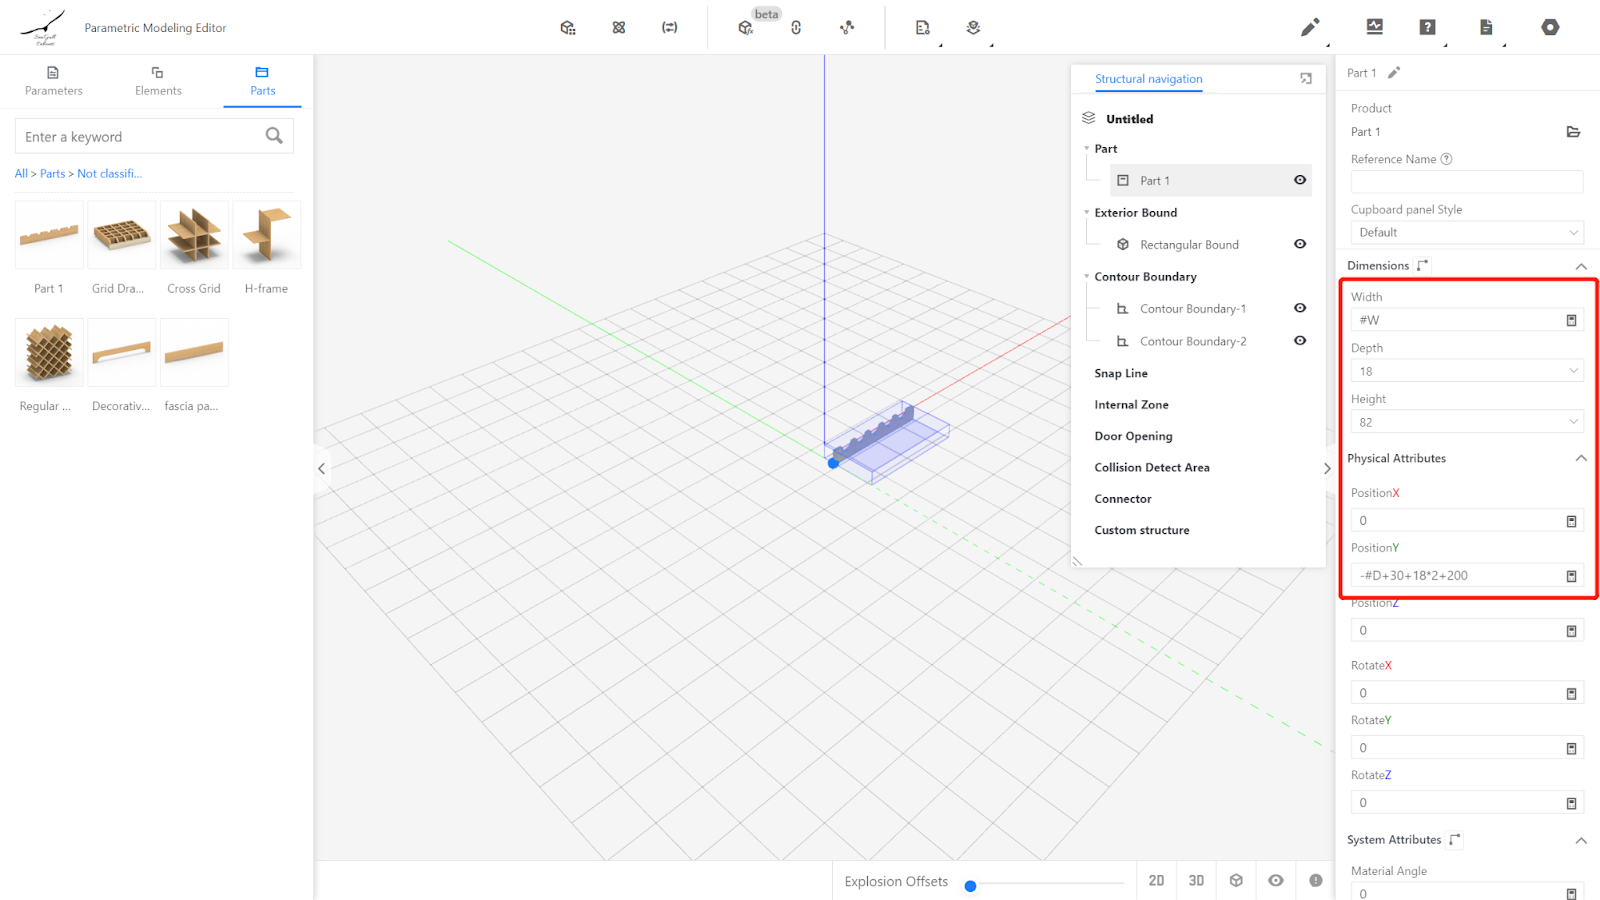
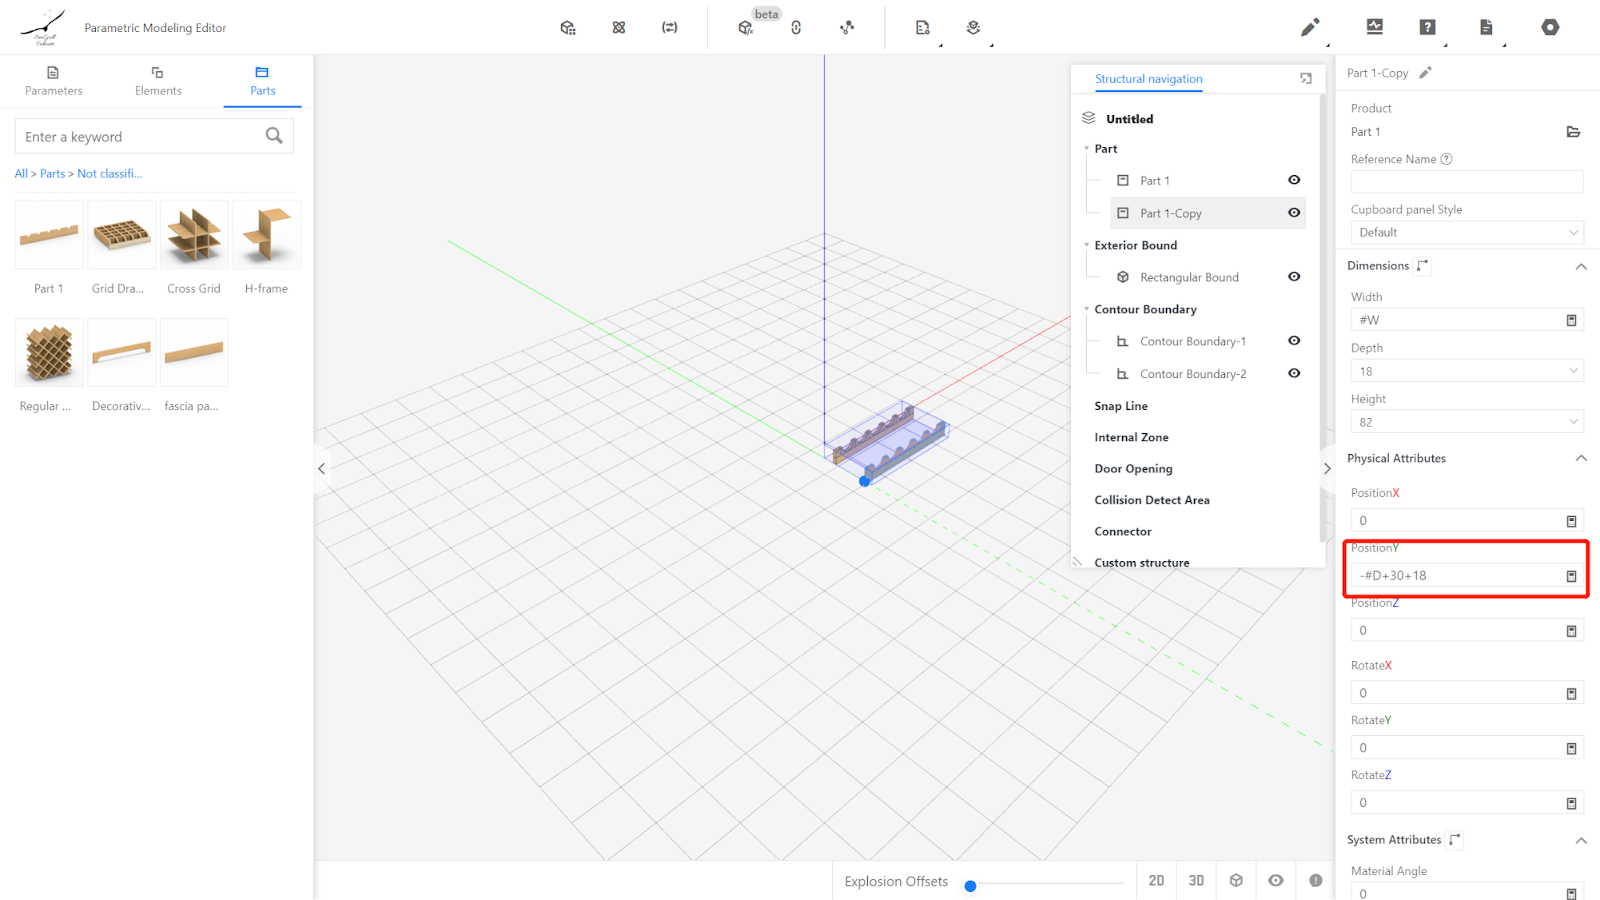
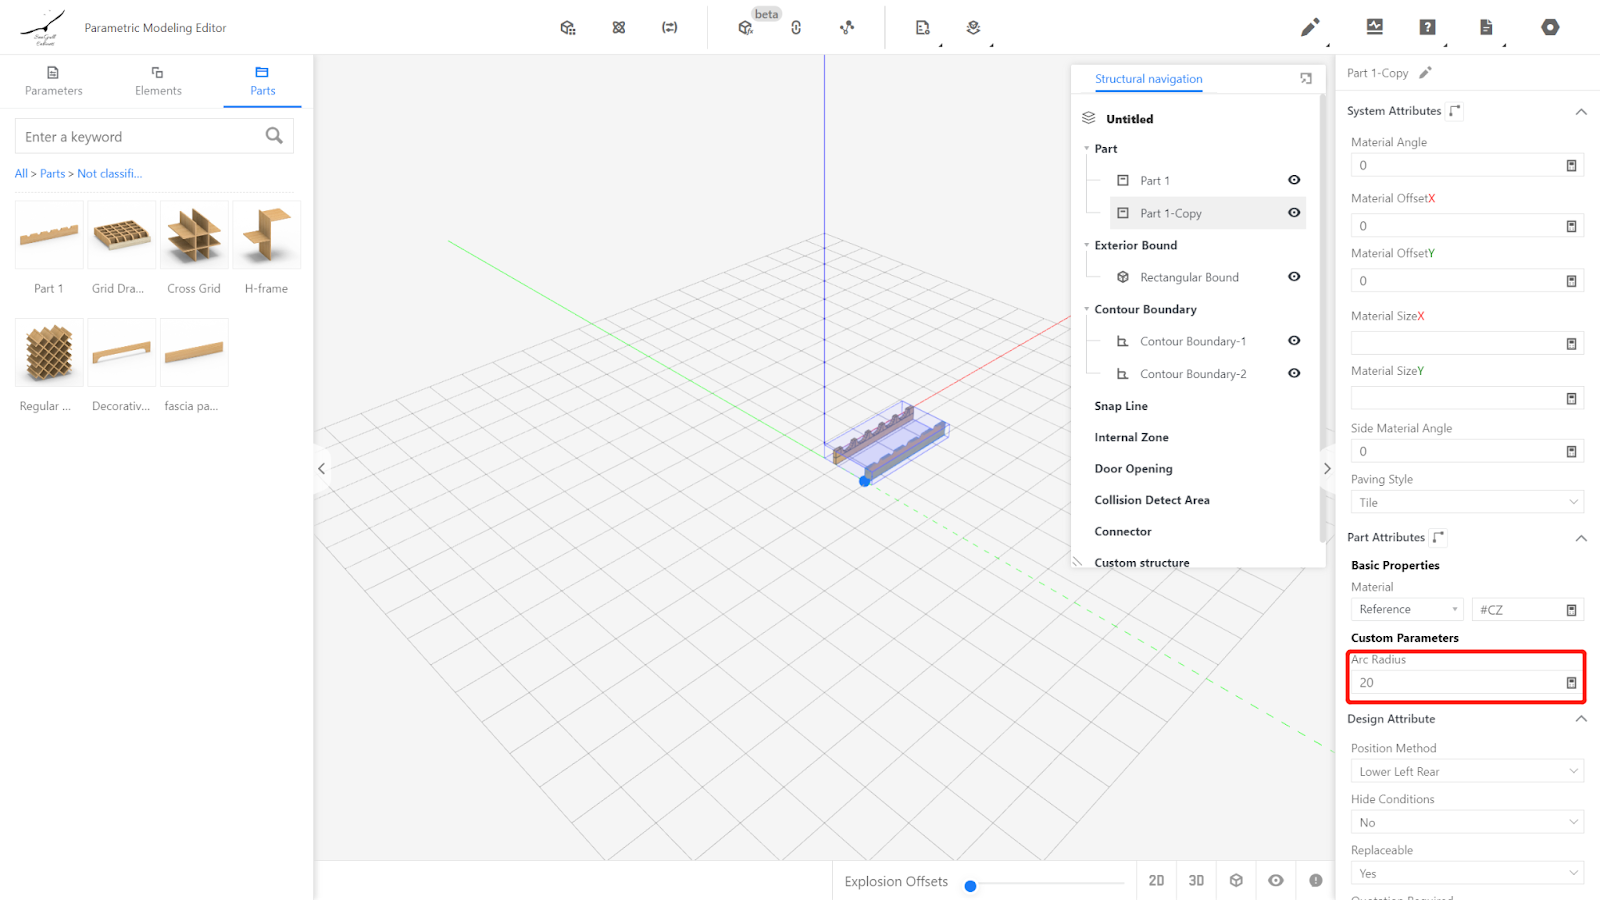
Click on Part 1, right-click and select "Copy", then modify the Position Y to -#D+30+18 and the Arc Radius to 20.
IV.Testing the Model
Enter numerical values within the range of parameters W and D, including the maximum and minimum values. Observe if the model changes accordingly with the numerical values. If everything appears normal, it indicates that the model is functioning correctly.
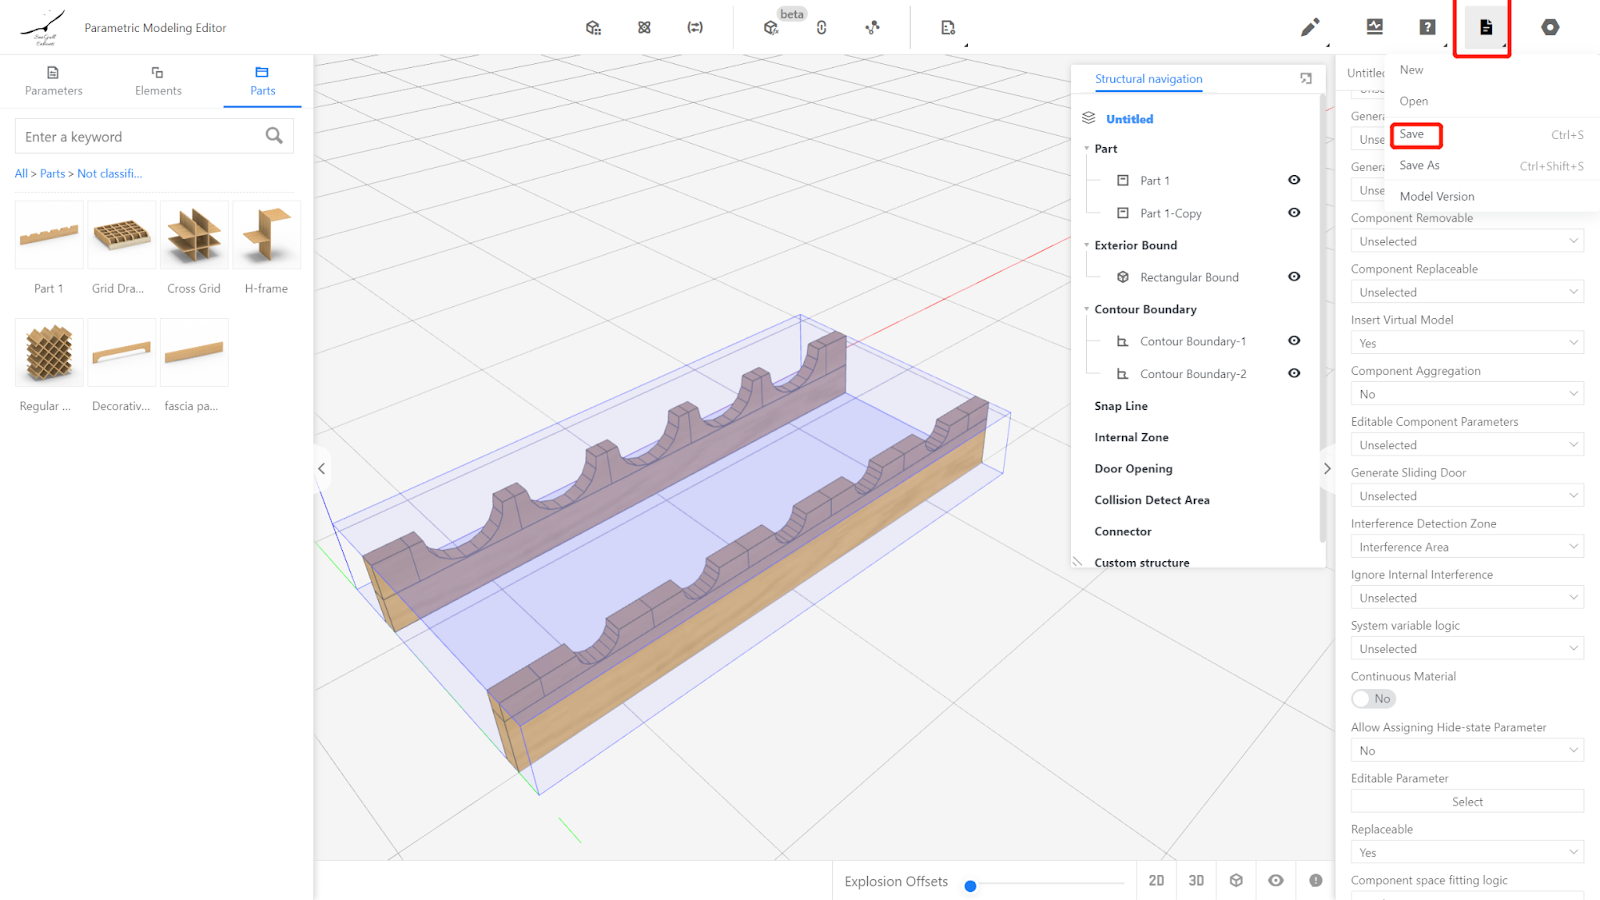
V.Saving to the Library
Click on the file icon in the upper right corner, select "Save," choose the desired subdirectory, name the file, and click on "Save."
On the product management page, find the corresponding category for the model. Check the model and click on "Store" to wait for the model rendering to complete.