Using the example of a drawer chest with 18mm panels, let's go through the following modeling steps.

-
Creation Position
Creation Position
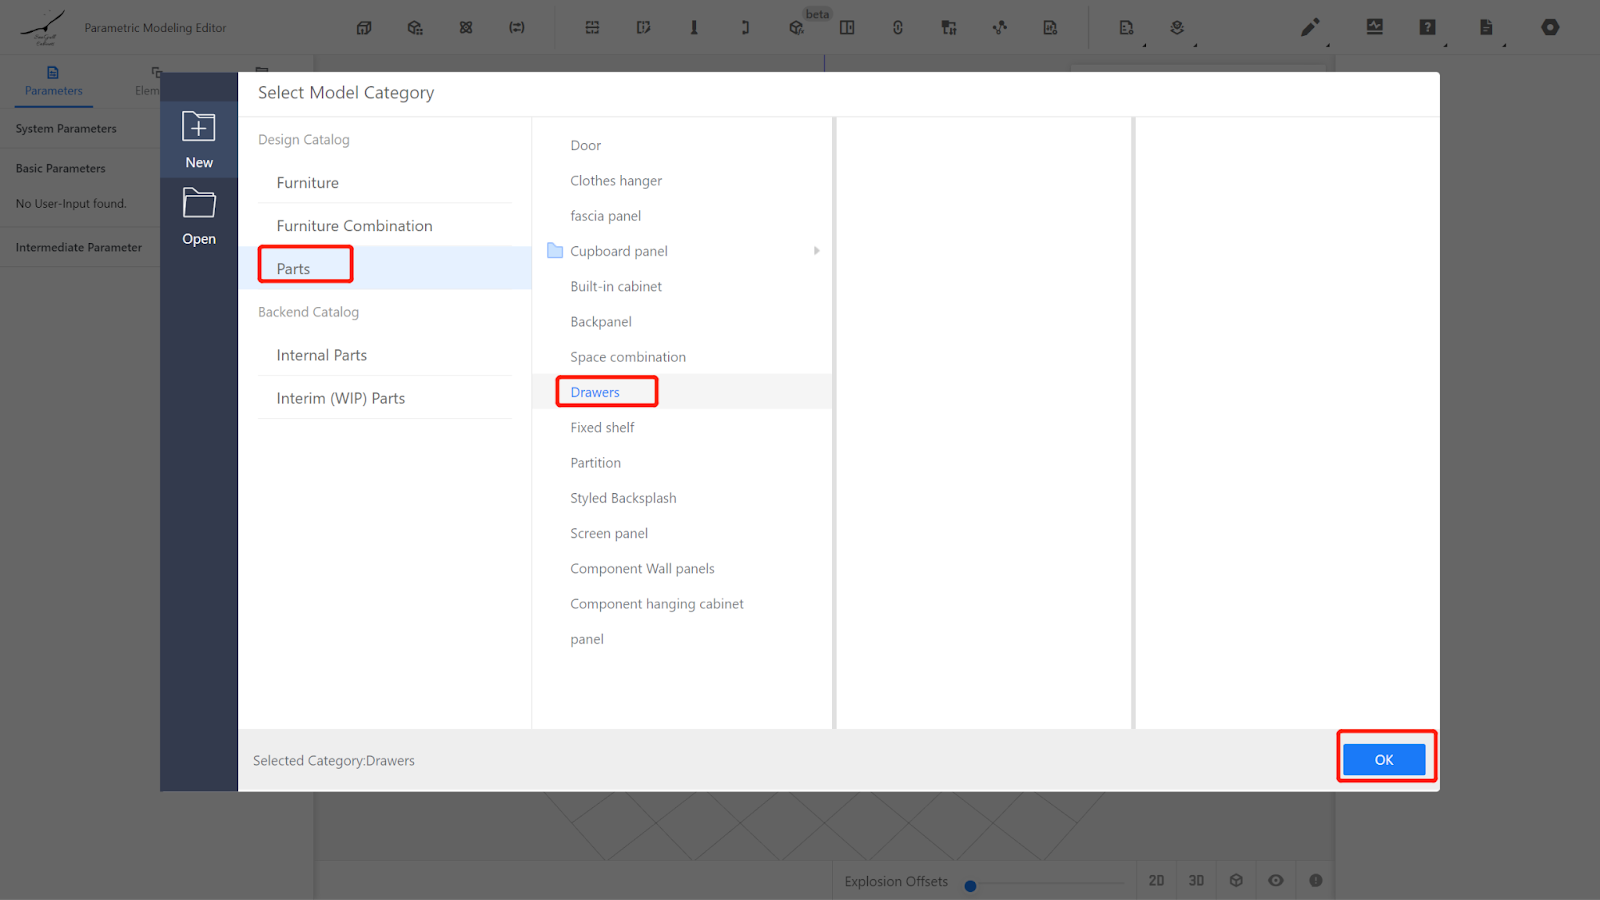
Custom Furniture —Create Asset—Parametric Model Library— New—
II.Setting Parameters
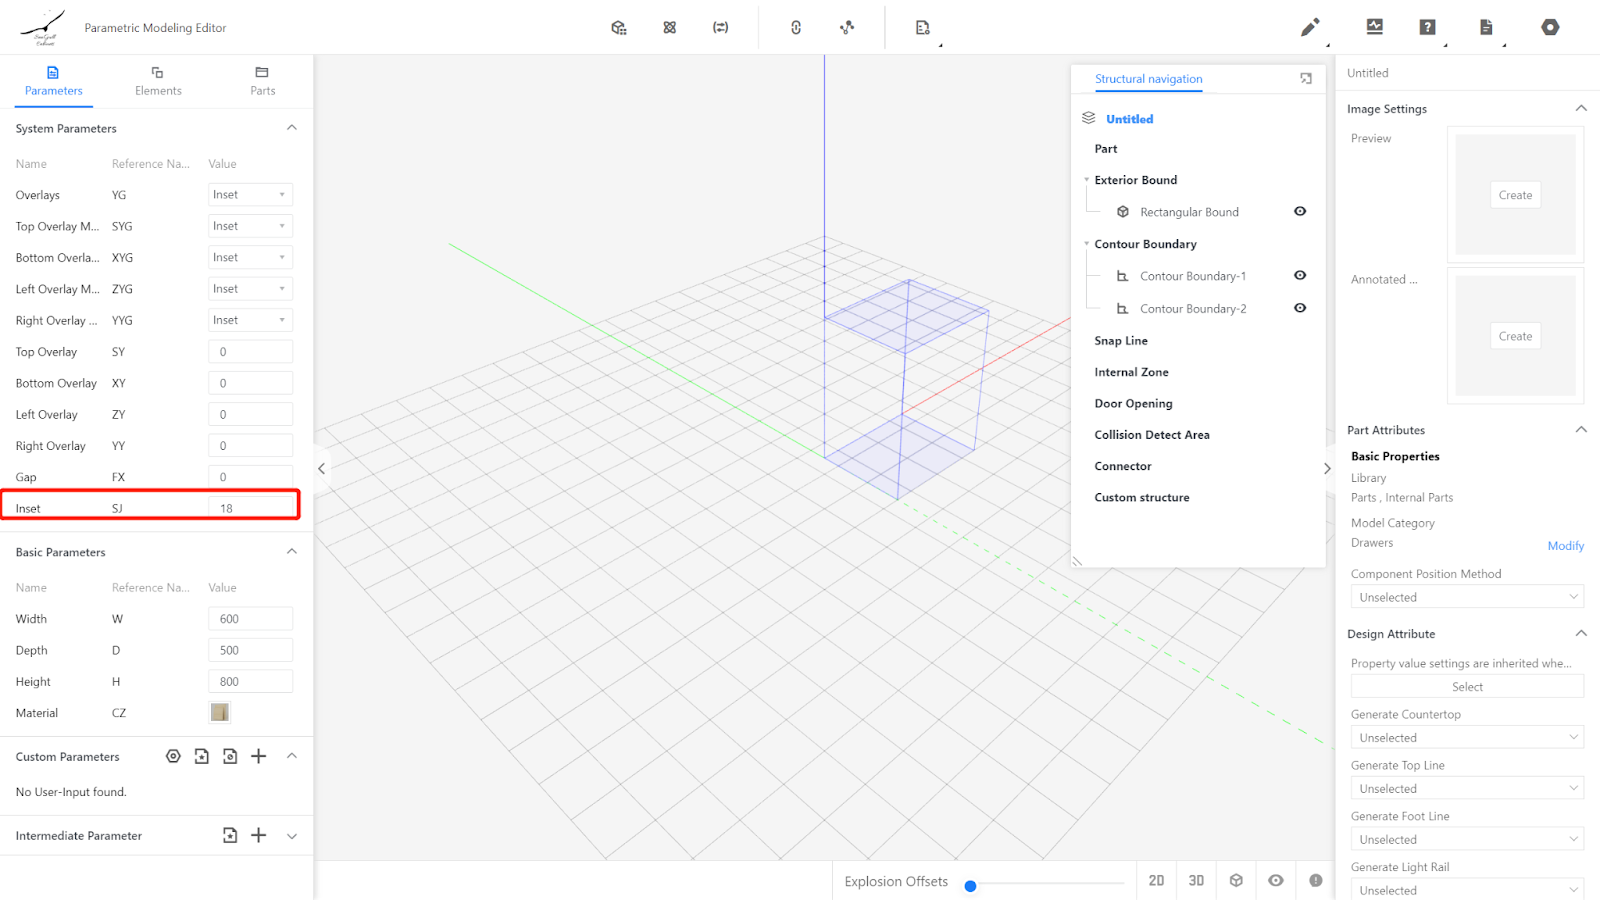
2.1 System Parameters:
Change the indentation value to 18 and keep the rest as default.
2.2 Custom Parameters
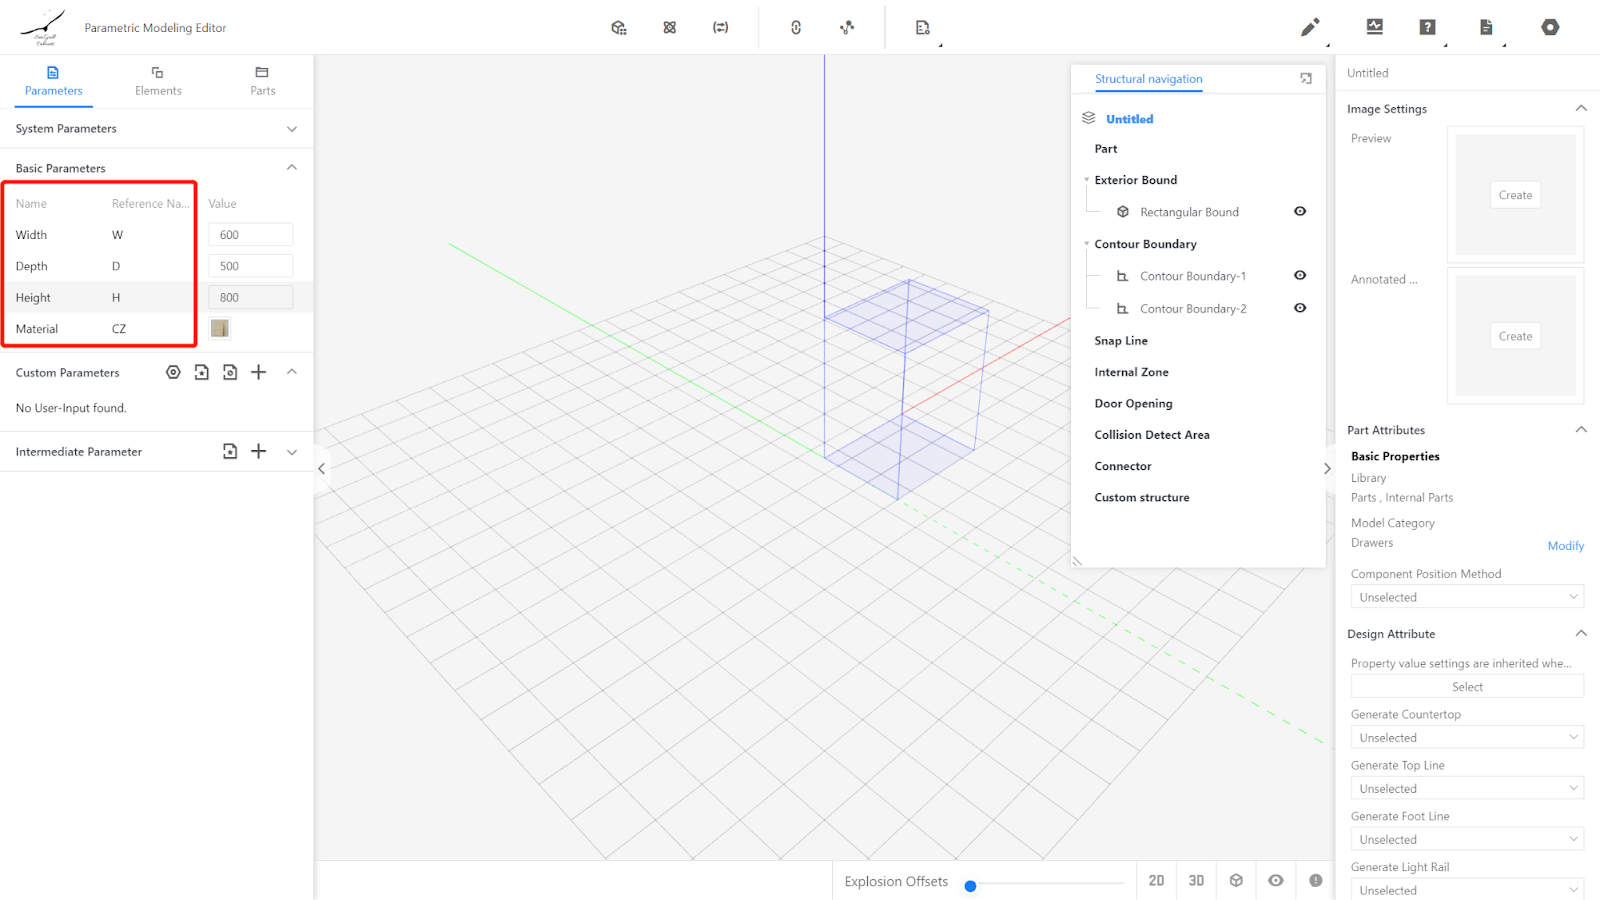
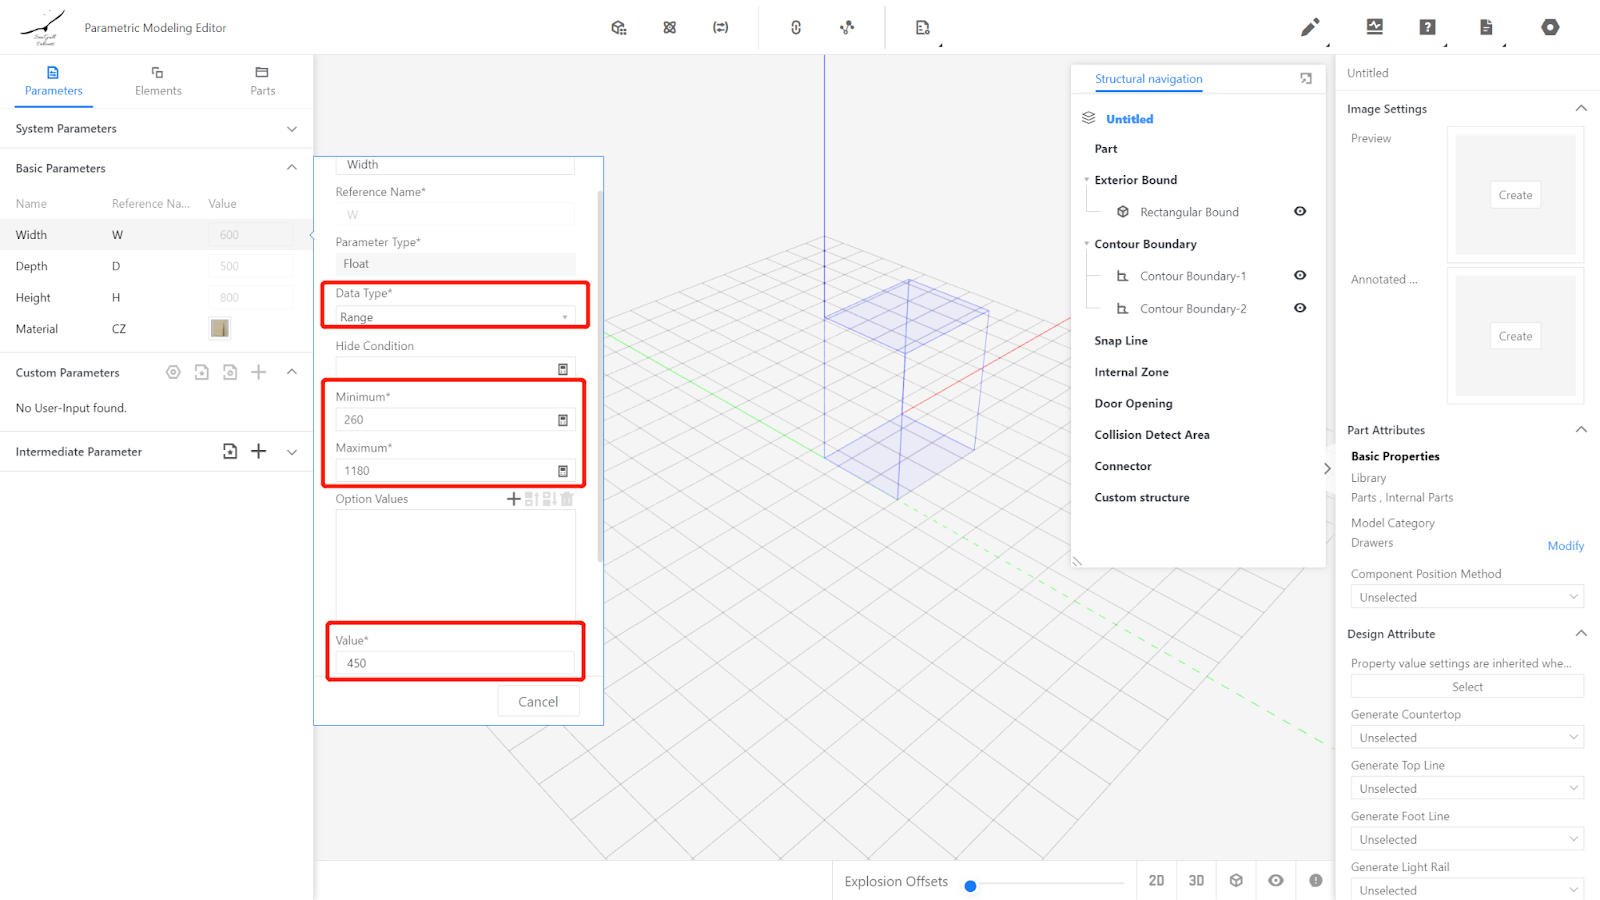
2.2.1 Width (W) - Represents the size of the model panel in the X-axis direction. Set the value type as a range (e.g., range 260-1180, current value: 450).
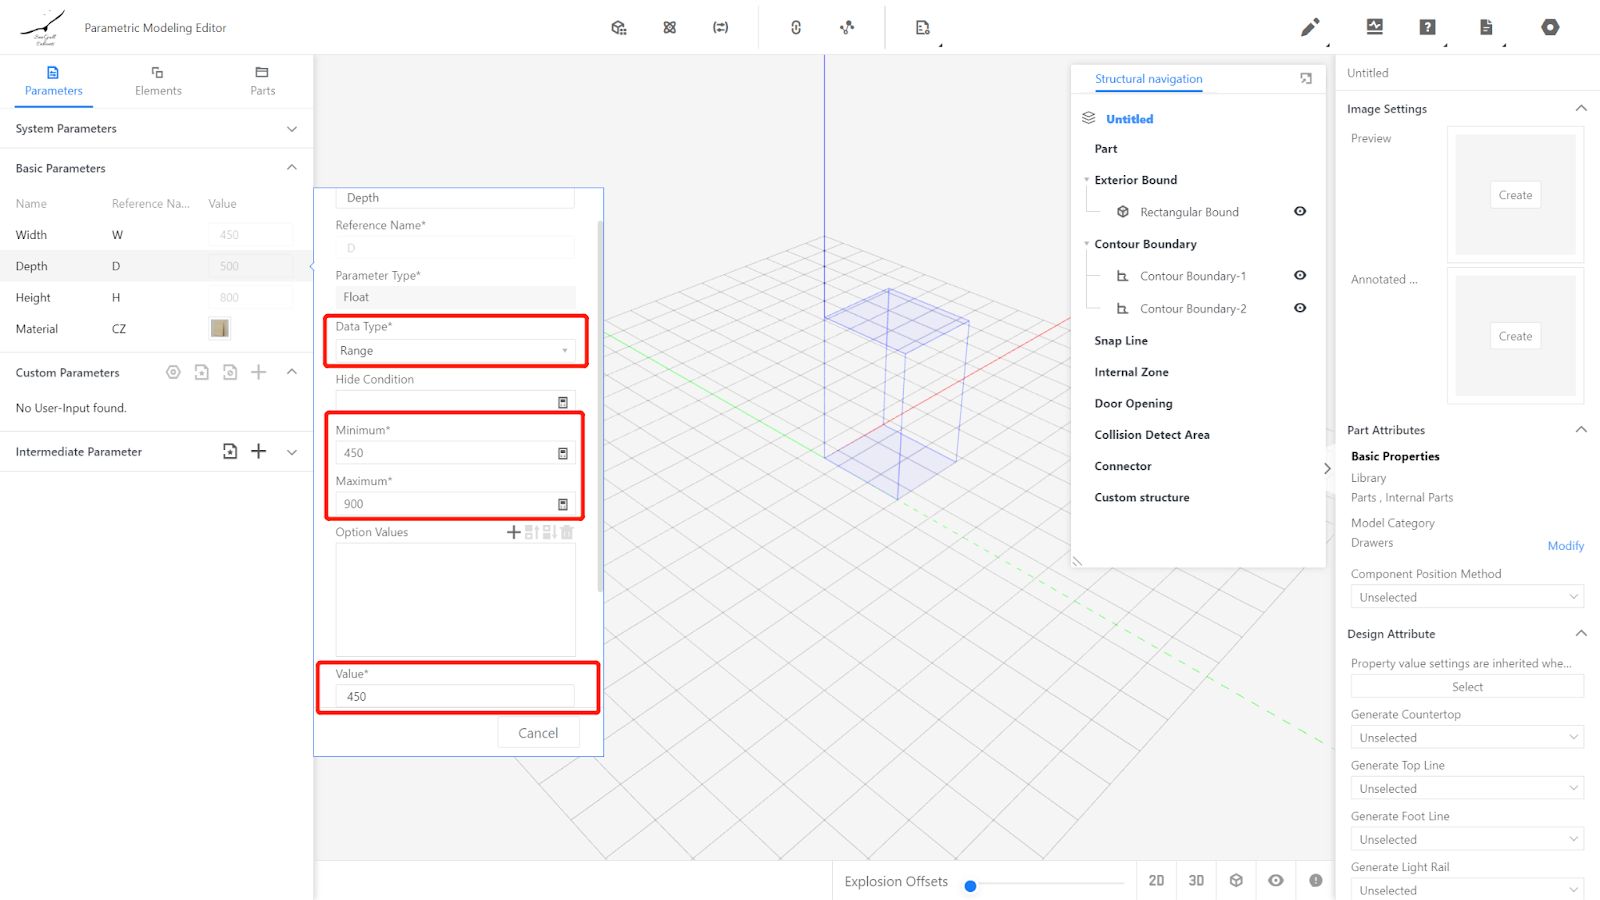
2.2.2 Depth (D) - Represents the size of the model in the Y-axis direction. Set the value type as a range (e.g., range 450-900, current value: 450).
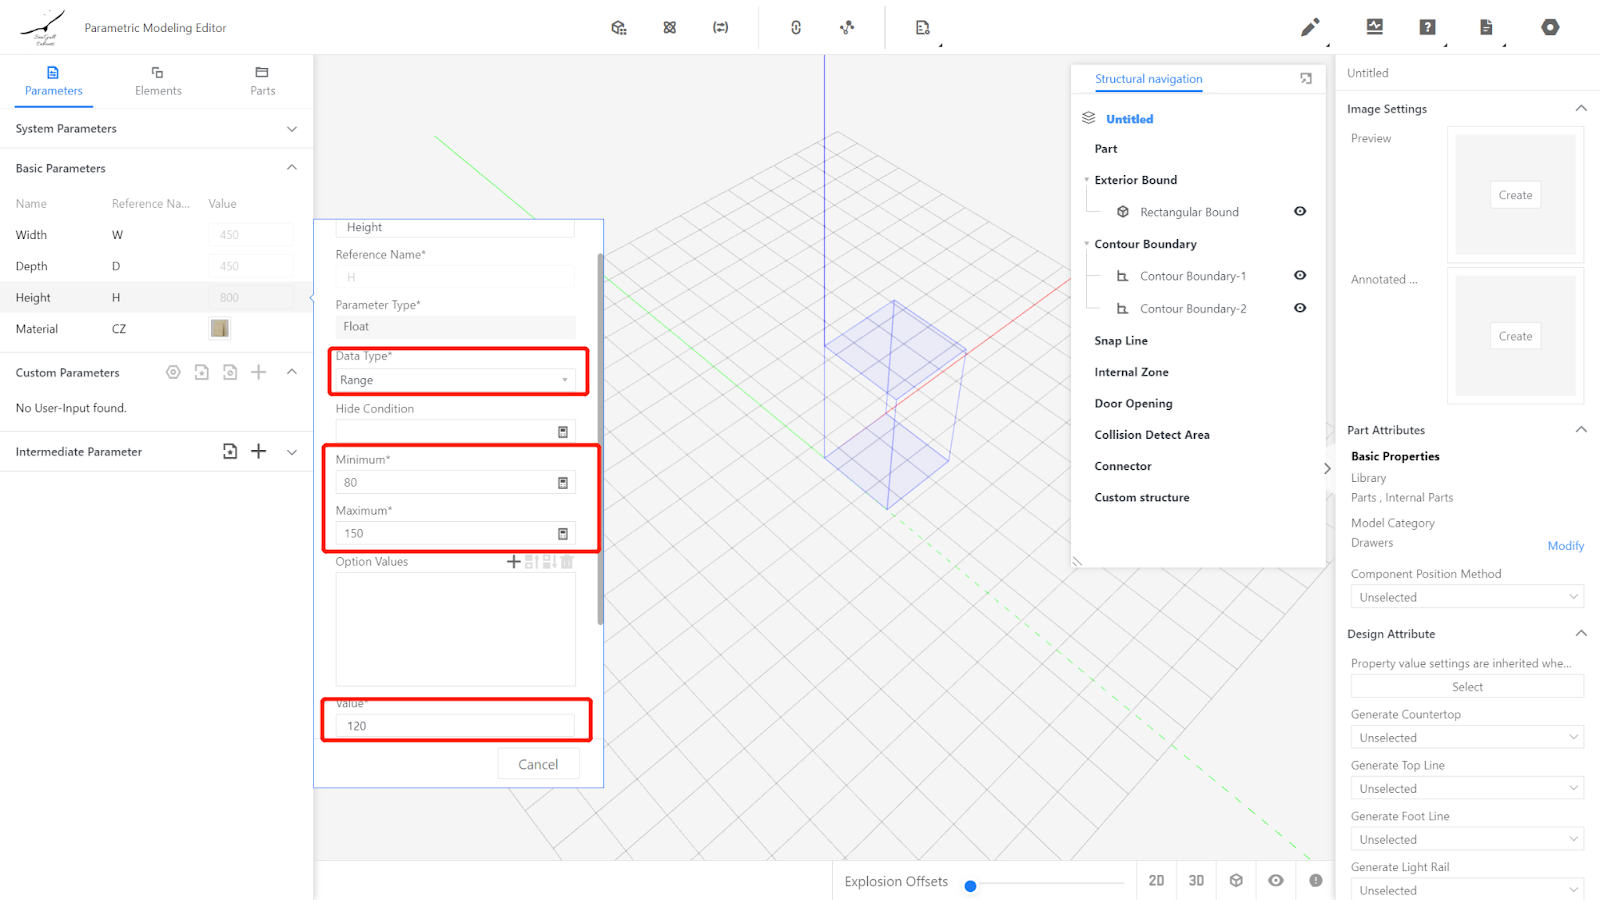
2.2.3 Height (H) - Represents the size of the closing panel in the Z-axis direction. The value type can be set as a range (e.g., range 80-150, current value: 120).
2.2.4 Material - No modification needed, indicating that the drawer chest uses the default material.
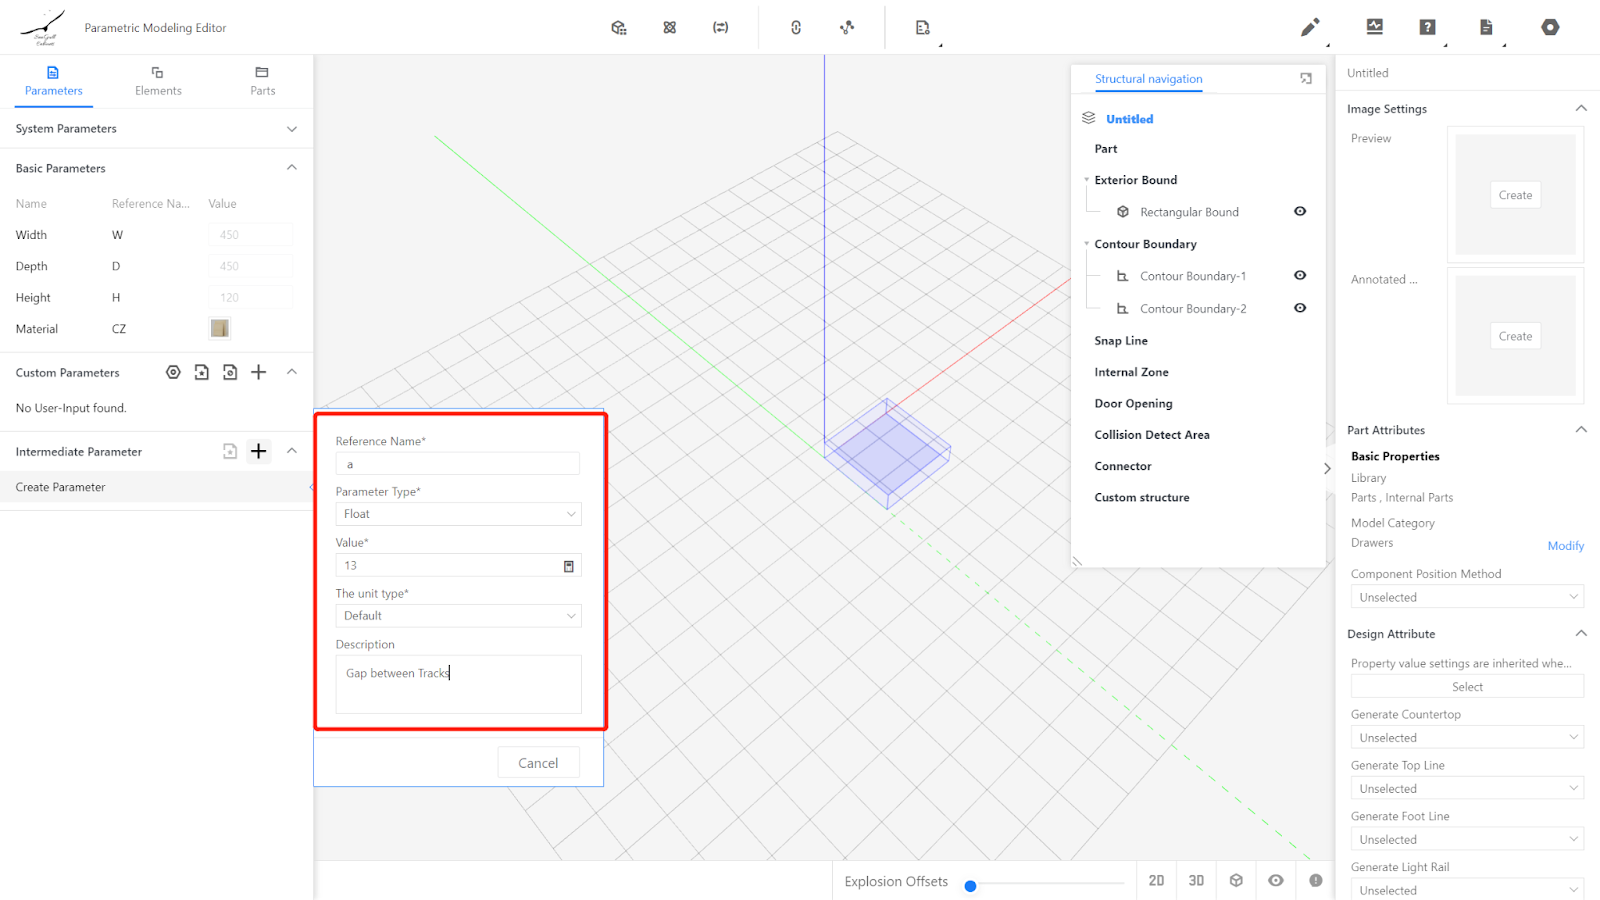
2.3 Intermediate Parameters
Intermediate Parameters are used to replace commonly used numbers or formulas in the editor. They are only displayed in the editor and not in the front-end tools.
2.3.1 Gap between Tracks (a) - Represents the space reserved for track installation. Set it to 13 in this case.
2.3.2 Minimum Empty Space at the Back of the Drawer (b) - Represents the minimum empty space at the back of the drawer. Set it to 30.

2.3.3 Maximum Depth of Drawer Side (c) - Represents the maximum size that can be used for the drawer side panel, usually related to the size of the drawer slide. Set it to 700.

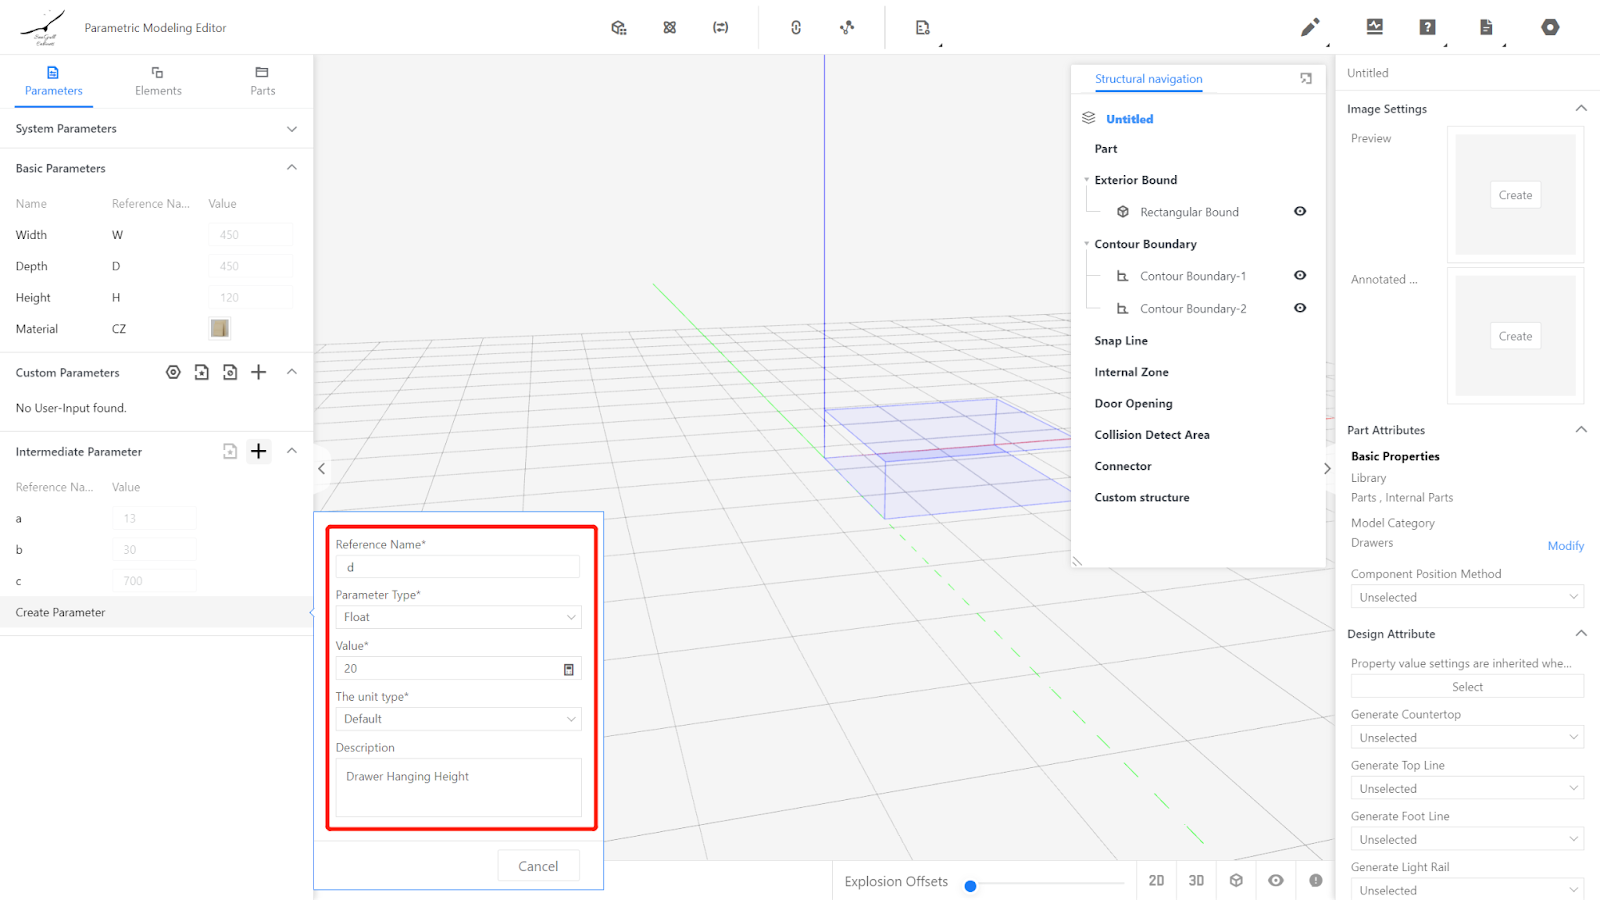
2.3.4 Drawer Hanging Height (d) - Represents the height of the drawer hanging below. Set it to 20.
III.Importing Submodels
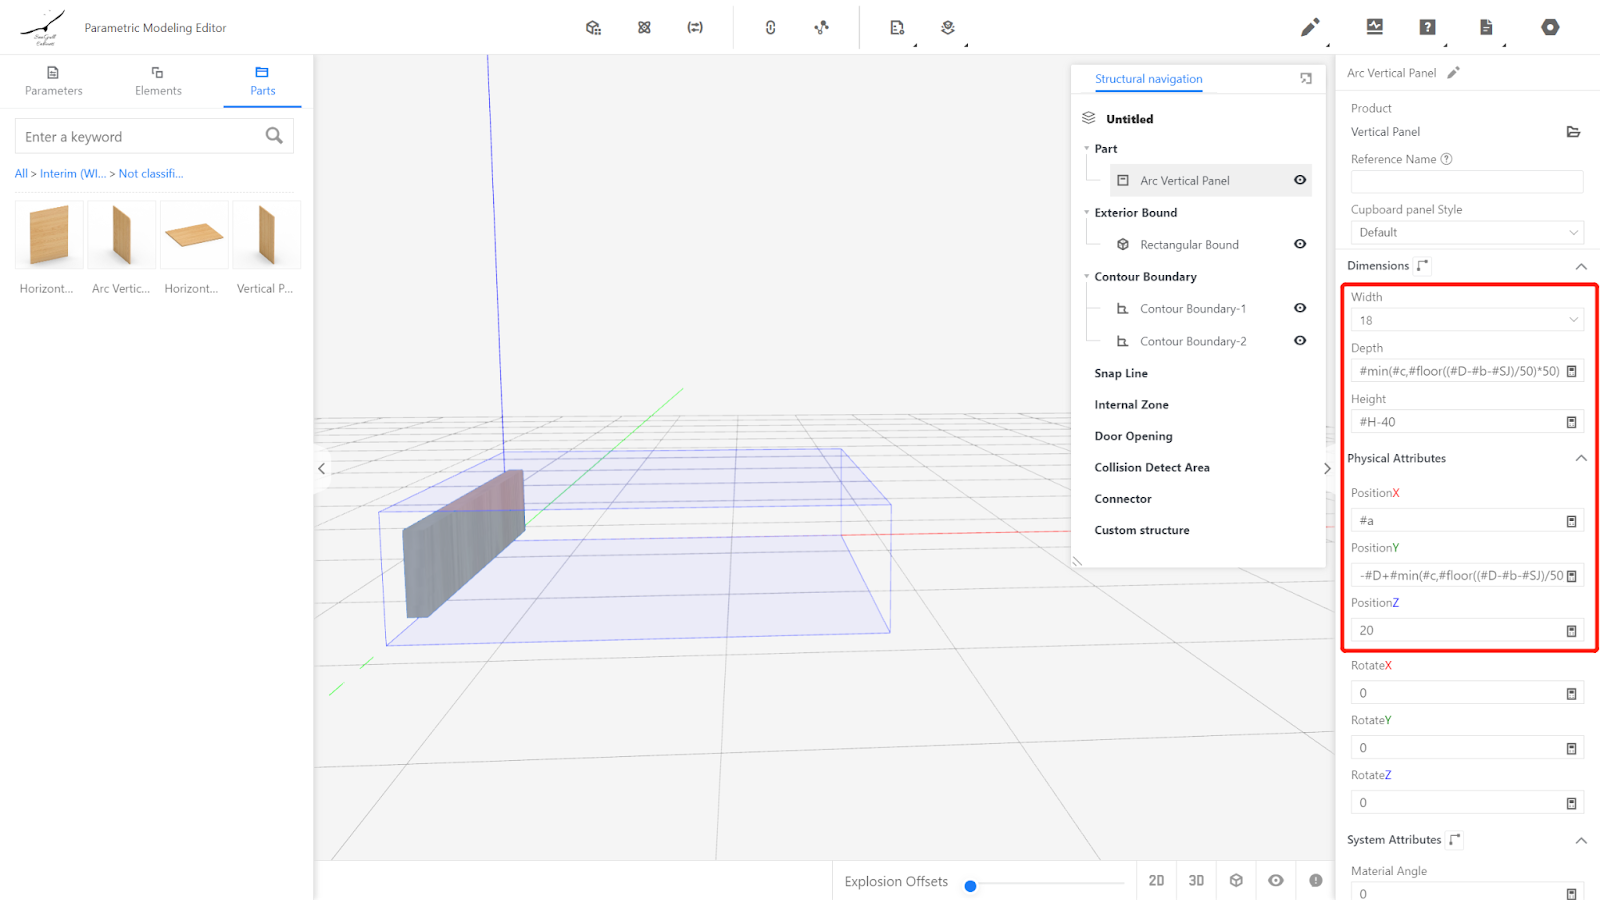
3.1. Import a finished 18mm side panel (with grain pattern) from the semi-finished library as the left drawer side panel and set its physical attributes. Width: 18, Depth: #min(#c,#floor((#D-#b-#SJ)/50)*50), Height: #H-40, Position X: #a, Position Y: -#D+#min(#c,#floor((#D-#b-#SJ)/50)*50)+#SJ, Position Z: 20.
3.2. Click on the panel, right-click and select "Copy," then change the Position X to #W-18-#a.

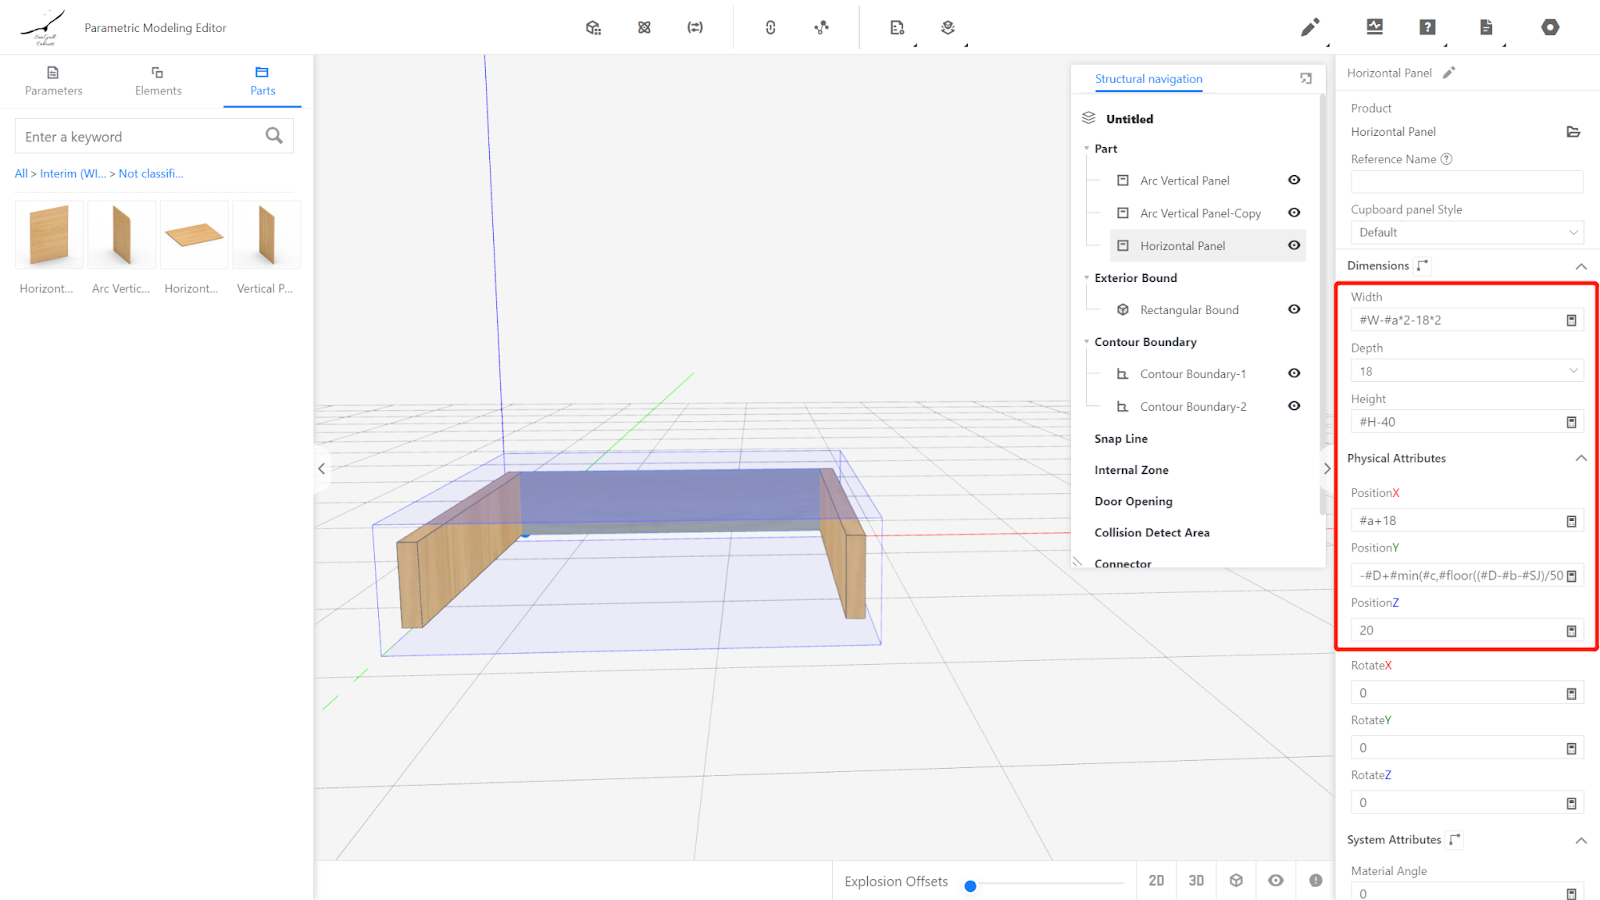
3.3. Insert an 18mm back panel and set its physical attributes. Width: #W-#a*2-18*2, Depth: 18, Height: #H-40, Position X: #a+18, Position Y: -#D+#min(#c,#floor((#D-#b-#SJ)/50)*50)+#SJ, Position Z: 20.
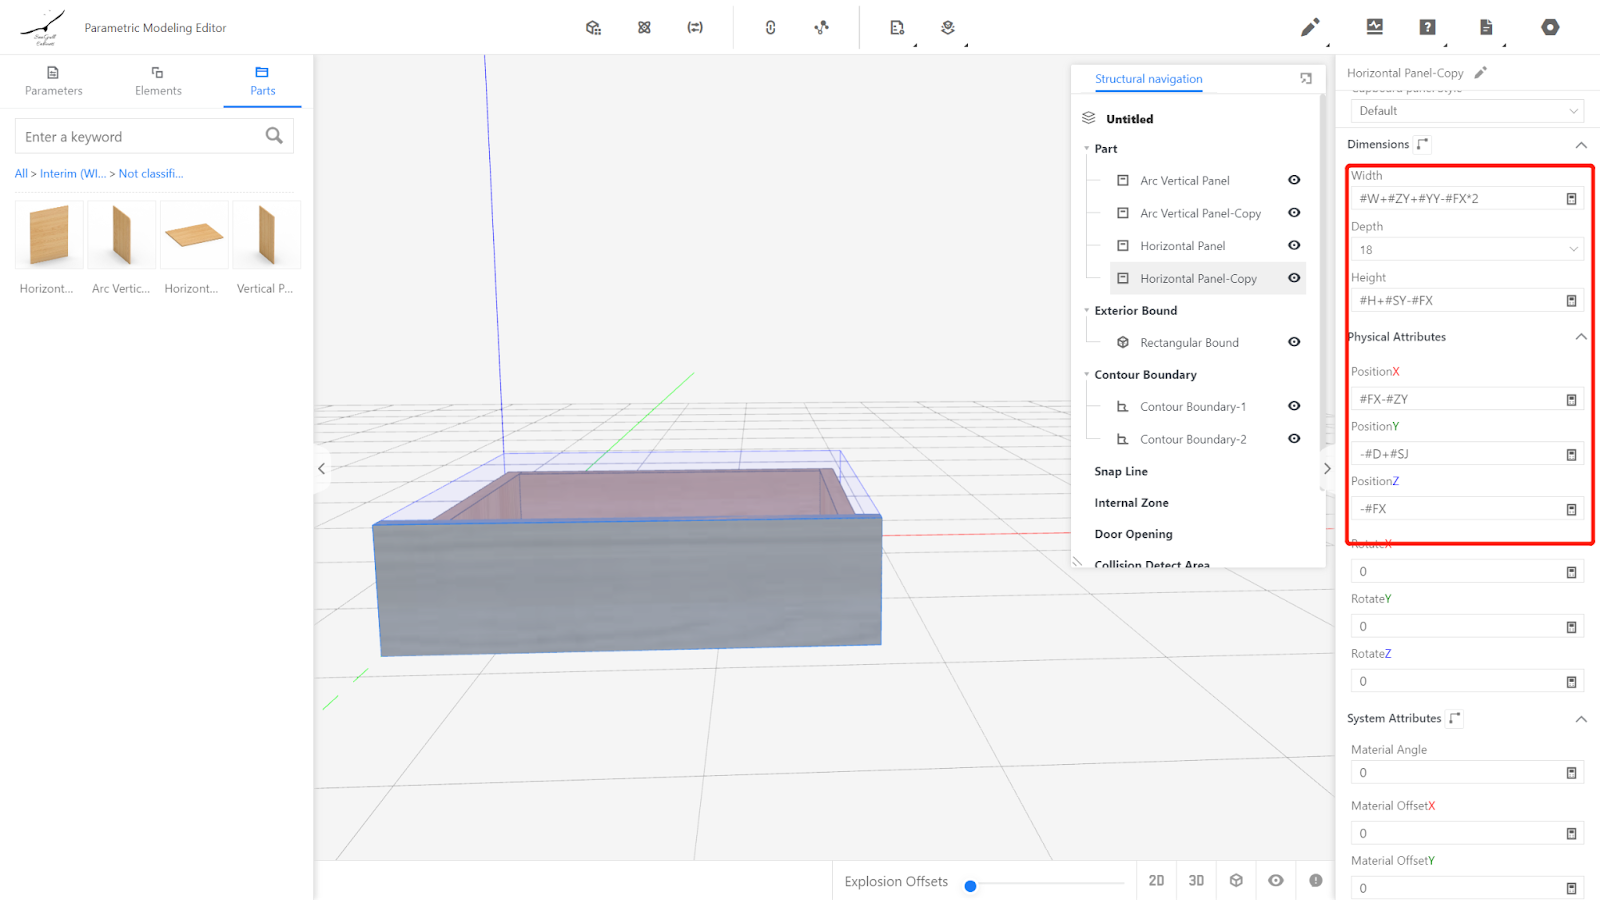
3.4. Insert a drawer front without handles and set its physical attributes. Width: #W+#ZY+#YY-#FX*2, Depth: 18, Height: #H+#SY-#FX, Position X: #FX-#ZY, Position Y: -#D+#SJ, Position Z: -#FX.
(Note: The material of the drawer front can be changed by selection and is not limited by the custom column's material.)
3.5. Aluminum hanging rod
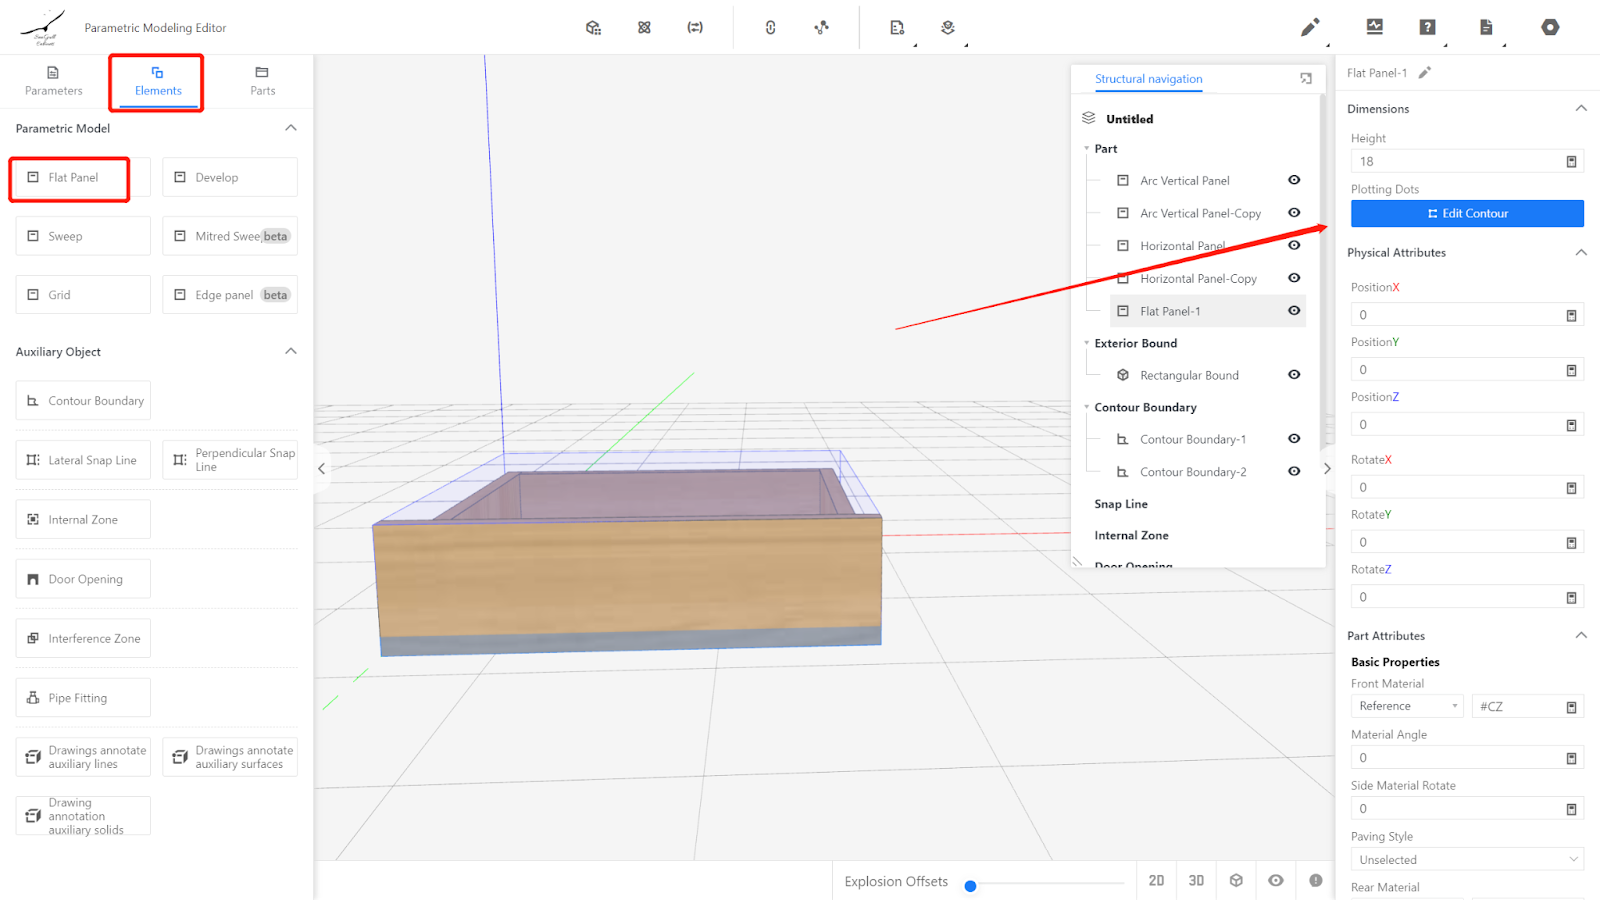
(There are multiple ways to implement a hanging rod. In this case, we will create a custom-shaped rectangular prism.)
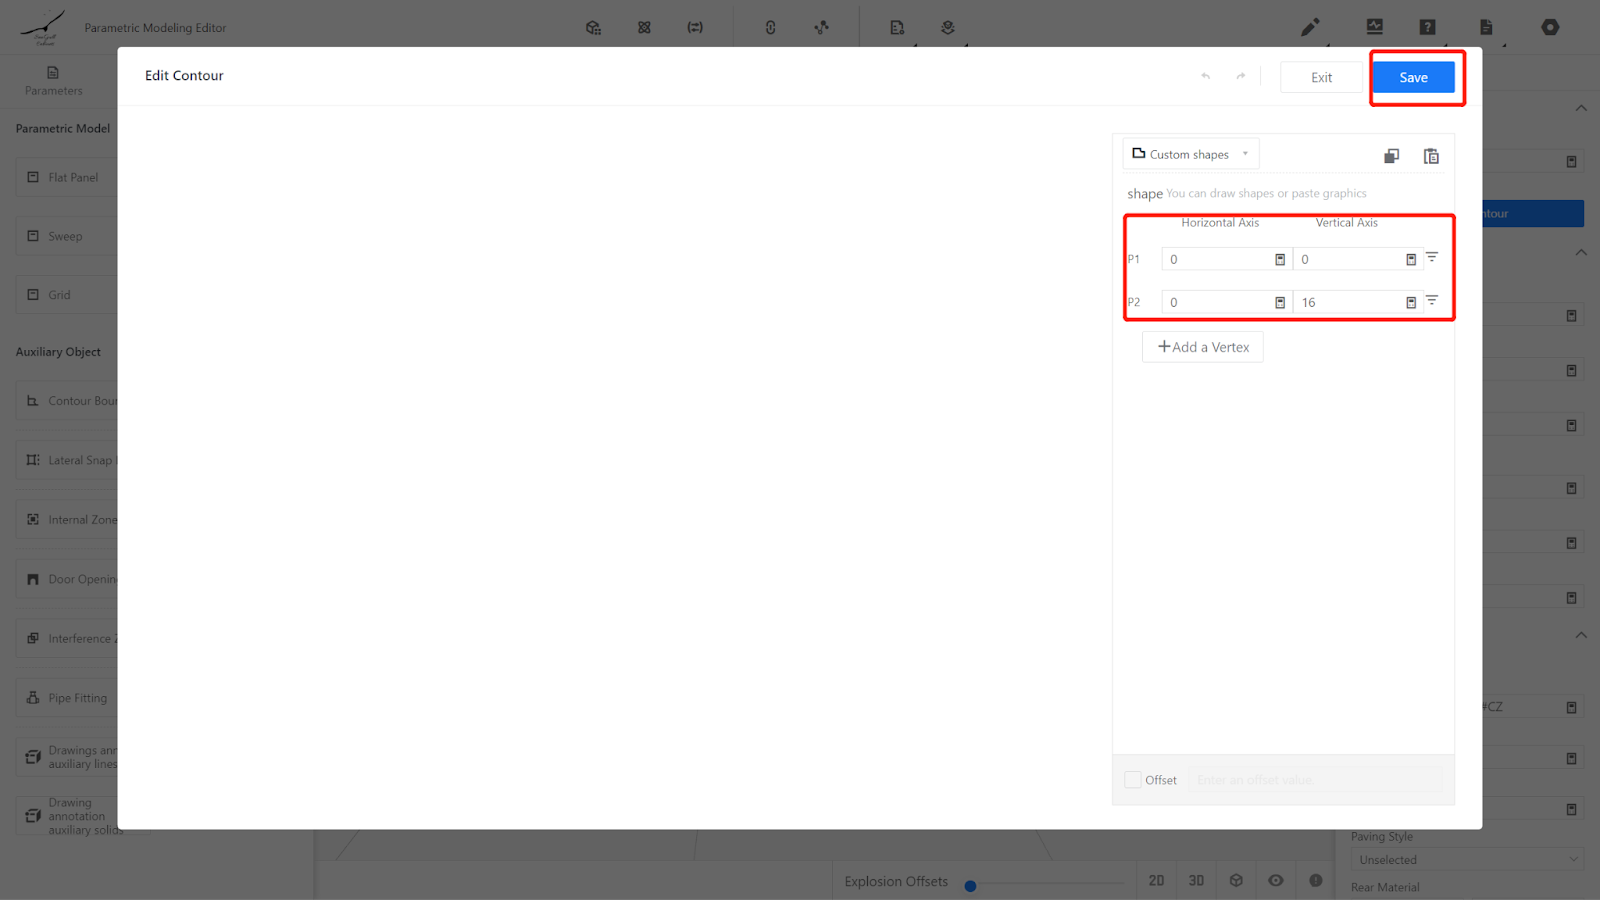
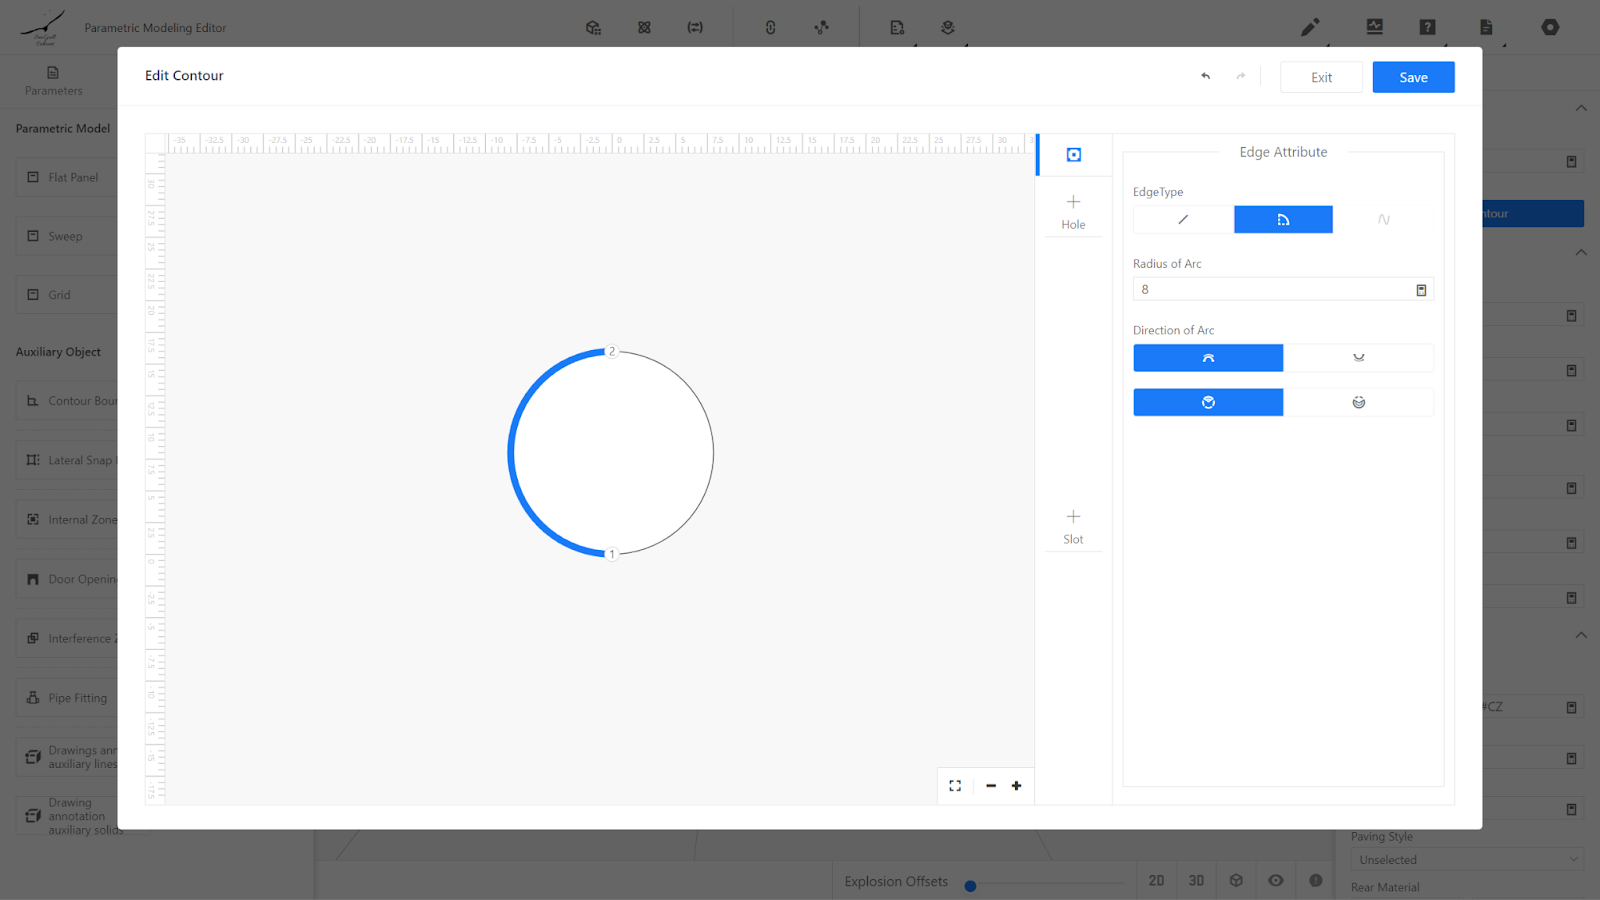
Create a custom-shaped rectangular prism - Edit Contour.
Keep two points: Point 1 (0,0) and Point 2 (0,16).
Select the line segment between Point 1 and Point 2 and convert it into an arc with a radius of 8.
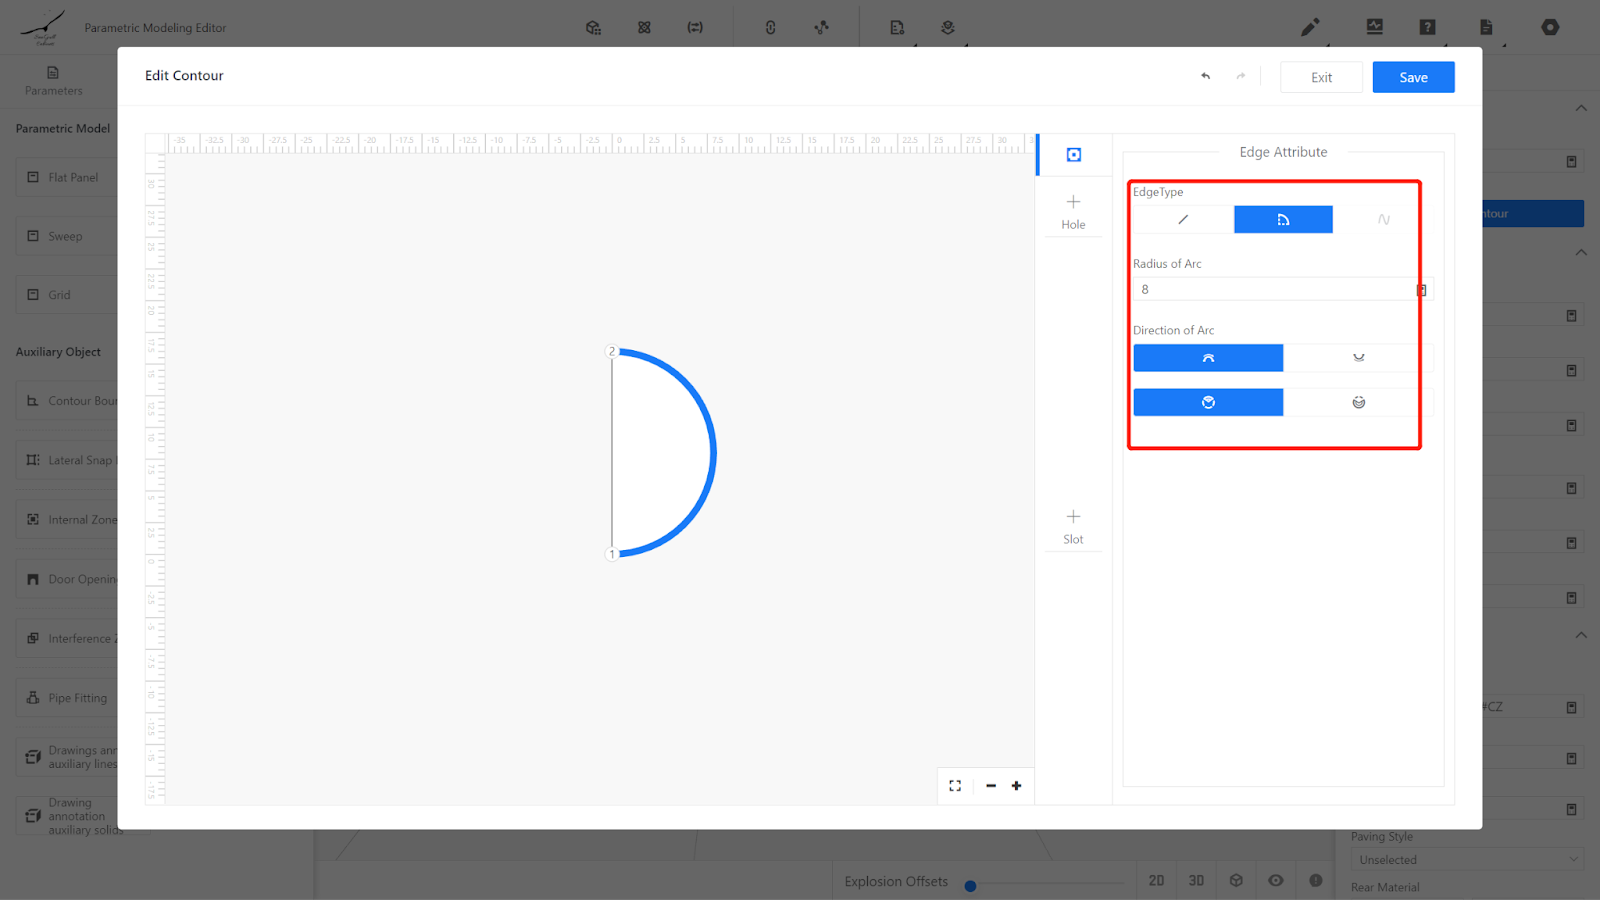
Repeat the previous step to convert the other straight line into an arc, creating a circular shape with a radius of 8. Click on "Save."
Physical Properties:
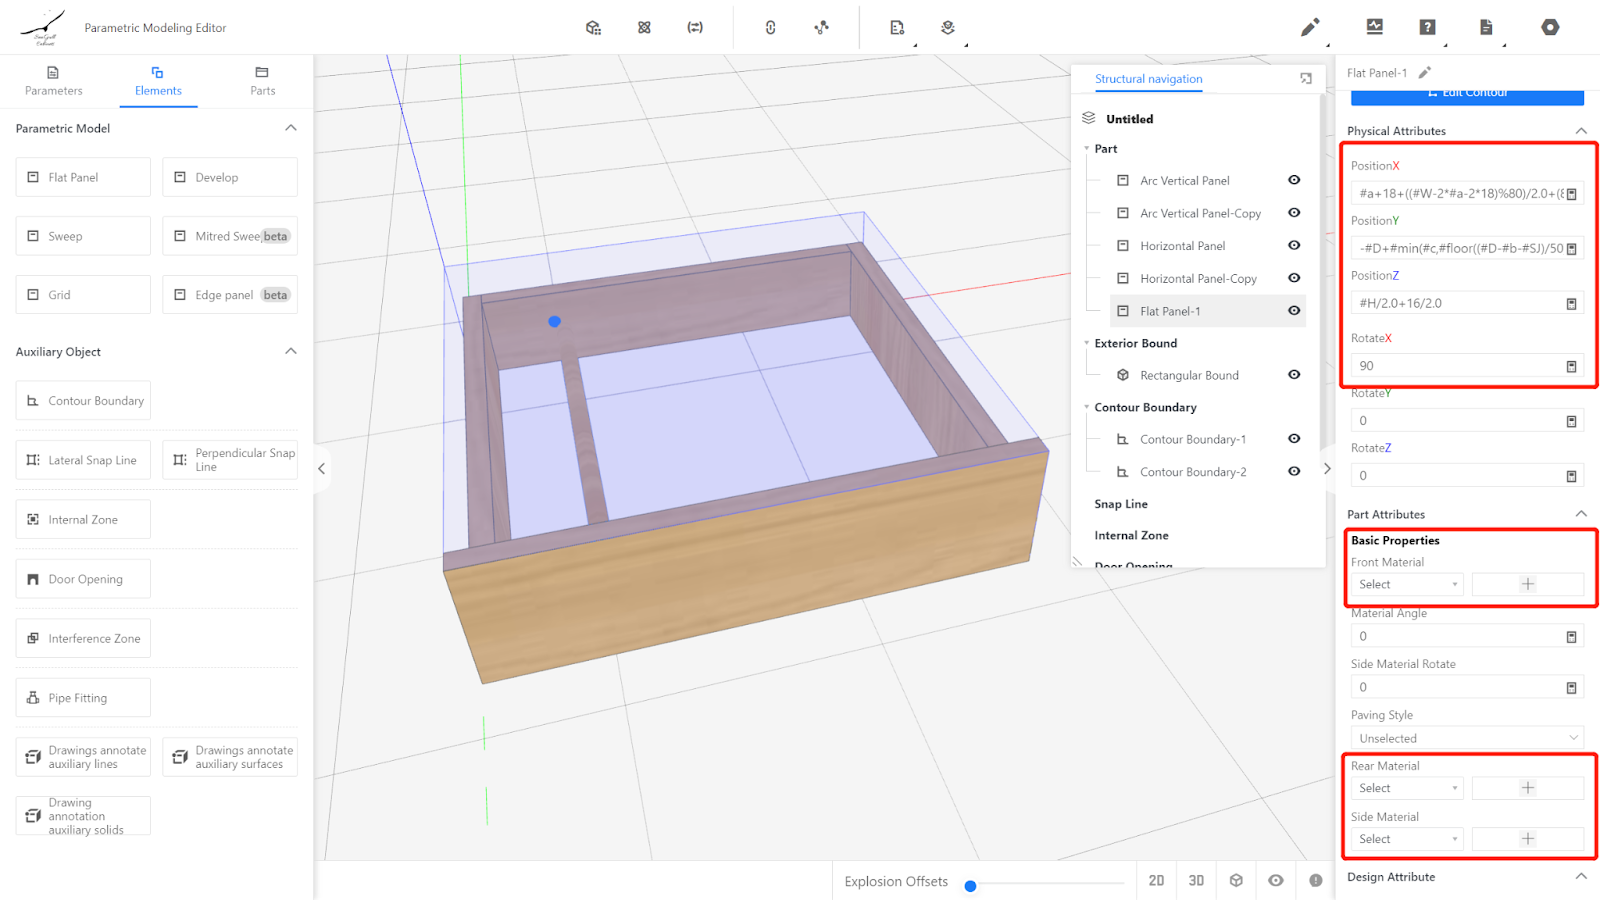
Height is #D-32-#SJ-18, position X is #a+18+((#W-2*#a-2*18)%80)/2.0+(80-16)/2.0, position Y is -#D+#min(#c,#floor((#D-#b-#SJ)/50)*50)+#SJ-18, position Z is #H/2.0+16/2.0, rotation X is 90.
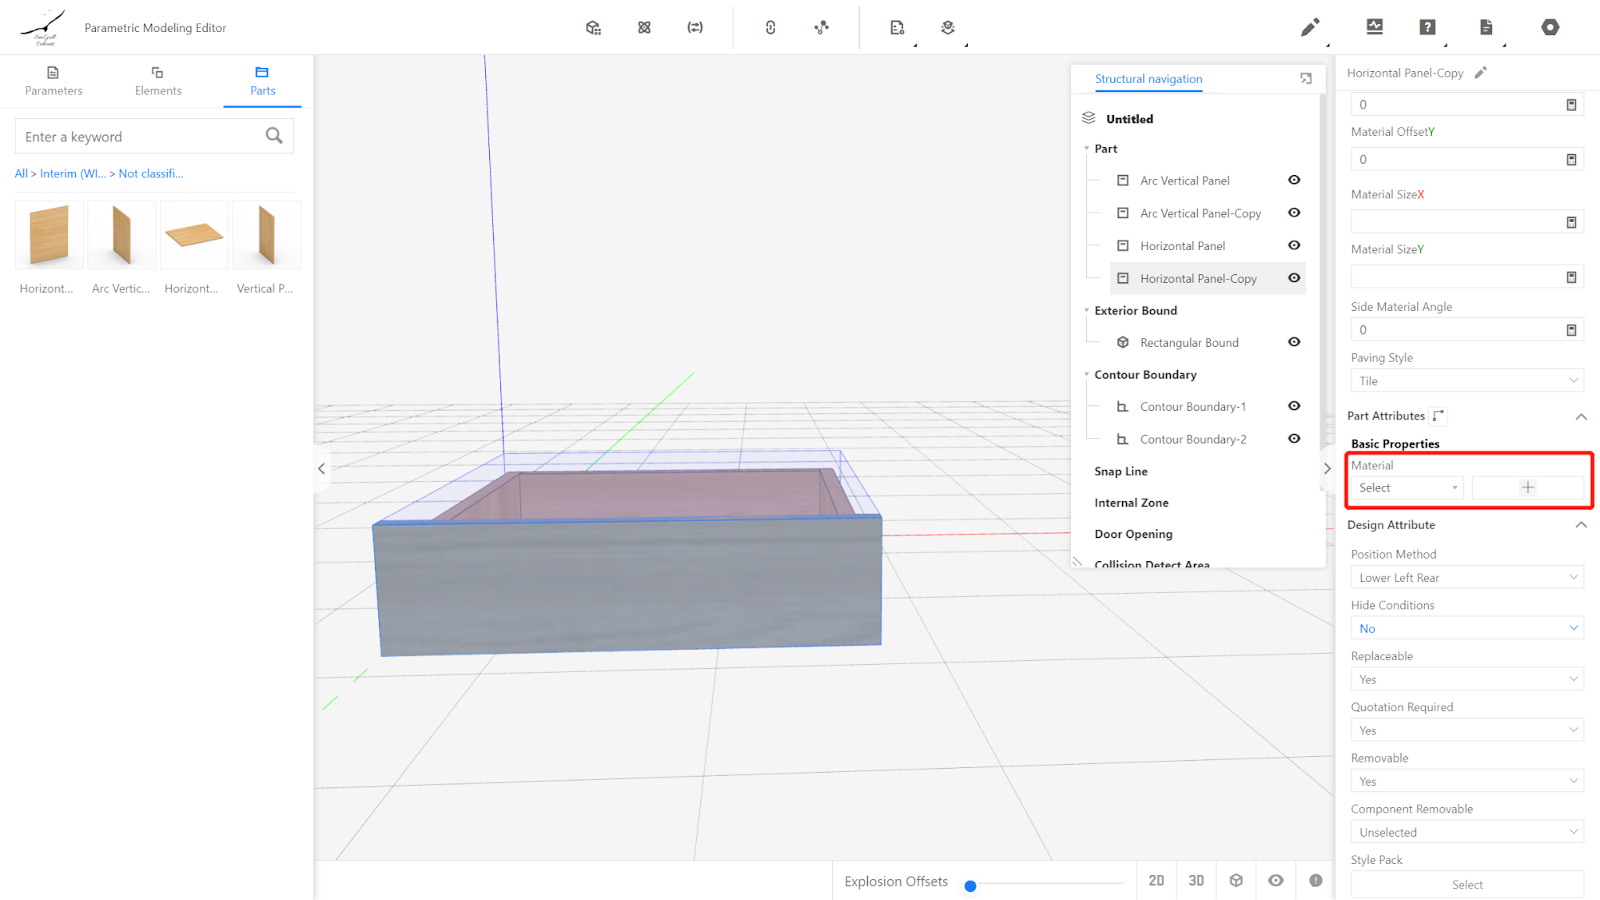
Material: Metal material is selected.
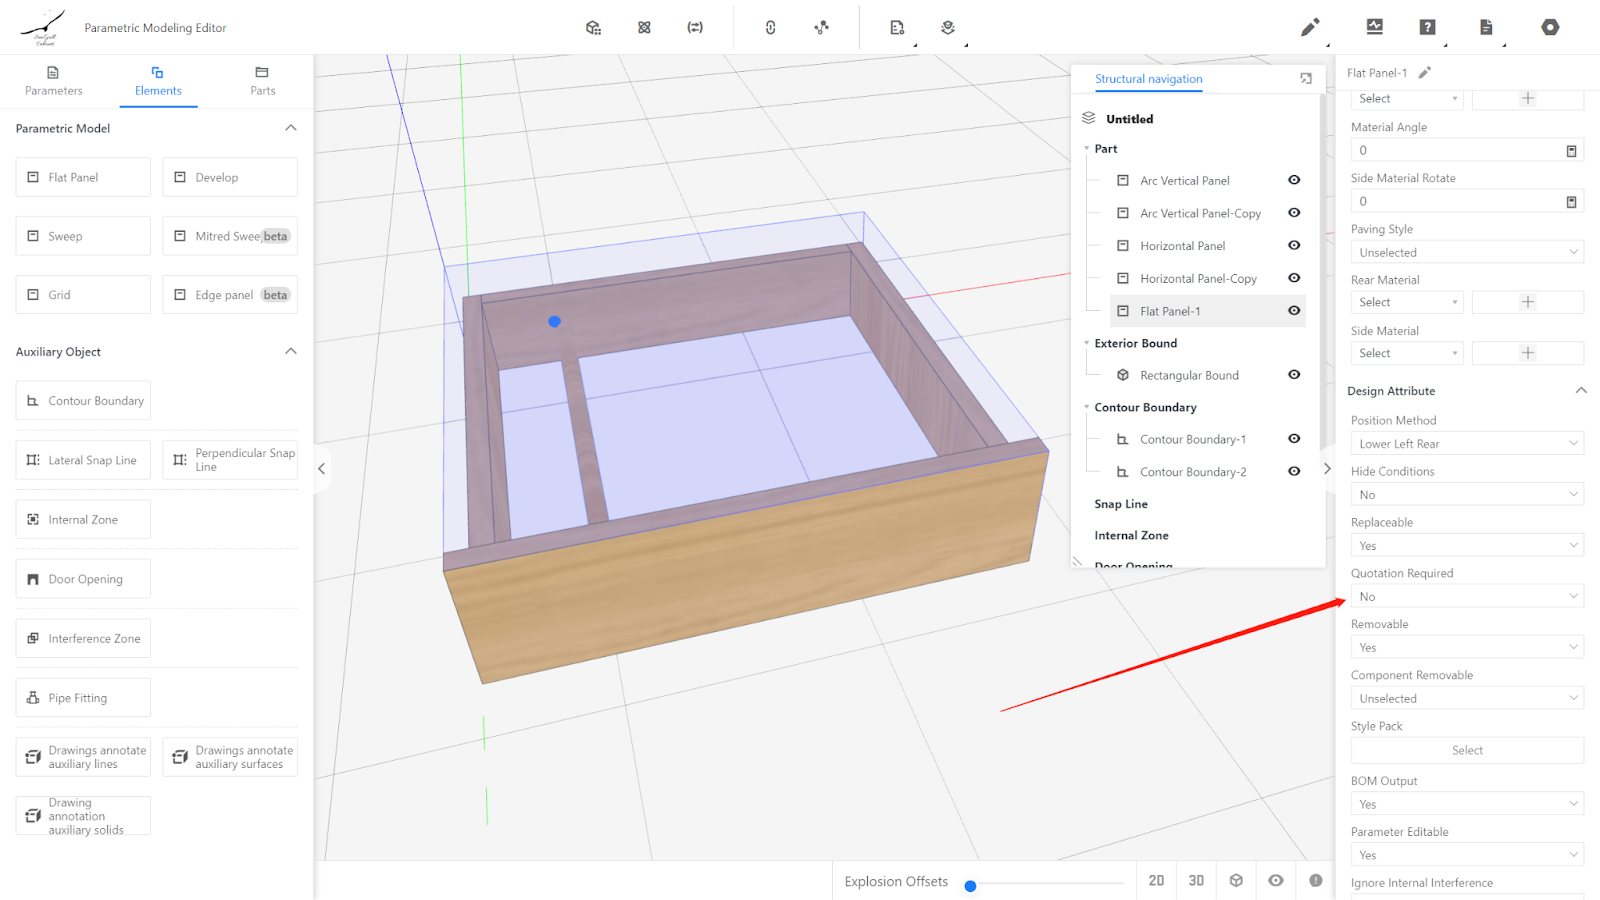
Front-end Attribute Usage: The trouser rod belongs to hardware accessories and does not need to be output in the panel list, so the list output is set to No.
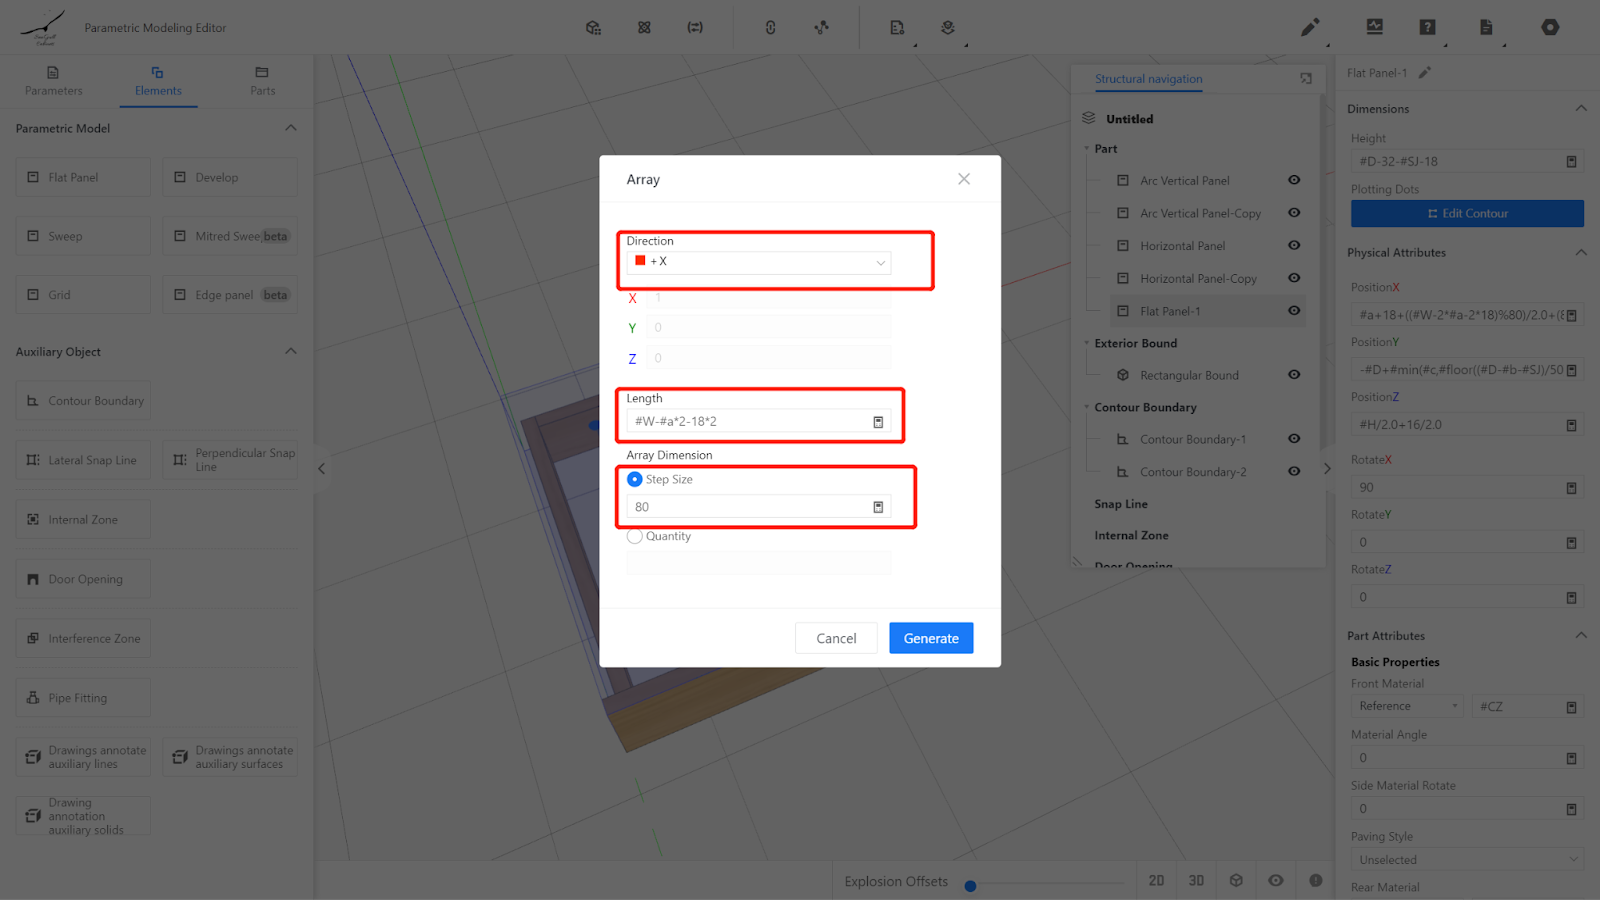
Rename the panel as aluminum trouser rod, the next step is to array.

Set Array Rules: Direction is +X, array length is #W-#a*2-18*2, step is 80, generate.
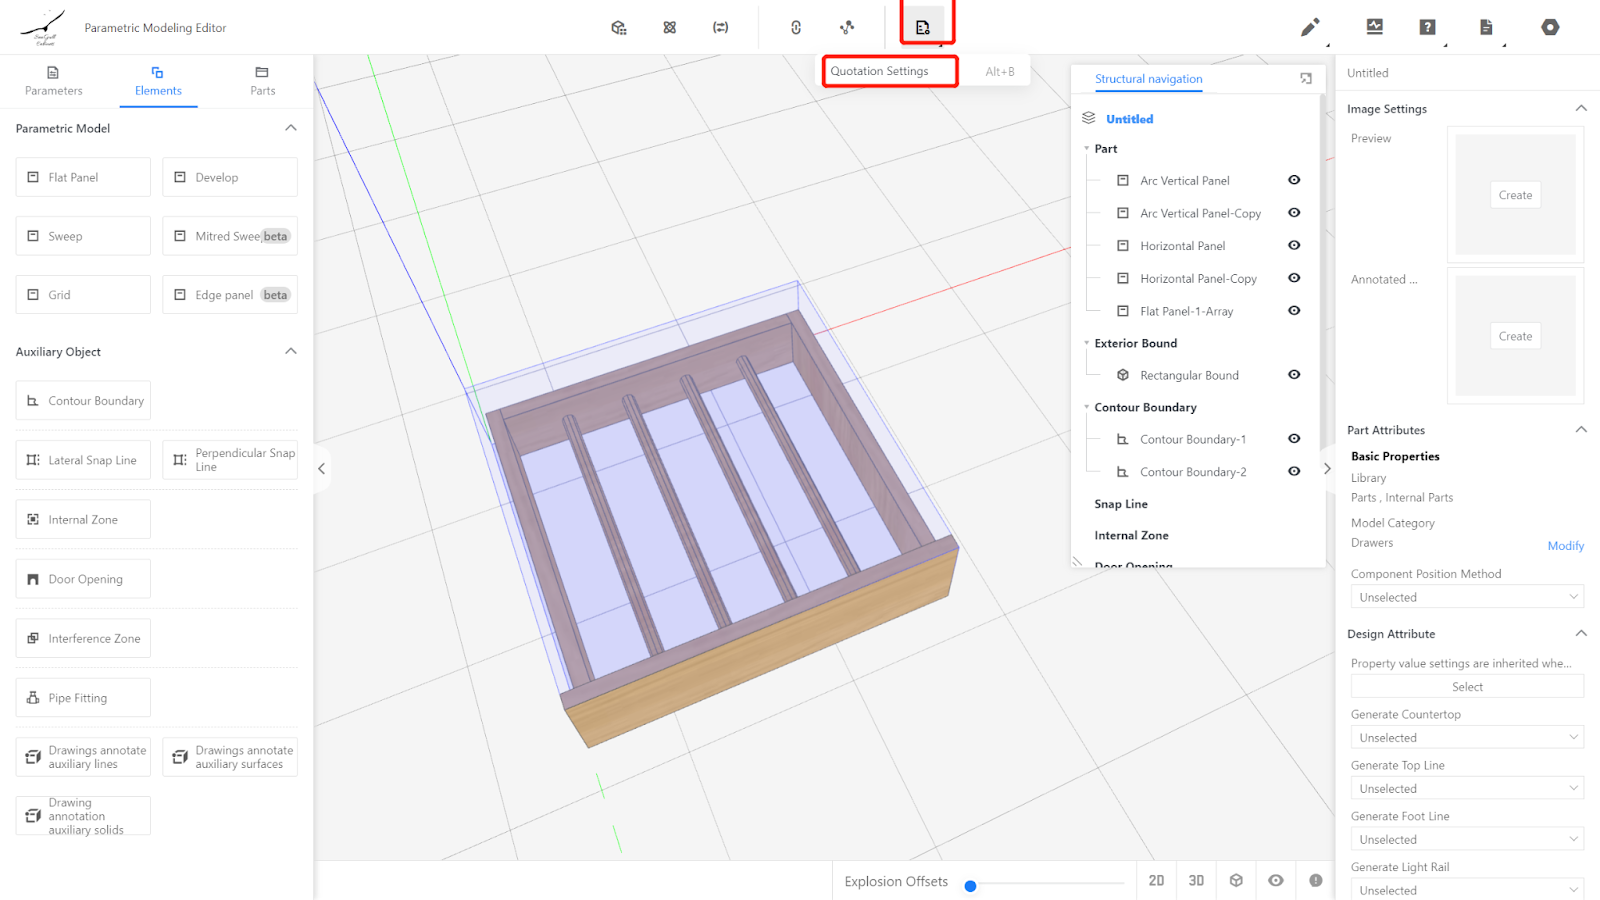
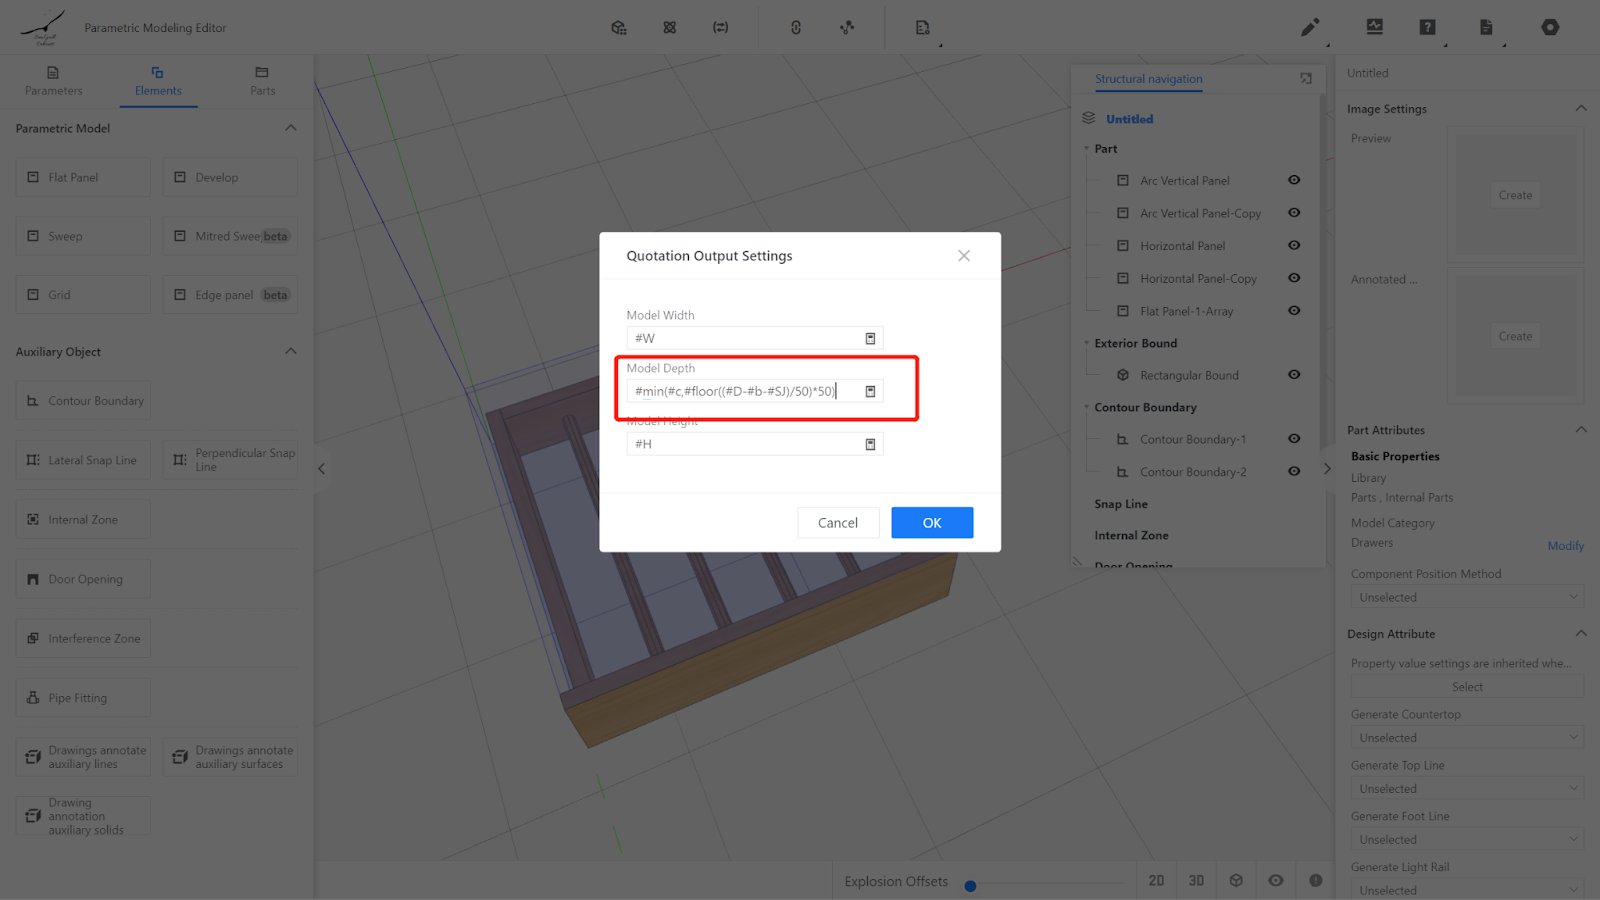
3.6. Output Settings
Modify output settings - quote settings, change #D to the depth of the side panel #min(#c,#floor((#D-#b-#SJ)/50)*50).
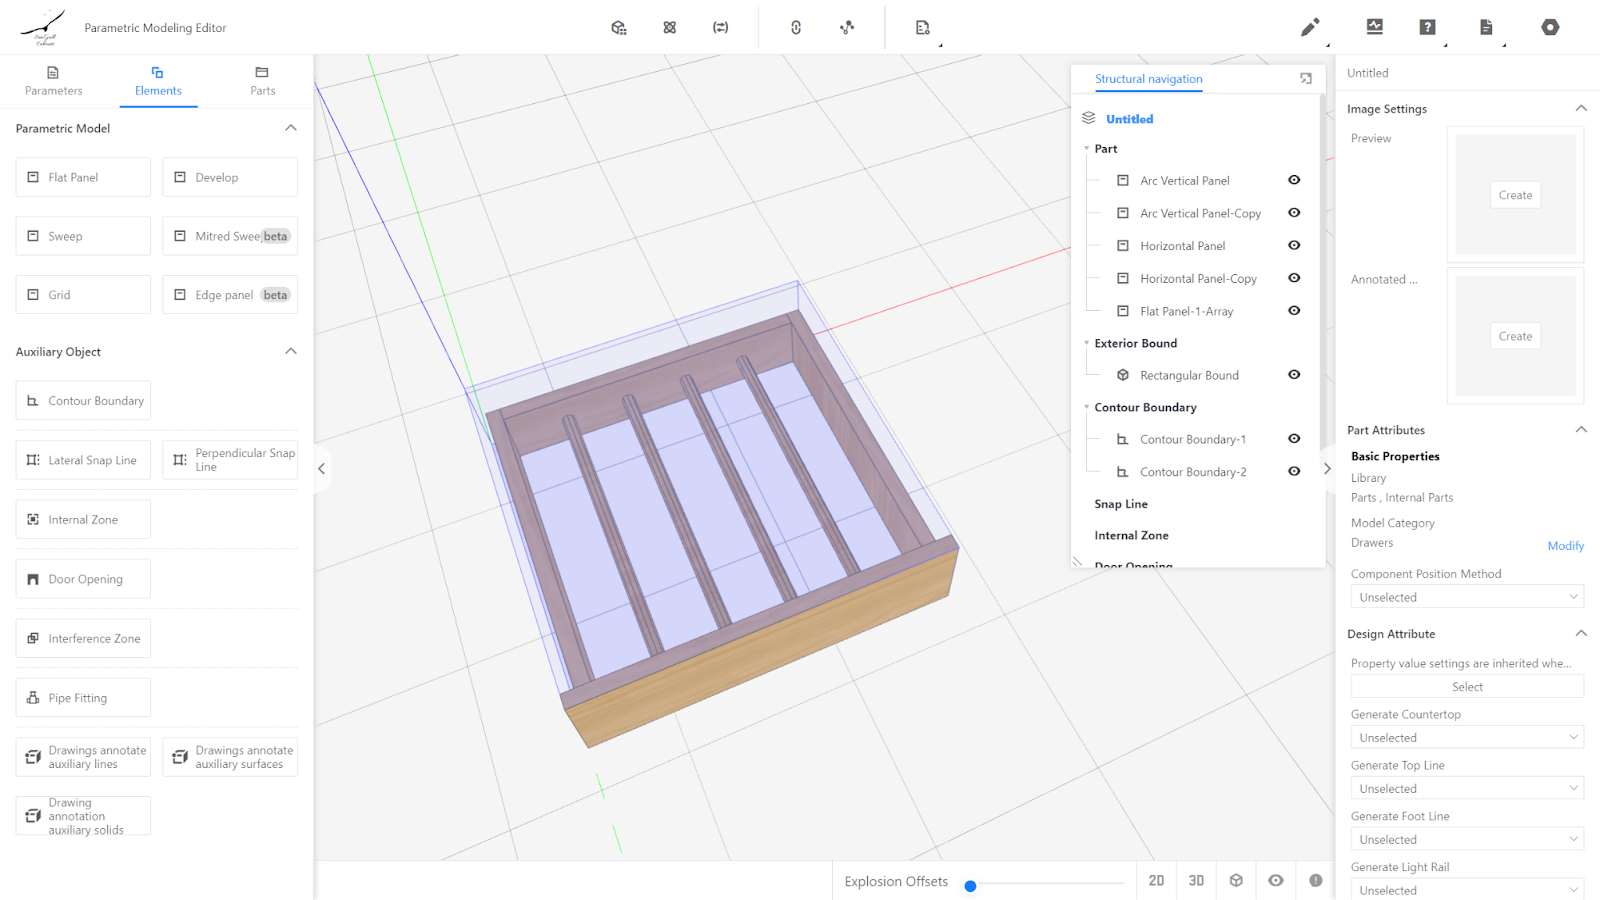
IV. Test the Model
Input values within the range of parameters W, D, and H, observe if the model changes correctly. If it does, it means the model is working fine. For example, inputting different values for width will result in a change in the quantity of trouser rods due to the difference in width.
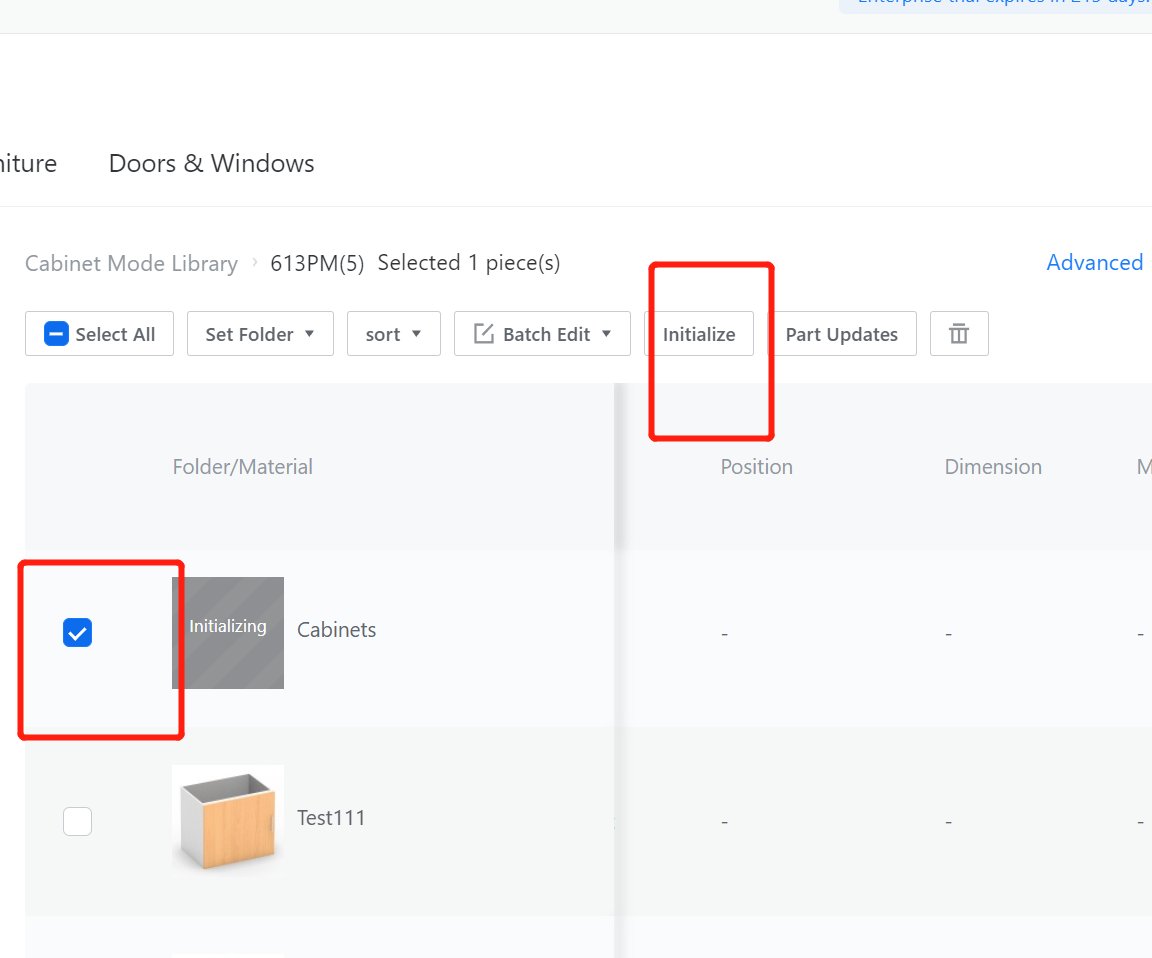
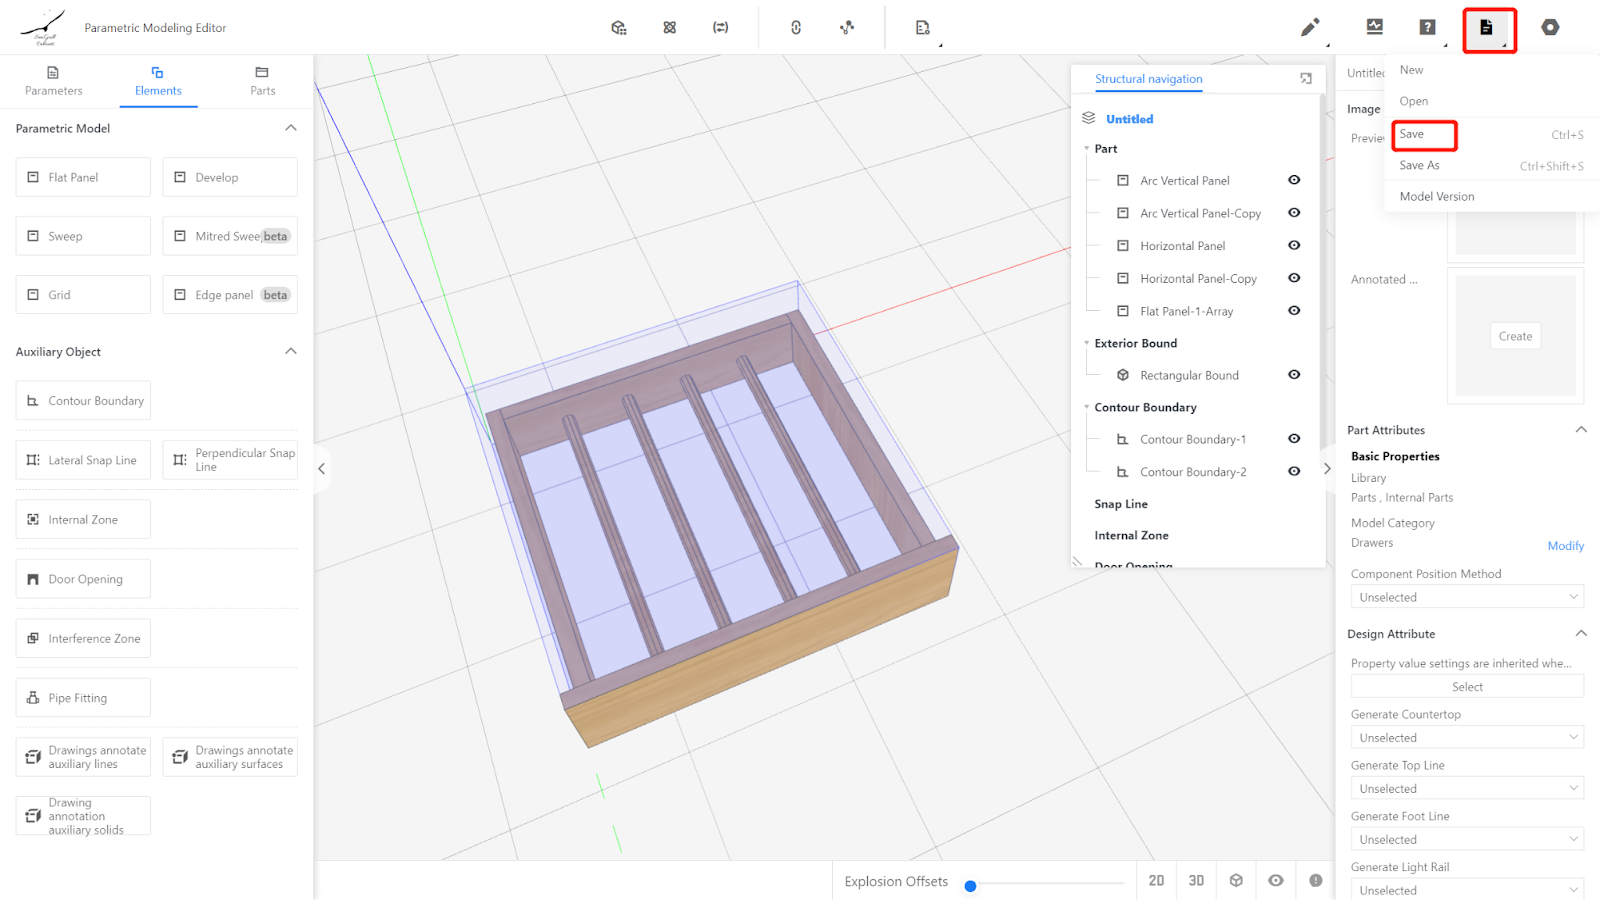
V. Save to Library
Click on the file in the upper right corner and choose save, select the subdirectory for saving, name it, and click save.
In the product management page, find the corresponding category for the model, select the model, click on "Save to Database", and wait for the model to finish rendering.