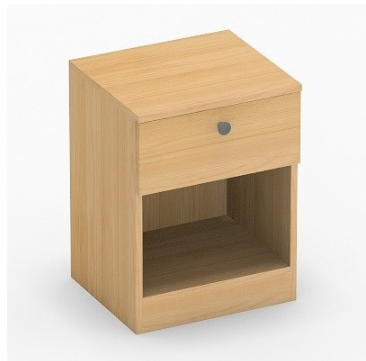
Definition: Cabinet frame add drawers as a chest of drawers
The following cabinet is used as an example to explain the setting method of adding drawers to the cabinet. The cabinet body is W450×D400×H600, the foot molding is 80 high, and the front of the table is 20mm. (Width 350-600, depth: 300-750, height: 500-1200, foot molding height 50-200)
Step 1:
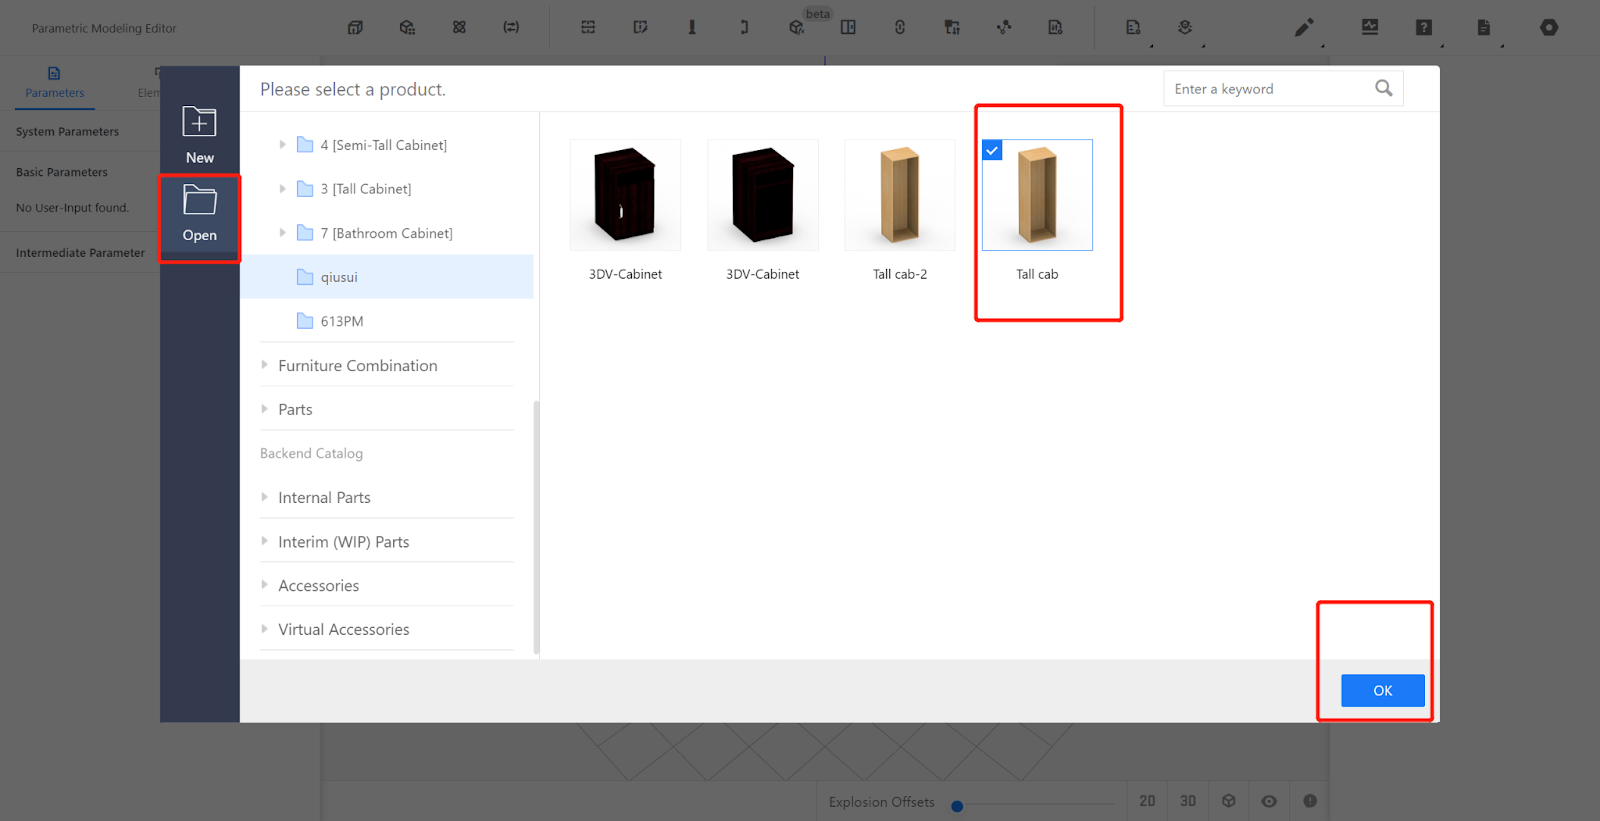
Open the pre-made cabinet model.
Custom Furniture Customization—Create Asset—Parametric Model Library— New—
Step 2:
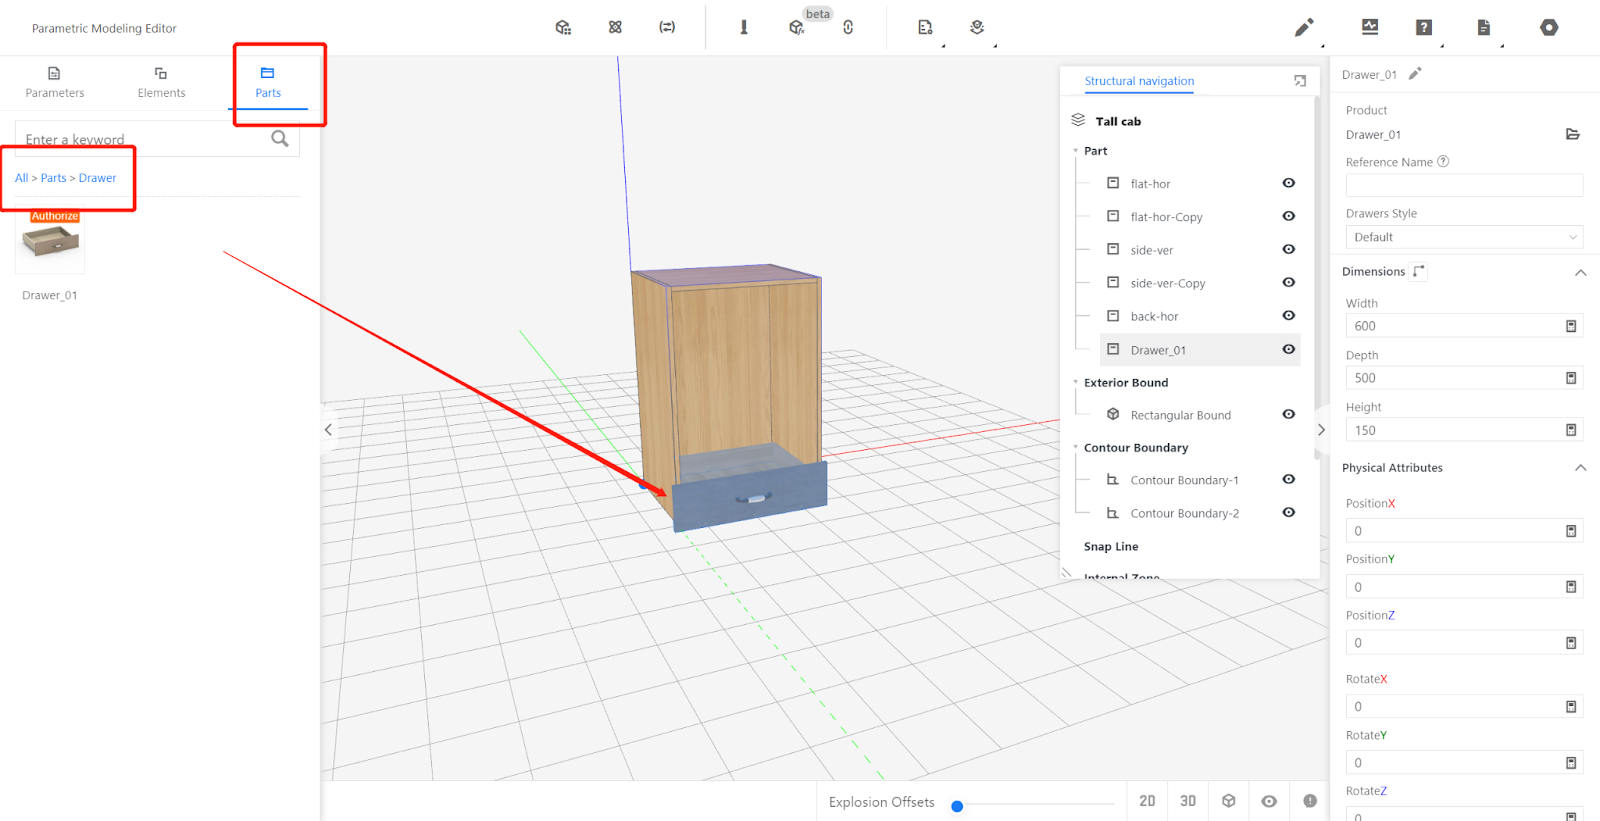
Insert the drawer sub-model.
From the Element Library, call out a drawer model and place it in the editor. The size of the drawer is determined by the available interior space.
Step 3:
Set the properties.
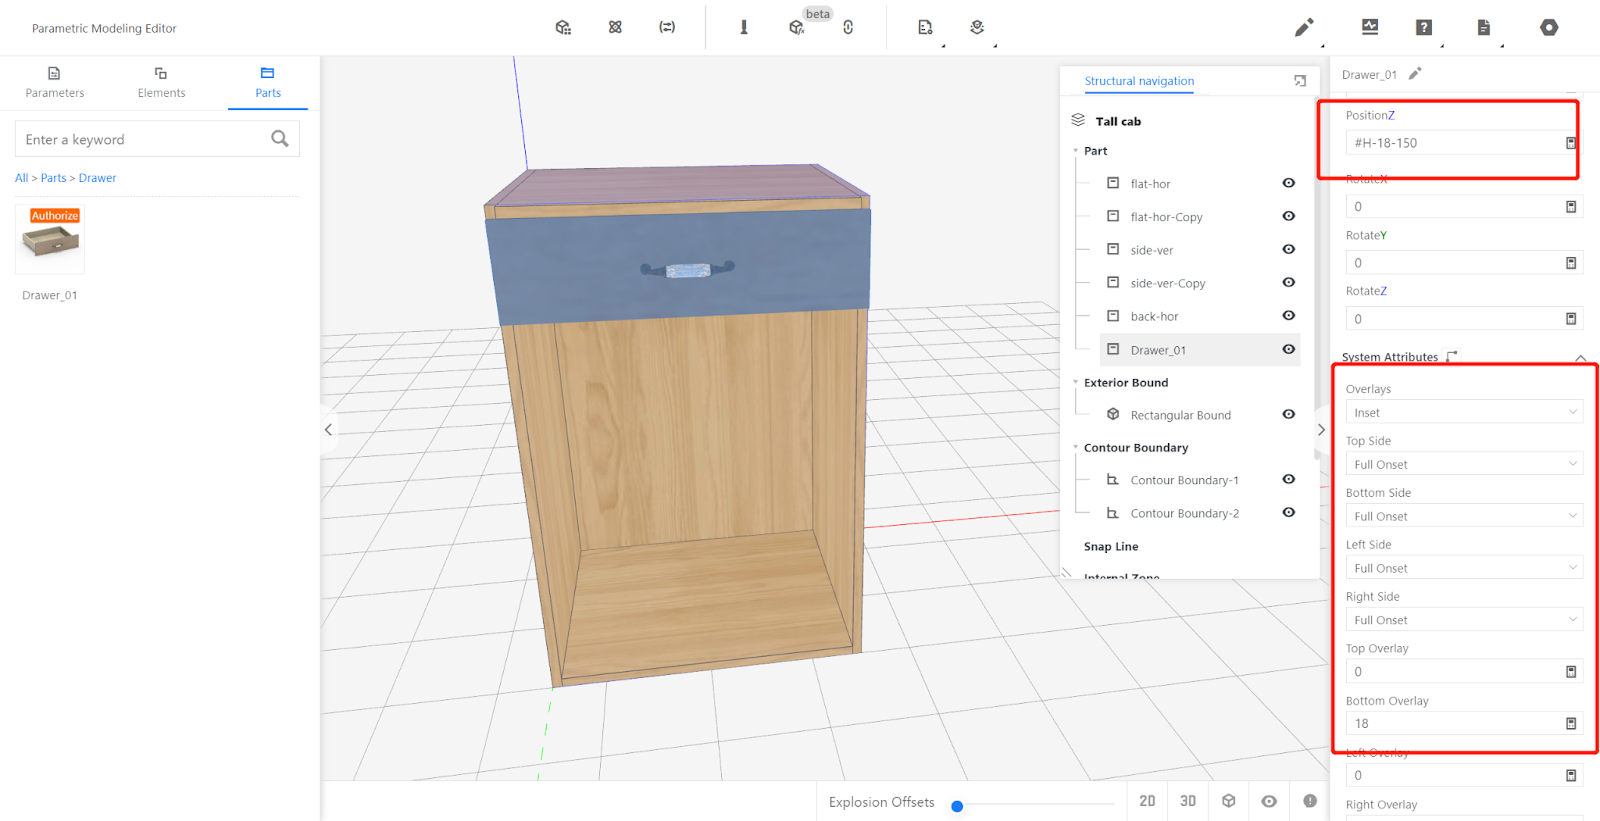
Physical properties: Width: #W-18*2, Depth: #D-20-18-9, Height: 180, Position-X: 0,
Position-Y:0, Position-Z: #H-18-150.
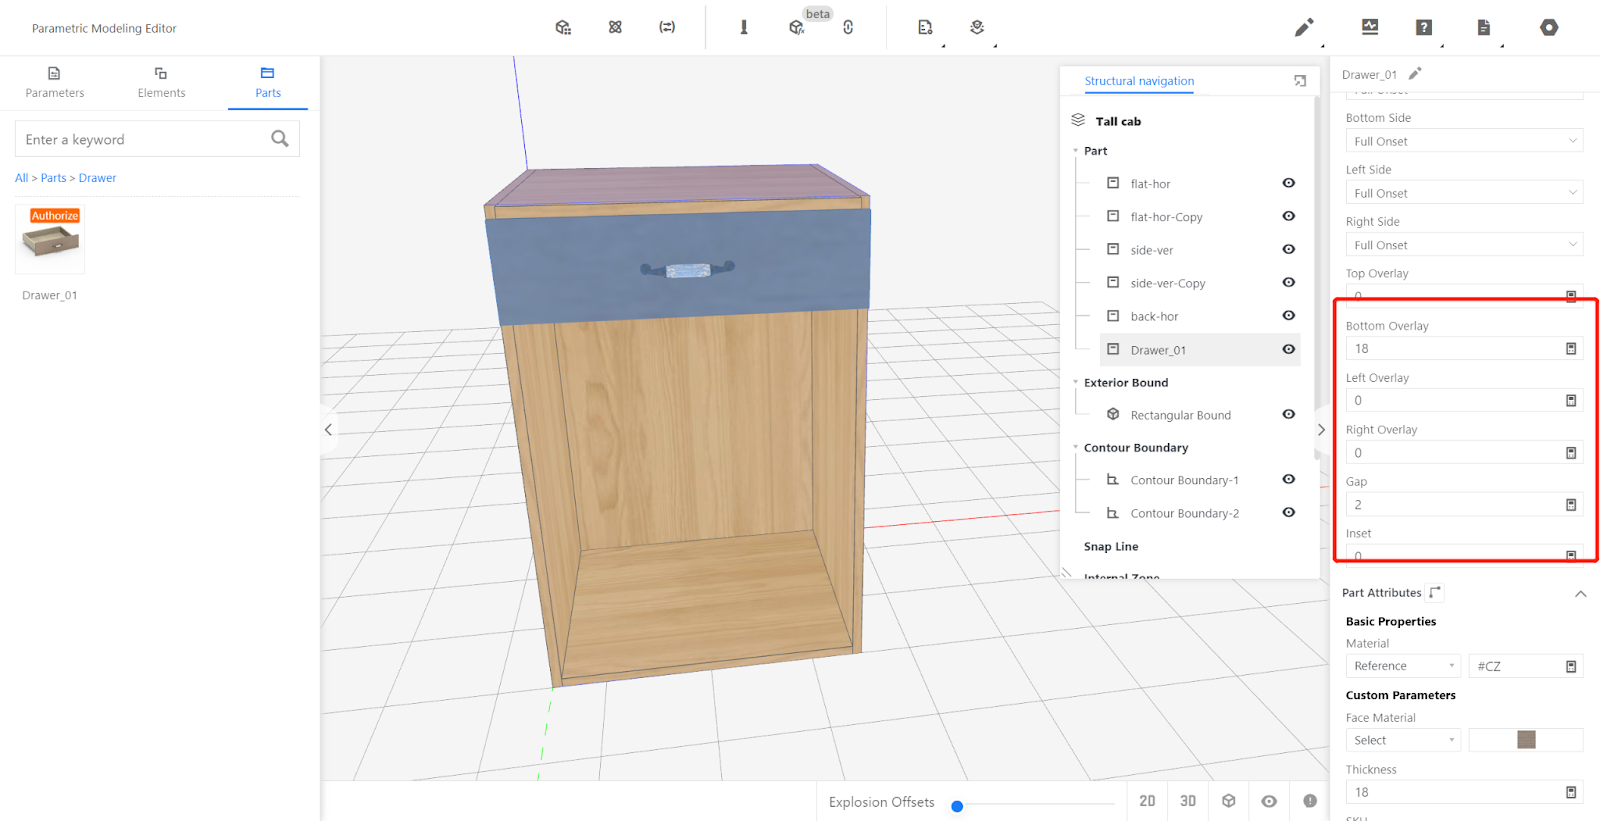
Other properties: Concealing method: Embedded, Concealing: 0, Gap: 2.
(The extent to which the drawer overlay extends can be adjusted according to the actual situation. The gap value should be set according to the factory's process specifications. The height of the drawer can be set using a formula or specific value based on different situations.)
Step 4:
Test the model.
Input values within the range of W, D, and H parameters, including minimum and maximum values. Observe if the drawer adjusts correctly with changes in the cabinet. If everything functions properly, it indicates there are no issues.
Step 5:
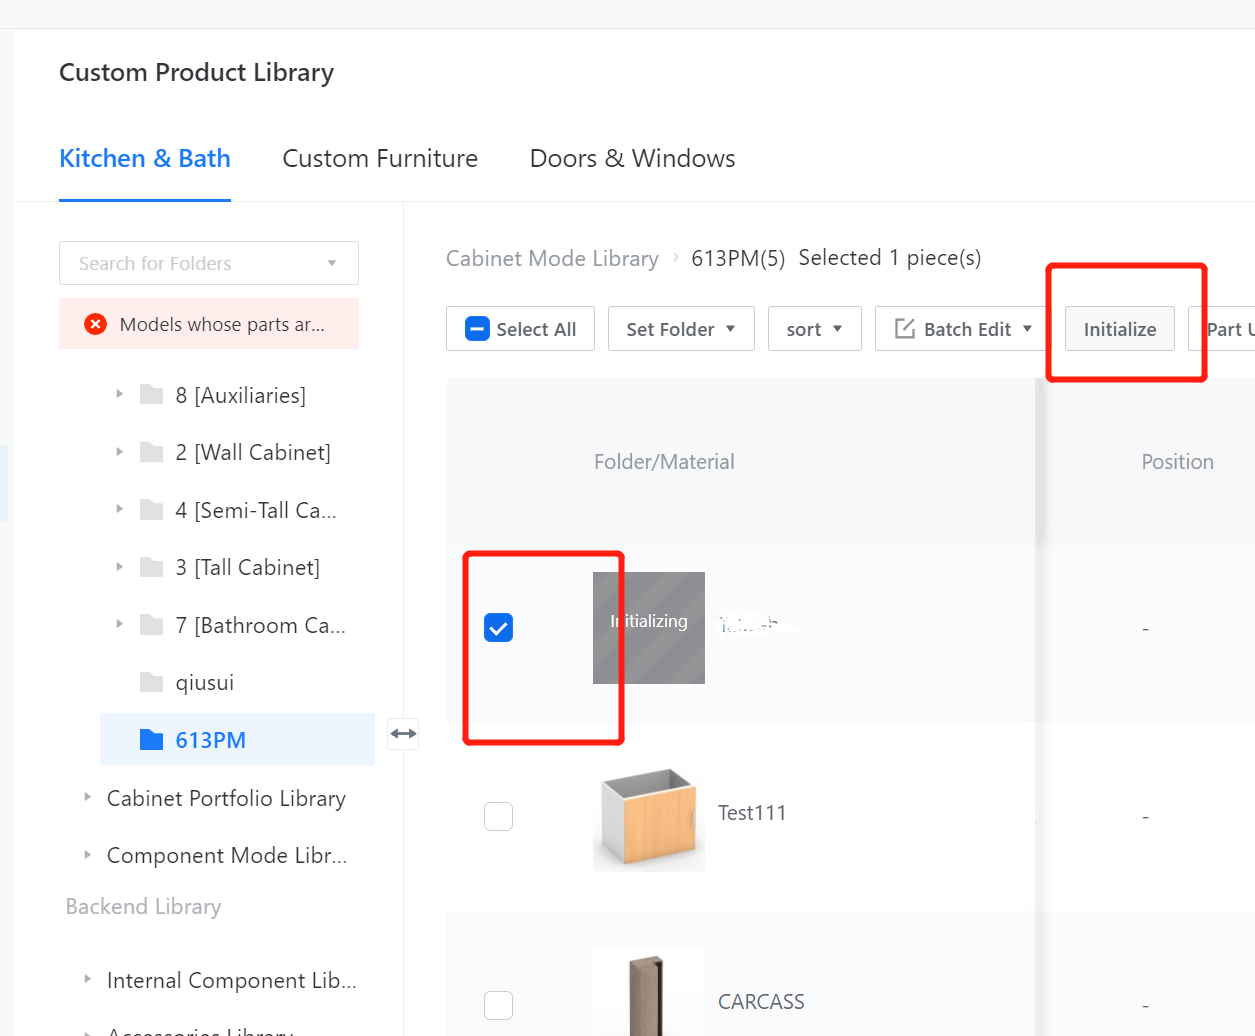
Save to the library.
5.1. Click on the file selection option in the top-right corner, confirm the save (If you don't want to overwrite the existing cabinet, choose to "Save As" before saving to the library).
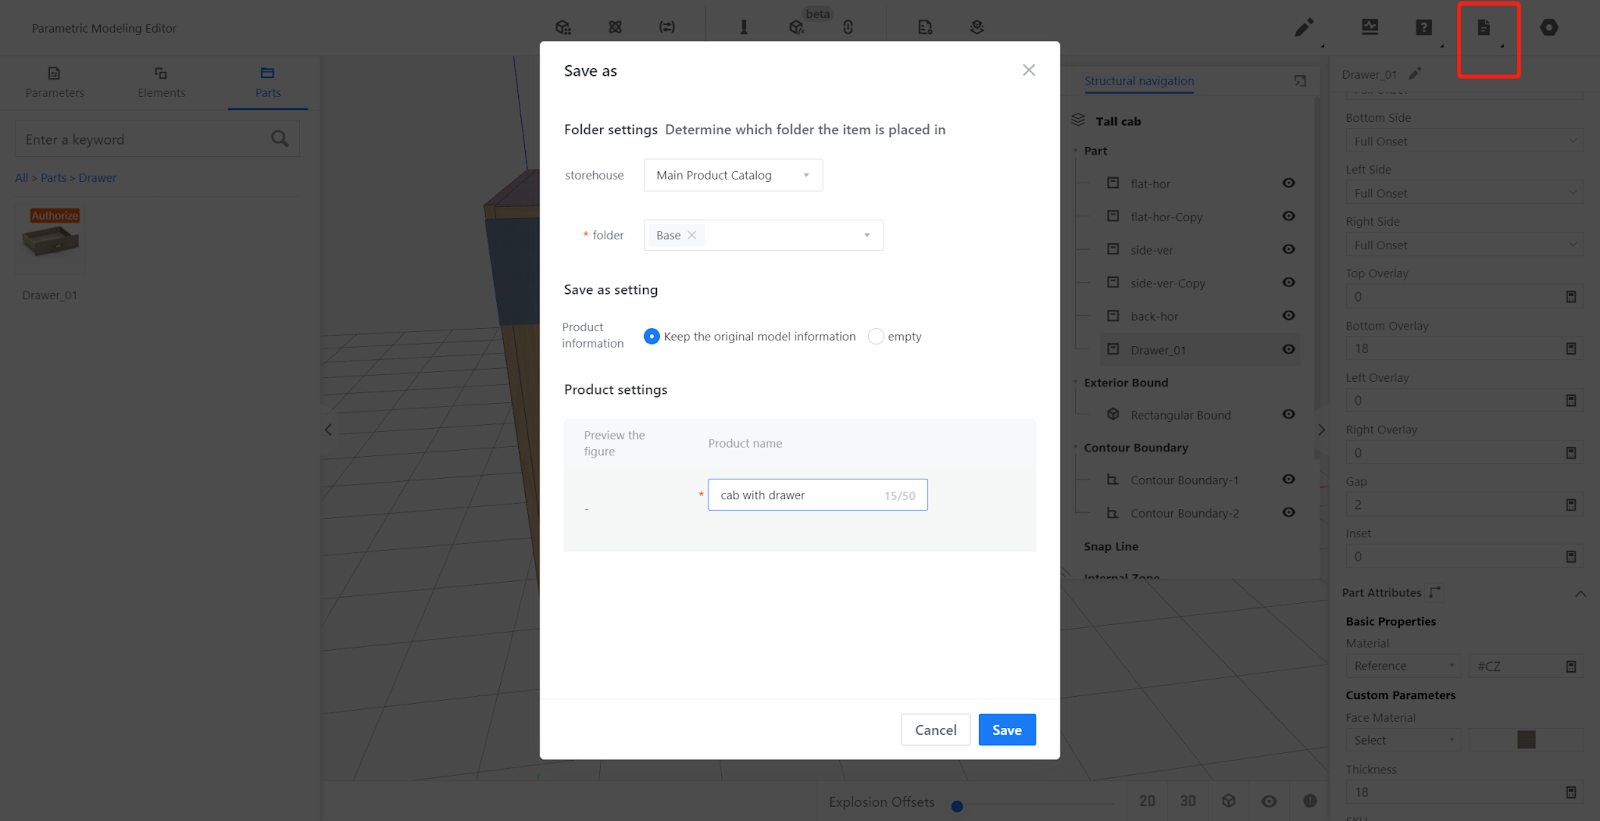
5.2. In the corresponding category , find the model. Select the model and click on "Save to library." Wait for the model to finish processing.