I. Explanation of Custom Contours
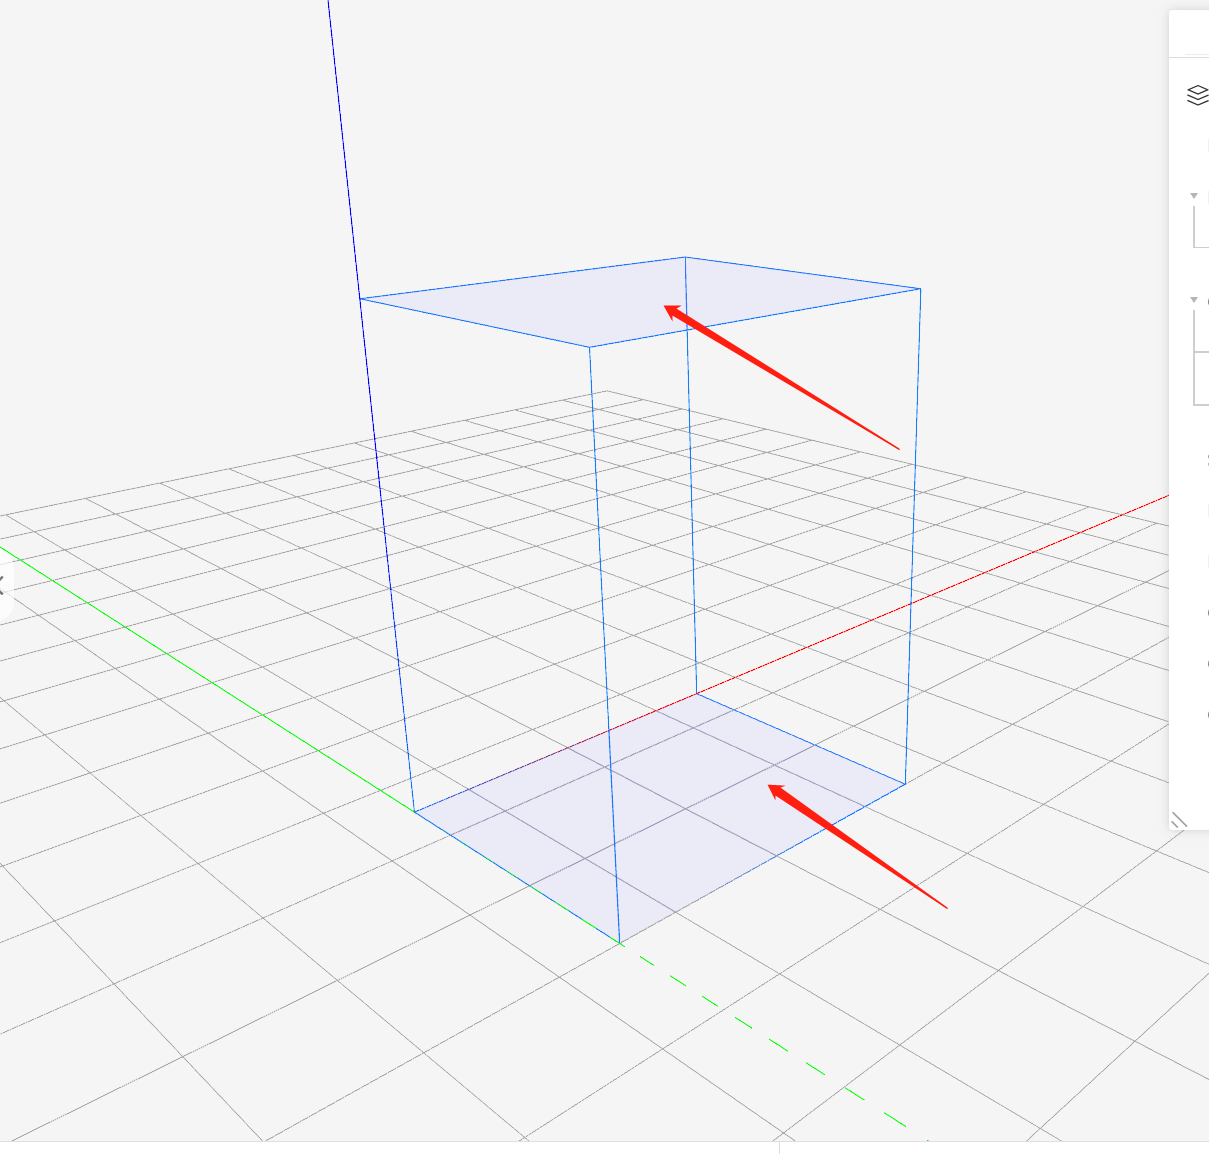
Whenever a new model is created in the editor, two blue rectangular surfaces are automatically added as custom contours.
II. Purpose of Custom Contours
Usage: Applied to cabinet models to generate lines according to predefined contour areas.
III. Difference between Custom Contours and Non-Custom Contours
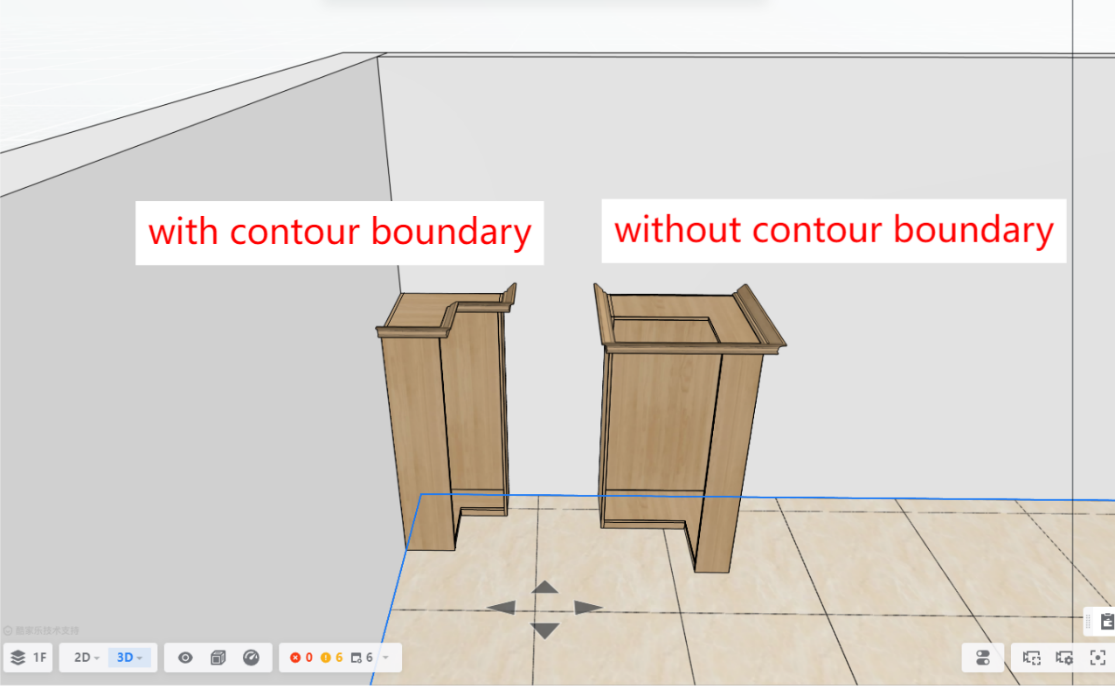
Difference: Without custom contours, lines are generated based on the maximum contour area of the cabinet. With custom contours, lines are generated according to the defined contour area.
IV. Position of Custom Contours
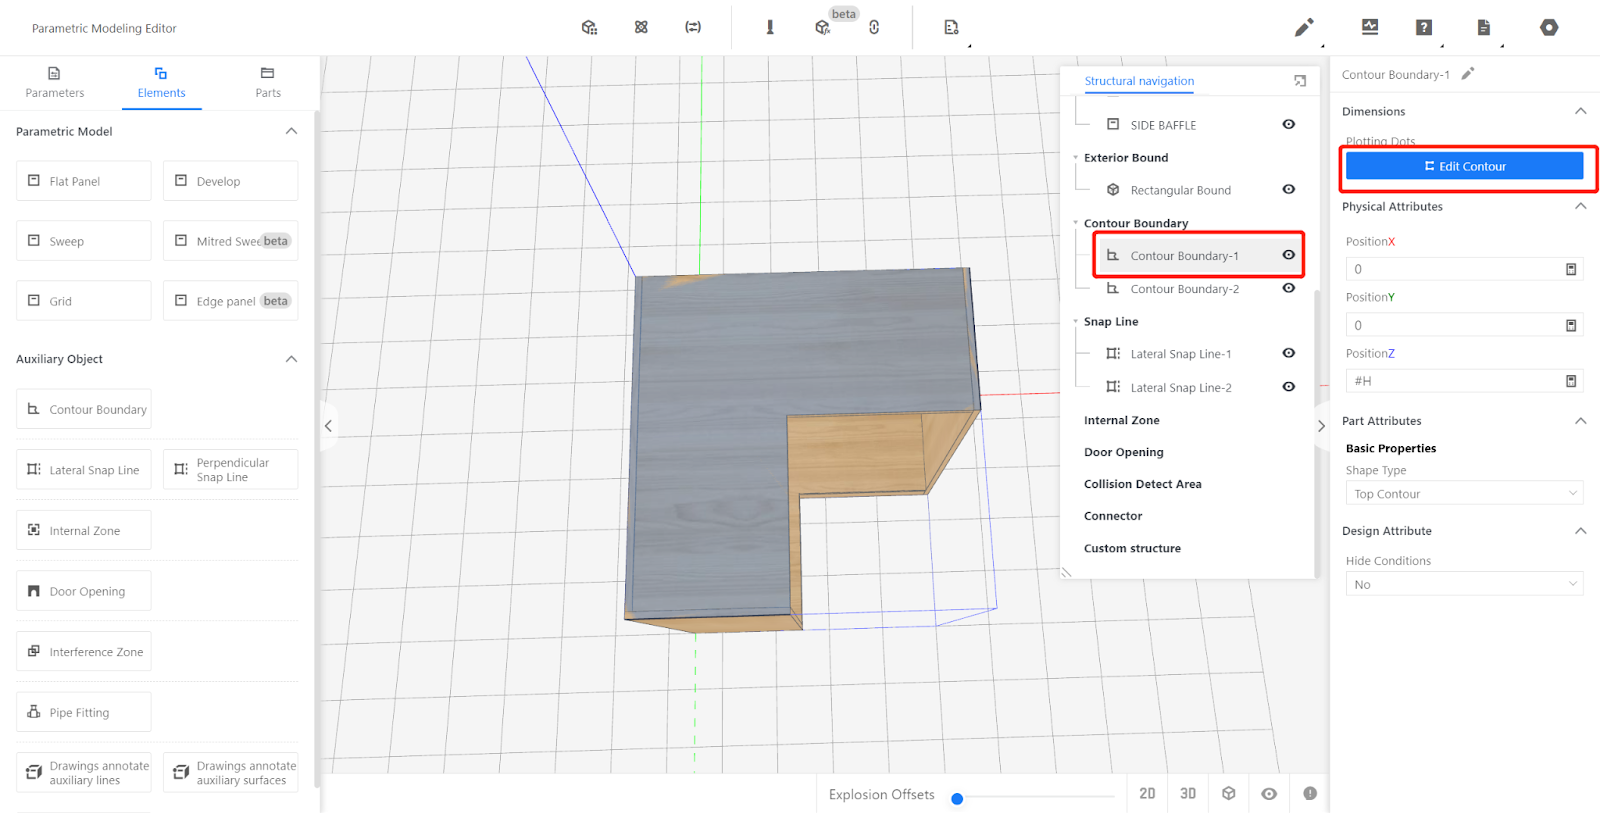
Position: The two default contours provided by the system can be found in the contour line list in the right-side structure navigation. Custom contours can also be added in the contour lines section of the left-side element library (generally not required to add them manually).
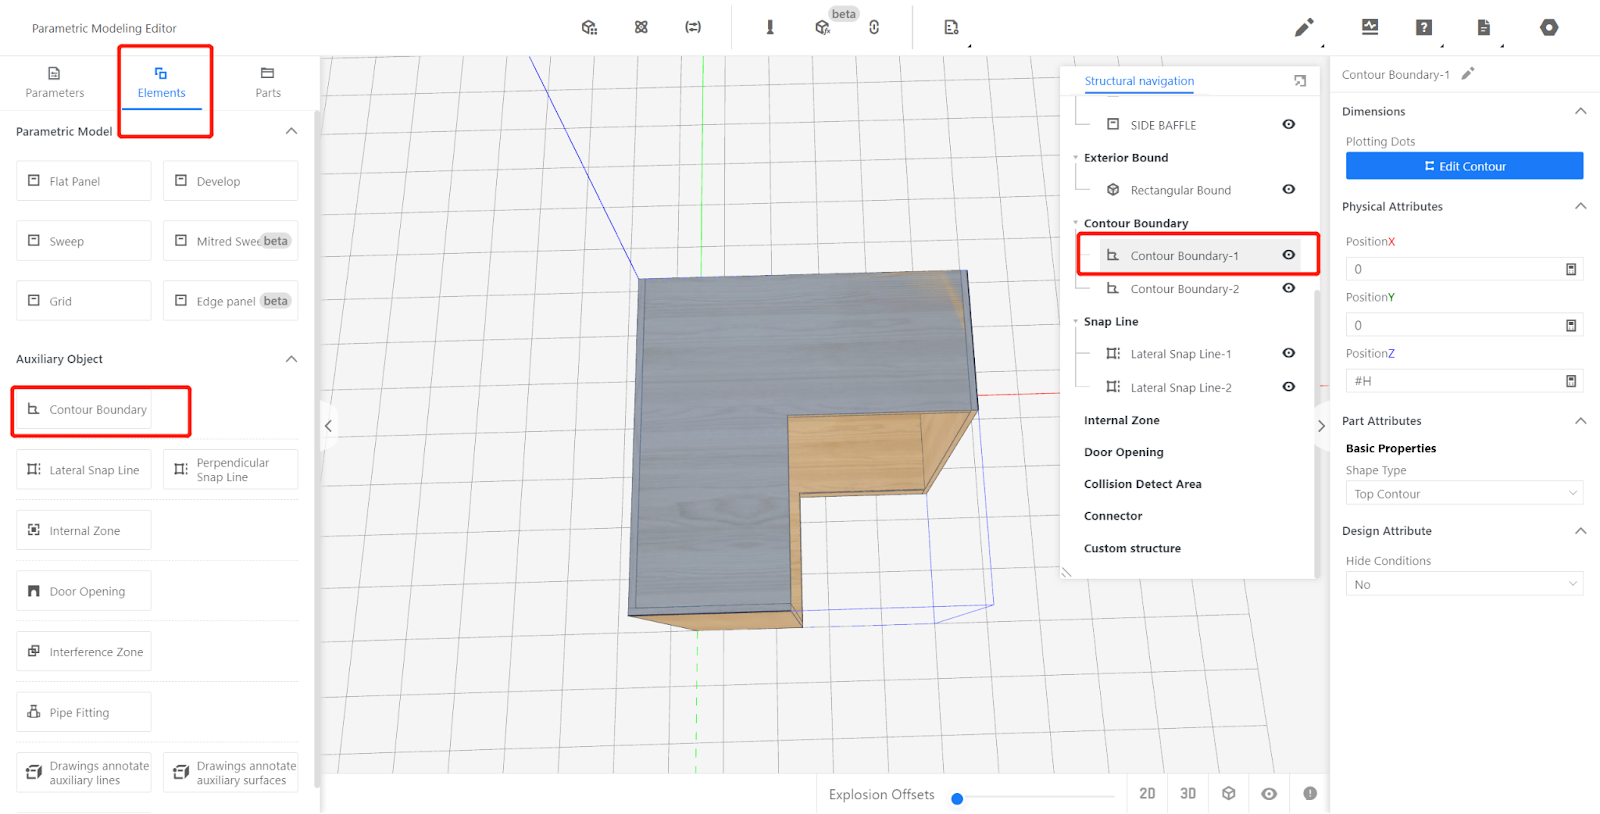
V. Properties of Custom Contours
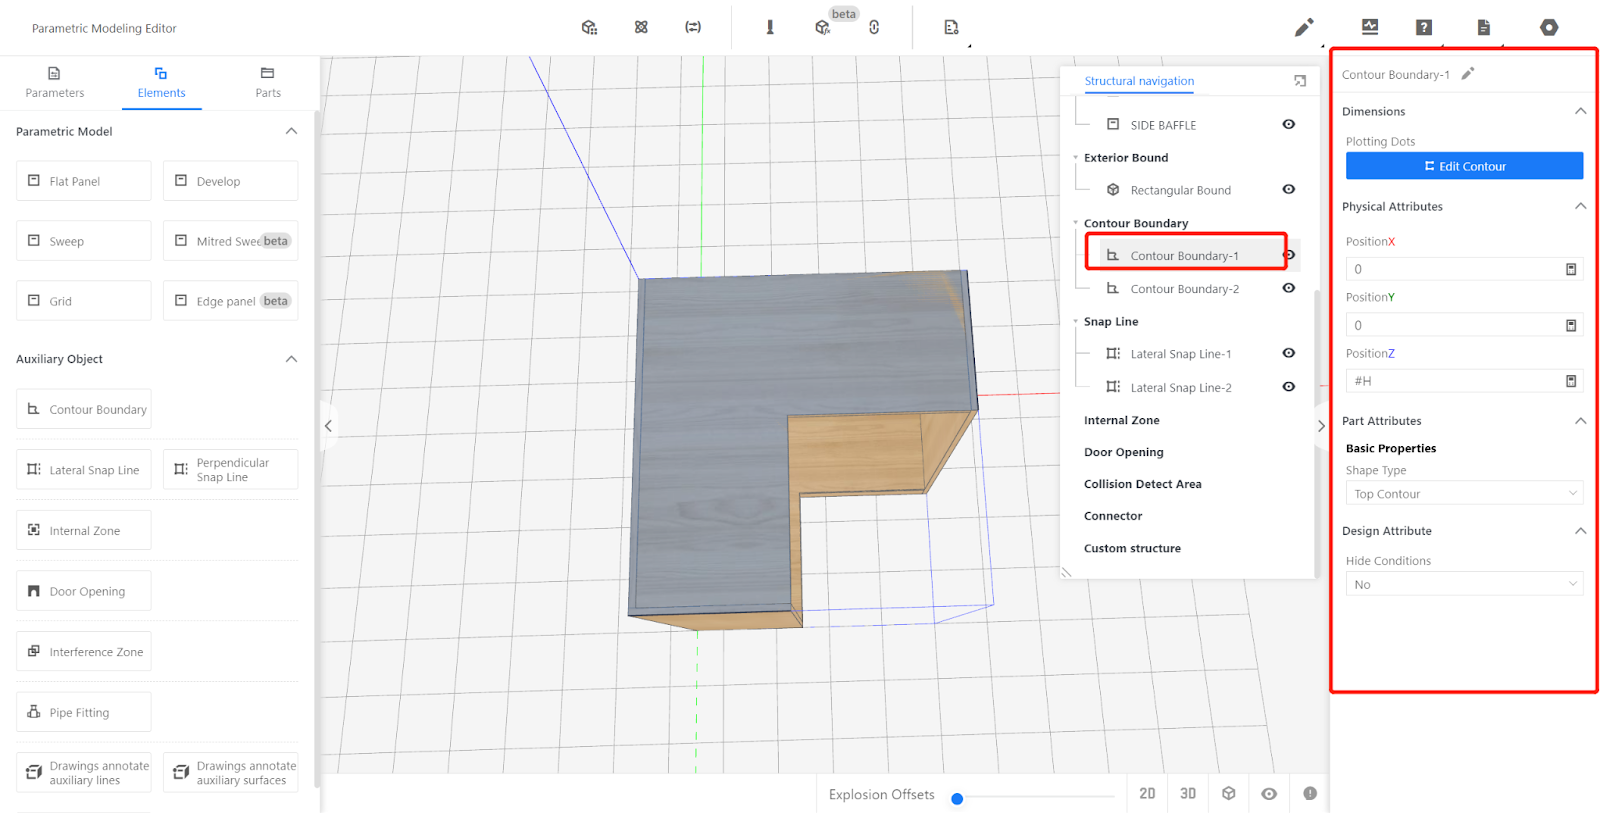
By left-clicking on a contour constraint in the structure navigation, contour properties will be displayed on the right side.
-
The properties of the model's outer frame include physical attributes and other attributes. The physical attributes include the position (XYZ) of the contour in the coordinate axis and its type (top contour, bottom contour, top sink contour, bottom sink contour), which are automatically filled in by the system (usually no modifications are needed for most models).
The properties of the model's outer frame include physical attributes and other attributes. The physical attributes include the position (XYZ) of the contour in the coordinate axis and its type (top contour, bottom contour, top sink contour, bottom sink contour), which are automatically filled in by the system (usually no modifications are needed for most models).
2.Contour types: The top contour is used to generate the top line or countertop, while the bottom contour is used to generate lighting lines or kickboard lines. The top sink contour and bottom sink contour are used to customize the hole shape of irregular sink countertops by adding contours to sinks in the editor. If no contour is set, the default hole shape will be a rectangle based on the sink model. In the frontend tool, if the sink installation method is "top mount," the hole will be shaped according to the top sink contour; if the sink installation method is "undermount" or "integral," the hole will be shaped according to the bottom sink contour. Note: Adding hole contours to non-sink models will not create holes and will not take effect.
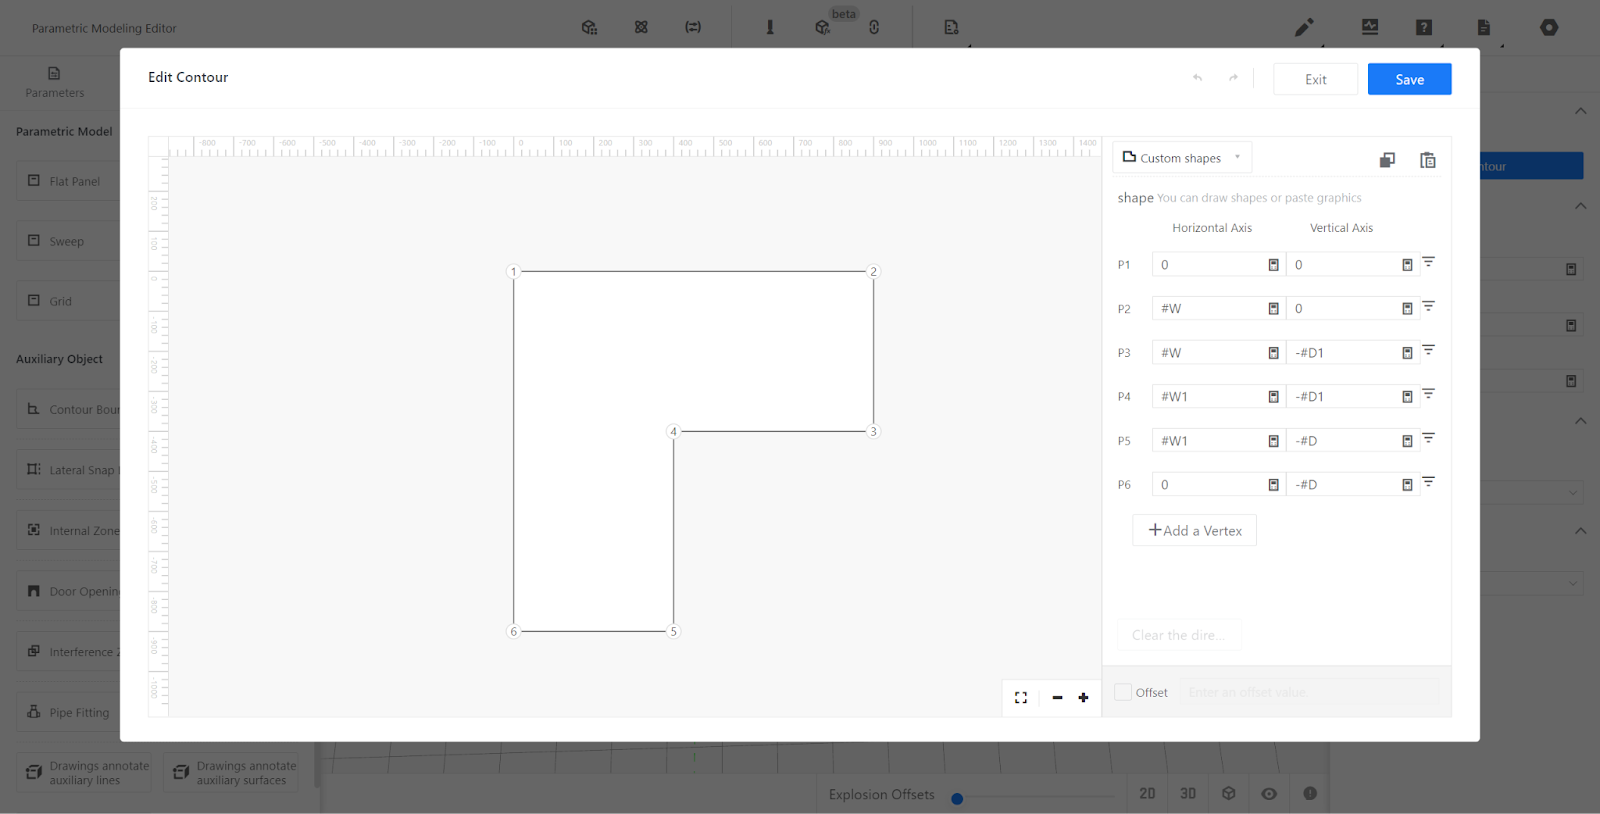
3.The other attributes are anchor points used to edit the contour shape. Clicking on "edit contour" allows you to define the contour shape by drawing points to form a shape. The system automatically draws the rectangular contour of the model's outer frame (no modifications are needed for regular rectangular cabinets, but for arched cabinets, corner cabinets, etc., adjustments may be necessary). You can modify the contour shape by changing the coordinates of points and adding or removing points. The buttons on the right side allow you to insert and delete points, and the button below adds endpoint points.