Overview
During the utilization of construction drawings, various issues may arise leading to the drawings not meeting drafting standards, dissatisfaction with line types, colors, or fills, or content appearing either too cluttered or too simplistic, resulting in a lack of professionalism. This article provides solutions to common problems encountered in such situations.
Target Users
All users
Solutions
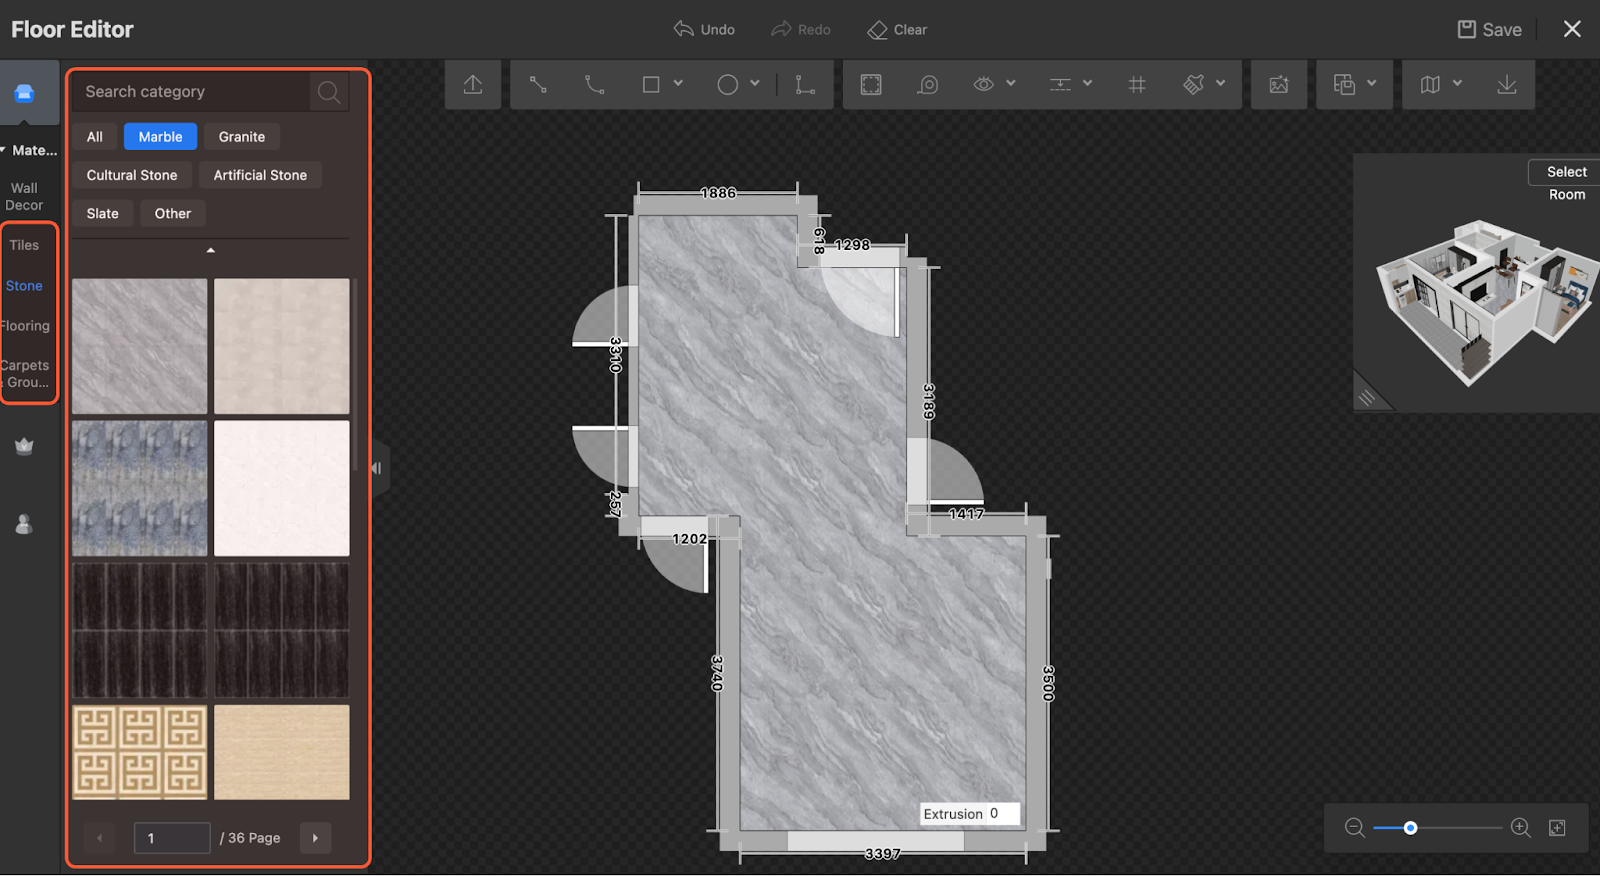
- Why do the displayed dimensions of tiles laid in the system differ from their actual dimensions? For instance, I've placed 600x600 tiles, but they are only showing as approximately 100x100.
Because what you placed are "textures", the proportions of "textures" may not necessarily match your needs and cannot be manually adjusted. If you wish to display the actual dimensions of tiles, you can use items categorized under "Tiles" or "Stone" instead.
II.I don't like the default colors and font sizes of the annotations in the system, nor do I like the line colors and fill styles of the models. What should I do?
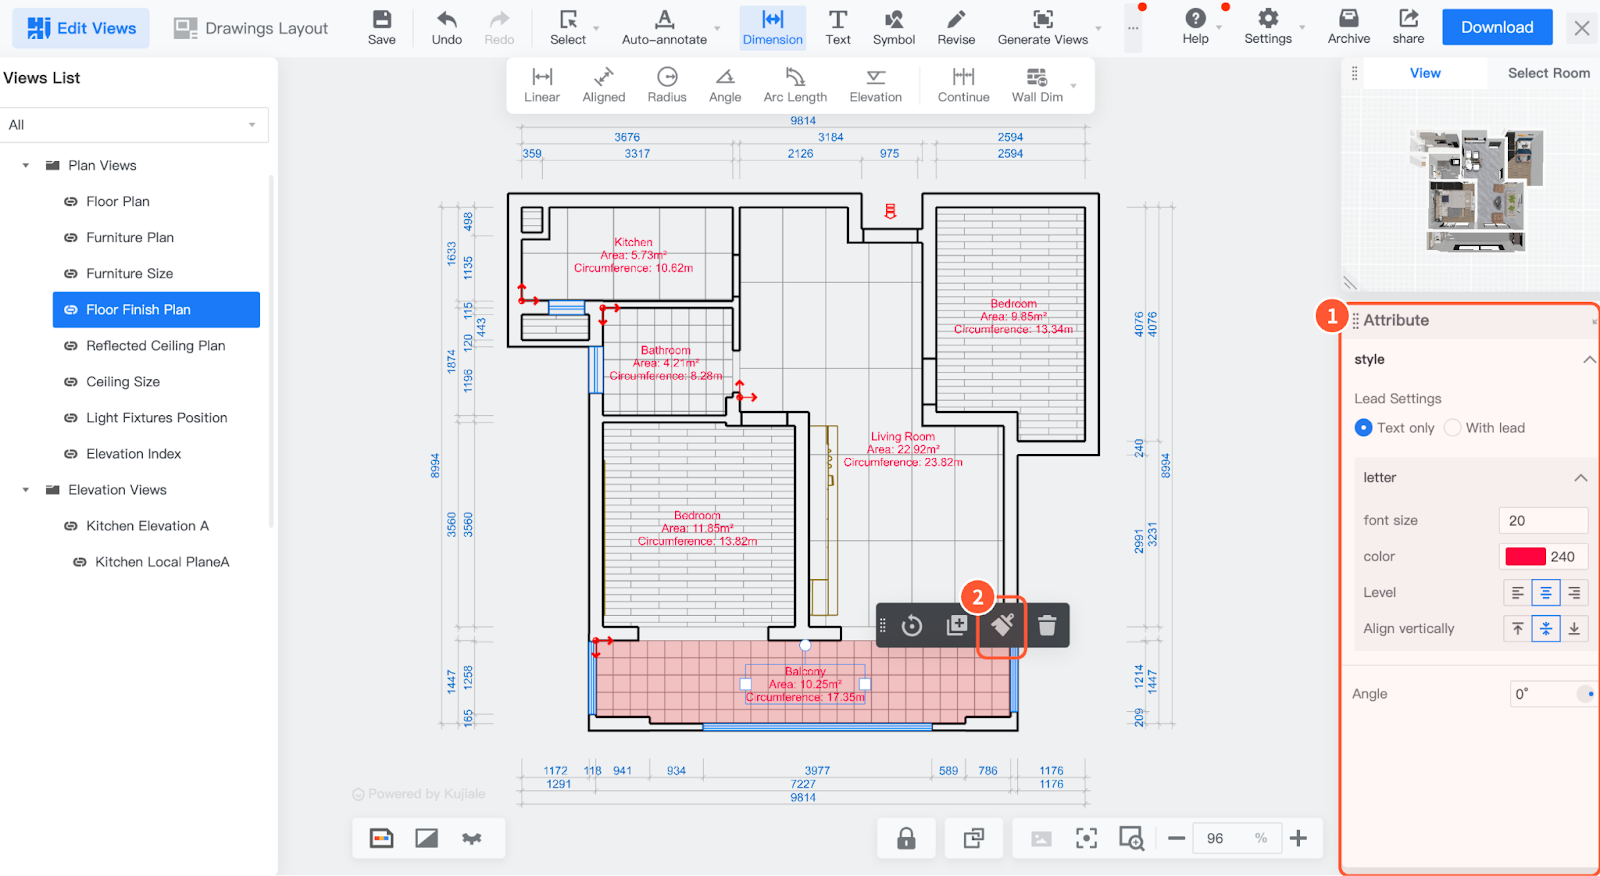
1.Modify the annotation style: Select any annotation, and you can adjust the annotation style in the ① Properties panel. You can also quickly batch adjust using the ② Format Painter.
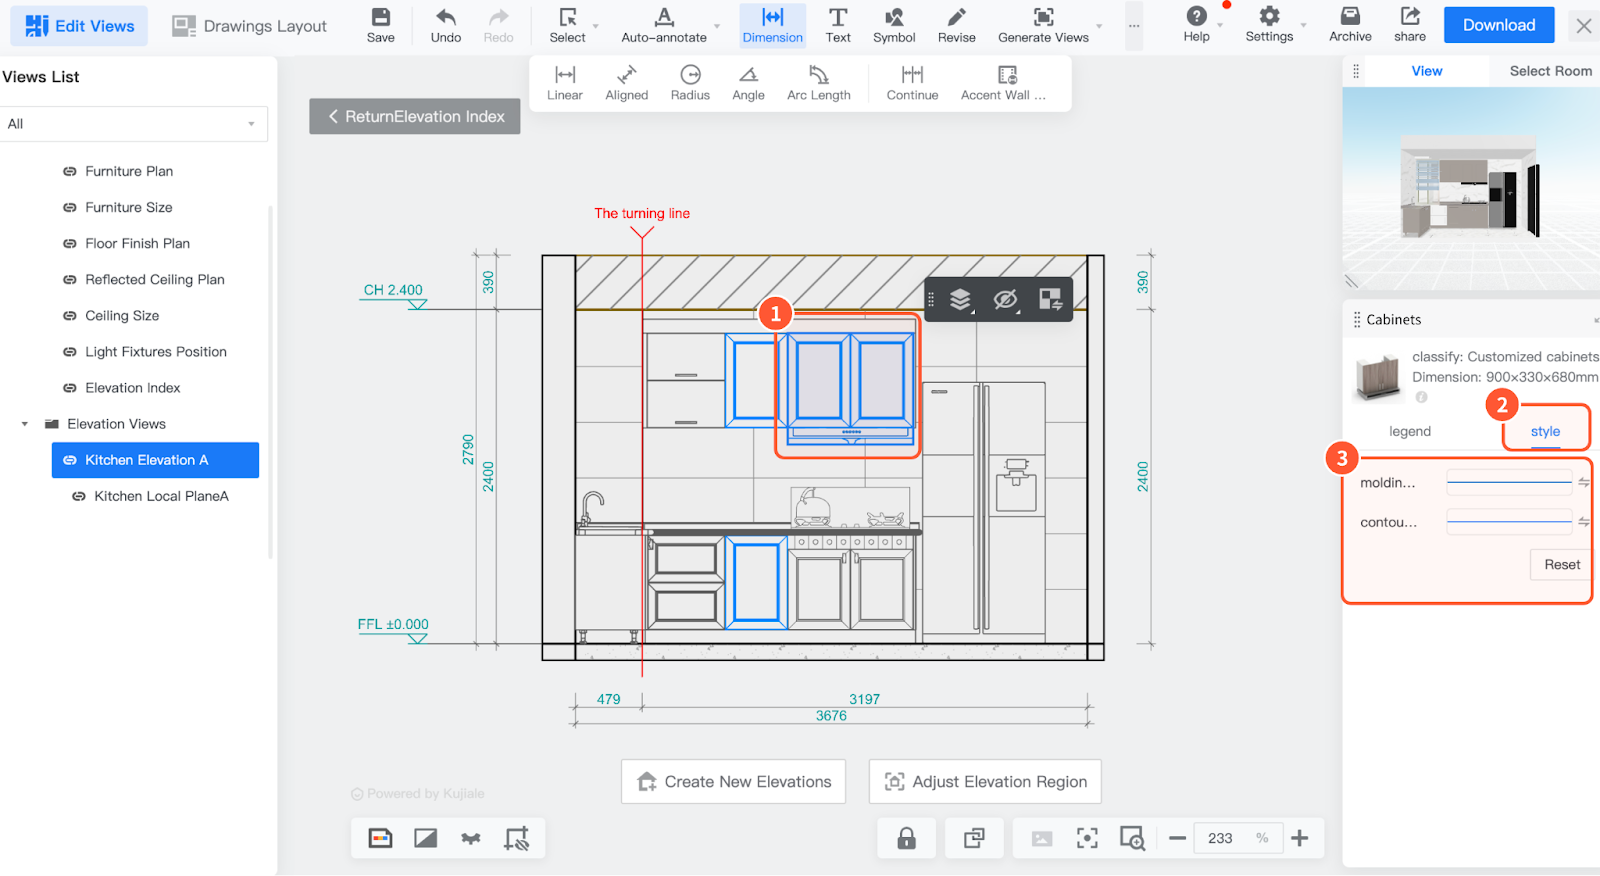
2.Modify the model's style: Select the ① model, then choose ② Style in the Properties panel to adjust the ③ line type and color of the lines.
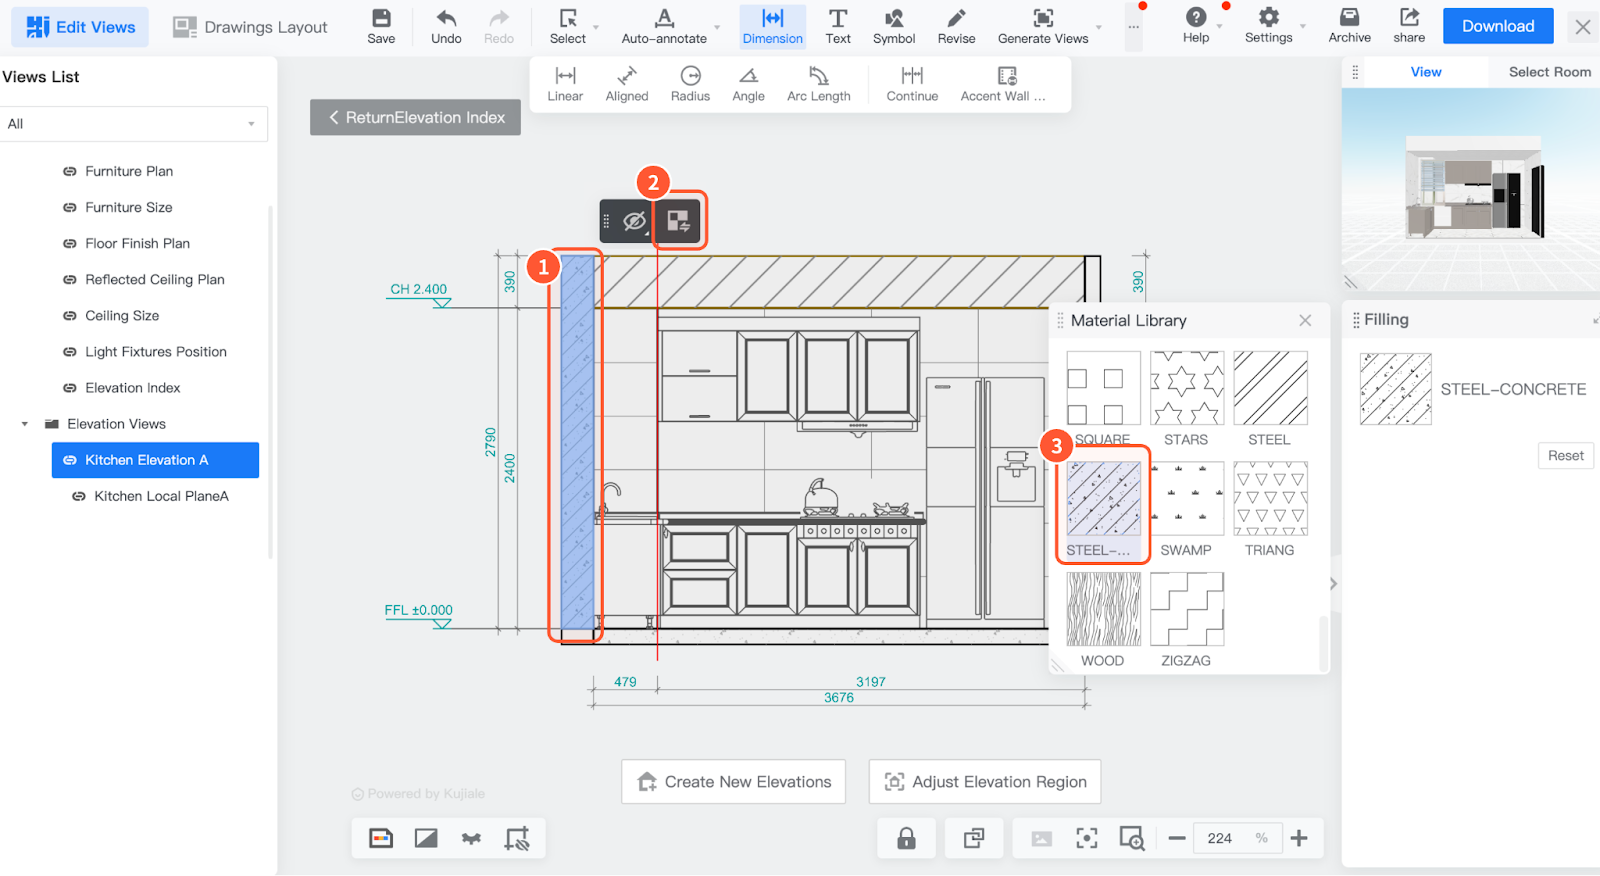
3.Modify the fill: Select the ① model, click on ② Fill Replacement, then choose a preferred ③ fill style.
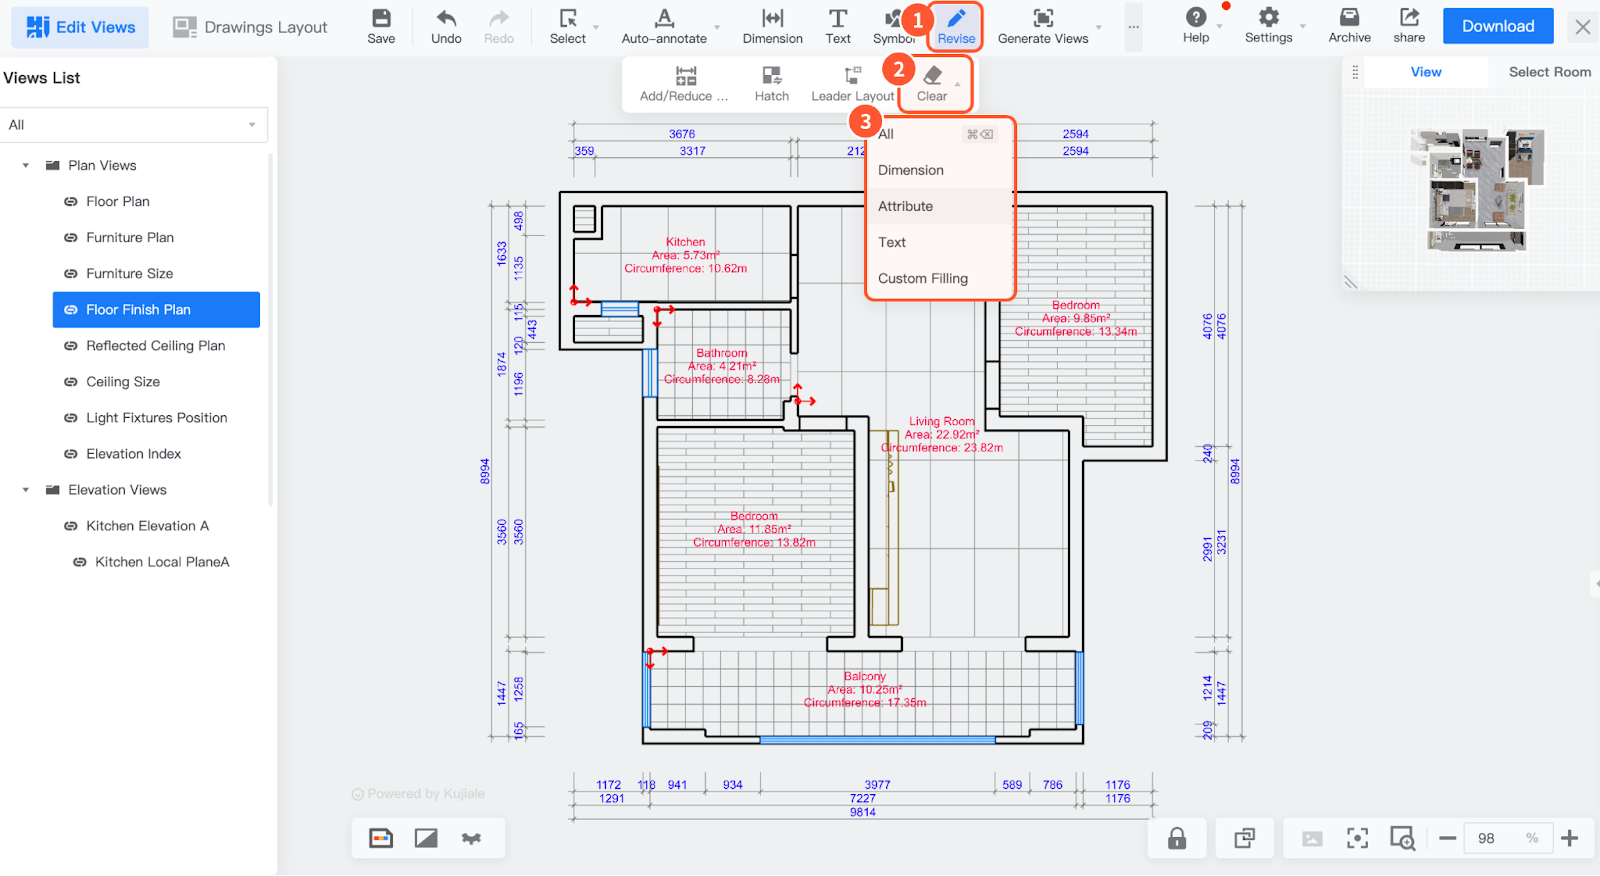
III.The automatically generated annotations by the system are too cumbersome. How can I quickly delete the unnecessary ones?
The system supports clearing annotations according to their types, for example, clearing all attribute annotations at once. Click on ① Modify, then click on ② Clear, and choose the ③ annotation type you want to delete. If you are an enterprise user, you can contact the main account administrator to adjust the annotation configuration and remove unnecessary annotations.
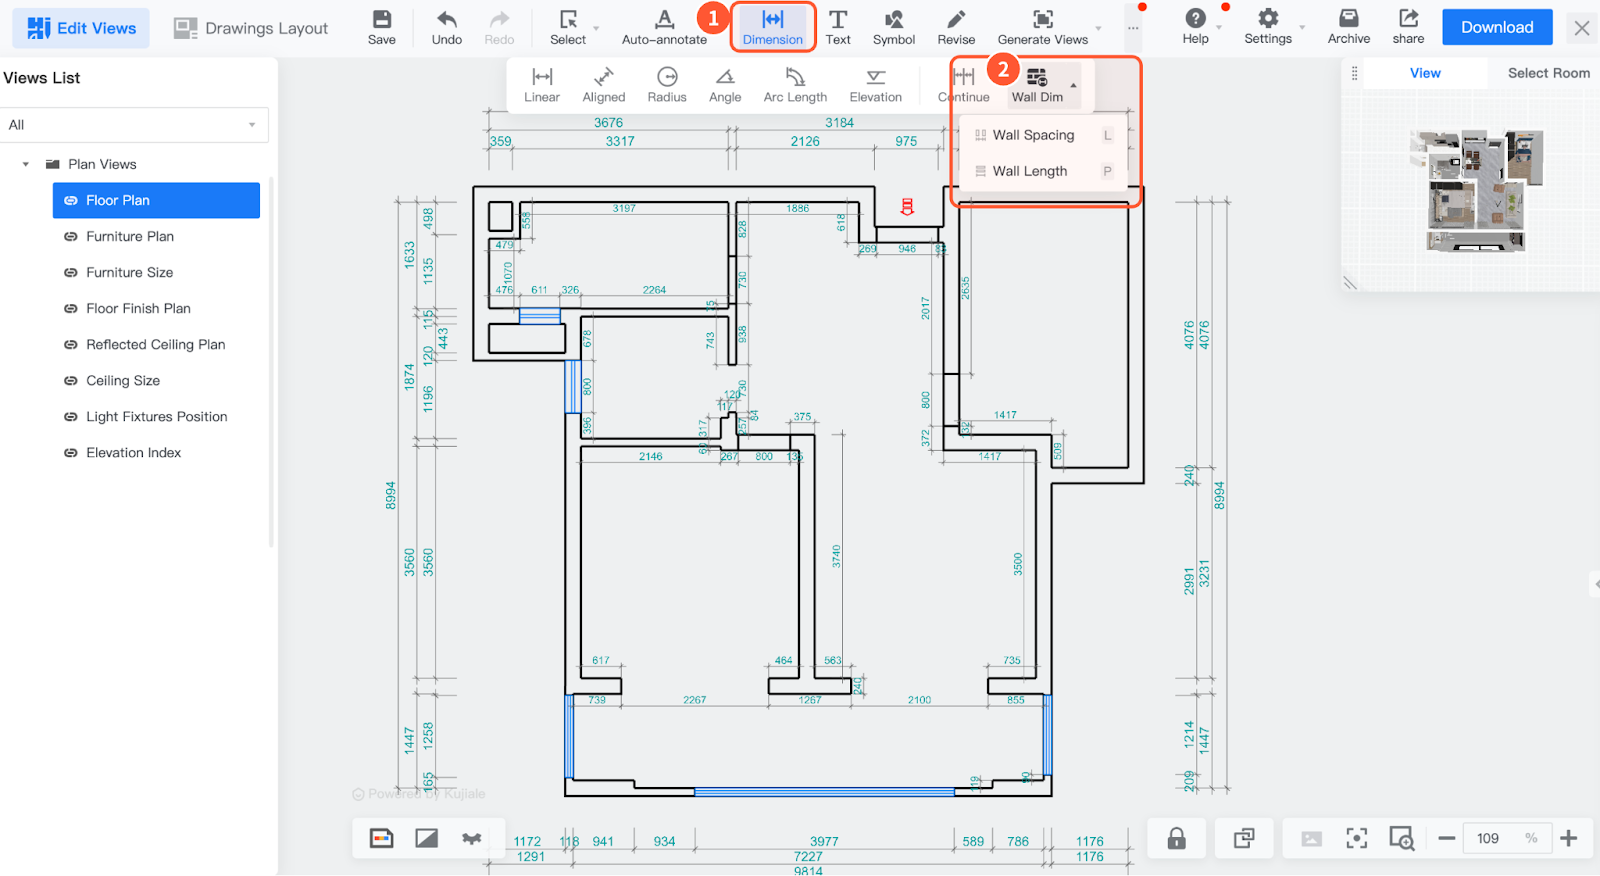
IV.The annotations generated by the system are too basic. How can I quickly add more professional annotations?
1.In the floor plan, you can click on ① dimensions to utilize the ② wall continuous dimensioning feature, to quickly complete wall dimension annotations.
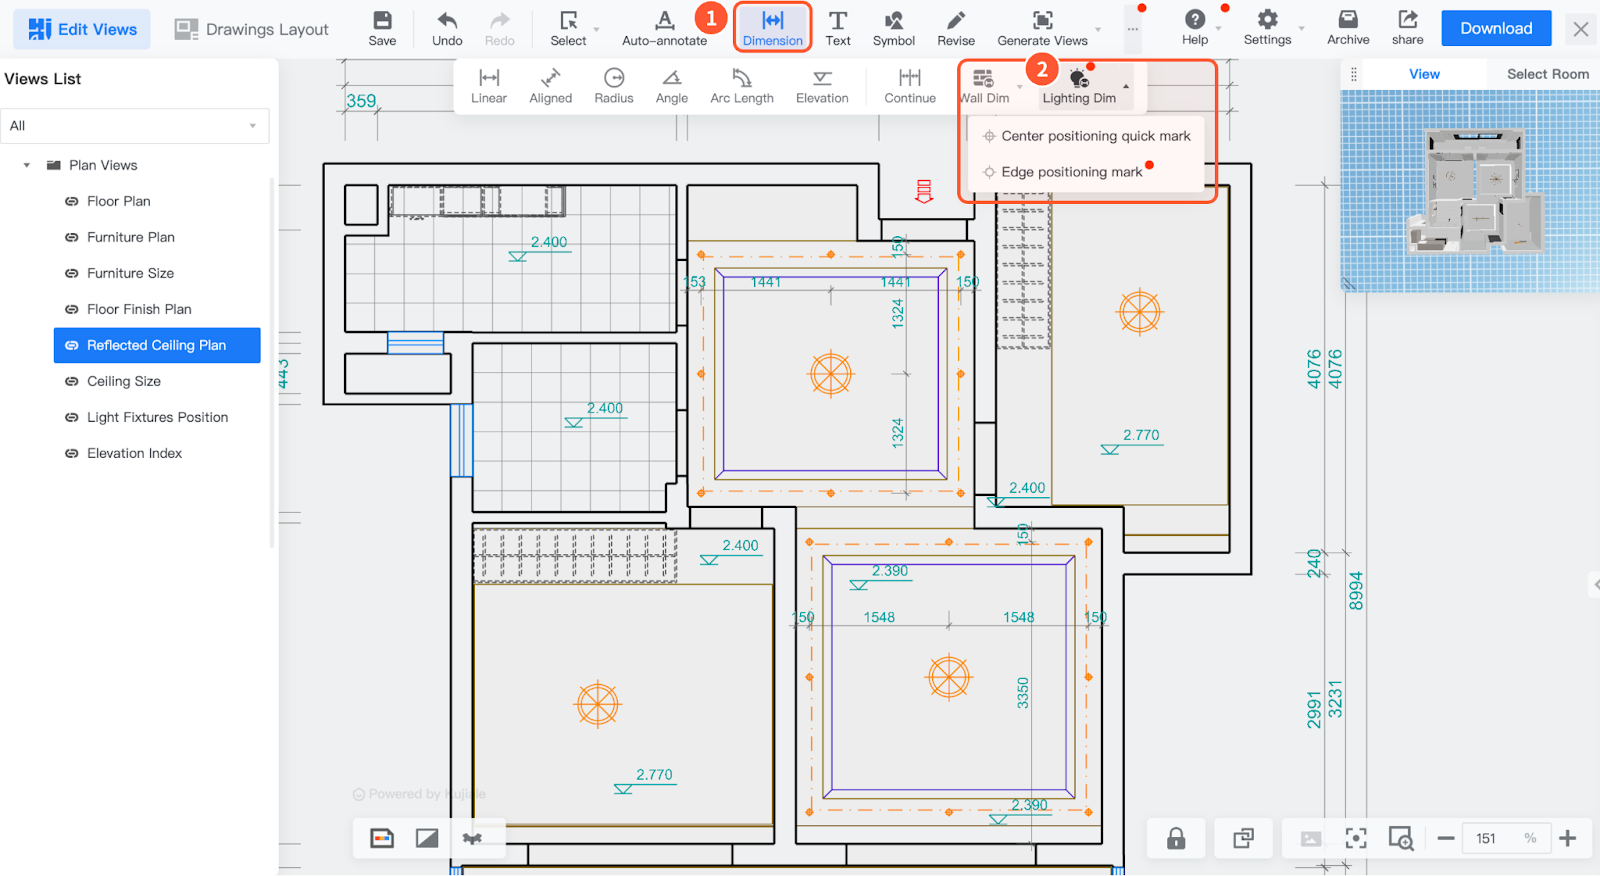
2.In the ceiling plan, you can click on ① dimensions to utilize the ② quick lighting annotation feature, to quickly complete annotations for the positioning dimensions of lighting fixtures. The system supports both center and edge positioning.
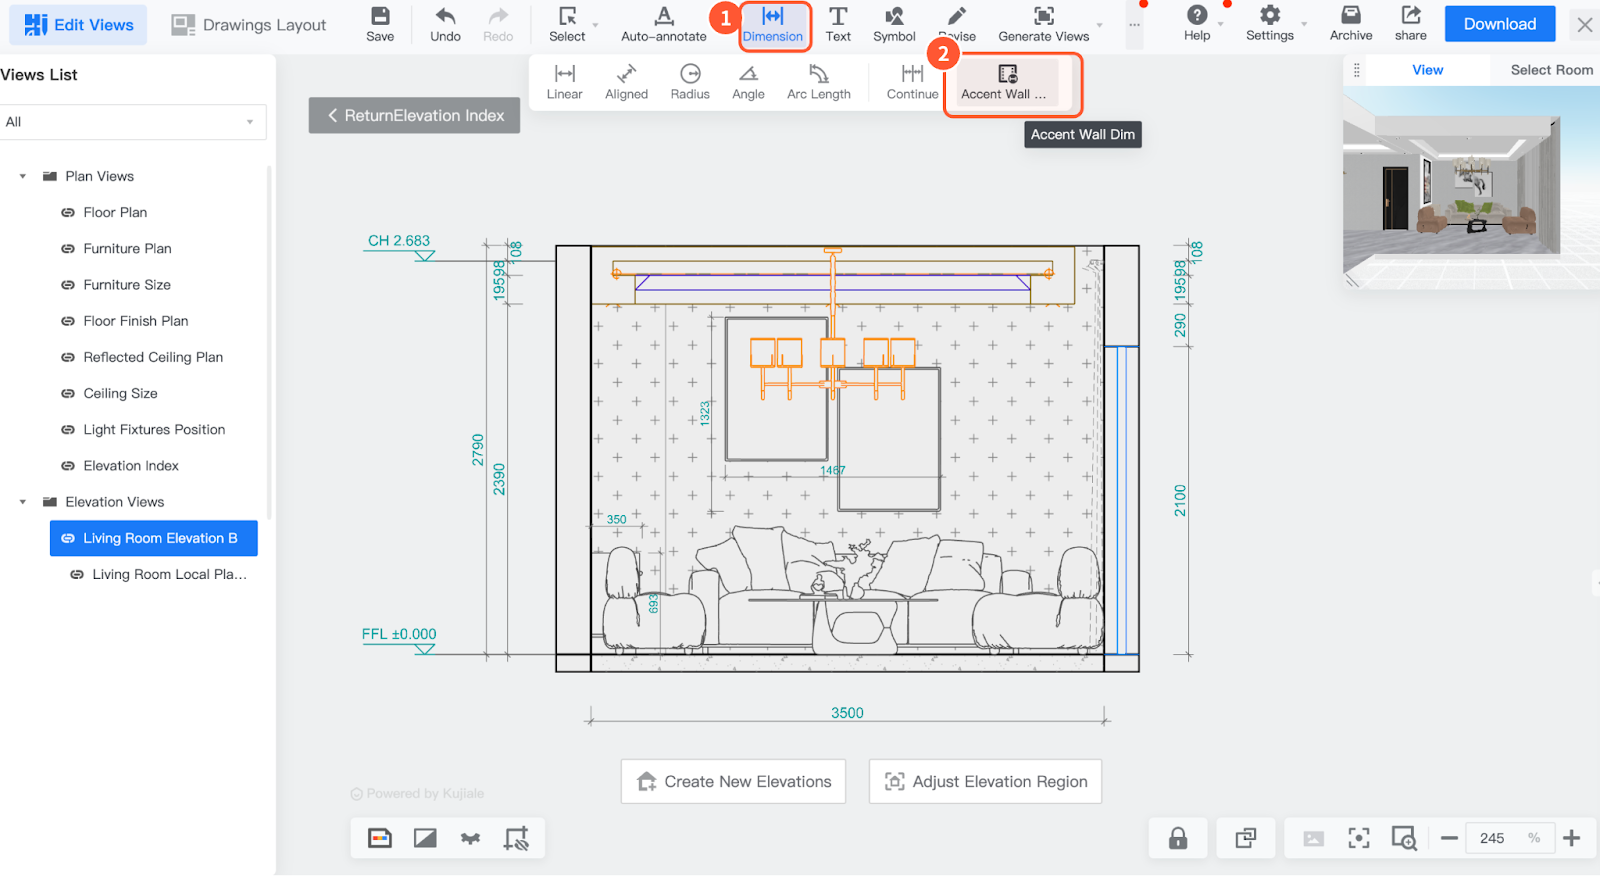
3.In the elevation view, you can click on ① dimensions to utilize the ② quick background wall annotation feature, to generate background wall dimension annotations with just one click.
4.You can click on ① text to utilize the ② quick text function, adding the desired ③ text annotations to the view.
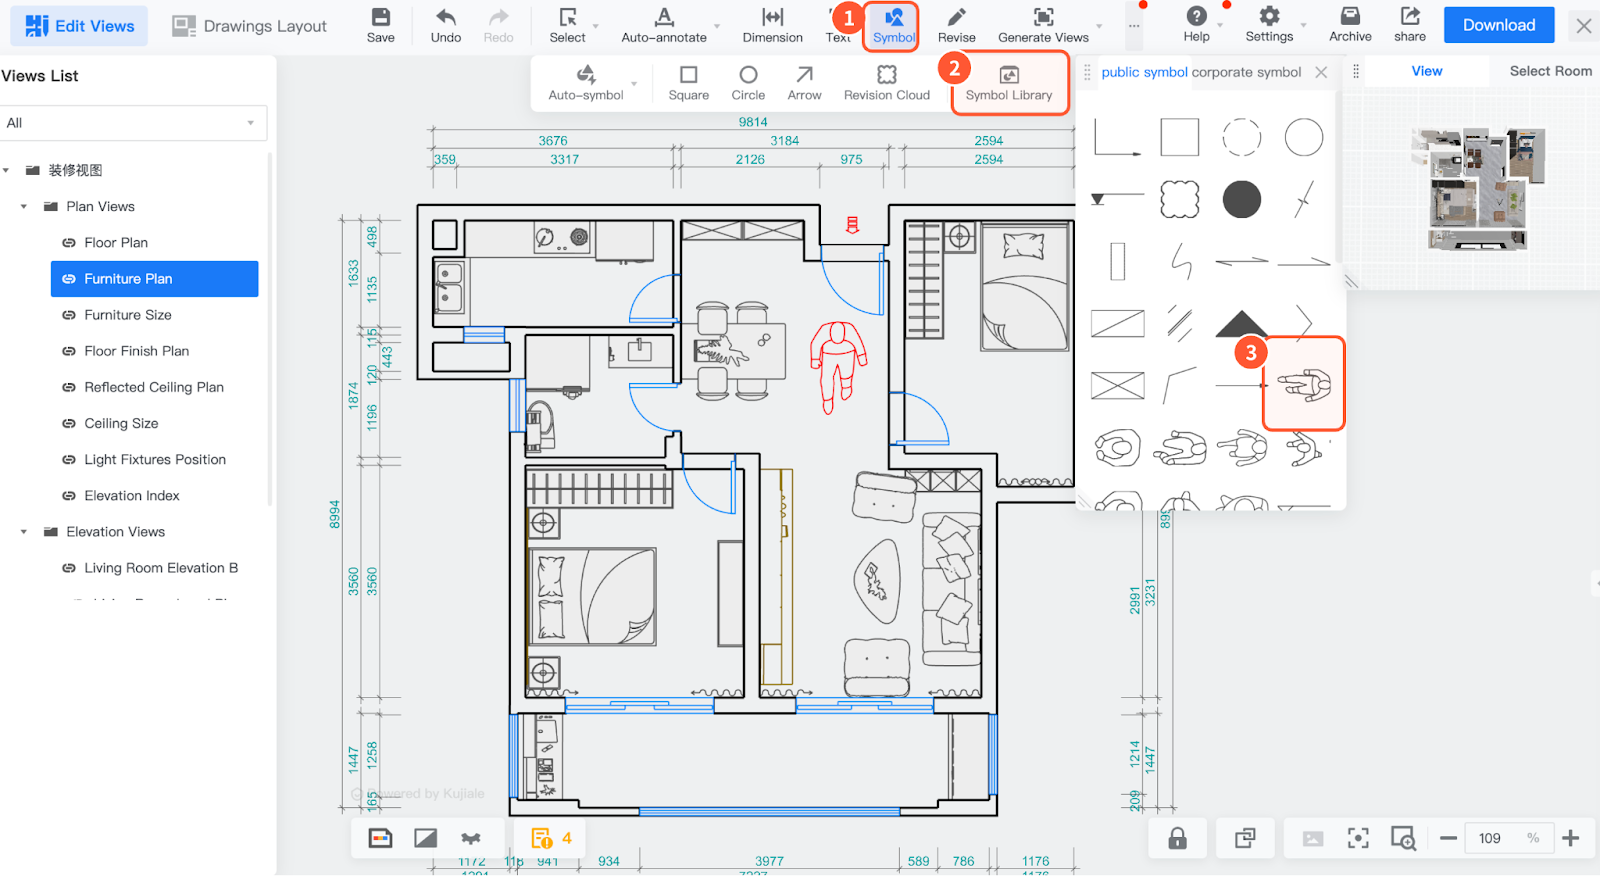
5.You can click on ① symbols to utilize the ② custom symbol function, adding the desired ③ symbols to the view.
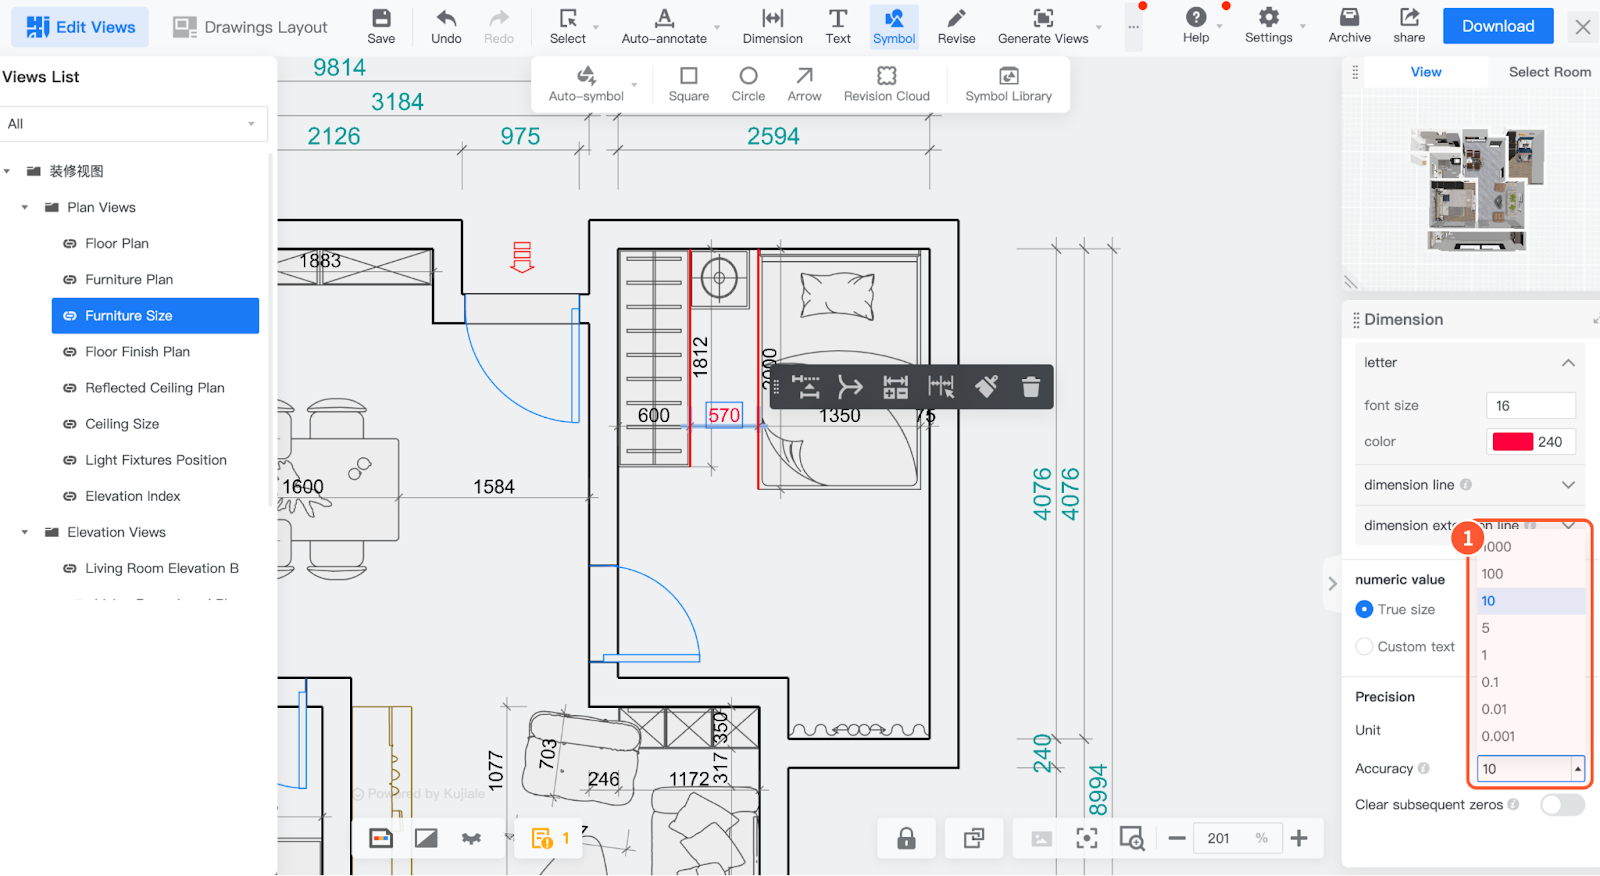
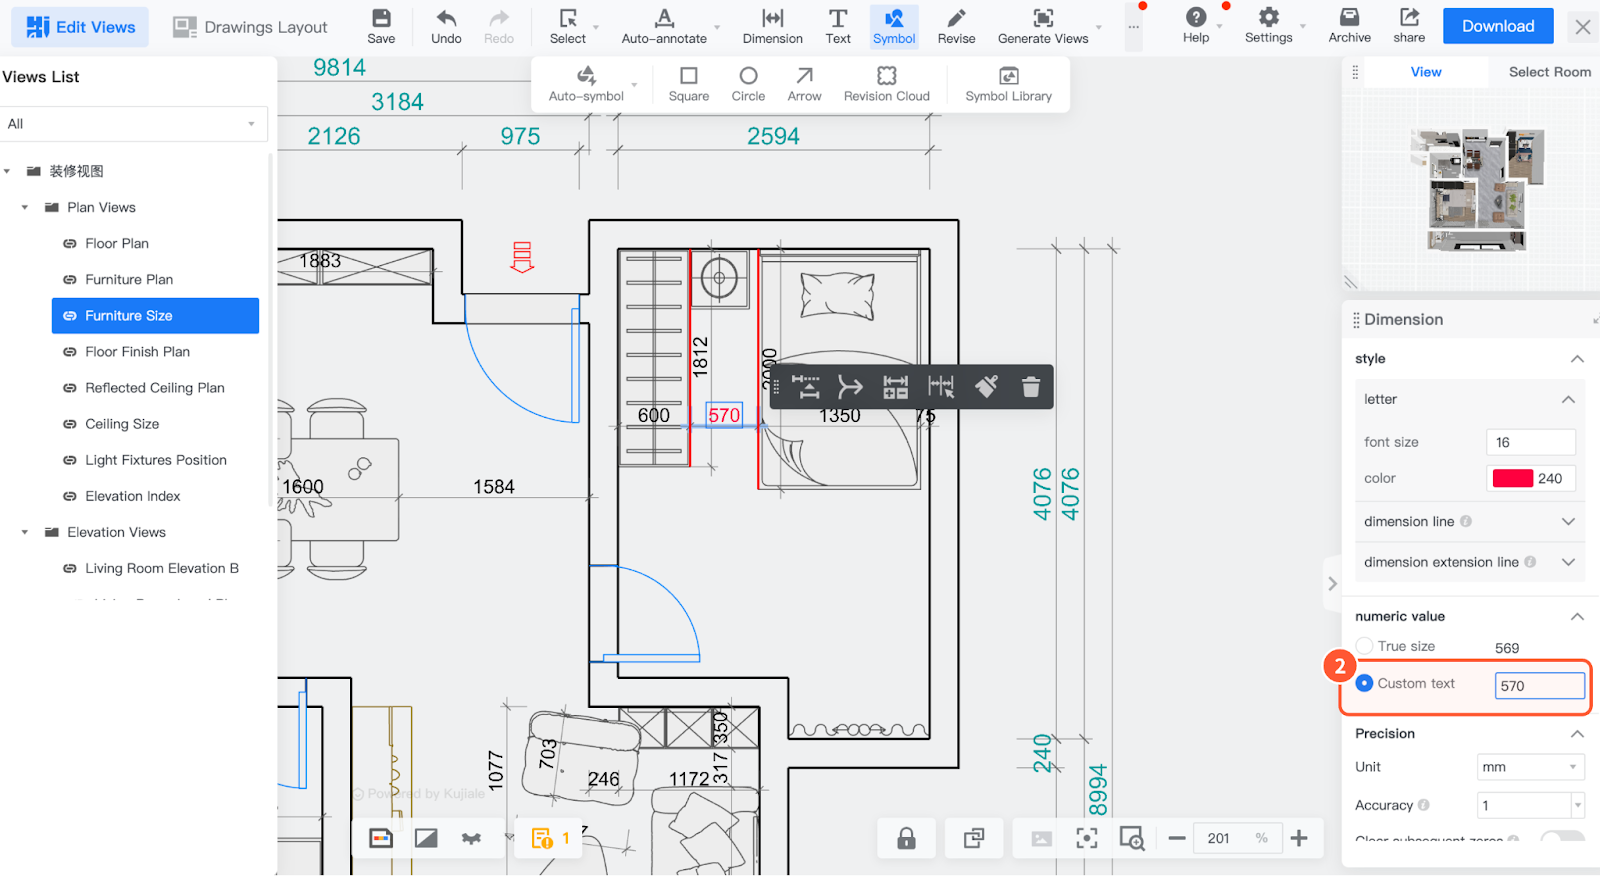
- How do I set the precision of dimension annotations?
You can adjust the ① annotation precision to round dimension annotations. You can also directly modify the displayed values of dimension annotations through ② annotation replacement.
VI.What should I do if there are missing dimension annotations generated by the system? For example, after completing the plumbing and electrical design, some areas lack dimension annotations, or after adjusting the exterior wall, the dimension annotations for the exterior wall disappear.
1.Use the "Dimension Annotation Supplement" function. Select adjacent dimension annotations, click "Dimension Annotation Supplement", click on the points where annotations are needed, and complete the dimension supplementation.
2.Use the "Incremental Automatic Annotation" feature. Click on "Preferences", and modify the automatic annotation rule to "Prompt whether to retain manual modifications each time"; return to the view, click on "Automatic Annotation", and in the pop-up window, select "Only annotate increments".